When to Plant Coral Bell Seeds
Plant coral bell seeds in late winter to early spring indoors, or direct sow in fall for natural stratification. These stunning perennials need cold treatment to germinate well. Start seeds 8-10 weeks before your last frost date for strong seedlings ready to transplant after danger of frost passes.
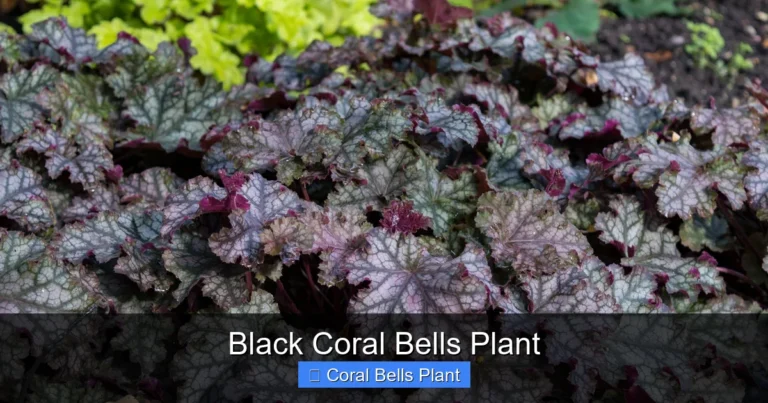
If you have ever admired those ruffled, colorful leaves in a shade garden, you have likely met coral bells. These perennials, also called Heuchera or alumroot, bring year-round interest with foliage in shades of purple, caramel, lime, silver, and near-black. Growing them from seed is rewarding and budget-friendly, but timing makes all the difference. Knowing when to plant coral bell seeds gives you strong, healthy plants that settle in quickly and thrive for years.
Many gardeners feel unsure about starting perennials from seed. Annuals sprout fast and bloom in weeks. Perennials play a longer game. Coral bells need a cold period to wake up. They need light to germinate. They grow slowly at first. But once established, they ask for little and give so much. This guide walks you through every timing decision, from stratification to transplanting, so you can grow a gorgeous patch of Heuchera without the guesswork.
Key Takeaways
- Best indoor timing: Start seeds 8-10 weeks before your last frost date in late winter for spring planting
- Fall direct sowing works: Plant seeds outdoors in autumn for natural cold stratification over winter
- Cold stratification is essential: Seeds need 4-6 weeks of cold, moist conditions to break dormancy
- Surface sow only: Coral bell seeds need light to germinate, so press them into soil without covering
- Germination takes patience: Expect 14-30 days for sprouts at 65-70°F after stratification
- Transplant after frost: Move seedlings outdoors only when nighttime temperatures stay above 50°F
- First-year blooms are rare: Most plants flower in their second year, but foliage shines from day one
Quick Answers to Common Questions
Can I plant coral bell seeds in summer?
No, summer heat inhibits germination and stresses seedlings. Best times are late winter indoors or fall outdoors for natural stratification.
Do coral bell seeds need light to germinate?
Yes, they require light. Surface sow and press gently into moist soil without covering.
How long does cold stratification take for coral bells?
4 to 6 weeks in the refrigerator at 35-40°F breaks dormancy effectively.
When will seed-grown coral bells flower?
Most bloom in their second year. First year focuses on foliage and root establishment.
Can I winter sow coral bells in milk jugs?
Yes, winter sowing in containers works well. Set jugs outside in January or February for natural stratification.
📑 Table of Contents
- Understanding Coral Bell Seed Biology
- When to Plant Coral Bell Seeds Indoors
- When to Plant Coral Bell Seeds Outdoors
- Caring for Coral Bell Seedlings
- Transplanting to the Garden
- Regional Timing Guide for Coral Bell Seeds
- Common Mistakes and How to Avoid Them
- Advanced Tips for Seed Success
- Troubleshooting Germination Problems
- Conclusion
Understanding Coral Bell Seed Biology
Why Timing Matters for Heuchera
Coral bell seeds have built-in dormancy. In nature, they fall in late summer, sit through winter, and sprout in spring. This cold-and-moist period is called stratification. Without it, germination rates drop low. If you sow fresh seeds in warm soil, they may just sit there. Understanding this biology helps you mimic nature or give seeds what they need artificially.
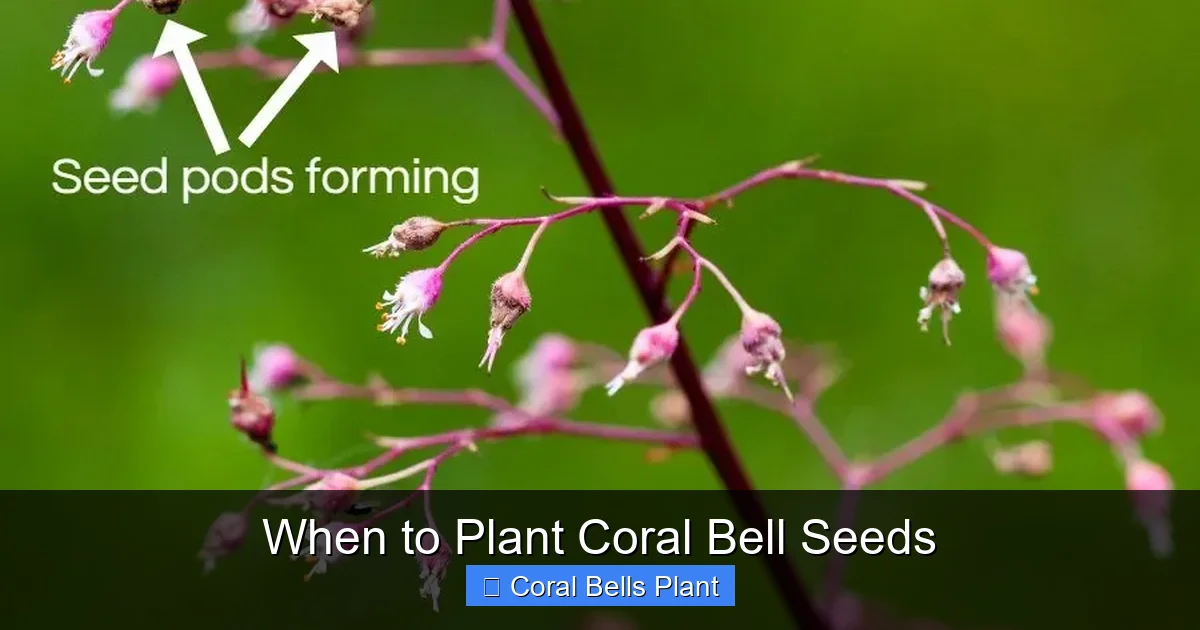
The seeds are tiny, almost dust-like. Each pod holds dozens. They need light to trigger germination. This means surface sowing is non-negotiable. Bury them, and they fail. They also prefer cool germination temperatures, around 65 to 70 degrees Fahrenheit. Hot soil inhibits them. All these traits point to specific planting windows.
Seed Viability and Storage
Fresh seeds germinate best. Viability drops after a year at room temperature. Store extras in a sealed container in the refrigerator. They stay viable for two to three years this way. Always label with the variety and collection date. Named cultivars may not come true from seed. Species types like Heuchera americana or Heuchera sanguinea grow more predictably. Hybrid seeds produce variable offspring, which can be a fun surprise.
When to Plant Coral Bell Seeds Indoors
Calculate Your Start Date
The most reliable method for most gardeners is starting seeds indoors. Count back 8 to 10 weeks from your average last frost date. This is your target sowing window. For example, if your last frost is May 1, start seeds between mid-February and early March. This gives seedlings time to develop strong roots before hardening off.
Why so early? Coral bells grow slowly at first. They spend weeks as tiny rosettes. Starting early means larger plants at transplant time. Larger plants handle outdoor stress better. They also establish faster once in the ground. If you start too late, you get wispy seedlings that struggle through their first summer.
Artificial Cold Stratification Step by Step
Since you are starting indoors, you must provide the cold period yourself. Here is the simple method:
- Moisten a paper towel or coffee filter. It should be damp, not dripping.
- Spread seeds on half the towel. Fold the other half over them.
- Place the towel in a zip-top bag. Seal with a little air inside.
- Label the bag with variety and date.
- Refrigerate for 4 to 6 weeks. Check weekly for mold.
After stratification, sow immediately. Do not let seeds dry out. The cold period breaks dormancy. The move to warmth signals spring. This one-two punch triggers strong, even germination.
Sowing Stratified Seeds
Use a fine seed-starting mix. Pre-moisten it. Fill cells or small pots. Press the mix gently to firm the surface. Sprinkle seeds thinly on top. Do not cover. Press them down lightly with your fingertips or a flat tool. This ensures good contact with the moist mix. Mist the surface. Cover with a clear dome or plastic wrap. Place under lights or in a bright window at 65 to 70°F.
Germination takes 14 to 30 days. Some pop up in a week. Others take a month. Be patient. Keep the surface moist but not soggy. Once you see green, remove the cover. Provide 14 to 16 hours of light daily. A shop light with cool-white LEDs works perfectly. Keep lights 2 to 3 inches above seedlings.
When to Plant Coral Bell Seeds Outdoors
Fall Direct Sowing for Natural Stratification
If you prefer to let nature do the work, fall sowing is excellent. Sow seeds 6 to 8 weeks before your ground freezes. In many zones, this means October to November. The seeds sit through winter’s freeze-thaw cycles. Snow cover insulates them. Spring warmth wakes them naturally. This method often yields the sturdiest seedlings because they never experience transplant shock.
Prepare a nursery bed in part shade. Loosen the top inch of soil. Remove weeds. Scatter seeds thinly. Press them into the soil with a board or your hand. Do not cover. Water gently. Mark the spot clearly. Winter weather does the rest. In spring, watch for tiny rosettes. Thin or transplant them to final spacing when they have two true leaves.
Spring Direct Sowing After Artificial Stratification
You can also stratify seeds in the fridge, then sow directly outdoors in spring. Do this after your last frost date when soil reaches 60°F. This works well if you lack indoor light space. The seedlings grow in their final home from day one. They avoid hardening off. But they face more weed competition and weather extremes. Mulch lightly with fine straw to retain moisture without blocking light.
Winter Sowing in Containers
A popular middle ground is winter sowing. Use translucent milk jugs or salad containers as mini-greenhouses. Cut drainage holes. Add 3 inches of moist potting mix. Sow seeds on top. Tape the container shut. Set outside in January or February. Snow and rain water them. Freeze-thaw cycles stratify them. Sun warms the container on bright days. Seedlings emerge when conditions are right. Open the tops gradually as weather warms. Transplant when seedlings are sturdy.
Caring for Coral Bell Seedlings
Light, Water, and Air Flow
Once seeds sprout, light becomes critical. Leggy seedlings mean insufficient light. Keep lights close. Rotate trays daily if using a window. Water from the bottom by setting cells in a tray of water. This keeps foliage dry and prevents damping off. A small fan on low nearby strengthens stems and reduces fungal issues.
Fertilize lightly after the first true leaves appear. Use a half-strength liquid fertilizer once a week. Fish emulsion or a balanced synthetic works. Do not overfeed. Slow, steady growth produces tougher plants than forced, soft growth.
Potting Up and Root Development
When seedlings have two sets of true leaves and roots fill the cell, pot up to 3- or 4-inch pots. Use a quality potting mix with perlite. Handle by leaves, never stems. Stems crush easily. Plant at the same depth. Water in well. Keep in bright light. This extra root room prevents binding and builds a robust system for transplant.
Hardening Off: The Critical Transition
Two weeks before your last frost, begin hardening off. Place seedlings outdoors in full shade for one hour. Increase time by an hour daily. Introduce morning sun after a few days. Protect from wind. Bring in if nights drop below 45°F. After two weeks, they handle full days outside. This gradual exposure prevents sunburn and transplant shock. Rushing this step sets plants back weeks.
Transplanting to the Garden
Choosing the Right Spot
Coral bells prefer part shade. Morning sun with afternoon shade is ideal. In cooler climates, they take more sun. In hot zones, they need more shade. Soil must drain well. They rot in wet clay. Amend heavy soil with compost and coarse sand. Aim for neutral to slightly acidic pH, 6.0 to 7.0. Space plants 12 to 18 inches apart depending on mature size. They spread slowly by clumping.
Planting Technique for Success
Dig a hole twice the pot width. Mix compost into the backfill. Remove the plant gently. Loosen circling roots. Set the crown at soil level. This is crucial. Buried crowns rot. Exposed crowns dry out. Backfill and firm gently. Water deeply. Mulch with shredded leaves or bark, keeping mulch off the crown. Water regularly for the first month until established.
First Season Expectations
First-year plants focus on roots. You see a neat rosette of leaves. Flowers may appear but are often sparse. Do not worry. The show starts in year two. Foliage color deepens with maturity. Some varieties change color through the seasons. Remove any flower stalks if you want maximum foliage growth. Or let them bloom for pollinators. Hummingbirds love the tiny bells.
Regional Timing Guide for Coral Bell Seeds
Cool Climates: Zones 3 to 5
Short seasons demand early starts. Begin indoor stratification in January. Sow stratified seeds in February under lights. Harden off in mid-May. Transplant after June 1. Fall direct sow in September. Winter sow in January. The key is maximizing the growing season before winter returns. Choose cold-hardy varieties like Heuchera americana or Heuchera villosa hybrids.
Moderate Climates: Zones 6 to 7
These zones offer flexibility. Start indoors in February for April transplant. Or fall sow in October. Winter sow in February. Spring direct sow in April after fridge stratification. Both spring and fall planting work well. You get a long establishment period before summer heat or winter cold.
Warm Climates: Zones 8 to 9
Heat is the challenge. Avoid summer planting. Fall sowing in November is best. Seeds stratify in cool winter soil. Seedlings emerge in early spring and establish before heat. Indoor starts in January for March transplant also work. Provide afternoon shade. Mulch well to keep roots cool. Heuchera villosa and Heuchera sanguinea tolerate heat better than others.
Mild Climates: Zone 10
True coral bells struggle in zone 10 heat. Try Heuchera sanguinea or look for heat-bred hybrids. Sow in December for January stratification. Transplant in February. Treat as short-lived perennials or annuals. Container culture with afternoon shade extends their life. Consider them cool-season foliage plants.
Common Mistakes and How to Avoid Them
Covering the Seeds
This is the number one error. Coral bell seeds need light. Even a thin layer of soil stops them. Press, do not cover. If you must, use a whisper-thin dusting of fine vermiculite. It holds moisture but lets light through. Better yet, skip it entirely. Mist the surface daily to keep seeds moist.
Skipping Stratification
Impatience leads to poor germination. Without cold, you might get 10% sprouting. With it, 70 to 90%. The 4 to 6 weeks in the fridge feels long but saves months of waiting. Mark your calendar. Set a reminder. Do not skip this step.
Starting Too Late
Sowing in April for May transplant yields tiny plugs. They bake in summer heat. They dry out fast. They lack reserves for winter. Start early. Big seedlings survive. Small ones struggle. If you missed the window, buy plugs or wait for fall sowing.
Overwatering or Underwatering
Seeds need constant moisture. A dry day kills emerging radicals. Soggy soil breeds fungus. Bottom watering solves both. Check daily. The surface should glisten, not shine with standing water. Use a humidity dome until germination, then remove it immediately.
Planting Crowns Too Deep
This kills more established coral bells than anything else. The crown sits at soil level. Roots go down. Leaves go up. Mulch touches soil, not stems. Check after watering settles soil. Adjust if needed. A buried crown rots in weeks.
Advanced Tips for Seed Success
Collecting Your Own Seeds
Let flower stalks dry on the plant. Pods turn brown and split. Shake into a paper bag. Clean by rubbing through a fine sieve. Store cool and dry. Label with parent plant and date. Remember, hybrids vary. Species come truer. Cross-pollination creates new combos. It is a fun experiment.
Using a Heat Mat? Skip It.
Most seeds love bottom heat. Coral bells do not. They germinate best at 65 to 70°F. A heat mat set to 75°F inhibits them. Room temperature is perfect. Save the mat for tomatoes and peppers.
Sowing in Plug Trays vs. Open Flats
Plug trays (72 or 128 cells) reduce root disturbance. Each seedling has its own cell. Transplant is a simple pop-out. Open flats require pricking out, which damages delicate roots. If using flats, space seeds an inch apart. Transplant at the first true leaf stage to minimize shock.
Companion Planting with Seedlings
Interplant coral bells with spring bulbs. The bulbs bloom early. Coral bells fill in as bulb foliage fades. Hostas, ferns, and astilbes make great shade companions. In sunnier spots, pair with sedum, ornamental grasses, or salvia. The foliage contrast is stunning.
Troubleshooting Germination Problems
No Sprouts After 4 Weeks
Check your stratification. Was it long enough? Cold enough? Fridge temperature should be 35 to 40°F. Check seed age. Old seeds fail. Check moisture. Did they dry out? Check light. Are they buried? Review each factor. Sometimes a second stratification cycle works. Return to fridge for 2 more weeks, then back to warmth.
Sprouts Then Die (Damping Off)
This fungal disease strikes at soil level. Stems pinch and fall. Prevention is key. Use sterile mix. Provide air flow. Water from bottom. Remove humidity dome at first sprout. Do not overcrowd. If it hits, remove affected cells. Sprinkle cinnamon on soil surface as a natural fungicide.
Leggy, Pale Seedlings
Not enough light. Move lights closer. Increase duration. Rotate trays. A leggy seedling can be saved by potting deeper, but coral bells hate buried crowns. Better to start over with better light. They recover fast at this stage.
Mold on Stratification Towel
Some mold is harmless. Heavy mold kills seeds. If you see fuzz, rinse seeds in a fine sieve under cool water. Pat dry on fresh towel. Return to clean bag. A drop of hydrogen peroxide in the rinse water helps. Do not use bleach.
Conclusion
Knowing when to plant coral bell seeds transforms a tricky perennial into a reliable garden star. Whether you choose indoor starts with artificial stratification, fall direct sowing for nature’s method, or winter sowing in jugs, the principles remain the same. Give seeds cold. Give them light. Give them time. Start early. Transplant carefully. Keep crowns high.
The reward is a palette of foliage colors that few plants match. From deep plum to electric lime, from frosted silver to warm caramel, coral bells paint the shade garden all season. They ask for little: decent drainage, some shade, and a crown that sees the light. In return, they form tidy clumps that grow more beautiful each year. Hummingbirds visit. Deer ignore them. You get compliments.
So mark your calendar. Order seeds. Clear a shelf for lights. The work you do in February or October pays off in May and for years after. Your future self, admiring a drift of ruffled leaves catching morning light, will thank you. Happy sowing.
Frequently Asked Questions
What is the best month to start coral bell seeds indoors?
Start seeds indoors 8-10 weeks before your last frost date. For most regions, this means February or March. This timing produces sturdy seedlings ready for spring transplant.
Do I have to stratify coral bell seeds in the fridge?
If starting indoors in spring, yes. Seeds need 4-6 weeks of cold, moist conditions. Fall or winter outdoor sowing provides natural stratification without fridge space.
How deep do I plant coral bell seeds?
Do not cover them. Press seeds onto the surface of moist seed-starting mix. They need light to germinate. A light dusting of vermiculite is optional but not required.
What temperature is best for germinating coral bell seeds?
65-70°F is ideal after stratification. Avoid heat mats. Higher temperatures reduce germination rates significantly.
How far apart should I space coral bell seedlings when transplanting?
Space plants 12-18 inches apart depending on the mature size of your variety. They spread slowly by clumping and need room for air circulation.
Why are my coral bell seeds not germinating?
Common causes: seeds buried too deep, skipped stratification, dried out during germination, old seeds, or temperatures too warm. Review each factor and try again with fresh seeds.