Coral Bell Planter
Coral bells thrive in containers with proper drainage and rich soil. These versatile perennials offer year-round foliage color and delicate blooms, making them perfect for patio planters, window boxes, and mixed container gardens.
If you have ever walked past a garden center display of coral bells and felt that tug of plant lust, you are not alone. These perennials, botanically known as Heuchera, have exploded in popularity over the last two decades. Breeders have unleashed a rainbow of foliage colors, from deep plum and fiery orange to electric lime and silvery pewter. The best part? You do not need a sprawling garden bed to enjoy them. A coral bell planter lets you bring that vivid foliage right onto your patio, balcony, or front porch.
Growing coral bells in containers is not difficult, but it does require a slightly different approach than planting them in the ground. Containers dry out faster. Roots have less insulation against temperature swings. Nutrients leach out with every watering. Once you understand these differences, you can create a coral bell planter that looks spectacular from early spring through late fall, and often well into winter in milder zones. This guide walks you through every step, from picking the perfect pot to designing show-stopping combinations.
Key Takeaways
- Choose the right container: Select pots at least 12 inches deep with drainage holes to accommodate coral bells’ root systems
- Use well-draining soil mix: Combine quality potting soil with perlite and compost for optimal moisture retention and drainage
- Provide partial shade: Most coral bell varieties prefer morning sun and afternoon shade, especially in hot climates
- Water consistently: Keep soil evenly moist but never soggy; containers dry out faster than ground plantings
- Fertilize lightly: Apply slow-release fertilizer in spring and supplement with liquid feed during growing season
- Design for impact: Pair coral bells with trailing plants, ornamental grasses, or contrasting foliage for stunning container combinations
- Overwinter with care: Protect container-grown coral bells in cold zones by moving to sheltered locations or insulating pots
Quick Answers to Common Questions
What size pot does a coral bell planter need?
A coral bell planter should be at least 12 inches wide and 10-12 inches deep for a single plant. Larger pots (18-24 inches) are better for mixed plantings and hold moisture longer.
Can coral bells survive winter in containers?
In zones 7 and warmer, yes with minimal protection. In zones 5-6, they need insulation (mulch, wrapping, grouping). In zones 4 and colder, it’s risky; plant in ground or move to an unheated garage above 20°F.
How often should I water a coral bell planter?
Water when the top inch of soil feels dry. In summer heat, this may be daily. In shade or cooler weather, every 2-3 days. Always water deeply until it drains from the bottom.
Do coral bells need full sun or shade?
Most prefer morning sun and afternoon shade. Dark-leaved varieties tolerate more sun; light-colored varieties (lime, yellow) scorch easily and need more shade.
What is the best soil mix for a coral bell planter?
Use 3 parts quality potting mix, 1 part perlite or pumice, and 10-15% compost or worm castings. This provides drainage, moisture retention, and slow-release nutrients.
📑 Table of Contents
- Why Choose a Coral Bell Planter
- Selecting the Perfect Container
- Creating the Ideal Soil Mix
- Choosing the Right Varieties for Containers
- Planting and Establishment
- Watering Strategies for Container Success
- Feeding Your Coral Bell Planter
- Designing Stunning Container Combinations
- Maintenance Through the Seasons
- Common Problems and Solutions
- Overwintering Strategies by Zone
- Propagation: Multiply Your Favorites
- Creative Coral Bell Planter Ideas
- Budget-Friendly Tips
- Environmental Benefits
- Conclusion
Why Choose a Coral Bell Planter
Versatility for Any Space
One of the biggest advantages of a coral bell planter is flexibility. You can move pots to follow the sun or escape harsh afternoon rays. You can group them with other containers for a lush vignette. You can even bring them indoors for a few weeks as a living centerpiece. Renters love container gardening because it goes with you when you move. A coral bell planter turns a bare balcony into a garden retreat without digging a single hole in the ground.
Control Over Growing Conditions
Heavy clay soil? Alkaline pH? Root competition from mature trees? None of that matters when you grow in a container. You control the soil mix, the drainage, the moisture level, and the fertility. Coral bells hate wet feet. In a well-designed coral bell planter, you can give them the sharp drainage they crave, even if your native soil is a swamp. This control often results in healthier, more vigorous plants than you might achieve in difficult ground conditions.
Year-Round Foliage Interest
Unlike many perennials that disappear underground in winter, coral bells are evergreen or semi-evergreen in most climates. A coral bell planter provides structure and color when the rest of the garden is brown and dormant. Varieties like ‘Palace Purple,’ ‘Obsidian,’ and ‘Caramel’ hold their leaves through freezing temperatures. In zone 7 and warmer, they stay gorgeous all winter. Even in colder zones, the foliage often persists until hard freezes finally knock it back.
Selecting the Perfect Container
Size Matters More Than You Think
Coral bells have a fibrous root system that spreads wider than it goes deep. However, they still need room to grow. A coral bell planter should be at least 12 inches in diameter and 10 to 12 inches deep for a single plant. If you want a mixed container with three or more coral bells plus companions, go for 18 to 24 inches wide. Larger pots hold more soil, which means more moisture retention, more nutrients, and better root insulation. Small pots dry out in hours on a hot day. That stress shows up as crispy leaf edges and diminished vigor.

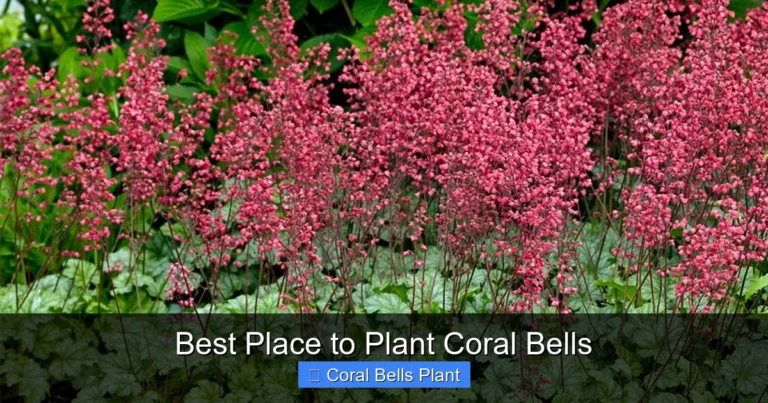
Visual guide about Coral Bell Planter
Image source: c8.alamy.com
Material Choices and Their Impact
Terra cotta looks classic and breathes well, which helps prevent root rot. But it dries out fast and can crack in freeze-thaw cycles. Glazed ceramic holds moisture longer and comes in endless colors, but it is heavy and also prone to cracking in extreme cold. Lightweight resin or fiberglass pots are easy to move and virtually indestructible. They often have built-in drainage reservoirs. Metal containers heat up quickly in sun, which can cook roots. If you love the look of metal, line it with bubble wrap or use it as a cachepot with a plastic liner inside. Wood planters, like half whiskey barrels, offer great insulation and a rustic look. Just ensure they have adequate drainage holes drilled in the bottom.
Drainage Is Non-Negotiable
Every coral bell planter must have drainage holes. Period. If your decorative pot lacks them, drill them yourself or use it as a cachepot. Place a piece of mesh screen, a coffee filter, or a shard of broken pottery over the hole to keep soil from washing out. Do not add a layer of gravel at the bottom. That old advice creates a perched water table that actually worsens drainage. The soil needs to be in direct contact with the hole for water to exit freely.
Creating the Ideal Soil Mix
The Goldilocks Mix: Moisture Retention Meets Drainage
Coral bells want soil that stays evenly moist but never soggy. Straight garden soil compacts in containers and suffocates roots. Straight peat-based potting mix dries out too fast and becomes hydrophobic. The sweet spot is a custom blend. Start with a high-quality peat-based or coco-coir-based potting mix. Avoid mixes with added moisture-control polymers; they can hold too much water for coral bells. To that base, add perlite or pumice at a ratio of about one part amendment to three parts potting mix. This creates air pockets and improves drainage. Finally, mix in compost or worm castings at roughly 10 to 15 percent by volume. This adds slow-release nutrients and beneficial microbes.
pH Considerations
Coral bells prefer slightly acidic to neutral soil, ideally between 6.0 and 7.0. Most commercial potting mixes fall in this range. If you are in an area with highly alkaline water, the pH in your coral bell planter can creep up over time. This can cause nutrient lockout, especially iron, leading to yellowing leaves with green veins. If you notice this, water with a solution of chelated iron or use an acidifying fertilizer a few times a season. A simple pH meter or test strips can help you monitor.
Refreshing the Mix Annually
Container soil breaks down over time. Peat decomposes, perlite rises to the surface, and the mix becomes dense. Each spring, before new growth emerges, gently remove the top inch or two of old mix and replace it with fresh compost-enriched blend. Every two to three years, do a full repot. This is also the perfect time to divide crowded plants and refresh your coral bell planter design.
Choosing the Right Varieties for Containers
Compact Habits Shine in Pots
Some coral bell varieties grow into broad mounds 18 inches across. Others stay tidy at 8 to 10 inches. For a coral bell planter, compact varieties are easier to manage and play well with neighbors. Look for series bred specifically for containers, like the ‘Dolce’ series from Proven Winners or the ‘Little Cutie’ series from Terra Nova Nurseries. ‘Dolce Apple Twist,’ ‘Dolce Cherry Truffles,’ and ‘Dolce Wildberry’ offer intense color in a neat package. ‘Little Cutie Blondie,’ ‘Little Cutie Frost,’ and ‘Little Cutie Sweet Tart’ are miniature charmers perfect for small pots or trough gardens.
Color Palettes for Every Style
The foliage color range is staggering. Deep purples and near-blacks like ‘Obsidian,’ ‘Black Pearl,’ and ‘Midnight Rose’ create drama. They pair beautifully with chartreuse, silver, or pink. Warm tones like ‘Caramel,’ ‘Peach Flambe,’ ‘Georgia Peach,’ and ‘Southern Comfort’ glow in autumn light. Cool silvers and pewters like ‘Silver Scrolls,’ ‘Appletini,’ and ‘Electric Lime’ brighten shady corners. Green varieties with dramatic veining, like ‘Green Spice’ and ‘Rave On,’ add texture. When planning a coral bell planter, think about the backdrop. Dark foliage pops against a light wall. Light foliage shines in shadow.
Sun Tolerance Varies by Color
As a general rule, darker foliage tolerates more sun. Lighter colors, especially yellows and limes, scorch easily in direct afternoon sun. ‘Palace Purple’ and ‘Obsidian’ can handle full sun in cooler climates if kept well-watered. ‘Lime Rickey’ and ‘Electra’ need shade by noon. Check the plant tag or breeder’s website for specific recommendations. In a coral bell planter, you have the luxury of moving the pot to find the sweet spot.
Planting and Establishment
Timing Your Planting
Spring is the classic planting time, as soon as the soil is workable and hard freezes are past. Fall planting works beautifully in zones 6 and warmer, giving roots time to establish before winter. Avoid planting in the heat of summer unless you can provide constant attention and shade. If you buy plants in summer, hold them in a shady spot and pot them up in early fall.
Planting Depth Is Critical
Coral bells have a woody crown where leaves emerge. This crown must sit at or slightly above the soil line. Bury it, and the plant will rot. Plant too high, and roots dry out. In a coral bell planter, fill the pot with your mix to a level where the root ball sits about an inch below the rim. Place the plant, backfill gently, and firm the soil around the roots. Water thoroughly to settle the mix. You may need to add a bit more soil after the first watering as it settles.
Spacing in Mixed Containers
In a mixed coral bell planter, space plants 8 to 12 inches apart, center to center. They will fill in quickly. If you are combining coral bells with annuals or bulbs, you can plant closer for an instantly full look, but be prepared to thin or repot sooner. Resist the urge to cram too many plants into one pot. Crowding reduces air circulation, invites disease, and creates competition for water and nutrients.
Watering Strategies for Container Success
The Finger Test Never Lies
Forget calendar watering. Stick your index finger into the soil up to the second knuckle. If it feels dry at your fingertip, water. If it feels cool and damp, wait. In a coral bell planter, the top inch can be bone dry while the root zone is still moist. Conversely, the top can look wet while the bottom is dry if the mix has become hydrophobic. The finger test checks where it matters.
Water Deeply, Not Frequently
When you water, water until it runs freely out the drainage holes. This ensures the entire root ball is moistened and flushes accumulated salts. Light, frequent watering encourages shallow roots that are vulnerable to heat and drought. In summer heat, a large coral bell planter in sun may need daily watering. The same pot in shade might go three days. Wind increases water use dramatically. Check daily during hot, windy spells.
Tools to Make Watering Easier
A watering wand with a breaker head delivers a gentle, thorough soak without blasting soil out of the pot. Drip irrigation with a timer is a game-changer for multiple containers. Self-watering planters with reservoirs can extend intervals between watering, but monitor them closely at first. Some coral bells dislike the constant moisture at the bottom of a self-watering pot. If you use one, let the reservoir empty completely before refilling.
Feeding Your Coral Bell Planter
Slow-Release Foundation
Incorporate a balanced, slow-release granular fertilizer into the soil mix at planting time. Look for an NPK ratio like 14-14-14 or 10-10-10 with micronutrients. This provides a steady baseline of nutrition for three to four months. Top-dress with another tablespoon or two in midsummer if the growing season is long. Scratch it into the top inch of soil and water in.
Liquid Supplements for Peak Performance
Container plants benefit from supplemental liquid feeding during active growth. Use a balanced water-soluble fertilizer at half strength every two to three weeks from spring through early fall. Fish emulsion, seaweed extract, or a synthetic 20-20-20 all work. Avoid high-nitrogen formulas that push lush, soft growth susceptible to pests and disease. Stop fertilizing six weeks before your average first frost date to let plants harden off.
Organic Options
If you prefer organic, worm castings mixed into the soil and used as a top-dressing provide gentle, complete nutrition. Compost tea applied monthly feeds soil biology as well as the plant. Kelp meal adds trace minerals and stress tolerance. Organic fertilizers release more slowly, so start applications earlier in spring.
Designing Stunning Container Combinations
Thriller, Filler, Spiller Formula
The classic container design recipe works perfectly for a coral bell planter. Coral bells are natural fillers with their mounding habit. Add a thriller: a tall, vertical element like a dwarf ornamental grass, a small conifer, a coral bell flower spike, or a tropical like canna or colocasia for summer. Add a spiller: something that cascades over the edge. Creeping jenny, sweet potato vine, lobelia, bacopa, or trailing sedum all work. The coral bell foliage bridges the gap between the upright thriller and the trailing spiller.
Color Echoes and Contrasts
Pick up a color from your coral bell foliage in the companion plants. A ‘Caramel’ coral bell planter paired with orange snapdragons and chartreuse creeping jenny creates a warm, harmonious scheme. A ‘Black Pearl’ coral bell planter with white calibrachoa and silver dichondra is high-contrast elegance. ‘Lime Rickey’ with purple petunias and dark sweet potato vine is electric. Use the color wheel. Complementary colors (opposites) create pop. Analogous colors (neighbors) create harmony.
Texture Play
Coral bells have ruffled, lobed, or smooth leaves with a matte or glossy finish. Contrast that with fine textures like carex grass, fern fronds, or asparagus fern. Contrast with bold textures like hosta leaves (in shade), bergenia, or colocasia. Contrast with airy textures like gaura, verbena bonariensis, or ornamental grass plumes. A coral bell planter with three distinct textures looks professionally designed.
Seasonal Transitions
Design your coral bell planter for the long haul. In spring, tuck in bulbs like species tulips or miniature daffodils between the coral bells. As bulbs fade, the coral bell foliage hides the dying leaves. In summer, add heat-loving annuals. In fall, swap summer annuals for ornamental kale, pansies, or mums. The coral bells remain the constant anchor. In winter, add evergreen boughs, red-twig dogwood stems, or lights for holiday cheer.
Maintenance Through the Seasons
Spring Wake-Up
As temperatures rise, remove any winter mulch or protection. Cut back any tattered or winter-damaged leaves to the base. Apply fresh compost top-dressing and slow-release fertilizer. Check for crown rot or pests. Divide if the clump is woody and hollow in the center. This is also the time to refresh the soil mix as described earlier.
Summer Grooming
Deadhead flower spikes after blooming to redirect energy to foliage. Some gardeners remove flower spikes entirely, preferring the foliage show. It is a personal choice. The flowers are delicate and charming, attracting hummingbirds. Remove any yellowed or damaged leaves promptly. Watch for leaf scorch in intense heat; move the coral bell planter to a shadier spot if needed.
Fall Preparation
Stop fertilizing. Reduce watering as growth slows and temperatures drop. Remove spent annuals and replace with fall plants if desired. Apply a two-inch layer of shredded leaves or straw mulch around the crowns for winter insulation, keeping it off the crown itself. In zones 5 and colder, consider moving the coral bell planter to an unheated garage or against a protected wall.
Winter Care
In zones 7 and up, coral bells in containers often need no special care. In zones 5 and 6, the roots are vulnerable to freeze-thaw cycles that would not happen in the ground. Group pots together on the ground (not on pavement) and mulch heavily around them. Wrap pots in burlap or bubble wrap. Water monthly during dry, unfrozen periods. Do not water frozen soil. In zones 3 and 4, overwintering in containers is risky. Either plant them in the ground for winter or move pots to a cold garage that stays above 20°F.
Common Problems and Solutions
Crown Rot
The number one killer of coral bells in containers is crown rot from excess moisture. Symptoms include mushy crown, foul smell, and leaves pulling away with no resistance. Prevention is everything: well-draining mix, proper planting depth, no mulch against the crown, and never letting pots sit in saucers of water. If caught early, you can sometimes save a plant by unpotting, cutting away rot, dusting with cinnamon or fungicide, and repotting in fresh, dry mix. But it is an uphill battle.
Heuchera Rust
This fungal disease appears as orange pustules on leaf undersides and yellow spots on top. It thrives in humid, crowded conditions with poor air flow. Space plants adequately. Water at the base, not overhead. Remove affected leaves immediately and dispose of them (not in compost). Copper-based fungicides can help prevent spread. Some varieties have better resistance; ‘Obsidian’ and ‘Midnight Rose’ are noted for rust resistance.
Vine Weevils
Adult vine weevils notch leaf edges at night. The real damage comes from larvae eating roots underground. Plants wilt inexplicably. Check by gently tugging the plant; if it comes up with few roots, larvae are likely present. Beneficial nematodes (Steinernema kraussei) applied as a soil drench in spring and fall control larvae effectively. Sticky traps catch adults. Inspect new plants carefully before adding to your coral bell planter.
Sun Scorch
Bleached, crispy patches on leaves, especially on light-colored varieties, indicate too much sun. Move the pot. Provide afternoon shade. Increase watering. Damaged leaves will not recover, but new growth will be fine in better conditions. This is the beauty of a coral bell planter: you can fix the problem by moving it.
Overwintering Strategies by Zone
Zones 8-10: Minimal Intervention
In these mild zones, a coral bell planter stays outdoors year-round. Growth may slow but rarely stops. Water during dry spells. Watch for fungal issues in wet winters. No mulch needed unless a hard freeze is forecast.
Zones 6-7: Moderate Protection
Move pots to a sheltered location against a south or west wall. Group them together. Mulch heavily around pots with leaves or straw. Wrap pots in burlap or frost cloth during extreme cold snaps. Water monthly if dry. Most varieties will stay evergreen.
Zones 4-5: Serious Insulation
These zones require active protection. Option one: sink the entire coral bell planter into the ground in a vegetable bed or holding area, mulch heavily, and lift in spring. Option two: move pots to an unheated attached garage, shed, or basement that stays between 20 and 40°F. Water sparingly, just enough to keep roots from desiccating. Option three: construct an insulated box around grouped pots using rigid foam insulation boards.
Zone 3 and Colder: Ground Is Best
Container overwintering is very unreliable. Plant coral bells in the ground in early fall. Mulch heavily after the ground freezes. Dig and repot in spring. Or treat them as annuals in containers and buy new each year. Given the cost of specialty varieties, planting in ground is the economical choice.
Propagation: Multiply Your Favorites
Division
Every three to four years, coral bells develop a woody center with vigorous growth at the edges. This is the signal to divide. In early spring or fall, lift the plant from the coral bell planter. Wash or shake off soil. Using a sharp knife or spade, cut the crown into sections, each with several leaves and a good root system. Discard the woody center. Replant divisions immediately in fresh mix. Water well and shade for a week. Division rejuvenates the plant and gives you free plants for more containers or to share.
Leaf Cuttings
Some gardeners propagate from leaf cuttings. Take a healthy leaf with a short piece of petiole (stem). Dip in rooting hormone. Insert into moist perlite or sand. Cover with a humidity dome or plastic bag. Place in bright, indirect light. Roots and a tiny plantlet may form at the base in four to eight weeks. Success rates vary by variety. This is more of a fun experiment than a reliable production method.
Seed
Coral bells hybridize readily. Seed from your coral bell planter will not come true to the parent. You will get a mix of traits, often with muddy colors. If you want to experiment, collect seed when pods turn brown and split. Sow on the surface of moist seed-starting mix. Do not cover; light aids germination. Keep at 65-70°F. Germination takes two to six weeks. Transplant seedlings when they have true leaves. It takes two years to reach flowering size. For true-to-type plants, buy tissue-cultured starts or divide.
Creative Coral Bell Planter Ideas
Single-Specimen Showcase
Sometimes one perfect plant in a beautiful pot is all you need. A large, mature ‘Obsidian’ in a matte charcoal ceramic pot is a sculptural statement. A ‘Caramel’ in a copper-finished resin pot glows like amber. Elevate the pot on feet or a plant stand to show off the form. This works beautifully on a pedestal by a front door or as a focal point at the end of a path.
Monochromatic Collection
Group three to five pots, each with a different coral bell variety in the same color family. All purples: ‘Black Pearl,’ ‘Plum Pudding,’ ‘Berry Smoothie,’ ‘Forever Purple.’ All caramels: ‘Caramel,’ ‘Peach Flambe,’ ‘Georgia Peach,’ ‘Tiramisu.’ All limes: ‘Lime Rickey,’ ‘Electra,’ ‘Appletini,’ ‘Lime Marmalade.’ The subtle variations create a sophisticated, curated look.
Trough Gardens
Hypertufa or stone troughs mimic alpine conditions that many coral bell species love. Plant a collection of species forms like Heuchera villosa, H. americana, H. sanguinea, and their hybrids. Add small sedums, sempervivums, and dwarf conifers. Top-dress with grit or small gravel. This naturalistic coral bell planter looks better with age as plants mingle and spill over edges.
Vertical Planters and Living Walls
Coral bells adapt well to pocket planters, pallet gardens, and modular living wall systems. Their shallow roots fit in narrow pockets. Choose compact varieties. Ensure the system has excellent drainage and a way to water evenly. A living wall of coral bells in a shady courtyard is a jaw-dropping feature. Mix foliage colors for a tapestry effect.
Budget-Friendly Tips
Start Small, Grow Big
Buy quart or 4-inch pots instead of gallon sizes. They cost half as much and catch up quickly in a coral bell planter with good care. In one season, a quart plant fills a 12-inch pot. Mail-order plug trays (32 or 72 cells) are the cheapest per plant if you need many for a large project or plant swap. Pot them up into 4-inch pots for a month before moving to final containers.
Divide and Conquer
Make friends with other coral bell enthusiasts. Host a division party in spring. Everyone brings a mature plant to divide, and everyone goes home with three new varieties. This is how serious collectors build diverse collections without breaking the bank.
Repurpose Containers
Almost anything with drainage holes can be a coral bell planter. Vintage galvanized tubs, wooden crates lined with landscape fabric, large food-grade buckets painted in fun colors, old wheelbarrows, even colanders (they come with drainage built in). Thrift stores and garage sales are gold mines for unique containers. Just clean them well with a 10% bleach solution before planting.
Make Your Own Soil Mix
Buying ingredients in bulk (peat, perlite, compost) and mixing yourself saves 50% or more over bagged potting soil. A cement mixer or large tarp makes blending easy. Store extra mix in heavy-duty trash cans with lids.
Environmental Benefits
Pollinator Support
Coral bell flowers are rich in nectar and attract hummingbirds, bees, butterflies, and hoverflies. The bloom period varies by variety but generally spans late spring to midsummer. Some rebloom in fall. A coral bell planter on a balcony brings pollinators up close where you can watch them. Avoid systemic insecticides that can contaminate nectar and pollen.
Stormwater Management
Container gardens capture rainfall that would otherwise run off impervious surfaces. A group of coral bell planters on a patio absorbs hundreds of gallons per year. The soil mix filters pollutants. This micro-scale green infrastructure adds up across a neighborhood.
Urban Heat Island Mitigation
Plants cool their surroundings through transpiration and shade. A coral bell planter on a hot concrete balcony lowers the ambient temperature slightly. Multiply by thousands of gardeners, and the effect is measurable. Plus, you get to enjoy the beauty.
Conclusion
A coral bell planter is one of the most rewarding container projects you can undertake. These plants give so much: months of vivid foliage, delicate flowers that dance in the breeze, adaptability to sun or shade, and the ability to thrive in pots for years with basic care. Whether you have a sprawling deck or a modest fire escape, there is a coral bell and a container combination that will bring you joy every time you walk past it.
Start with one pot. Pick a variety that makes your heart skip a beat. Follow the basics: good drainage, quality mix, consistent moisture, and the right light. Watch it grow. Take notes. Take photos. Next season, try a combination. Then a trough. Then a living wall. The world of coral bells is vast and colorful, and container gardening lets you explore it all without committing precious garden real estate. Your patio is waiting. Go plant something beautiful.
Frequently Asked Questions
Why are the leaves on my coral bell planter turning brown and crispy?
Brown crispy edges usually indicate underwatering, low humidity, or too much sun for that variety. Check soil moisture daily and move the pot to a shadier location if it receives hot afternoon sun.
Can I grow coral bells indoors as houseplants?
Coral bells can be grown indoors temporarily but prefer outdoor conditions. They need bright indirect light, cool temperatures (60-65°F), high humidity, and a winter dormancy period. They rarely thrive long-term as houseplants.
Should I cut back coral bell flowers after they bloom?
Deadheading spent flower stems keeps the plant tidy and redirects energy to foliage growth. Cut stems at the base. Some gardeners remove flower spikes entirely to focus on the foliage display.
How do I know when to repot my coral bell planter?
Repot every 2-3 years in early spring, or when you see roots circling the pot, water runs straight through without absorbing, or the plant looks stunted despite good care. Refresh the soil mix and divide if crowded.
What plants pair well with coral bells in a mixed container?
Great companions include ferns, hostas, carex grasses, heucherella, tiarella, brunnera, and shade-tolerant annuals like impatiens, begonias, and coleus. For sun, try ornamental grasses, salvia, and sedum.
Are coral bells deer and rabbit resistant?
Yes, coral bells are generally deer and rabbit resistant due to their astringent, fuzzy foliage. However, hungry animals may sample them in early spring when new growth is tender. Repellent sprays help during vulnerable periods.