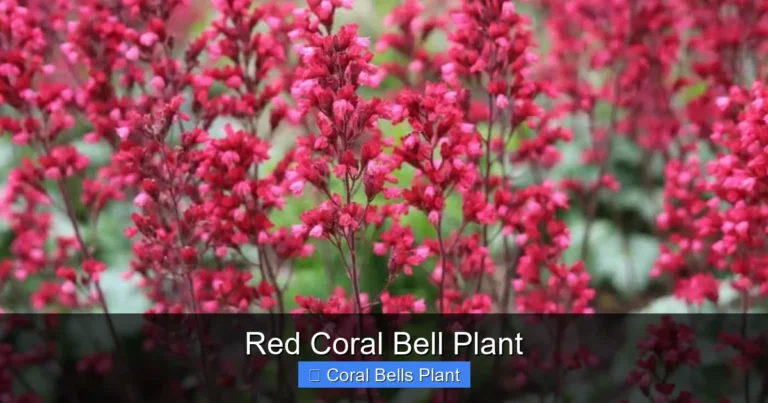
Coral Bell Plant Maintenance
Coral bells (Heuchera) are low-maintenance perennials prized for their stunning foliage colors and delicate bell-shaped flowers. With proper coral bell plant maintenance including well-draining soil, partial shade, consistent moisture, and annual division, these versatile plants provide year-round garden interest. Follow our expert guide for thriving heuchera that returns bigger and more beautiful each season.
Key Takeaways
- Choose the right location: Plant coral bells in partial shade with morning sun and afternoon protection for optimal foliage color and plant health.
- Ensure excellent drainage: Heuchera crowns rot easily in wet soil; amend heavy clay with compost and plant slightly high to prevent crown rot.
- Water consistently but wisely: Keep soil evenly moist during establishment, then water deeply when the top inch feels dry; avoid overhead watering to prevent fungal issues.
- Fertilize lightly in spring: Apply a balanced slow-release fertilizer or compost top-dressing in early spring; avoid high-nitrogen formulas that promote weak growth.
- Divide every 3-4 years: Lift and divide congested clumps in early spring or fall to rejuvenate plants, prevent center die-out, and propagate new specimens.
- Remove spent flower stalks: Deadhead after blooming to redirect energy to foliage production; cut stems at the base for a tidy appearance.
- Protect in winter: Apply mulch after ground freezes to prevent frost heaving; avoid covering crowns directly to reduce rot risk during freeze-thaw cycles.
Quick Answers to Common Questions
How often should I water coral bells?
Water newly planted coral bells 2-3 times per week for the first month, then weekly. Established plants need deep watering when the top inch of soil feels dry, typically once a week in summer. Always water at the base to avoid wet foliage.
When is the best time to divide coral bells?
Divide coral bells in early spring as new growth emerges or in early fall (September) giving them 4-6 weeks before ground freeze. Avoid dividing during summer heat or winter dormancy for best results.
Why are my coral bells dying in the center?
Center die-out indicates the plant needs division. Over time, the woody crown becomes congested and the center rots or dries out. Divide every 3-4 years in spring or fall to rejuvenate the plant and restore vigorous growth.
Can coral bells grow in full sun?
In cool northern zones (USDA 4-6), many cultivars tolerate full sun with consistent moisture. In hot climates (USDA 7-9), afternoon shade is essential. Villosa hybrids handle more sun than other types. Morning sun with afternoon shade is ideal for most varieties.
Do coral bells need fertilizer?
Coral bells are light feeders. In rich soil, they need no fertilizer. Otherwise, apply a balanced slow-release fertilizer or compost top-dressing in early spring. Avoid high-nitrogen formulas which cause weak growth and reduce leaf color intensity.
📑 Table of Contents
- Why Coral Bells Deserve a Spot in Your Garden
- Understanding the Coral Bell Plant
- Choosing the Perfect Planting Site
- Watering Wisdom for Healthy Heuchera
- Feeding Your Coral Bells
- Seasonal Maintenance Calendar
- Dividing and Propagating Coral Bells
- Common Problems and Solutions
- Designing with Coral Bells
- Advanced Tips for Coral Bell Enthusiasts
- Conclusion: Your Coral Bells Will Thank You
Why Coral Bells Deserve a Spot in Your Garden
If you have ever walked through a shade garden and spotted mounds of ruffled leaves in shades of caramel, purple, lime green, or silver, you have likely met coral bells. These North American natives, botanically known as Heuchera, have exploded in popularity over the last two decades. Plant breeders have introduced hundreds of cultivars, each offering a unique leaf color, texture, or pattern. The result is a perennial that looks good from early spring until hard frost, and in mild climates, often stays attractive through winter.
But here is the thing: coral bells have a reputation for being fussy. Gardeners sometimes lose them after a single season and wonder what went wrong. The truth is that coral bell plant maintenance is straightforward once you understand what these plants need. They are not difficult; they are just particular about a few key conditions. Get those right, and you will have reliable, long-lived plants that multiply steadily and ask for very little in return.
Understanding the Coral Bell Plant
What Exactly Is a Coral Bell?
Coral bells belong to the Saxifragaceae family and are native to rocky cliffs, woodland slopes, and alpine meadows across North America. The species name Heuchera sanguinea gives us the common name coral bells, thanks to its bright coral-red flowers that dangle on wiry stems above the foliage. Modern hybrids, however, are grown primarily for their leaves. Flowers are a bonus, often appearing in late spring to early summer in shades of white, pink, or red.
The plant forms a low mound of basal leaves arising from a central crown. Each leaf sits on a long petiole, creating a fountain-like habit. Most cultivars reach 12 to 18 inches tall and wide, though some miniatures stay under 8 inches and a few giants can spread to 2 feet. The crown is woody and sits at or just above soil level. This crown is the heart of the plant, and protecting it is the single most important aspect of coral bell plant maintenance.
Popular Cultivar Groups
Breeders have crossed several Heuchera species to create distinct lines. Knowing which group your plant belongs to helps you predict its performance.
- H. villosa hybrids: These tolerate heat and humidity better than most. Large, hairy leaves resist foliar diseases. ‘Caramel’, ‘Citronelle’, and ‘Mocha’ belong here.
- H. americana hybrids: Native to eastern woodlands, these offer excellent cold hardiness and striking silver veining. ‘Palace Purple’ started the purple-leaf craze.
- H. micrantha hybrids: Compact plants with ruffled leaves, often used in containers. ‘Obsidian’ and ‘Midnight Rose’ are standouts.
- H. sanguinea hybrids: The classic coral bells grown for flowers as much as foliage. They prefer cooler summers and sharp drainage.
- Heucherella (foamy bells): Intergeneric crosses between Heuchera and Tiarella. They combine coral bell foliage with foamflower’s airy flower spikes and running habit.
Choosing the Perfect Planting Site
Light Requirements: Not All Shade Is Equal
Coral bells are often labeled as shade plants, but that is only half the story. Most cultivars perform best with morning sun and afternoon shade, or dappled light throughout the day. In cooler northern zones (USDA 4-6), many varieties handle full sun if soil moisture is consistent. In hot southern zones (USDA 7-9), afternoon shade is non-negotiable. Too much direct sun bleaches leaf color, scorches edges, and stresses the plant. Too little light leads to leggy growth, reduced color intensity, and fewer flowers.
Observe your garden at different times of day before planting. A spot that gets gentle eastern light until 11 a.m. is ideal. If you only have deep shade, choose cultivars bred for low light, such as ‘Green Spice’ or ‘Silver Scrolls’. If you have a sunny bed, look for villosa hybrids like ‘Southern Comfort’ or ‘Georgia Peach’ that withstand more light.
Soil Preparation: The Foundation of Success
If there is one mistake that kills coral bells, it is heavy, poorly drained soil. In their native habitats, these plants grow in rocky crevices where water moves through quickly. The crown sits high, never submerged. Replicate this by amending your planting area generously.
Start by loosening soil to a depth of 12-18 inches. Mix in coarse organic matter: compost, aged pine bark fines, or leaf mold. Avoid fine peat moss alone; it holds too much water. If your soil is heavy clay, create a raised bed or mound the planting area 4-6 inches above grade. Add perlite or coarse sand (not play sand) to improve porosity. The goal is soil that feels moist but crumbles easily in your hand, never forming a sticky ball.
Test drainage by digging a 12-inch hole, filling it with water, and timing how long it takes to drain. If water remains after 30 minutes, improve drainage further or choose a different site. A pH between 6.0 and 7.0 is ideal. Coral bells tolerate slightly acidic to neutral soil. If your soil is very alkaline (above 7.5), incorporate elemental sulfur or use an acidifying fertilizer annually.
Spacing and Planting Technique
Space plants 12-18 inches apart depending on mature size. This allows air circulation, which prevents fungal diseases. When planting, the most critical rule is: keep the crown at or slightly above soil level. Burying the crown invites rot. Spread roots outward and downward in the planting hole. Backfill with amended soil, firm gently, and water thoroughly to settle soil around roots. Apply a thin layer of mulch (1-2 inches) keeping it away from the crown. Shredded bark, pine straw, or leaf mold work well.
Watering Wisdom for Healthy Heuchera
Establishment Phase: The First Growing Season
Newly planted coral bells need consistent moisture to develop a strong root system. Water deeply two to three times per week during the first month, then weekly unless rainfall exceeds one inch. Check soil moisture by inserting your finger two inches deep near the root zone. If it feels dry at that depth, water. Avoid daily light sprinklings; they encourage shallow roots that dry out quickly.
Water at the base of the plant using a soaker hose, drip irrigation, or a watering can with a long spout. Wet foliage, especially in evening, promotes powdery mildew and leaf spot diseases. Morning watering is best so leaves dry quickly. If you must use overhead sprinklers, run them early enough that foliage dries before nightfall.
Ongoing Water Management
Established coral bells are moderately drought tolerant but perform best with regular moisture. During hot, dry spells, water deeply once a week. In cooler weather or clay soil, every 10-14 days may suffice. The key is deep, infrequent watering that encourages roots to chase moisture downward. Mulch helps maintain even soil moisture and reduces watering frequency.
Watch for signs of water stress. Underwatered plants develop crispy leaf edges, wilted foliage that does not recover by morning, and slowed growth. Overwatered plants show yellowing lower leaves, soft crowns, and a general lack of vigor. If you suspect overwatering, pull back mulch, allow soil to dry, and check crown firmness. A mushy crown indicates rot; at that point, recovery is unlikely.
Container Watering Considerations
Coral bells make excellent container plants, but pots dry out faster than ground soil. Check containers daily in summer. Water until it drains from the bottom holes. Use a high-quality potting mix with added perlite or pumice. Avoid garden soil in pots; it compacts and drains poorly. Elevate containers on pot feet to ensure drainage holes stay clear. In winter, move pots to a protected location and water sparingly, just enough to prevent complete desiccation.
Feeding Your Coral Bells
When and What to Fertilize
Coral bells are light feeders. In rich, organic soil, they may need no supplemental fertilizer at all. If your soil is average or you want maximum vigor, apply a balanced slow-release fertilizer (such as 10-10-10 or 14-14-14) in early spring as new growth emerges. Scatter granules around the drip line, not against the crown. Water in thoroughly. Alternatively, top-dress with 1-2 inches of compost in spring. This feeds slowly and improves soil structure.
Avoid high-nitrogen fertilizers (like lawn food). They produce lush, weak foliage that is prone to disease and winter damage. They also reduce the intense leaf coloration that makes coral bells special. If using liquid fertilizer, dilute to half strength and apply monthly from spring to early summer. Stop fertilizing by mid-July so plants can harden off before winter.
Signs of Nutrient Deficiency
Pale or yellowing leaves (chlorosis) may indicate nitrogen deficiency or iron deficiency in alkaline soil. Stunted growth and purplish leaf undersides suggest phosphorus shortage. Brown leaf margins can mean potassium deficiency or salt buildup from over-fertilizing. Before treating, test your soil. Many symptoms mimic each other, and adding the wrong amendment wastes money and can harm plants.
Seasonal Maintenance Calendar
Spring: Wake-Up and Clean-Up
Early spring is the busiest time for coral bell plant maintenance. As soon as snow melts and ground thaws, remove winter mulch from around crowns. Gently pull away any dead or damaged leaves from the previous season. They pull off easily at the base. Do not cut into the woody crown. If the plant has heaved out of the ground (common in freeze-thaw cycles), press it back firmly and add soil around the base.
Apply fertilizer or compost top-dressing now. This is also the ideal time to divide congested clumps (see division section below). Water divisions well and mulch lightly. Watch for slugs and snails on tender new growth; use iron phosphate bait or copper barriers if needed.
Summer: Bloom and Groom
Flower spikes appear in late spring to early summer. They attract hummingbirds and pollinators. If you enjoy the flowers, leave them. If you prefer foliage focus, snip spikes at the base as they emerge. Deadheading spent flowers prevents self-seeding (seedlings rarely resemble parents) and keeps plants tidy. Continue monitoring soil moisture during dry spells.
Inspect leaves weekly for pests. Aphids cluster on new growth and flower stems. Blast them off with water or spray insecticidal soap. Spider mites cause stippled, dusty leaves in hot, dry weather; increase humidity and spray neem oil if severe. Vine weevil adults notch leaf edges at night; larvae eat roots. Beneficial nematodes applied to soil in late summer control larvae effectively.
Fall: Prepare for Dormancy
Stop fertilizing by late summer. As temperatures cool, reduce watering frequency. Remove any diseased foliage and dispose of it (do not compost). In zones 5 and colder, apply a 2-3 inch layer of shredded leaves or straw after the ground freezes. This prevents frost heaving, which pushes crowns out of the soil. In warmer zones, a light mulch is sufficient. Do not cut back green foliage; it continues photosynthesizing and protects the crown.
Winter: Rest and Protect
In most regions, coral bells are evergreen or semi-evergreen. Leaves may look tattered by late winter but will be replaced by fresh growth in spring. Avoid walking on frozen plants; brittle leaves and stems break easily. If heavy snow accumulates, gently brush it off to prevent crown damage. In containers, move pots to an unheated garage or sheltered corner. Water once a month if soil is dry and not frozen.
Dividing and Propagating Coral Bells
Why Divide?
Over time, coral bell clumps become woody and hollow in the center. Flowering declines, foliage loses vibrancy, and the plant looks tired. Division every 3-4 years rejuvenates the plant, gives you free plants, and allows you to amend soil in the original spot. It is one of the most rewarding aspects of coral bell plant maintenance.
When to Divide
Early spring (just as new growth emerges) and early fall (September in most zones) are the best times. Spring divisions have the whole growing season to establish. Fall divisions need 4-6 weeks before ground freeze to root in. Avoid dividing in summer heat or winter dormancy.
Step-by-Step Division Guide
- Water the plant thoroughly the day before dividing.
- Dig around the clump 6-8 inches out from the crown, going deep to get as many roots as possible.
- Lift the entire clump and shake off excess soil.
- Examine the crown. You will see multiple growing points (eyes) connected by woody rhizomes.
- Using a sharp knife or garden spade, cut the clump into sections. Each division needs 3-5 healthy eyes and a good root system.
- Trim any long, straggly roots to 4-6 inches. Remove dead or mushy tissue.
- Replant divisions immediately at the same depth they were growing. Water well.
- Mulch lightly and keep evenly moist for 4-6 weeks until established.
Other Propagation Methods
Coral bells can be grown from seed, but hybrids do not come true. Seedlings are variable and take 2-3 years to reach flowering size. Leaf cuttings work for some cultivars but have low success rates. Tissue culture is how nurseries produce thousands of identical plants, but it requires laboratory conditions. Division remains the most reliable method for home gardeners.
Common Problems and Solutions
Crown Rot: The Number One Killer
Crown rot is caused by soil-borne fungi (Phytophthora, Pythium, Rhizoctonia) that thrive in wet, poorly drained conditions. Symptoms include wilting that does not improve with watering, blackened mushy crown tissue, and a foul odor. Leaves pull away easily from the crown. Prevention is everything: excellent drainage, proper planting depth, and avoiding overhead irrigation. Once crown rot takes hold, the plant cannot be saved. Remove and destroy it. Do not replant coral bells in the same spot for at least two years.
Frost Heaving
Repeated freezing and thawing pushes shallow-rooted plants out of the ground, exposing roots and crowns to drying wind and cold. This is most common in heavy clay soils and newly planted specimens. The fix: plant in well-drained soil, mulch after ground freezes, and check plants in late winter. If heaved, gently press back and add soil.
Leaf Scorch
Brown, crispy leaf edges and bleached patches indicate too much sun, wind, or insufficient water. Move the plant to a shadier spot in fall or spring. Increase watering during hot spells. Provide a windbreak if the site is exposed. Some cultivars are simply more sun-sensitive; research before buying.
Powdery Mildew
A white, powdery coating on leaves, usually in late summer when days are warm and nights cool with high humidity. It rarely kills but looks unsightly. Improve air circulation by proper spacing. Water at soil level. Remove severely affected leaves. Spray with potassium bicarbonate or neem oil at first sign. Choose resistant cultivars like villosa hybrids.
Rust
Orange-brown pustules on leaf undersides, with yellow spots on top. Caused by fungal spores that overwinter on plant debris. Clean up fallen leaves in fall. Avoid overhead watering. Copper fungicides help if caught early. Good air flow and resistant varieties are your best defense.
Pest Issues
Vine weevils are the most damaging pest. Adults notch leaf margins at night. Larvae (white, C-shaped grubs) eat roots and bore into crowns, often killing plants. Inspect roots when dividing. Apply beneficial nematodes (Heterorhabditis bacteriophora) to soil in late summer when larvae are young. Slugs and snails chew irregular holes in leaves. Use iron phosphate bait, diatomaceous earth, or beer traps. Deer and rabbits occasionally browse foliage, especially in winter. Repellents or fencing help.
Designing with Coral Bells
Companion Plants for Shade Gardens
Coral bells play well with others. Their mounded habit and colorful foliage complement many shade lovers. Pair purple-leaved cultivars with golden Japanese forest grass (Hakonechloa ‘Aureola’) for striking contrast. Plant silver-leaved varieties alongside blue hostas and brunnera. Use chartreuse types like ‘Lime Rickey’ to brighten dark corners under evergreens. Ferns, astilbes, hellebores, and epimediums all share similar cultural needs.
Container Combinations
In pots, coral bells serve as the “filler” in thriller-filler-spiller designs. Combine a dark-leaved heuchera like ‘Obsidian’ with a tall thriller (cordyline, upright fuchsia) and a trailing spiller (creeping jenny, ivy, bacopa). For a foliage-only pot, mix three heuchera cultivars with contrasting leaf colors and textures. Ensure the container is at least 12 inches deep and wide.
Rock Gardens and Slopes
Because they naturally grow in rocky, well-drained sites, coral bells excel in rock gardens and on slopes. Tuck them between stones where soil drains instantly. Their evergreen foliage provides winter interest when alpine plants are dormant. On slopes, they help stabilize soil with their fibrous root systems.
Edging and Mass Plantings
Space plants 12 inches apart in a row for a colorful border along a woodland path. Mass 5-7 of the same cultivar for a bold drift of color. This works especially well with intensely colored varieties like ‘Fire Alarm’ (red), ‘Electric Lime’ (chartreuse), or ‘Black Pearl’ (near-black). The effect is a living tapestry that changes with the seasons.
Advanced Tips for Coral Bell Enthusiasts
Extending the Season in Cold Climates
In zones 3-4, choose cultivars with H. villosa or H. americana parentage for maximum hardiness. ‘Northern Exposure’ series, ‘Palace Purple’, and ‘Dale’s Strain’ are reliable. Apply extra winter mulch (4-6 inches of straw) after ground freezes. Consider a temporary windbreak of burlap on the windward side. Snow cover is the best insulator; if reliable snow is absent, mulch is critical.
Managing Heat and Humidity in the South
In zones 8-9, coral bells can struggle with summer heat and fungal diseases. Select villosa hybrids exclusively. ‘Caramel’, ‘Citronelle’, ‘Mocha’, ‘Brownies’, and ‘Peach Flambe’ tolerate southern conditions. Plant in bright shade with zero afternoon sun. Ensure exceptional air circulation. Water in morning only. Consider treating preventively with copper fungicide in early summer if rust or mildew are recurring problems.
Rejuvenating Old, Woody Plants
If you inherit a garden with ancient, woody heucheras that have not been divided in a decade, do not despair. In early spring, dig the entire plant. Cut away the dead, woody center completely. You will find live growth at the outer edges. Separate these into individual divisions with roots attached. Replant in amended soil. They will recover quickly and often surpass their former glory within a season.
Collecting and Sowing Seeds
If you want to experiment, let a few flower spikes mature. When seed capsules turn brown and split, collect seeds. Sow immediately on the surface of moist seed-starting mix. Do not cover; light aids germination. Keep at 65-70°F. Germination takes 2-8 weeks. Transplant seedlings to individual pots when they have two true leaves. Grow on for a year before planting out. Remember: hybrids produce variable offspring. This is how new cultivars are discovered!
Conclusion: Your Coral Bells Will Thank You
Coral bell plant maintenance boils down to a few simple principles: give them drainage, protect the crown, water thoughtfully, feed lightly, and divide occasionally. That is it. No complex spraying schedules, no precise pruning regimens, no constant fussing. These plants want to thrive. They evolved in tough conditions and carry that resilience in their genes.
Start with one or two cultivars that catch your eye. Plant them well. Watch them through the seasons. You will learn their rhythms: the fresh spring flush, the delicate flower wands, the deepening summer color, the winter persistence. Before long, you will be dividing them to share with friends, tucking divisions into new spots, and wondering how you ever gardened without them.
The world of heuchera is vast and ever-expanding. New introductions appear each year with colors and patterns that seem impossible. But the basics of care remain the same. Master those, and you can grow any coral bell that comes your way. Your shade garden will never look the same again, and you will have the satisfaction of knowing you gave these beautiful plants exactly what they needed to shine.
Frequently Asked Questions
How do I prevent crown rot in coral bells?
Plant coral bells with the crown at or slightly above soil level in well-draining soil. Amend heavy clay with compost and coarse materials. Avoid overhead watering and mulch away from the crown. Good drainage is the single most important prevention factor.
Should I cut back coral bells in fall?
No, do not cut back green foliage in fall. The leaves protect the crown through winter and continue photosynthesizing. Remove only dead or diseased leaves. In spring, gently pull away any winter-damaged foliage as new growth emerges.
Why are my coral bell leaves turning brown and crispy?
Brown crispy edges usually indicate too much sun, wind exposure, or underwatering. Move the plant to a shadier location, provide wind protection, or increase watering frequency. Some cultivars are more sun-sensitive than others.
Can I grow coral bells in containers?
Yes, coral bells thrive in containers. Use a pot at least 12 inches deep with drainage holes. Fill with quality potting mix amended with perlite. Water when the top inch feels dry. Fertilize lightly in spring. Protect containers in winter by moving to a sheltered location.
Do coral bells spread on their own?
Coral bells form slowly expanding clumps but do not spread aggressively by runners (except heucherella hybrids). They may self-seed lightly, but seedlings rarely resemble the parent plant. Division every few years is the best way to increase your stock.
Are coral bells deer resistant?
Coral bells are generally considered deer resistant due to their slightly fuzzy or leathery leaves and alkaloid content. However, hungry deer may browse them in winter when other food is scarce. Repellents or fencing provide additional protection in high-deer areas.