Usb-powered for Tomato Under $150
Growing tomatoes indoors is easier than ever with USB-powered grow lights under $150. These affordable systems plug into any USB port or power bank, making them perfect for apartments, offices, or kitchen counters. Our guide covers top picks, setup steps, and pro tips for a bountiful harvest.
Key Takeaways
- USB-powered grow lights offer plug-and-play convenience: No wiring or special outlets needed — just connect to a laptop, power bank, or wall adapter.
- Budget-friendly options under $150 deliver real results: Many models provide full-spectrum light strong enough for fruiting tomatoes.
- Look for at least 20 watts actual draw: Lower wattage works for seedlings, but mature tomato plants need more intensity.
- Full-spectrum white light beats purple blurple: White LEDs (4000K-6500K) support all growth stages and look better in living spaces.
- Adjustable height and timer functions are must-haves: Tomatoes grow fast; you need to raise lights and automate 14-16 hour cycles.
- Pair with a small fan for stronger stems: Air movement mimics outdoor wind, preventing leggy, weak plants.
- Expect 50-70 days to first harvest from transplant: Cherry and dwarf varieties work best in compact USB setups.
Quick Answers to Common Questions
Can I really grow tomatoes with just a USB port?
Not directly from a laptop port — those only provide 2.5-4.5 watts. USB-powered grow lights use USB-C Power Delivery (PD) with a wall charger (20-100W) or a high-capacity power bank. The USB connection handles control/data; the charger delivers the actual power.
What is the cheapest complete setup that works?
Viparspectra P600 ($70) + smart plug ($12) + fabric pot ($5) + soil ($10) + seeds ($3) = ~$100. Add a clip fan ($15) for best results. Skip the fan if budget is tight, but expect weaker stems.
How many tomatoes can one USB light produce?
A 30W light over one dwarf plant (Micro Tom, Red Robin) yields 0.5-1.5 lbs per cycle — roughly 30-80 cherry tomatoes. Two plants under the same light reduces yield per plant but increases total slightly.
Do I need special nutrients for hydroponic vs. soil?
Yes. Soil buffers pH and holds nutrients; use soil-formulated fertilizers. Hydroponics (like AeroGarden) requires precise hydroponic nutrients. Do not mix them. For soil in fabric pots, any quality tomato fertilizer (Espoma, FoxFarm, Jack’s) works.
Can I use these lights for other vegetables?
Absolutely. The same 30W full-spectrum light grows lettuce, spinach, herbs, peppers (dwarf varieties), microgreens, and strawberries. Leafy greens need less intensity — raise the light or dim to 50%. Peppers need similar intensity to tomatoes.
📑 Table of Contents
- Why USB-Powered Grow Lights Make Sense for Tomatoes
- Understanding Power Requirements for Tomato Plants
- Top USB-Powered Grow Light Picks Under $150
- Setting Up Your USB-Powered Tomato Grow System
- Daily Care and Optimization
- Troubleshooting Common Issues
- Maximizing Yield in a Small Footprint
- Cost Breakdown: What You Really Spend
- Environmental Impact and Energy Use
- Scaling Up: When You Outgrow USB
- Conclusion
Why USB-Powered Grow Lights Make Sense for Tomatoes
Growing tomatoes indoors used to mean bulky fixtures, ballasts, and dedicated circuits. Today, a USB-powered for tomato under $150 setup changes everything. These lights draw power from standard USB ports — the same ones on your laptop, phone charger, or portable power bank. That means you can start seeds on a bookshelf, grow a cherry tomato on your desk, or keep a dwarf variety thriving in a kitchen window without rewiring a thing.
The appeal goes beyond convenience. USB-powered units are energy-efficient, cool-running, and surprisingly capable. Many deliver full-spectrum output that rivals older fluorescent tubes. For urban gardeners, renters, or anyone short on space, they open the door to fresh, vine-riped tomatoes year-round. This guide walks you through everything you need to know: what to buy, how to set it up, and how to get the best harvest from a compact, budget-friendly system.
Understanding Power Requirements for Tomato Plants
Watts, PPFD, and What Tomatoes Actually Need
Not all USB lights are created equal. Marketing claims often cite “equivalent watts” or theoretical maximums. What matters is actual power draw and photosynthetic photon flux density (PPFD) at canopy level. Tomato plants in vegetative stage need 200-400 µmol/m²/s. During flowering and fruiting, they want 400-600 µmol/m²/s or more.
Visual guide about Usb-powered for Tomato Under $150
Image source: m.media-amazon.com
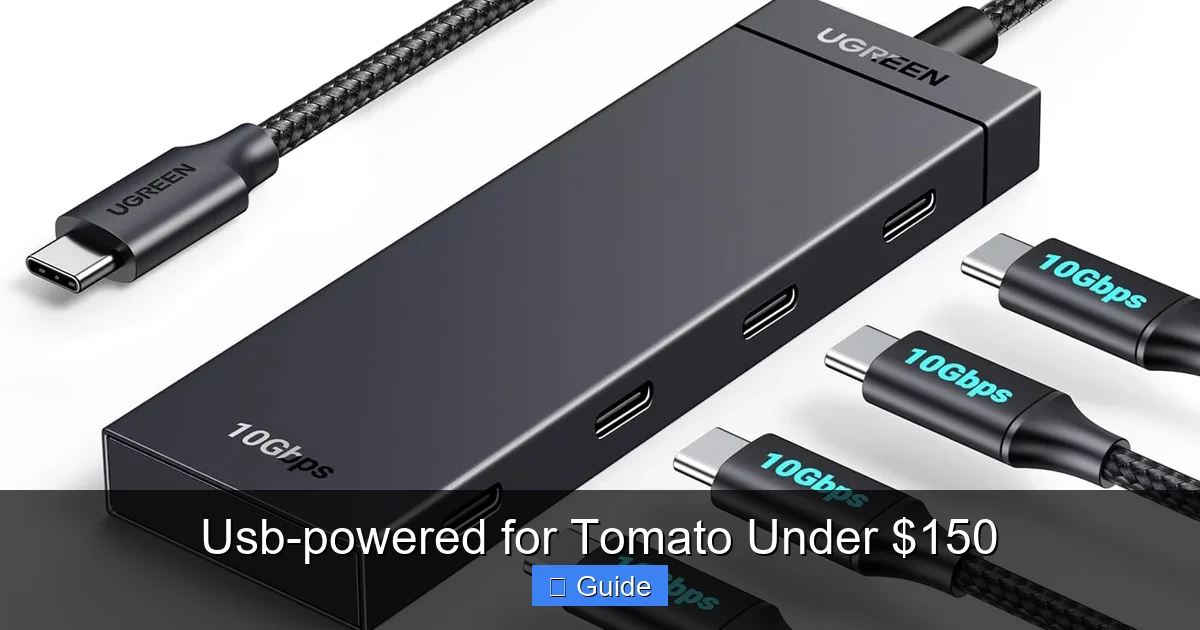
A typical USB 2.0 port delivers 2.5 watts (5V at 0.5A). USB 3.0 bumps that to 4.5 watts. USB-C with Power Delivery can push 15-100 watts depending on the charger. Most USB-powered grow lights under $150 use USB-C PD or a dedicated wall adapter rated 20-60 watts. The USB connection is for data or low-power control; the real juice comes from the wall wart.
Minimum Viable Specs for Fruiting Tomatoes
For a single dwarf or cherry tomato plant, aim for:
- Actual draw: 20-30 watts minimum
- Coverage: 12×12 inches at 12-18 inch hang height
- Spectrum: Full-spectrum white (3500K-5000K) with added 660nm red
- Dimming: 0-100% or at least 3-4 steps
- Timer: Built-in or smart-plug compatible
Anything below 15 watts actual draw will struggle past the seedling stage. You will get leggy growth, few flowers, and tiny fruit. Spend the extra $20-30 for a 30-watt unit — it pays off in yield.
Top USB-Powered Grow Light Picks Under $150
Best Overall: Spider Farmer SF300 (30W)
The Spider Farmer SF300 leads the pack for a reason. It pulls 30 watts from a USB-C PD charger (included), uses Samsung LM301B diodes, and delivers a beautiful 4000K full-spectrum spread with boosted 660nm red. The aluminum heat sink runs cool. A built-in dimmer knob and timer (4/8/12/16 hour cycles) make it truly set-and-forget. Coverage is roughly 2×2 feet for veg, 1.5×1.5 feet for flower — perfect for one determinate tomato or two dwarf plants.
Price typically lands around $89-99. Build quality feels premium. The only downside: the USB-C cable is short (3 feet), so plan your outlet placement or buy a quality extension.
Best Budget: Viparspectra P600 (40W)
Don’t let the “600” model name fool you — this unit draws 40 watts actual. It uses a Mean Well driver and SMD LEDs in a 3500K full-spectrum mix. No built-in timer, but it works with any smart plug. The hanging kit includes ratchet hangers, which are sturdier than the wire hooks on cheaper lights. At $69-79, it is the highest raw output per dollar in this category.
Trade-offs: larger footprint (12×12 inches), no dimmer on the unit itself, and the purple-pink hue is more noticeable than white-spectrum lights. Great if your grow space is tucked away.
Best for Small Spaces: Mars Hydro TS-600 (100W but USB-C PD compatible)
Wait — 100 watts? Yes, but the TS-600 includes a USB-C PD input option alongside standard AC. With a 65W or 100W GaN charger (sold separately), you can run it on USB-C power delivery. It covers 2×2 feet for veg, 1.5×1.5 for flower. Samsung diodes, 4000K spectrum, silent fanless design. Price hovers around $119-129 for the light alone; add $25-35 for a quality 100W USB-C charger.
This is the pick if you might scale up later. The same light works on AC power for a future tent setup.
Best All-in-One Kit: AeroGarden Harvest Elite (20W)
Technically a hydroponic system with integrated light, the Harvest Elite deserves mention. The 20-watt LED arm adjusts up to 12 inches. Includes pod kit, nutrients, and app-controlled timer. At $99-129 on sale, it removes every variable — no soil, no separate light hanging, no guesswork. Yield is modest (one cherry tomato plant max), but success rate for beginners is near 100%.
Downside: proprietary pods and nutrients lock you in. Light cannot be reused for other plants easily. Think of it as a tomato starter kit, not a long-term grow platform.
Honorable Mention: Barrina T5 LED Strip Lights (40W 4-pack)
Four 10-watt strips, linkable, 5000K full spectrum. Each has its own on/off switch. Mount under shelves, on wire racks, or vertically for side lighting. Total cost $59-69. Not a single “grow light” but a flexible system. Great for seed starting and supplemental light. For full-cycle tomatoes, you need all four strips focused on one plant — doable but less elegant.
Setting Up Your USB-Powered Tomato Grow System
Choosing the Right Location
Pick a spot with stable temperatures (65-75°F), decent airflow, and easy access for watering. A kitchen counter near the sink works well. A bookshelf in a home office keeps plants visible — you will spot issues faster. Avoid drafty windows, heating vents, or high-traffic zones where plants get bumped.
You need a way to hang the light 12-24 inches above the plant. Options:
- Wire shelving unit: Hang from the shelf above with S-hooks or zip ties.
- Gooseneck clamp: Attaches to desk or shelf edge; flexible but less stable for heavier lights.
- Tripod stand: Freestanding, adjustable height, portable. $25-40.
- Ceiling hook + pulley: Cleanest look, easy height adjustment. Requires drilling.
Power Strategy: Wall Adapter vs. Power Bank
Most USB-powered for tomato under $150 lights ship with a USB-C PD wall adapter. Use it. Power banks work for portability but add cost and complexity. A 65W GaN charger (Anker, Ugreen, Baseus) costs $25-35 and runs any light in this class. Plug into a smart plug (Kasa, Tapo, Meross — $10-15) for automated scheduling if your light lacks a built-in timer.
Cable management matters. Use Velcro ties or adhesive clips. Keep cords away from water. A drip loop (cord dips below outlet then rises) prevents water tracking into the plug.
Container and Soil Selection
For USB setups, container size is constrained by light footprint. A 3-5 gallon fabric pot (Smart Pot, GeoPot) fits a 12-18 inch canopy. Fabric pots air-prune roots, prevent overwatering, and breathe. Use a high-quality potting mix (FoxFarm Ocean Forest, Pro-Mix HP, or DIY: 1/3 peat, 1/3 compost, 1/3 perlite + worm castings). Avoid garden soil — it compacts and brings pests.
Variety Selection: Think Small, Think Determinate
Indeterminate tomatoes grow 6-10 feet tall. They will outgrow a USB light in weeks. Choose determinate or dwarf varieties bred for containers:
- Micro Tom: 6-8 inches tall, 50 days, tiny red fruit. True windowsill tomato.
- Red Robin: 12 inches, 55 days, sweet cherry size. Very productive.
- Tiny Tim: 12-18 inches, 60 days, classic cherry flavor. Reliable.
- Patio Choice Yellow: 18 inches, 65 days, yellow cherry, AAS winner.
- Tumbling Tom (Red or Yellow): Trailing habit, great for hanging baskets under side-mounted strips.
- Siberian: 24-30 inches, 60 days, 3-5 oz red fruit. Cold-tolerant, early.
Start seeds 6-8 weeks before you want to harvest. Or buy transplants from a local nursery — saves time and guarantees a healthy start.
Daily Care and Optimization
Light Schedule and Height Management
Tomatoes need 14-16 hours of light daily. Set timer for 14 hours on, 10 off. Start with light 18-24 inches above seedlings. Lower 1-2 inches per week as plants grow. Target 12-14 inches at maturity. Watch for light stress: leaves curling up (too close) or stretching with long internodes (too far).
Rotate plants 90 degrees daily if light is directional. This prevents leaning and ensures even canopy.
Watering: The Finger Test
Overwatering kills more indoor tomatoes than anything else. Stick your finger 2 inches into soil. Water only when dry at that depth. Water thoroughly until it drains from bottom. Empty saucer after 15 minutes. Fabric pots dry faster — check daily.
Feeding Schedule
Start feeding at first true leaves with 1/4 strength balanced fertilizer (2-2-2 or 3-3-3). At first flowers, switch to tomato-specific formula (higher phosphorus/potassium, e.g., 4-6-8). Feed every 7-10 days. Flush with plain water once a month to prevent salt buildup.
Pollination: You Are the Bee
Indoors, no wind or insects move pollen. Gently shake plants daily when flowers open. Or use a small brush to transfer pollen between flowers. An electric toothbrush held to flower stems mimics buzz pollination. Do this midday when pollen is most viable. Fruit set improves dramatically.
Airflow and Humidity
A small clip-on fan ($12-18) running 2-3 hours daily strengthens stems, reduces fungal risk, and aids pollination. Aim for gentle leaf movement, not a wind tunnel. Humidity 40-60% is ideal. In dry winter air, a pebble tray or small humidifier helps.
Troubleshooting Common Issues
Leggy, Pale Seedlings
Cause: Insufficient light intensity or light too far away.
Fix: Lower light to 6-8 inches. Ensure 16-hour cycle. Check actual wattage — upgrade if under 20W.
Yellowing Lower Leaves
Cause: Nitrogen deficiency, overwatering, or natural aging.
Fix: Feed with nitrogen-rich fertilizer. Check soil moisture. Remove fully yellow leaves.
Flowers Dropping, No Fruit
Cause: Failed pollination, temperature extremes, or humidity too high/low.
Fix: Hand-pollinate daily. Keep temps 70-80°F day, 60-70°F night. Run fan.
Blossom End Rot (Black Bottoms on Fruit)
Cause: Calcium uptake issue from irregular watering.
Fix: Consistent moisture. Mulch soil surface. Calcium spray (optional).
Whiteflies, Aphids, Spider Mites
Cause: Hitchhiked on plants or entered from outside.
Fix: Inspect weekly. Spray neem oil or insecticidal soap weekly as prevention. Yellow sticky traps catch adults.
Maximizing Yield in a Small Footprint
Pruning for Productivity
Even dwarf tomatoes benefit from light pruning. Remove suckers (shoots between main stem and branches) below the first flower cluster. This directs energy to fruit. Pinch off any leaves touching soil. Remove yellowed or diseased foliage promptly.
Side Lighting with Strips
Add two 10-watt LED strips vertically on opposite sides of the plant. This penetrates lower canopy, keeps bottom leaves productive, and boosts total PPFD 30-40%. Barrina strips or similar work well. Run on same timer as main light.
CO2 Supplementation (Optional)
In a small enclosed space (grow tent or wardrobe), CO2 can limit growth. A simple DIY yeast-sugar generator or Exhale bag raises CO2 200-400 ppm. Not necessary for single plants, but can push yields 15-20% if other factors are optimized.
Succession Planting
Start a new seed every 4-6 weeks. As one plant finishes, the next enters production. With two 3-gallon pots and one light, you can stagger for near-continuous harvest. Label pots with start dates.
Cost Breakdown: What You Really Spend
Let us tally a realistic first-year budget for a quality USB-powered tomato setup:
- Spider Farmer SF300 light + charger: $95
- Smart plug (timer): $12
- Tripod stand: $30
- 2x 3-gallon fabric pots: $10
- Potting mix (2 cu ft): $18
- Fertilizer (tomato formula, 1 lb): $12
- Seeds (3 varieties, 10 seeds each): $9
- Clip fan: $15
- Sprayer, labels, stakes: $10
- Total: ~$211
Year two drops to ~$40 (seeds, fertilizer, fresh soil). Compare to store-bought cherry tomatoes at $4-6/pint. A single plant yields 1-2 lbs (8-16 pints equivalent). Break-even comes fast.
Environmental Impact and Energy Use
A 30-watt light running 16 hours daily uses 175 kWh/year. At $0.14/kWh (US average), that is $24.50 annually. Carbon footprint depends on your grid — roughly 125 lbs CO2. Offset by growing local food: no transport, no packaging, no refrigeration. Every homegrown tomato saves ~0.5 lbs CO2 vs. store-bought. Net positive within months.
USB-C PD chargers are 90%+ efficient. Minimal vampire draw. Smart plugs cut standby power to zero during off-hours.
Scaling Up: When You Outgrow USB
USB-powered for tomato under $150 is a gateway. Signs you are ready for a tent and AC-powered light:
- You want 3+ plants simultaneously
- You crave larger slicing tomatoes
- You need 3×3 or 4×4 foot coverage
- You want passive cooling (no fans) at higher wattage
- You are ready to manage environment (temp, humidity, CO2) actively
Next step: 2×2 or 3×3 grow tent ($80-150), 100-200W quantum board ($120-200), inline fan + carbon filter ($100-150). Total $400-600. But start with USB. Learn the plant. Earn the upgrade.
Conclusion
A USB-powered for tomato under $150 setup is the most accessible entry point to indoor food growing. No electrical work. No massive footprint. No intimidating gear. Just a light, a pot, a seed, and a USB port. Within 60-70 days, you can harvest sun-warmed, vine-ripened cherry tomatoes from your desk, kitchen, or bookshelf.
The keys to success are simple: choose a light with real 20-30 watt output and full-spectrum white diodes. Pick a dwarf determinate variety. Water when dry, feed when flowering, pollinate by hand, and give a little breeze. The learning curve is gentle. The reward — that first sweet, juicy bite in January — is disproportionately huge.
Start small. One light, one plant, one variety. Master the basics. Then expand. Your future self, eating homegrown tomatoes while snow falls outside, will thank you.
Frequently Asked Questions
What wattage USB grow light do I need for tomatoes?
For fruiting tomatoes, you need at least 20-30 watts actual power draw. Seedlings can survive on 10-15 watts, but mature plants require higher intensity for flowering and fruit development. Check the manufacturer’s “actual watts” or “power draw” spec, not the “equivalent watts” marketing number.
Can I run a USB grow light from a power bank?
Yes, but you need a power bank with USB-C Power Delivery (PD) rated for your light’s wattage. A 30W light needs a 45W+ PD power bank. Expect 3-6 hours runtime per 20,000 mAh. Wall power is cheaper and more reliable for daily 16-hour cycles.
How close should the grow light be to tomato plants?
Start at 18-24 inches for seedlings. Lower 1-2 inches per week as plants grow. Mature tomatoes thrive at 12-14 inches from a 30W full-spectrum light. Watch for leaf curling (too close) or stretching (too far) and adjust accordingly.
Do USB grow lights use a lot of electricity?
A 30W light running 16 hours daily uses about 0.48 kWh per day, or 175 kWh per year. At average US rates ($0.14/kWh), that costs roughly $24.50 annually — about the same as a bright LED bulb left on all day.
Which tomato varieties work best under USB grow lights?
Dwarf determinate varieties: Micro Tom (6-8 inches), Red Robin (12 inches), Tiny Tim (12-18 inches), Patio Choice Yellow (18 inches), and Tumbling Tom (trailing). Avoid indeterminate varieties — they outgrow the light footprint quickly.
How do I pollinate indoor tomatoes without bees?
Gently shake the plant daily when flowers are open, or use a small paintbrush to transfer pollen between flowers. An electric toothbrush held to flower stems mimics buzz pollination. Do this midday for best results. Fruit set improves dramatically with hand pollination.