How to Plant Coral Bells in the Ground
Planting coral bells in the ground is simple when you follow the right steps. Choose a spot with partial shade and well-draining soil, then space plants 12 to 18 inches apart. Water deeply after planting and mulch to retain moisture for healthy, vibrant foliage all season.
Key Takeaways
- Choose the right location: Coral bells thrive in partial shade with morning sun and afternoon protection.
- Prepare soil properly: Amend heavy clay or sandy soil with compost for better drainage and nutrients.
- Space plants correctly: Leave 12 to 18 inches between each plant for good air circulation.
- Plant at the right depth: Keep the crown at soil level to prevent rot and encourage healthy growth.
- Water deeply after planting: Soak the root zone thoroughly to settle soil and reduce transplant shock.
- Mulch to conserve moisture: Apply 2 inches of organic mulch, keeping it away from the crown.
- Divide every few years: Rejuvenate crowded clumps in spring or fall to maintain vigor.
Quick Answers to Common Questions
How deep should I plant coral bells?
Plant coral bells with the crown at soil level. The crown is where the stems meet the roots. Planting too deep causes crown rot. Planting too high exposes roots to air and drought.
Can coral bells grow in full sun?
In cool climates (zones 4-6), coral bells tolerate full sun with adequate moisture. In hot climates (zones 7+), they need afternoon shade to prevent leaf scorch and color fading.
How often should I water newly planted coral bells?
Water deeply every 2 to 3 days for the first 4 to 6 weeks. Check soil moisture 2 inches down. Once established, water weekly during dry spells. Avoid overhead watering to prevent fungal issues.
When is the best time to divide coral bells?
Divide coral bells in early spring or early fall every 3 to 4 years. Dig up the clump, separate into sections with roots and growth buds, and replant immediately at the correct depth.
What soil do coral bells prefer?
Coral bells need well-draining, loamy soil rich in organic matter with a pH of 6.0 to 7.0. Amend heavy clay with compost and coarse sand. Amend sandy soil with compost and peat moss.
📑 Table of Contents
- Why Coral Bells Deserve a Spot in Your Garden
- Understanding Coral Bells Before You Plant
- Choosing the Perfect Planting Site
- When to Plant Coral Bells for Best Results
- Step-by-Step Guide to Planting Coral Bells in the Ground
- Caring for Newly Planted Coral Bells
- Long-Term Maintenance and Division
- Common Mistakes to Avoid
- Design Ideas for Using Coral Bells in the Landscape
- Conclusion: Your Coral Bells Journey Starts Now
Why Coral Bells Deserve a Spot in Your Garden
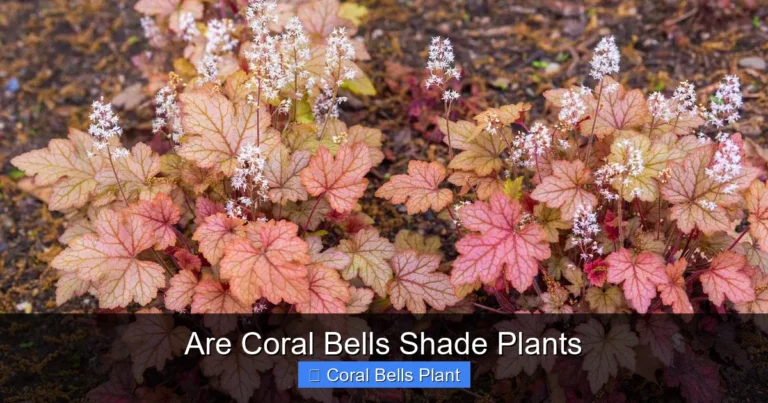
If you want a plant that brings color, texture, and year-round interest without demanding constant attention, coral bells should be at the top of your list. These perennials, also known by their botanical name Heuchera, are famous for their ruffled leaves in shades of purple, lime green, caramel, silver, and near-black. They form neat mounds that look great in borders, containers, rock gardens, and woodland edges.
But their beauty is not just skin deep. Coral bells are tough, adaptable, and long-lived when planted correctly. They attract hummingbirds with their delicate bell-shaped flowers on tall wiry stems. They resist deer and rabbits. And once established, they handle dry spells better than many shade plants. The secret to all this? Getting the planting right from day one. Let us walk through everything you need to know.
Understanding Coral Bells Before You Plant
What Are Coral Bells?
Coral bells belong to the Saxifragaceae family and are native to North America. There are over 50 species, but most garden varieties are hybrids bred for foliage color and form. The common name comes from the tiny, bell-shaped flowers that hover above the leaves in late spring to early summer. While the blooms are lovely, gardeners grow these plants mainly for their stunning leaves.
Popular Varieties to Consider
You will find dozens of cultivars at nurseries. ‘Palace Purple’ is a classic with deep bronze-purple leaves. ‘Caramel’ offers warm amber foliage that holds color in heat. ‘Lime Rickey’ brings electric chartreuse to shady corners. ‘Obsidian’ has nearly black, glossy leaves. ‘Berry Smoothie’ shows off rose-pink new growth. Pick varieties suited to your climate and light conditions for best results.
Hardiness and Climate Needs
Most coral bells are hardy in USDA zones 4 through 9. Some tolerate zone 3 with winter protection. In hot southern zones, they need more shade and consistent moisture. In cooler northern areas, they can handle more sun, which often intensifies leaf color. Always check the plant tag for specific zone ratings.
Choosing the Perfect Planting Site
Light Requirements: Not All Shade Is Equal
Coral bells are often labeled as shade plants, but they do best with morning sun and afternoon shade. Too much deep shade leads to leggy growth and dull color. Too much hot afternoon sun, especially in zones 7 and up, can scorch leaves. Dappled light under open-branched trees is ideal. If you only have full shade, choose varieties bred for low light like ‘Green Spice’ or ‘Autumn Bride’.
Soil Conditions That Make Them Thrive
Well-draining soil is non-negotiable. Coral bells hate wet feet. Heavy clay holds water and causes crown rot. Pure sand drains too fast and lacks nutrients. The sweet spot? Loamy soil rich in organic matter with a pH between 6.0 and 7.0. If your soil is poor, do not worry. You can fix it before planting.
Testing and Improving Your Soil
Dig a test hole 12 inches deep. Fill it with water. If it drains in under an hour, drainage is good. If water sits for hours, amend heavily. Mix in 2 to 3 inches of compost, leaf mold, or aged manure into the top 10 inches of soil. For clay, add coarse sand or fine pine bark. For sand, add extra compost and peat moss. This prep pays off for years.
When to Plant Coral Bells for Best Results
Spring Planting Advantages
Early spring, just after the last frost, is a prime planting window. Soil is warming, rains are frequent, and plants have a full season to establish roots before winter. Nurseries have the best selection then. Water regularly if spring turns dry.
Fall Planting Benefits
Early fall, at least six weeks before the ground freezes, is equally excellent. Cooler air reduces stress. Soil stays warm, encouraging root growth. Weeds are less aggressive. Plants often bloom better the following spring. Mulch well after planting for winter protection.
Avoid Summer and Winter Planting
Mid-summer heat stresses new transplants. If you must plant then, provide shade cloth and daily watering. Winter planting is risky in cold zones. Frozen ground prevents proper root contact. In mild climates, winter planting works if soil is workable.
Step-by-Step Guide to Planting Coral Bells in the Ground
Gather Your Tools and Materials
Before you start, have these ready: garden fork or spade, compost, slow-release fertilizer (optional), mulch (shredded bark, pine straw, or leaf mold), watering can or hose, gloves, and a trowel. Having everything close saves trips to the shed.
Prepare the Planting Hole
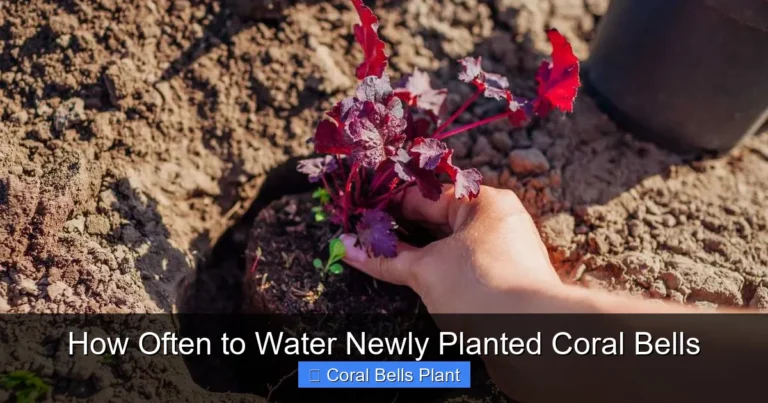
Dig a hole twice as wide as the root ball and just as deep. Wide holes encourage roots to spread outward. Loosen the soil at the bottom and sides with your fork. If soil is poor, mix compost 50/50 with native soil. Do not add fertilizer to the hole. It can burn tender roots.
Remove the Plant from Its Pot
Water the plant in its container an hour before planting. This reduces shock. Turn the pot upside down, supporting the crown with your hand. Tap the bottom. Slide the plant out. If roots circle the bottom, gently tease them apart with your fingers. Make a few vertical cuts in the root ball if it is severely root-bound.
Position at the Correct Depth
This is critical. Place the plant in the hole so the crown sits at or slightly above soil level. The crown is where stems meet roots. Planting too deep causes rot. Planting too high exposes roots. Check by laying a tool handle across the hole. Adjust soil underneath until the crown aligns.
Backfill and Firm Gently
Fill the hole halfway with your soil mix. Water lightly to settle. Finish backfilling. Press soil gently with your hands — not your feet — to remove air pockets. Do not compact heavily. Roots need oxygen. Form a shallow basin around the plant to hold water.
Water Thoroughly
Give the plant a long, slow soak. Water until the soil is moist 8 to 10 inches deep. This settles soil around roots and eliminates dry pockets. If water runs off, pause and let it soak in, then continue. Newly planted coral bells need consistent moisture for the first 4 to 6 weeks.
Apply Mulch Properly
Spread 2 inches of organic mulch in a circle around the plant, extending to the drip line. Keep mulch 1 to 2 inches away from the crown. Piling mulch against stems invites rot and pests. Mulch conserves moisture, suppresses weeds, and moderates soil temperature. Replenish as it breaks down.
Caring for Newly Planted Coral Bells
Watering Schedule for Establishment
Check soil moisture every 2 to 3 days for the first month. Stick your finger 2 inches deep. If dry, water deeply. After 4 to 6 weeks, reduce to once a week unless rain provides an inch. Established plants need water only during dry spells. Always water at the base. Wet leaves invite fungal disease.
Fertilizing: Less Is More
Coral bells are light feeders. If you amended soil with compost at planting, skip fertilizer the first year. In subsequent springs, apply a balanced slow-release fertilizer like 10-10-10 at half the label rate. Or top-dress with 1 inch of compost. Avoid high-nitrogen formulas. They promote soft growth prone to disease.
Deadheading and Pruning
Remove spent flower stalks at the base after blooming. This redirects energy to foliage. In late winter or early spring, cut back any tattered or winter-damaged leaves to the crown. New growth emerges fresh. Do not cut into the woody crown. It may not resprout.
Managing Pests and Diseases
Coral bells are generally trouble-free. Watch for vine weevil larvae eating roots — notched leaf edges signal adults. Apply beneficial nematodes in spring. Powdery mildew appears in humid, crowded conditions. Ensure good air flow. Crown rot comes from wet soil or deep planting. Prevention is the best cure.
Long-Term Maintenance and Division
When and How to Divide
Every 3 to 4 years, clumps become woody in the center with fewer leaves. This signals division time. Do it in early spring or early fall. Dig up the entire clump. Shake off soil. Pull or cut apart into sections, each with healthy roots and several growth buds. Replant immediately at correct depth. Water well.
Winter Care in Cold Climates
In zones 4 to 6, apply a loose 3-inch mulch layer after the ground freezes. Pine boughs or straw work well. This prevents freeze-thaw cycles that heave plants out of soil. Remove excess mulch in early spring. Do not cut foliage in fall. It protects the crown.
Companion Planting Ideas
Coral bells play well with others. Pair with hostas for bold texture contrast. Ferns add feathery softness. Astilbe brings feathery plumes. Lungwort (Pulmonaria) offers silver-spotted leaves. Japanese forest grass (Hakonechloa) flows beautifully. All share similar light and moisture needs.
Common Mistakes to Avoid
Planting Too Deep
This is the number one killer. The crown must breathe. Buried crowns rot. Always plant at the same level as in the pot — or slightly higher to allow for settling.
Overwatering or Poor Drainage
Soggy soil suffocates roots. If your site stays wet, build a raised bed or mound soil 6 to 8 inches high. Plant on the mound. This dramatically improves drainage.
Ignoring Light Needs
Full sun in hot climates fades color and burns leaves. Deep shade makes plants leggy. Observe your site at different times of day before choosing a spot.
Skipping Soil Prep
Planting into unprepared clay or sand sets plants up for struggle. Take time to amend. Your plants will reward you with vigor and color.
Crowding Plants
Tight spacing reduces air flow, invites disease, and creates competition. Follow spacing guidelines. Thin or divide as needed.
Design Ideas for Using Coral Bells in the Landscape
Border Edging and Mass Plantings
Plant coral bells in drifts of 3, 5, or 7 along a path or bed edge. Their mounding habit creates a tidy, colorful line. Repeat the same variety for cohesion. Or mix complementary colors like purple and chartreuse for punch.
Woodland Garden Gems
Under deciduous trees, coral bells shine in spring before canopy leaf-out. Combine with spring bulbs like daffodils. The foliage hides dying bulb leaves later. Add native wildflowers for a natural look.
Rock Gardens and Slopes
Sharp drainage makes rock gardens perfect. Tuck plants between stones. Their roots anchor soil on slopes. Choose compact varieties like ‘Little Cutie’ series for tight spaces.
Container Accents That Transition to Ground
Start coral bells in pots for instant color on patios. In fall, transplant them into the ground. This lets you enjoy them up close first, then establish them permanently.
Conclusion: Your Coral Bells Journey Starts Now
You now have the knowledge to plant coral bells like a pro. From picking the right spot and prepping soil to setting the crown at the perfect depth and mulching wisely — every step matters. These plants ask for little but give so much: months of vibrant foliage, delicate flowers, hummingbird visits, and year-round structure.
Remember, gardening is a conversation with nature. Observe your plants. Adjust watering. Move a struggling one. Divide a thriving clump. Share divisions with friends. That is the real joy. So grab your trowel, pick a few gorgeous varieties, and get planting. Your shady corners are about to get a serious upgrade. Happy gardening!
Frequently Asked Questions
Do coral bells come back every year?
Yes, coral bells are herbaceous perennials that return each spring in zones 4 through 9. They may stay evergreen in mild winters. In harsh winters, foliage dies back but roots survive to regrow.
Why are my coral bells turning brown and crispy?
Brown, crispy leaves usually indicate too much sun, insufficient water, or both. Move plants to a shadier spot or increase watering. Ensure mulch covers the root zone but not the crown.
Can I grow coral bells in containers permanently?
Yes, coral bells thrive in containers with good drainage and quality potting mix. Water more frequently than in-ground plants. Repot or divide every 2 to 3 years to prevent root-binding.
Are coral bells deer resistant?
Coral bells are generally deer and rabbit resistant due to their tough, slightly fuzzy leaves. However, hungry animals may nibble young growth. Use repellents in high-pressure areas.
How do I propagate coral bells from seed?
Collect seeds from dried flower stalks in summer. Sow indoors in late winter on moist seed-starting mix. Do not cover — light aids germination. Transplant seedlings after frost. Note: hybrids may not come true from seed.
What causes the center of my coral bells to die out?
A woody, bare center means the plant needs division. This happens every 3 to 4 years as the crown ages. Dig, divide, and replant the healthy outer sections. Discard the dead center.