How to Care for Fiddle Leaf Fig in Winter
Winter care for fiddle leaf figs requires adjustments to watering, lighting, and humidity to prevent leaf drop and root rot. Follow these proven strategies to keep your plant healthy and vibrant through the coldest months.
Winter can feel like a stressful time for plant parents. Your fiddle leaf fig that looked so vibrant in summer might suddenly start dropping leaves or developing brown spots. You are not alone. Many plant owners struggle with how to care for fiddle leaf fig in winter because these tropical beauties have very specific needs when the seasons change. The good news is that with a few simple adjustments to your care routine, your plant can not only survive but actually thrive during the colder months.
I have helped hundreds of fiddle leaf fig owners navigate winter care over the years. The key is understanding that your plant enters a period of slower growth. It needs less water, more light, and protection from the dry air that heating systems create. Once you make these adjustments, you will see your plant maintain its gorgeous foliage all winter long. Let me walk you through everything you need to know about how to care for fiddle leaf fig in winter so you can feel confident in your plant care routine.
Key Takeaways
- Reduce watering frequency: Let the top two inches of soil dry out completely between waterings to prevent root rot in cooler temperatures.
- Maximize light exposure: Move your plant to the brightest spot possible or supplement with grow lights for 12 to 14 hours daily.
- Maintain stable temperatures: Keep your fiddle leaf fig away from drafts, heating vents, and cold windows to avoid temperature shock.
- Boost humidity levels: Use a humidifier, pebble tray, or grouping plants to maintain 40 to 60 percent humidity around your plant.
- Pause fertilizing: Stop feeding during winter dormancy and resume only when new growth appears in spring.
- Clean leaves regularly: Dust leaves weekly with a damp cloth to maximize photosynthesis during shorter daylight hours.
- Monitor for pests: Inspect weekly for spider mites and scale insects which thrive in dry indoor winter air.
Quick Answers to Common Questions
How often should I water my fiddle leaf fig in winter?
Water only when the top two inches of soil are completely dry, typically every two to three weeks depending on your home conditions.
Does my fiddle leaf fig need a grow light in winter?
If your plant gets less than six hours of bright indirect light daily, a full spectrum LED grow light running twelve to fourteen hours will prevent leggy growth and leaf drop.
Why are the edges of my fiddle leaf fig leaves turning brown in winter?
Brown crispy edges usually indicate low humidity from indoor heating; aim for forty to sixty percent humidity using a humidifier or pebble tray.
Should I fertilize my fiddle leaf fig during winter?
No, stop fertilizing completely during winter dormancy and resume at half strength only when you see new growth in spring.
Is it normal for my fiddle leaf fig to drop leaves in winter?
Losing one or two lower leaves per month is normal winter adjustment, but rapid leaf drop signals a problem with watering, temperature, or light.
📑 Table of Contents
- Understanding Winter Dormancy in Fiddle Leaf Figs
- Adjusting Your Watering Routine for Winter
- Maximizing Light During Short Winter Days
- Managing Temperature and Humidity
- Soil, Fertilizer, and Root Health
- Leaf Care and Pest Prevention
- Troubleshooting Common Winter Problems
- Creating Your Winter Care Routine
- Conclusion
Understanding Winter Dormancy in Fiddle Leaf Figs
What Happens to Your Plant in Winter
Fiddle leaf figs are native to the tropical rainforests of West Africa. In their natural habitat, they enjoy consistent warmth, high humidity, and bright filtered light year round. When winter arrives in temperate climates, everything changes. Days get shorter. Light intensity drops. Indoor heating systems strip moisture from the air. Your plant senses these changes and naturally slows its growth.
This slowdown is not a bad thing. It is a survival mechanism. Your fiddle leaf fig is conserving energy. You might notice fewer new leaves. The leaves that do emerge might be smaller. Some older leaves might yellow and drop. This is normal. The plant is prioritizing its resources. Understanding this helps you avoid the biggest mistake plant parents make: overwatering a dormant plant.
Signs Your Plant Is Adjusting to Winter
Watch for these normal winter responses. Growth slows significantly. You might go months without a new leaf. The plant might drop a few lower leaves. This is the plant shedding what it cannot support. Leaf edges might brown slightly due to lower humidity. New leaves might emerge smaller than summer leaves. None of these mean your plant is dying. They mean it is adapting.
However, watch for warning signs that indicate a problem. Rapid leaf drop (more than a leaf or two per week) signals stress. Black or mushy spots on leaves suggest root rot from overwatering. Crispy brown edges spreading inward mean humidity is too low. Yellowing of many leaves at once often means temperature shock or overwatering. Knowing the difference between normal adjustment and distress saves your plant.
Adjusting Your Watering Routine for Winter
Why Less Water Is Critical
Watering is the number one killer of fiddle leaf figs in winter. In summer, your plant might need water every week. In winter, it might need water every two to three weeks. The reason is simple. Cooler temperatures slow evaporation. Shorter days mean less photosynthesis. The plant simply uses less water. If you keep watering on your summer schedule, the soil stays wet too long. Roots suffocate. Root rot sets in. This is the fastest way to lose your plant.
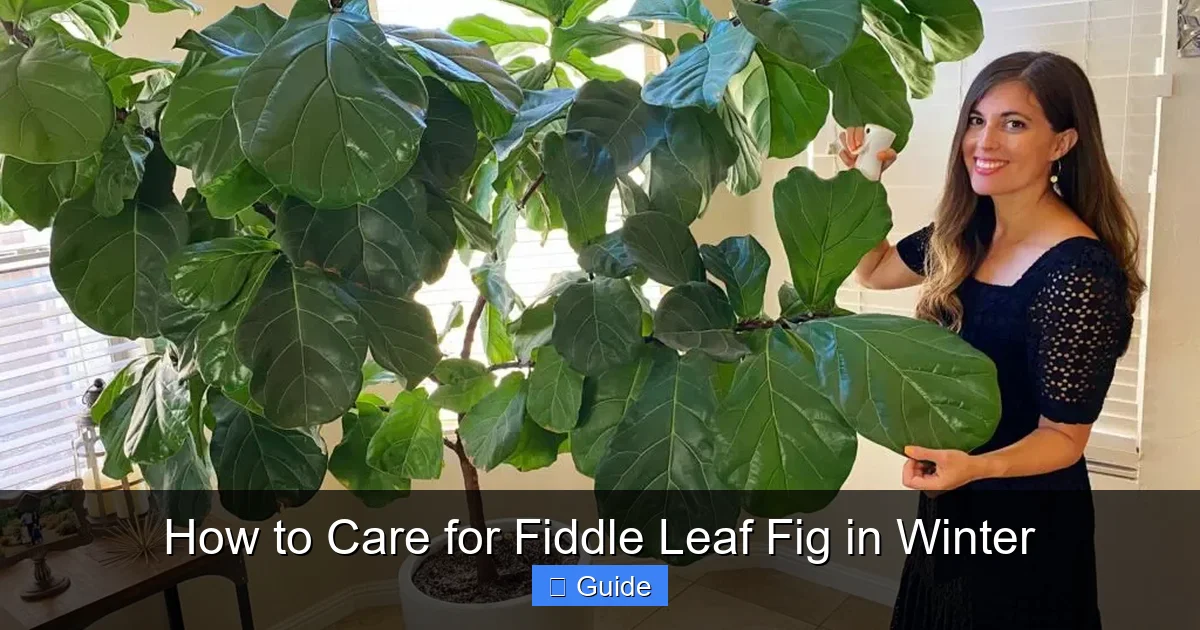
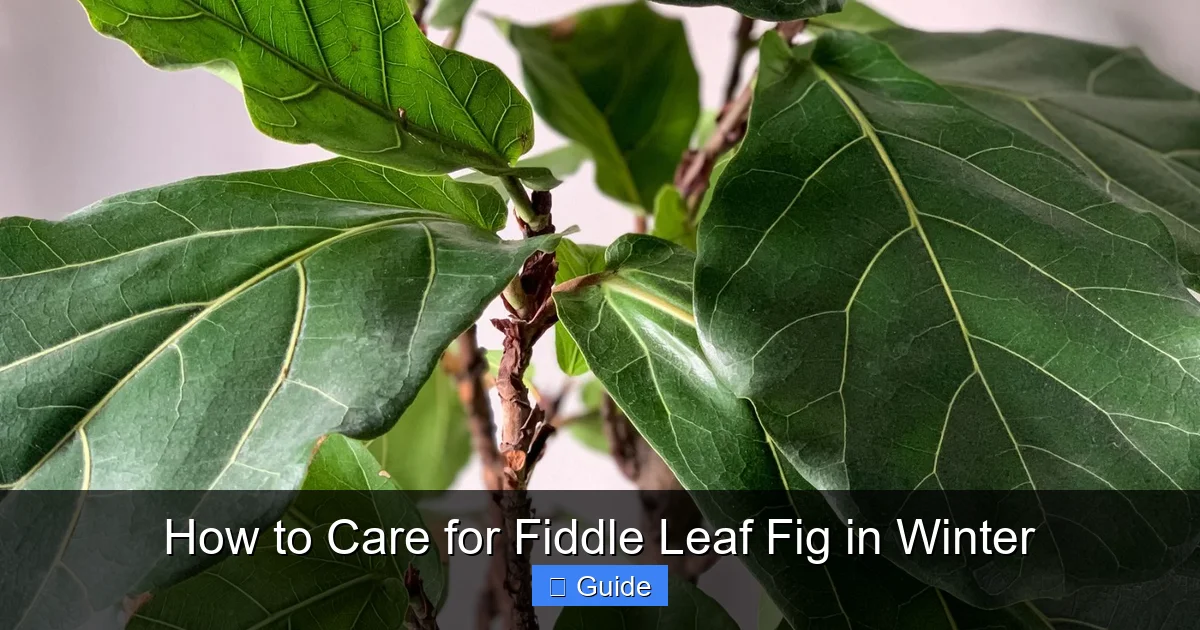
Visual guide about How to Care for Fiddle Leaf Fig in Winter
Image source: fitnessista.com
The rule for how to care for fiddle leaf fig in winter is straightforward. Water only when the top two inches of soil are completely dry. Not slightly damp. Completely dry. Stick your finger deep into the soil. If you feel any moisture at your second knuckle, wait. A moisture meter takes the guesswork out of this. Aim for a reading of 3 or 4 on a scale of 10 before watering again.
How to Water Properly in Winter
When you do water, water thoroughly. Pour water slowly around the base of the plant until it flows freely from the drainage holes. This ensures the entire root ball gets moisture. It also flushes any accumulated salts from fertilizer. Let the plant drain completely. Never let it sit in a saucer of water. Empty the saucer after ten minutes.
Use room temperature water. Cold water from the tap can shock tropical roots. Let water sit overnight to reach room temperature and allow chlorine to dissipate. If your tap water is heavily treated, consider filtered or rain water. Fiddle leaf figs are sensitive to chemicals in water. This small step makes a big difference in leaf health.
Common Watering Mistakes to Avoid
Do not water on a schedule. Check the soil instead. Do not mist the soil surface thinking it counts as watering. It does not reach the roots. Do not use ice cubes. The extreme cold damages roots. Do not water because the leaves look droopy without checking soil first. Droopy leaves can mean both overwatering and underwatering. The soil tells the truth. Always check the soil.
Maximizing Light During Short Winter Days
Finding the Best Winter Location
Light is the second most critical factor in how to care for fiddle leaf fig in winter. Your plant needs bright indirect light for at least six to eight hours daily. In winter, the sun sits lower in the sky. Light intensity drops by up to fifty percent. A spot that was perfect in summer might be too dark now. You likely need to move your plant.
South facing windows provide the most winter light. East facing windows work well for morning sun. West facing windows give strong afternoon light that can be too intense even in winter. North facing windows rarely provide enough light for a fiddle leaf fig in winter. If you only have north facing windows, you will need supplemental lighting. Do not guess. Observe your space at different times of day. Note where the sun actually hits.
Using Grow Lights Effectively
Grow lights are a game changer for winter care. Full spectrum LED grow lights mimic natural sunlight. They provide the red and blue wavelengths plants need for photosynthesis. Position the light twelve to eighteen inches above the plant. Run it for twelve to fourteen hours daily. A timer makes this effortless. Your plant will maintain active growth even in the darkest months.
Choose a light with at least 2000 lumens for a medium sized plant. Larger plants need more intensity. White light around 4000K to 6500K looks natural in your home. Avoid purple blurple lights unless you have a dedicated plant room. They make it hard to assess leaf health. Quality LED panels last years and use minimal electricity. They are one of the best investments for serious plant parents.
Rotating for Even Growth
Rotate your plant a quarter turn each week. This prevents leaning toward the light source. It ensures all sides receive equal light exposure. Even growth means a fuller, more balanced plant. It also lets you inspect all sides of the plant weekly for pests or problems. Make rotation part of your Sunday routine. It takes ten seconds and pays off in a beautiful symmetrical plant.
Managing Temperature and Humidity
Protecting from Temperature Extremes
Fiddle leaf figs hate temperature fluctuations. They prefer a steady 65 to 75 degrees Fahrenheit. Winter brings multiple threats. Cold drafts from doors and windows. Hot dry air from heating vents. Cold window glass that chills leaves touching it. Each of these causes stress. Stress leads to leaf drop. Prevention is simple but requires attention.
Move your plant at least three feet from heating vents. The hot air blasts dry out leaves in hours. Keep it away from exterior doors that open frequently. The blast of cold air shocks the plant. Do not let leaves touch cold window glass. The temperature difference damages leaf tissue. Use a sheer curtain as a buffer if the plant must stay near a window. A digital thermometer near your plant helps you monitor the actual temperature it experiences.
Combating Dry Indoor Air
Indoor humidity in winter often drops to twenty percent or lower. Fiddle leaf figs want forty to sixty percent. This gap causes crispy leaf edges, brown tips, and increased susceptibility to spider mites. You have several effective options to raise humidity. A humidifier is the gold standard. It adds consistent moisture to the air. Choose one with a built in hygrometer so it maintains your target humidity automatically.
Pebble trays work for smaller plants. Fill a tray with pebbles. Add water to just below the top of the pebbles. Set the plant on top. As water evaporates, it creates a humidity bubble around the plant. Refill as needed. Grouping plants together creates a microclimate. Each plant releases moisture through transpiration. Together they raise local humidity. This works beautifully if you have multiple tropical plants.
Misting Myths and Reality
Many people mist their plants daily thinking it raises humidity. It does not. The water evaporates in minutes. It provides almost no lasting humidity benefit. Worse, water sitting on leaves in cool conditions encourages fungal diseases. Bacterial leaf spot loves wet leaves in stagnant air. If you mist, do it in the morning so leaves dry completely before night. Better yet, skip misting and use a humidifier. Your plant will thank you.
Soil, Fertilizer, and Root Health
When to Repot and When to Wait
Winter is not the time to repot your fiddle leaf fig. Repotting stimulates root growth. The plant needs energy for that. In winter, energy reserves are low. Repotting now risks transplant shock the plant cannot recover from. Wait until spring when you see new growth emerging. That is the signal the plant is ready for fresh soil and a larger pot.
If you must repot due to root rot or a broken pot, do it gently. Use a pot only one size larger. Ensure excellent drainage. Use a well draining mix. Two parts quality potting soil, one part perlite, one part orchid bark works beautifully. This mimics the airy forest floor these plants love. Do not fertilize for at least six weeks after winter repotting. Let roots establish first.
Why You Should Stop Fertilizing
Fertilizer in winter does more harm than good. The plant is not actively growing. It cannot use the nutrients. They accumulate in the soil as salts. These salts burn roots. They cause brown leaf tips and edges. They make the plant more vulnerable to pests and disease. Stop fertilizing completely when growth slows in fall. Resume only when you see new leaves in spring.
If you have been fertilizing regularly, flush the soil before winter sets in. Water thoroughly three times in one session, letting it drain completely each time. This removes excess salts. Your plant enters winter with clean soil. This simple step prevents many winter leaf problems.
Checking Root Health Without Repotting
You can assess root health without disturbing the plant. Gently lift the plant from its decorative pot. Look at the drainage holes. Healthy roots are white or light tan and firm. Dark brown, black, or mushy roots indicate rot. A foul smell confirms it. If you see healthy root tips at the drainage holes, your plant is in good shape. If roots are circling tightly, make a note to repot in spring.
Leaf Care and Pest Prevention
Keeping Leaves Clean and Functional
Dust builds up faster in winter with windows closed. A layer of dust blocks light. It reduces photosynthesis when your plant needs every photon. Clean leaves weekly. Use a soft microfiber cloth dampened with lukewarm water. Support each leaf from underneath with one hand. Wipe gently from stem to tip with the other. Clean both sides. This takes five minutes and dramatically improves light absorption.
While cleaning, inspect each leaf. Look for pests. Check for early signs of problems. Yellow halos around brown spots suggest bacterial infection. Concentric rings suggest fungal issues. Sticky residue means scale or mealybugs. Fine webbing means spider mites. Early detection makes treatment easy. Late detection can mean losing the plant.
Preventing and Treating Spider Mites
Spider mites explode in dry winter air. They are tiny. You rarely see them until damage appears. Look for stippling on leaves. Tiny yellow or white dots where they have sucked chlorophyll. Fine webbing on leaf undersides or between leaves and stems. Leaves turning bronze or gray. If you see these signs, act immediately.
Take the plant to the shower. Spray all surfaces thoroughly with lukewarm water. Focus on leaf undersides. This physically removes most mites. Let dry. Then apply neem oil or insecticidal soap per label directions. Repeat weekly for three weeks to catch hatchlings. Run your humidifier. Mites hate humidity above fifty percent. Prevention is easier. Keep humidity up. Inspect weekly. Quarantine new plants for two weeks.
Dealing with Scale and Mealybugs
Scale insects look like small brown bumps on stems and leaf veins. They do not move. Mealybugs look like tiny cotton balls in leaf axils and stem joints. Both suck plant sap. Both excrete sticky honeydew. Both weaken the plant. Remove them manually with a cotton swab dipped in isopropyl alcohol. Touch each insect. It dissolves their protective coating. Follow with neem oil spray. Check weekly for a month. They are persistent but manageable with diligence.
Troubleshooting Common Winter Problems
Leaf Drop: When to Worry
Some leaf drop is normal. The plant sheds older leaves it cannot support. One or two leaves a month is fine. More than that signals a problem. Check your watering first. Overwatering is the most common cause. Check for root rot. Check for temperature shock. Did a cold snap hit? Is a vent blowing on it? Check light. Has it been cloudy for weeks? Check humidity. Are leaf edges crispy? Address the root cause. The plant will stabilize.
If the plant is dropping leaves from the top, that is serious. Top leaf drop means the growing point is stressed. This usually means severe root rot or extreme cold damage. Act fast. Unpot. Check roots. Remove rot. Repot in fresh dry mix. Place in warm bright spot. Do not water for a week. Pray. Sometimes they recover. Sometimes they do not. This is why prevention matters so much.
Brown Spots and Edges: Decoding the Signs
Brown spots tell a story. Brown edges moving inward mean low humidity or underwatering. Brown spots with yellow halos mean bacterial infection. Improve air circulation. Remove affected leaves. Avoid wetting leaves. Brown mushy spots in the leaf center often mean fungal infection from water sitting on leaves. Dry brown patches on the side facing the window mean sunburn. Even winter sun can burn through glass. Move the plant back slightly.
Black spots at the leaf base where it meets the stem often mean root rot traveling up. This is urgent. Check roots immediately. Small brown dots in a line along the leaf margin are often edema. This happens when roots take up water faster than leaves can transpire. It happens in cool, humid, low light conditions. It is cosmetic. Improve light and air flow. Reduce watering slightly.
Yellowing Leaves: The Many Causes
Yellow leaves are the plant equivalent of a check engine light. Many things cause it. Overwatering is number one. The oldest leaves yellow first. Root rot prevents nutrient uptake. Nutrient deficiency from lack of fertilizer shows as yellowing between veins on newer leaves. This is rare in winter since you are not fertilizing anyway. Cold damage causes yellowing that turns brown. Spider mite damage causes stippled yellowing. Natural aging yellows the very lowest leaves one at a time.
When you see yellowing, do not panic. Do not immediately fertilize. Check soil moisture. Check for pests. Check temperature history. Check light. Address the most likely cause. Wait two weeks. If yellowing stops, you found it. If it continues, reassess. Plants communicate slowly. Give them time to respond to corrections.
Creating Your Winter Care Routine
Weekly Checklist for Success
Consistency beats intensity. A simple weekly routine keeps your fiddle leaf fig happy all winter. Every Sunday, spend ten minutes with your plant. Check soil moisture with your finger or meter. Water only if the top two inches are dry. Wipe leaves with a damp cloth. Inspect for pests on both leaf surfaces. Check for new growth. Rotate the plant a quarter turn. Verify the humidifier is running. Confirm no vents are blowing on it. That is it. Ten minutes. Done.
Monthly, do a deeper check. Flush the soil if you see white crust on the surface. Check drainage holes for root health. Clean the humidifier to prevent mold. Wash the grow light lens for maximum output. Check the plant’s distance from the window. Adjust as the sun angle changes. These monthly tasks take twenty minutes and prevent major issues.
Tracking Progress with a Plant Journal
Keep a simple notebook or phone note for your plant. Record the date you water. Note any changes you make. Photograph the plant monthly. Write down problems and solutions. This creates a personalized care guide for your specific plant in your specific environment. Next winter, you will know exactly what worked. You will see patterns. You will become the expert on your plant.
Include observations like: “January 15 – watered, soil dry to 3 inches, one lower leaf yellowed, removed it. Humidity 45%. New leaf bud visible at top.” This level of detail seems like overkill until you need it. Then it is invaluable. You will spot trends. You will correlate actions with results. You will stop guessing and start knowing.
Preparing for Spring Transition
Winter care sets up spring success. As days lengthen in late February, watch for signs of waking up. New leaf buds swelling. Slightly faster soil drying. Brighter light hitting the plant. These signal the end of dormancy. Begin transitioning slowly. Increase watering frequency slightly. Resume fertilizing at half strength. Move the plant if a better summer spot exists. Acclimate over two weeks. Your plant will explode with growth.
The transition period is delicate. Do not shock the plant with sudden changes. If moving outdoors for summer, wait until nights are consistently above fifty five degrees. Harden off over two weeks. Start with one hour of morning shade. Increase daily. This prevents sunburn and transplant shock. Your winter care investment pays off in a spectacular spring flush.
Conclusion
Learning how to care for fiddle leaf fig in winter transforms your relationship with this stunning plant. You move from anxious guessing to confident care. The adjustments are simple. Water less. Provide more light. Stabilize temperature. Increase humidity. Stop fertilizing. Clean leaves. Watch for pests. Each small action compounds. Your plant stays healthy. It maintains its architectural beauty. It greets spring ready to grow.
Remember that every plant and every home is different. Use these guidelines as your foundation. Observe your specific plant. Adjust based on its feedback. Trust the process. Winter is not a threat to your fiddle leaf fig. It is a season of rest and preparation. With proper care, your plant will not just survive winter. It will emerge stronger, fuller, and more magnificent than ever. You have got this. Your fiddle leaf fig is lucky to have you.
Frequently Asked Questions
Can I repot my fiddle leaf fig in winter?
Avoid repotting in winter unless absolutely necessary due to root rot or a broken pot. The plant lacks energy to recover from transplant shock. Wait until spring when new growth appears.
What temperature is too cold for a fiddle leaf fig?
Temperatures below 60 degrees Fahrenheit can cause cold damage. Keep your plant away from drafty windows, exterior doors, and unheated rooms to prevent temperature shock.
How do I know if my fiddle leaf fig has root rot?
Signs include mushy black roots, foul soil odor, yellowing leaves that drop rapidly, and soil that stays wet for weeks. Unpot the plant to inspect roots directly if you suspect rot.
Can I put my fiddle leaf fig near a heater vent?
Never place your fiddle leaf fig near heating vents. The hot dry air causes rapid moisture loss from leaves, leading to crispy edges, leaf drop, and increased pest susceptibility.
Should I mist my fiddle leaf fig in winter?
Misting provides only temporary humidity and can encourage fungal diseases on wet leaves in cool conditions. Use a humidifier instead for consistent, effective humidity control.
When should I start fertilizing again after winter?
Resume fertilizing at half strength when you see active new growth in spring, typically March or April depending on your climate. This signals the plant has exited dormancy.