How to Plant Coral Bells
Coral bells (Heuchera) are versatile perennials prized for their colorful foliage and delicate flowers. This comprehensive guide covers everything from selecting the right variety and preparing soil to proper planting techniques and ongoing care for year-round garden beauty.
If you have ever wandered through a shade garden and spotted those gorgeous mounds of ruffled leaves in shades of purple, caramel, lime green, or deep burgundy, you have likely met coral bells. These charming perennials, botanically known as Heuchera, have become garden superstars over the past few decades. Plant breeders have worked magic with native North American species, creating an astonishing rainbow of foliage colors and patterns. But for all their sophisticated looks, coral bells are surprisingly approachable plants. Learning how to plant coral bells correctly sets the stage for years of low-maintenance beauty in your garden beds, borders, and containers.
I remember the first time I brought home a ‘Palace Purple’ coral bell from a local nursery. The tag promised dramatic foliage and easy care. I planted it in a sunny spot with heavy clay soil, watered it sporadically, and wondered why it struggled. That experience taught me that while these plants are forgiving, they do have preferences. Understanding those preferences makes all the difference between a plant that merely survives and one that thrives with vibrant color and lush growth. Whether you are a beginning gardener or have years of experience, this guide will walk you through everything you need to know about how to plant coral bells for success.
Key Takeaways
- Choose the right location: Coral bells thrive in partial shade with morning sun and afternoon protection in most climates
- Prepare well-draining soil: Amend heavy clay or sandy soil with organic matter to create ideal growing conditions
- Plant at the correct depth: Keep the crown at soil level to prevent rot and ensure healthy growth
- Water consistently after planting: Maintain even moisture for the first growing season to establish strong roots
- Mulch properly: Apply 2-3 inches of organic mulch keeping it away from the crown
- Divide every 3-4 years: Rejuvenate plants and prevent center die-out through regular division
- Monitor for pests: Watch for vine weevils, foliar nematodes, and fungal issues in humid conditions
Quick Answers to Common Questions
What is the best time of year to plant coral bells?
Spring and fall are the best times to plant coral bells. Spring planting after the last frost gives plants a full growing season to establish. Fall planting 6-8 weeks before the first hard frost allows root establishment in cool, moist soil without summer heat stress.
How deep should I plant coral bells?
Plant coral bells with the crown (where stems meet roots) at or slightly above soil level. Planting too deep causes crown rot. Planting too high exposes roots to drying air. The root ball should sit on firm, undisturbed soil at the bottom of the hole.
Do coral bells need full sun or shade?
Coral bells prefer partial shade: morning sun with afternoon shade, or dappled light all day. In cooler climates (zones 4-6), they tolerate more sun with adequate moisture. In hot climates (zones 7-9), afternoon shade is essential. Dark-leaved varieties handle more sun than light-leaved ones.
How often should I water newly planted coral bells?
Water newly planted coral bells deeply 2-3 times per week for the first month, then once or twice weekly for the rest of the first growing season. Check soil moisture 2 inches deep. Water at the base, not overhead. Established plants need supplemental water only during drought.
When and how should I divide coral bells?
Divide coral bells every 3-4 years in early spring or early fall when the center becomes woody and dies out. Dig up the entire clump, wash off soil, and cut the crown into sections with healthy leaves and roots. Discard the woody center. Replant immediately at correct depth.
📑 Table of Contents
- Understanding Coral Bells Before You Plant
- Choosing the Perfect Location
- Preparing the Planting Site
- Step-by-Step Planting Process
- Establishment Care: The First Growing Season
- Long-Term Maintenance and Care
- Growing Coral Bells in Containers
- Design Ideas and Landscape Uses
- Troubleshooting Common Problems
- Advanced Tips for Coral Bell Enthusiasts
- Conclusion
Understanding Coral Bells Before You Plant
What Makes Coral Bells Special
Coral bells belong to the Saxifragaceae family and are native to North America. The genus Heuchera includes roughly 50 species, but the plants we buy at garden centers are mostly complex hybrids. These hybrids combine the best traits of different species: the heat tolerance of Heuchera villosa, the cold hardiness of Heuchera americana, and the showy flowers of Heuchera sanguinea. The result is a plant that offers season-long interest. The foliage forms neat mounds typically 12 to 18 inches tall and wide. In late spring to early summer, wiry stems rise above the leaves bearing tiny bell-shaped flowers in shades of white, pink, or red. These flowers attract hummingbirds and make lovely cut flowers for small arrangements.
Popular Varieties to Consider
The variety of coral bells available today is staggering. For deep, dramatic color, ‘Obsidian’ and ‘Black Pearl’ offer nearly black leaves with a glossy sheen. If you prefer warm tones, ‘Caramel’ and ‘Peach Flambe’ bring amber and orange hues that glow in autumn light. Chartreuse lovers gravitate toward ‘Lime Rickey’ and ‘Electric Lime’ for bright spots in shady corners. Silver-leaved varieties like ‘Silver Scrolls’ and ‘Appletini’ add cool elegance. Some varieties, such as ‘Berry Smoothie’ and ‘Forever Purple’, hold their color exceptionally well through summer heat. When selecting varieties, consider your climate. Villosa hybrids handle heat and humidity better, while sanguinea types prefer cooler conditions. Most modern hybrids are rated for USDA zones 4 through 9, but always check the specific plant tag.
Growth Habits and Seasonal Changes
Understanding how coral bells grow helps you site them properly. These are clump-forming perennials with a woody crown at soil level. New leaves emerge from this crown each spring. The foliage is semi-evergreen in mild winters but may look tattered by late winter. In colder zones, the leaves often die back to the crown. Fresh growth appears in early spring, often before many other perennials wake up. This early emergence makes coral bells valuable for spring garden interest. The flowering period typically lasts four to six weeks in late spring to early summer. After flowering, the plant puts energy into foliage growth. Some varieties may produce a light rebloom in fall if deadheaded promptly.
Choosing the Perfect Location
Light Requirements Explained
One of the most common questions about how to plant coral bells concerns light exposure. The answer depends on your climate and the specific variety. In general, coral bells prefer partial shade. This means morning sun with afternoon shade, or dappled light throughout the day. In cooler northern climates (zones 4-6), many varieties tolerate full sun if given adequate moisture. The lighter-colored varieties (chartreuse, yellow, peach) often need more shade to prevent leaf scorch. Dark-leaved varieties (purple, black, bronze) generally handle more sun because their pigments provide some protection. In hot southern climates (zones 7-9), afternoon shade is essential for all varieties. Too much sun leads to bleached, crispy leaf edges. Too much deep shade results in leggy growth and reduced color intensity. Observe your garden at different times of day before choosing a spot.
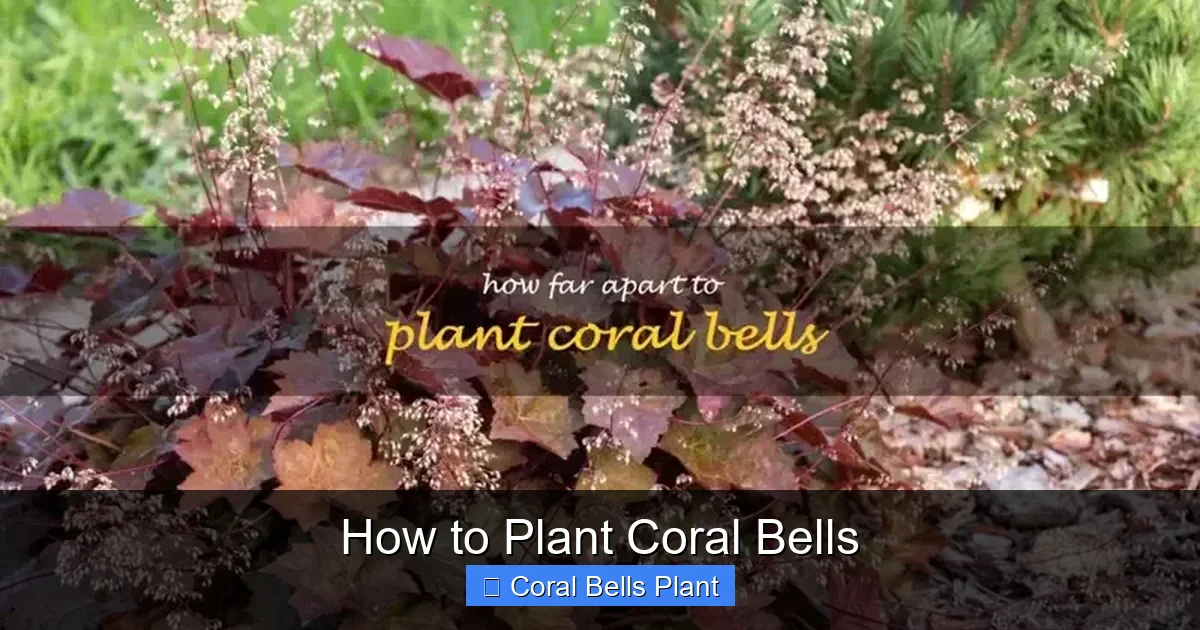
Visual guide about How to Plant Coral Bells
Image source: shuncy.com
Soil Conditions for Success
Coral bells are not extremely fussy about soil type, but they have a clear preference: well-draining, humus-rich soil with a slightly acidic to neutral pH (6.0 to 7.0). Heavy clay soil holds too much water around the crown, leading to rot. Pure sandy soil drains too quickly and lacks nutrients. The ideal soil feels loose and crumbly, holding moisture without becoming soggy. If you are unsure about your soil drainage, dig a hole 12 inches deep and fill it with water. If it drains within an hour, drainage is good. If water stands for several hours, you need to improve drainage before planting. Soil pH affects nutrient availability. A simple soil test from your local extension service tells you exactly what amendments you need.
Companion Planting Considerations
Coral bells play well with others in the shade garden. Their mounded habit and colorful foliage complement many shade-loving plants. Hostas make classic companions, their broad leaves contrasting beautifully with the ruffled texture of heuchera. Ferns add feathery texture. Astilbes bring feathery plumes of color in early summer. Japanese forest grass (Hakonechloa) echoes the mounding form. Spring bulbs like daffodils and snowdrops bloom before coral bells reach full size. For a native plant combination, pair coral bells with foamflower (Tiarella), wild ginger (Asarum), and woodland phlox. In containers, coral bells work as the “filler” in the classic thriller-filler-spiller formula. Their evergreen foliage provides winter interest in mixed containers when annuals have faded.
Preparing the Planting Site
Soil Amendment Strategies
Proper soil preparation is the foundation of success when learning how to plant coral bells. Start by removing any weeds, grass, or debris from the planting area. Loosen the soil to a depth of 12 to 18 inches using a garden fork or tiller. This deep loosening encourages roots to penetrate downward rather than circling in the planting hole. For clay soil, incorporate 3 to 4 inches of organic matter such as compost, aged manure, or leaf mold. This improves drainage and adds nutrients. For sandy soil, add the same amount of organic matter to increase water retention. Peat moss can help lower pH in alkaline soils. Avoid using fresh manure, which can burn tender roots. If your soil test reveals specific nutrient deficiencies, add recommended amendments at this stage. Mix everything thoroughly so amendments are evenly distributed throughout the planting zone, not just in the hole.
Creating Raised Beds for Poor Drainage
If your soil is stubbornly heavy or the water table is high, consider building raised beds for your coral bells. A raised bed 8 to 12 inches high filled with a custom soil mix solves drainage problems permanently. Use a blend of 50% native soil (if not pure clay), 30% compost, and 20% coarse sand or fine gravel. This mix provides excellent drainage while retaining adequate moisture. Raised beds also warm up faster in spring, giving coral bells an early start. They make maintenance easier too, reducing the need to bend over for weeding and dividing. Frame raised beds with untreated lumber, stone, or recycled composite boards. Ensure the bed is at least 2 feet wide to accommodate the mature spread of the plants.
Timing Your Planting
The best time to plant coral bells depends on your climate. In most regions, spring and fall are ideal. Spring planting (after the last frost date) gives plants a full growing season to establish before winter. Fall planting (6 to 8 weeks before the first hard frost) allows roots to establish in cool, moist soil without the stress of summer heat. In mild climates (zones 7-9), fall planting is often more successful because plants avoid summer stress entirely. In cold climates (zones 3-4), spring planting is safer to prevent winter heaving. Avoid planting during summer heat waves or when the ground is frozen. Container-grown plants from nurseries can be planted any time the ground is workable, but they need extra attention to watering during hot weather. Bare-root plants, sometimes available by mail order in early spring, should be planted immediately upon arrival.
Step-by-Step Planting Process
Gathering Your Tools and Materials
Before you start planting, gather everything you need. This prevents interruptions and ensures proper technique. You will need: a garden spade or shovel, a garden fork for loosening soil, a watering can or hose with gentle spray nozzle, organic mulch (shredded bark, pine straw, or leaf mold), compost or slow-release fertilizer, gardening gloves, and a trowel for fine adjustments. If planting multiple coral bells, a measuring tape helps with spacing. A soil knife or hori-hori is useful for teasing apart root balls. Have a bucket of water nearby to soak root balls before planting. If you are amending soil in the hole, have your amendments ready in a wheelbarrow or bucket.
Proper Plant Spacing
Spacing is crucial for air circulation and future growth. Most coral bells reach 12 to 18 inches wide at maturity. Space plants 14 to 18 inches apart, measuring from center to center. For a mass planting or groundcover effect, you can space them slightly closer at 12 inches. For specimen plants where you want to see the full mounded form, give them 18 to 24 inches. Consider the mature size of your specific variety. Some villosa hybrids like ‘Autumn Bride’ can reach 24 inches wide. Miniature varieties like ‘Petite Pearl Fairy’ stay under 10 inches. When planting near other perennials, account for their mature spread too. Good spacing reduces competition for water and nutrients and minimizes fungal diseases by promoting air flow.
Planting Depth: The Critical Detail
This is the single most important technical aspect of how to plant coral bells. The crown, where stems meet roots, must sit at or slightly above soil level. Planting too deep buries the crown, inviting crown rot. Planting too high exposes roots to air and drying. Dig a hole twice as wide as the root ball but no deeper than the root ball height. The plant should sit on firm, undisturbed soil at the bottom of the hole. This prevents settling later. Remove the plant from its container. Gently loosen any circling roots with your fingers or a soil knife. If the plant is severely root-bound, make four vertical cuts 1/2 inch deep around the root ball and gently tease the bottom roots apart. Place the plant in the hole. Check the crown level by laying a straight stick or tool handle across the hole. The crown should touch the stick or sit slightly above it.
Backfilling and Watering In
Once the plant is positioned correctly, backfill with the amended soil you removed. Fill halfway, then water gently to settle the soil and eliminate air pockets. Continue filling to ground level. Firm the soil lightly with your hands, not your feet. Over-compacting reduces aeration. Create a shallow basin or berm around the plant, slightly wider than the root ball, to direct water to the roots. Water thoroughly until the soil is moist to the depth of the root ball. This first watering is critical. It ensures good soil-to-root contact and hydrates the plant after transplant stress. If the soil settles significantly after watering, add more soil to maintain the correct crown level. Do not mound soil against the crown.
Mulching for Moisture and Temperature Control
Apply a 2 to 3 inch layer of organic mulch around the plant, extending to the drip line. Keep mulch 2 to 3 inches away from the crown. This gap is essential. Mulch touching the crown holds moisture against the stems, creating perfect conditions for rot. Good mulch choices include shredded hardwood bark, pine needles, leaf mold, or compost. Avoid large wood chips that break down slowly and can tie up nitrogen. Avoid rubber mulch or stone, which do not improve soil. Mulch conserves moisture, moderates soil temperature, suppresses weeds, and gradually adds organic matter as it decomposes. Replenish mulch annually in spring as it breaks down.
Establishment Care: The First Growing Season
Watering Schedule for New Plants
Consistent moisture is the key to establishment. New coral bells have limited root systems and dry out quickly. Water deeply 2 to 3 times per week for the first month, depending on rainfall and temperature. Check soil moisture by inserting your finger 2 inches deep near the root ball. If it feels dry at that depth, water. After the first month, reduce to once or twice weekly. By the end of the first growing season, plants should be established enough to handle normal rainfall, though supplemental water during drought is always beneficial. Water at the base of the plant, not overhead. Wet foliage encourages fungal diseases. Soaker hoses or drip irrigation are ideal. Morning watering allows any splashed foliage to dry quickly.
Fertilizing Young Plants
Coral bells are light feeders. If you amended the soil well at planting, additional fertilizer may not be needed the first year. If growth seems slow or foliage color is pale, apply a balanced slow-release fertilizer (such as 10-10-10 or 14-14-14) in early spring at half the recommended rate. Alternatively, top-dress with 1 inch of compost around the plant in spring. Avoid high-nitrogen fertilizers, which promote lush, weak growth susceptible to disease and pests. Never fertilize after midsummer. Late fertilization stimulates tender growth that will not harden off before winter. Container-grown coral bells need more regular feeding since nutrients leach out with frequent watering. Use a diluted liquid fertilizer monthly during the growing season.
Monitoring for Establishment Issues
Watch new plants closely for signs of stress. Wilting in the heat of the day that recovers by evening is normal. Persistent wilting indicates a watering issue, either too little or too much. Yellowing lower leaves can signal overwatering or poor drainage. Brown, crispy leaf edges usually mean too much sun or insufficient water. Stunted growth with purplish leaves may indicate phosphorus deficiency in cold soil. Small holes in leaves suggest slug or snail activity. Notched leaf edges are characteristic of vine weevil adults. White powdery coating indicates powdery mildew, often from poor air circulation. Address issues promptly. Most establishment problems are cultural and easily corrected.
Long-Term Maintenance and Care
Seasonal Care Calendar
Coral bells require minimal maintenance once established, but timely tasks keep them looking their best. In early spring, remove any winter-damaged or dead leaves by gently pulling them from the base. Do not cut into the woody crown. Apply a fresh layer of mulch. If desired, apply slow-release fertilizer or compost top-dressing. In late spring, enjoy the flowers. Deadhead spent flower stems by cutting them to the base to encourage rebloom and tidy appearance. Summer care focuses on watering during dry spells and monitoring for pests. In fall, stop fertilizing. In zones 5 and colder, apply a protective layer of shredded leaves or evergreen boughs after the ground freezes to prevent frost heaving. In mild zones, plants remain evergreen through winter.
Dividing Mature Plants
Division is an essential part of long-term coral bell care. Over time, the woody crown becomes elongated and the center may die out, leaving a ring of growth. Plants lose vigor and flower production declines. Divide every 3 to 4 years in early spring or early fall. Water the plant well the day before. Dig up the entire clump, getting as much root system as possible. Shake or wash off excess soil to see the crown structure. Using a sharp knife or spade, cut the crown into sections, each with several healthy leaves and a good root system. Discard the woody, unproductive center. Replant divisions immediately at the correct depth. Water well and mulch. Divisions may look rough for a few weeks but recover quickly.
Managing Common Pests and Diseases
Healthy coral bells in good conditions have few serious problems. The most damaging pest is the vine weevil. Adults notch leaf edges at night. Larvae feed on roots, causing sudden wilting and death. Control adults by hand-picking at night or using sticky traps. Apply beneficial nematodes (Steinernema kraussei) to soil in spring or fall to control larvae. Foliar nematodes cause angular brown spots between leaf veins. Remove and destroy affected leaves. Improve air circulation. Slugs and snails chew holes in leaves. Use beer traps, copper barriers, or iron phosphate baits. Fungal diseases include powdery mildew (white powdery coating), rust (orange pustules on leaf undersides), and leaf spots. Prevent by spacing properly, watering at soil level, and removing diseased foliage. Crown rot from overwatering or deep planting is fatal. Prevention through proper planting is the only cure.
Growing Coral Bells in Containers
Container Selection and Preparation
Coral bells make excellent container plants, bringing their colorful foliage to patios, decks, and entryways. Choose a container at least 12 inches wide and deep with drainage holes. Terra cotta, glazed ceramic, fiberglass, and wood all work well. Dark-colored containers absorb heat, which can stress roots in summer. Light-colored or insulated containers keep roots cooler. Cover drainage holes with a piece of landscape fabric or a coffee filter to prevent soil loss. Do not add gravel to the bottom. This creates a perched water table that actually worsens drainage. Fill with a high-quality potting mix designed for perennials or make your own: 2 parts peat moss or coconut coir, 1 part perlite or coarse sand, 1 part compost. Mix in slow-release fertilizer according to package directions.
Container Planting Technique
The planting technique for containers mirrors in-ground planting with a few adjustments. Position the plant so the crown sits 1 inch below the container rim. This leaves room for watering without overflow. Backfill with potting mix, firming gently. Water thoroughly until water drains from the bottom. Apply a thin layer of fine mulch such as cocoa hulls or fine bark, keeping it away from the crown. Place the container in its permanent location before watering, as wet containers are heavy. Elevate containers on pot feet or bricks to ensure drainage holes remain clear and to prevent water staining on surfaces.
Container-Specific Care
Container-grown coral bells need more frequent watering than in-ground plants. Check daily in hot weather. Water when the top inch of mix feels dry. Fertilize monthly with half-strength liquid fertilizer during the growing season, or use slow-release fertilizer in spring. In winter, containers need protection in zones 6 and colder. Move pots to an unheated garage, shed, or against a protected wall. Mulch heavily over the crown. Alternatively, sink the pot in the ground up to its rim and mulch over. In spring, refresh the top 2 inches of potting mix with fresh mix and compost. Repot every 2 to 3 years or when roots fill the container, dividing if necessary.
Design Ideas and Landscape Uses
Shade Garden Combinations
Coral bells shine in shade garden designs. Create a foliage tapestry by combining varieties with contrasting leaf colors and textures. Pair deep purple ‘Obsidian’ with chartreuse ‘Lime Rickey’ and silver ‘Silver Scrolls’ for a dramatic trio. Add variegated hostas like ‘Patriot’ or ‘June’ for broader leaves. Intersperse with Japanese painted fern (Athyrium niponicum ‘Pictum’) for metallic fronds. Use coral bells as edging along woodland paths. Their neat mounds define edges without blocking views. Plant in drifts of 3, 5, or 7 for naturalistic effect. In a formal shade garden, use identical varieties in symmetrical plantings. Coral bells also work well under deciduous trees where they receive spring sun before leaf-out and summer shade after.
Rock Gardens and Slopes
The native habitat of many Heuchera species includes rocky cliffs and slopes. This heritage makes coral bells naturals for rock gardens and sloping sites. Their fibrous root systems help stabilize soil on gentle slopes. Plant them in crevices between rocks where drainage is excellent. The reflected heat from rocks can intensify foliage color, especially in darker varieties. On slopes, stagger plants in a zigzag pattern rather than straight rows. This slows water runoff and creates a more natural look. Combine with other rock garden plants: sedums, creeping thyme, dwarf conifers, and small ornamental grasses. Ensure the crown sits slightly above the surrounding soil on slopes to shed water away from the center.
Seasonal Container Displays
Coral bells are the backbone of four-season containers. In spring, pair them with tulips, daffodils, and pansies. The coral bells foliage hides fading bulb foliage. For summer, add flowering annuals like impatiens, begonias, or coleus. Trailing plants such as sweet potato vine or creeping jenny spill over edges. In fall, replace summer annuals with ornamental kale, mums, and ornamental peppers. The coral bells continue providing structure and color. For winter interest in zones 6 and warmer, keep the coral bells and add evergreen boughs, red-twig dogwood branches, and pinecones. In colder zones, move the container to a protected spot. The evergreen or semi-evergreen foliage provides rare winter color.
Cut Flower and Foliage Use
While grown primarily for foliage, coral bells flowers and leaves have a place in floral arrangements. The airy flower stems add a delicate, wildflower quality to bouquets. Cut stems when the first few flowers open. They last 5 to 7 days in water. The foliage is even more valuable for arrangements. Individual leaves last 2 to 3 weeks in water. Their sturdy stems and interesting textures complement roses, hydrangeas, and lilies. Dark leaves add depth to pale arrangements. Chartreuse leaves brighten dark flowers. Harvest foliage sparingly from garden plants, taking no more than one-third of leaves at a time. Cut leaves at the base of the stem. Place in water immediately.
Troubleshooting Common Problems
Foliage Issues and Solutions
Even well-cared-for coral bells occasionally show foliage problems. Scorched leaf margins (brown, crispy edges) usually indicate too much sun, insufficient water, or salt buildup from fertilizer. Move to shadier spot, increase watering, or flush soil with water. Yellowing leaves with green veins suggest iron deficiency in alkaline soil. Apply chelated iron or acidify soil with sulfur. Uniform yellowing of older leaves is normal aging. Remove these leaves. Small brown spots with yellow halos may be fungal leaf spot. Remove affected leaves, improve air circulation, avoid overhead watering. White powdery coating is powdery mildew. Same cultural fixes. Holes in leaves: slugs (irregular holes with slime trails) or vine weevil adults (notched edges). Ragged, chewed leaves: deer or rabbits. Use repellents or fencing.
Growth and Vigor Problems
If your coral bells seem stuck in neutral, several factors could be at play. Stunted growth with small leaves often means the plant is root-bound (in containers) or competing with tree roots (in ground). Divide or repot. Apply compost. Poor color intensity usually means insufficient light for that variety. Dark varieties need some sun to develop full pigment. Leggy, stretched growth with wide leaf spacing indicates too much shade. Move to brighter location. Center die-out with a ring of healthy growth means the plant needs division. The woody crown has become unproductive. Divide in spring or fall. Sudden wilting and collapse despite moist soil suggests vine weevil larvae or crown rot. Dig up and inspect roots. White C-shaped grubs are vine weevil. Black, mushy crown is rot. Treat accordingly.
Winter Damage Recovery
In spring, you may find winter-damaged coral bells. Frost heaving (plants pushed out of ground by freeze-thaw cycles) exposes roots. Gently press plants back into soil or replant at correct depth. Mulch heavily after ground freezes next winter. Desiccated, brown leaves from winter wind and sun are common. Wait for new growth to emerge, then remove dead leaves. Do not pull too hard or you may damage the crown. If the crown feels mushy, the plant may have crown rot from winter wet. Dig up, cut away rot to healthy tissue, dust with fungicide, and replant in better-drained location. Plants that fail to emerge by late spring are likely dead. Replace with new plants, choosing a more suitable site or variety.
Advanced Tips for Coral Bell Enthusiasts
Propagation Beyond Division
While division is the easiest propagation method, coral bells can also be grown from seed and leaf cuttings. Seed propagation is fun but unpredictable. Hybrid varieties do not come true from seed. Seedlings vary widely in color and form. Collect seeds from spent flower stalks in summer. Sow fresh in pots outdoors or stratify (cold treat) for 6 weeks before indoor sowing. Germination takes 2 to 8 weeks. Leaf cuttings work for some varieties. In early summer, cut a healthy leaf with a short piece of petiole (leaf stem). Dip in rooting hormone. Insert into moist perlite or vermiculite. Cover with a plastic bag. Place in bright indirect light. Roots form in 4 to 6 weeks. Pot up and grow on. This method produces clones of the parent plant.
Creating a Coral Bell Collection
Many gardeners become collectors once they discover the diversity of coral bells. Start a collection by choosing varieties with different foliage colors: one dark, one light, one silver, one amber. Add varieties with different leaf shapes: ruffled, lobed, rounded, pointed. Include varieties with different seasons of peak color: spring stars, summer holders, fall changers. Label each plant with variety name and planting date. Keep a garden journal noting performance, color changes, and combinations you love. Visit local botanical gardens and nursery display gardens to see mature plants. Join online forums or local plant societies to trade divisions with other enthusiasts. A curated collection provides year-round interest and endless design possibilities.
Breeding and Selection Insights
Understanding modern coral bell breeding helps you choose better plants. Early hybrids focused on flower color. Modern breeding prioritizes foliage: color intensity, durability, and heat tolerance. The ‘villosa revolution’ introduced genes from Heuchera villosa, a species native to the hot, humid Southeast. Villosa hybrids have larger, thicker leaves with hairy undersides. They resist heat, humidity, and foliar diseases better than older types. Look for ‘villosa hybrid’ on plant tags if you garden in challenging climates. Another breeding trend is tighter, more compact habits for containers. Some new varieties are sterile, putting all energy into foliage rather than flowers. While flowers attract pollinators, sterile varieties never need deadheading and never self-sow.
Conclusion
Learning how to plant coral bells opens the door to one of the most rewarding perennials for shade and partial shade gardens. These plants offer an incredible return on investment: months of colorful foliage, delicate flowers that attract hummingbirds, adaptability to containers and garden beds, and minimal maintenance once established. The keys to success are simple but specific. Choose a site with morning sun and afternoon shade, or dappled light all day. Prepare soil thoroughly with organic matter to ensure good drainage. Plant at the correct depth with the crown at soil level. Water consistently during the first season. Mulch properly, keeping material away from the crown. Divide every few years to maintain vigor. That is the complete formula.
My own garden now features a dozen coral bell varieties weaving through hostas, ferns, and foamflowers. The ‘Caramel’ glows beside a stone path in October. The ‘Obsidian’ provides dramatic contrast to chartreuse hakonechloa. The ‘Berry Smoothie’ holds its rosy color through July heat. Each variety has its moment, and together they create a tapestry that changes with the seasons. The initial effort of proper planting pays dividends for years. Whether you plant one coral bell in a container or design an entire shade border around them, these versatile perennials will not disappoint. Start with one variety that catches your eye, follow the planting steps in this guide, and watch your garden transform with ruffles of color that persist when flowers have faded.
Frequently Asked Questions
Can coral bells grow in full shade?
Coral bells tolerate full shade but grow more slowly and may have less intense foliage color. Flowering is reduced in deep shade. For best results, provide at least 2-4 hours of morning sun or bright dappled light throughout the day.
Are coral bells deer resistant?
Coral bells are considered deer resistant but not deer proof. Deer may browse them, especially in winter when food is scarce or in areas with high deer pressure. The fuzzy leaves of villosa hybrids are less palatable. Use repellents or fencing if deer are a persistent problem.
Why are my coral bells turning brown and crispy?
Brown, crispy leaf edges usually indicate too much sun, insufficient water, or both. Check if the plant receives hot afternoon sun. Increase watering frequency and ensure deep soaking. Mulch to conserve moisture. Consider transplanting to a shadier location in fall or early spring.
Do coral bells come back every year?
Yes, coral bells are herbaceous perennials that return each year in USDA zones 4-9. In mild winters, foliage remains evergreen. In cold winters, leaves die back but the crown survives underground. New growth emerges from the crown in early spring.
Can I grow coral bells indoors as houseplants?
Coral bells can be grown indoors temporarily but prefer outdoor conditions. They need bright indirect light, cool temperatures (60-65°F), high humidity, and excellent drainage. They often decline indoors due to dry air and insufficient light. Better to enjoy them as outdoor perennials.
What causes the center of my coral bells to die out?
Center die-out is natural aging. The woody crown becomes unproductive after 3-4 years, creating a ring of growth with a dead center. This signals it’s time to divide. Dig up the plant, discard the woody center, and replant the healthy outer sections to rejuvenate the plant.