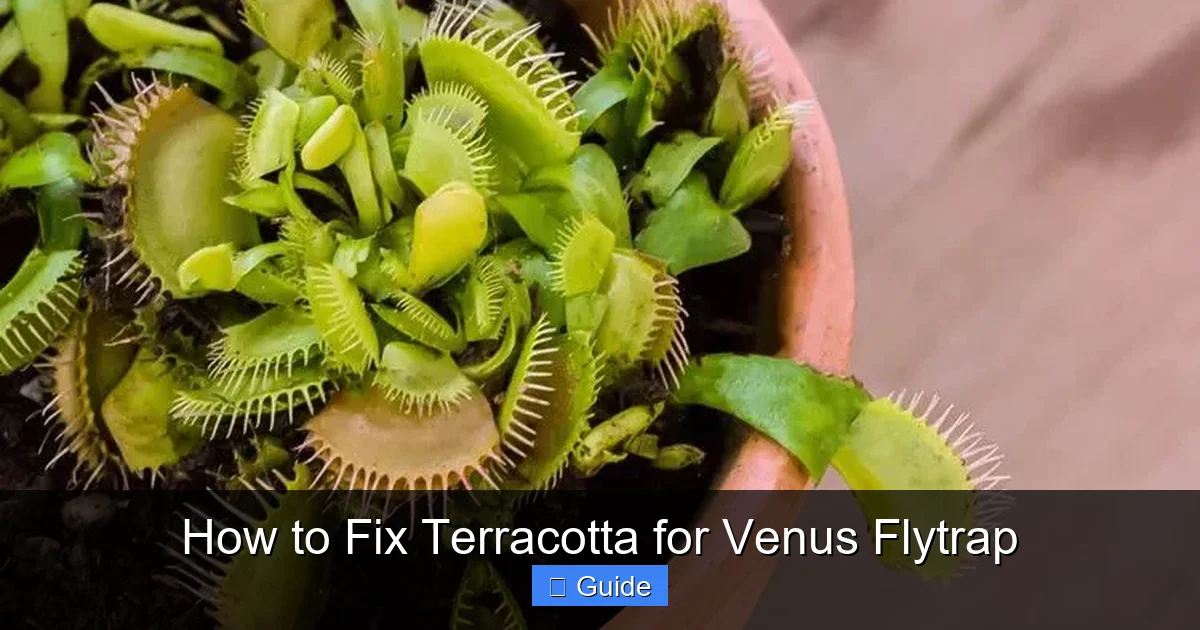
How to Fix Terracotta for Venus Flytrap
Terracotta pots must be sealed before use with Venus flytraps because raw clay leaches harmful minerals into the soil. This guide covers why sealing matters, step-by-step instructions using food-safe sealants, and long-term maintenance tips to keep your carnivorous plants thriving for years.
If you have ever brought home a beautiful terracotta pot for your Venus flytrap, you might have made a costly mistake. Those porous clay pots look natural and breathable. They seem perfect for a plant that loves wet soil. But here is the hard truth. Raw terracotta will slowly poison your Venus flytrap. The clay releases minerals into the soil every time you water. Venus flytraps cannot tolerate those minerals. They evolved in nutrient-poor bogs. Their roots are not built to handle dissolved salts. Within a few months, your plant will decline and die.
The good news is you can fix this problem. You can learn how to fix terracotta for Venus flytrap use with the right sealant and a little patience. This guide walks you through every step. We cover why terracotta is dangerous, which sealants are safe, how to apply them correctly, and how to maintain your pots long term. By the end, you will know exactly how to transform any terracotta pot into a safe home for your carnivorous plants.
Key Takeaways
- Raw terracotta is dangerous: Unsealed clay pots release calcium, magnesium, and other minerals that kill Venus flytraps within months.
- Food-safe sealants only: Use aquarium-safe silicone, epoxy resin, or specialized pottery sealers labeled non-toxic for plants.
- Seal inside and out: Complete coverage prevents mineral leaching from both soil contact and external water absorption.
- Cure time is critical: Allow 7-14 days full cure before adding soil or plants to ensure all volatile compounds have evaporated.
- Test before planting: Run distilled water through sealed pots and test with a TDS meter to confirm zero mineral leaching.
- Reinspect annually: Check for sealant degradation, chips, or cracks each spring before the growing season begins.
- Plastic pots are easier: Consider plastic or glazed ceramic as lower-maintenance alternatives to sealed terracotta.
Quick Answers to Common Questions
Can I use regular silicone caulk from the hardware store?
No. Regular silicone contains fungicides and antimicrobials that leach into soil and kill Venus flytraps. Only use 100% silicone labeled aquarium-safe or potable water safe.
How long does the sealing process take from start to finish?
The full process takes 10-14 days including cleaning, multiple coat applications, full curing, and water testing. Rushing any step risks seal failure.
Do I need to seal the drainage hole?
Yes, seal the drainage hole edges thoroughly. You can leave the hole open for drainage but the clay rim around it must be sealed on both interior and exterior surfaces.
How often should I reseal terracotta pots?
Inspect annually and reseal if you see any damage. In harsh climates with freeze-thaw cycles, plan preventive resealing every 1-2 years.
Can I use a penetrating sealer instead of silicone or epoxy?
Penetrating sealers are easier to apply but often do not block 100% of mineral leaching. Most serious Venus flytrap growers avoid them for this reason. Test thoroughly if you try this method.
📑 Table of Contents
- Why Terracotta Pots Need Fixing for Venus Flytraps
- Understanding the Problems with Raw Terracotta
- Step-by-Step Guide: How to Fix Terracotta for Venus Flytrap
- Alternative Methods and Sealants
- Long-Term Care for Sealed Terracotta Pots
- Common Mistakes to Avoid
- When to Just Buy Plastic Pots Instead
- Troubleshooting Sealed Pot Problems
- Advanced Tips for Serious Growers
- Conclusion
Why Terracotta Pots Need Fixing for Venus Flytraps
The Mineral Leaching Problem
Terracotta is made from natural clay fired at relatively low temperatures. This leaves the material porous. Water moves through the clay walls. As water evaporates from the outside surface, it pulls dissolved minerals from the clay body. Those minerals end up in your soil. The main culprits are calcium carbonate, magnesium, iron oxides, and trace heavy metals. In a regular garden, these minerals are harmless or even beneficial. For a Venus flytrap, they are toxic.
Venus flytraps (Dionaea muscipula) grow in nitrogen-poor, acidic bogs in the Carolinas. Their roots have zero tolerance for dissolved solids. A TDS (total dissolved solids) reading above 50 ppm can cause root burn. Raw terracotta can push soil TDS well over 200 ppm within weeks. The plant cannot absorb water properly. Roots rot. Traps turn black. Growth stops. The plant eventually dies.
Why Porosity Backfires
Gardeners often choose terracotta because it “breathes.” The porosity allows air exchange and prevents waterlogging. For most houseplants, this is great. For Venus flytraps, it creates a cycle of contamination. Water wicks through the clay. Minerals concentrate at the evaporation surface. They wash back down into the soil with the next watering. The mineral load increases constantly. There is no equilibrium. The pot becomes a mineral pump.
Signs Your Pot Is Leaching Minerals
You might not realize the pot is the problem at first. Watch for these symptoms. White crusty buildup on the pot exterior or soil surface. This is mineral salt deposition. Leaf tips turning brown or black despite proper watering. New traps forming smaller than previous ones. The plant looking “tired” or stagnant during growing season. Root tips turning brown or mushy when you repot. If you see these signs and use terracotta, the pot is likely the cause.
Understanding the Problems with Raw Terracotta
Chemical Composition of Terracotta Clay
Not all terracotta is created equal. The mineral content depends on the clay source. Red clay from iron-rich deposits leaches more iron. Buff or white clay bodies may leach more calcium. Some commercial terracotta includes grog (fired clay particles) or sand to reduce cracking. These additives can introduce their own mineral profiles. There is no standard formula. You cannot know exactly what your specific pot will leach without lab testing. The safest approach assumes all raw terracotta is unsafe.
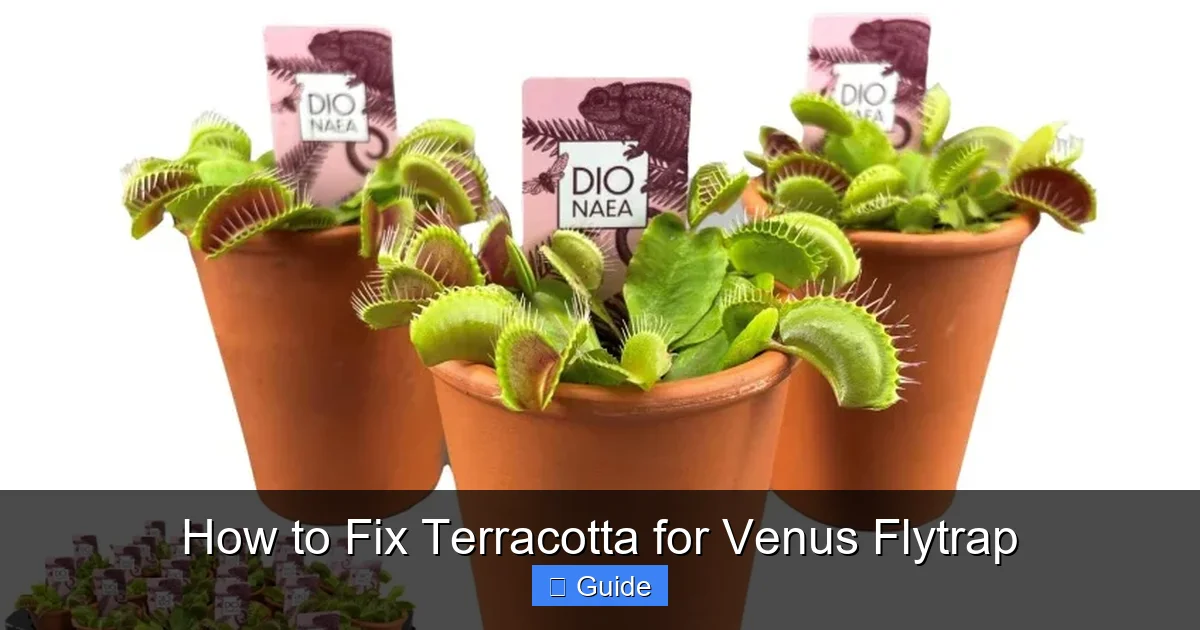
Visual guide about How to Fix Terracotta for Venus Flytrap
Image source: newlands.ie
The pH Shift Danger
Venus flytraps need acidic soil, typically pH 3.5 to 5.0. Terracotta is alkaline. As minerals leach, they raise the soil pH. This makes nutrients even less available. It also encourages harmful bacteria and fungi. The beneficial microbes that help break down insect prey cannot survive in alkaline conditions. The entire root zone ecology shifts against the plant. This pH drift happens slowly. You might not notice for months. By then, the damage is done.
Why Glazed Terracotta Is Not Always Safe
You might think glazed pots solve the problem. Many do. But cheap glazes can contain lead or cadmium. These heavy metals leach in acidic conditions. Venus flytrap soil is acidic. The glaze may also be incomplete on the rim or bottom. Any unglazed area becomes a leaching point. Crazing (fine crack networks in the glaze) creates microscopic pathways for mineral migration. Unless you know the glaze is food-safe and the coverage is 100%, assume glazed terracotta needs sealing too.
Step-by-Step Guide: How to Fix Terracotta for Venus Flytrap
Materials You Will Need
Gather everything before starting. Preparation prevents mistakes. You need food-safe sealant. The best options are aquarium-safe silicone sealant (100% silicone, no mold inhibitors), two-part epoxy resin rated for potable water, or specialized pottery sealer like EC-21 or similar non-toxic penetrating sealers. You need a clean workspace with good ventilation. Nitrile gloves protect your hands. Isopropyl alcohol (90%+) for cleaning. Lint-free cloths or paper towels. Disposable brushes or foam rollers for application. Painter’s tape for clean edges. A curing rack or elevated surface. Distilled water for testing. A TDS meter (inexpensive online). Patience. The process takes 10 to 14 days total.
Step 1: Clean the Pot Thoroughly
Start with a brand new pot or a used one scrubbed clean. Remove all soil residue. Soak in hot water with a stiff brush. No soap. Soap leaves surfactants that interfere with sealant adhesion. Rinse until water runs completely clear. Wipe with isopropyl alcohol on a lint-free cloth. This removes dust, oils, and any remaining contaminants. Let the pot dry completely. This takes 24 to 48 hours depending on humidity. The clay must be bone dry inside and out. Any trapped moisture will cause sealant failure.
Step 2: Tape Off Areas (Optional)
If you want to leave the bottom drainage hole unsealed for airflow, tape it off. Use painter’s tape on the exterior bottom covering the hole. Some growers seal the hole too and drill a new one later. Either works. If you tape, press edges firmly to prevent sealant bleed. Do not tape the interior. The entire interior must be sealed.
Step 3: Apply First Coat – Interior
Work in a well-ventilated area. Wear gloves. Stir your sealant gently. Do not shake. Shaking introduces bubbles. For silicone, cut the tip to a 1/8 inch opening. Apply a smooth bead around the interior bottom edge. Work upward in vertical strips. Overlap each pass slightly. Use a gloved finger or disposable tool to smooth into an even layer. Target 1-2 mm thickness. Too thin leaves pinholes. Too thick takes forever to cure. Cover every square millimeter including the rim. Let cure per manufacturer’s minimum time (usually 2-4 hours for silicone, 4-6 for epoxy).
Step 4: Apply First Coat – Exterior
Once interior is tack-free, flip the pot. Apply exterior coat the same way. Cover the entire outside surface including the bottom (except taped drainage hole). Pay extra attention to the rim exterior and bottom edge. These areas contact water trays. Extend sealant slightly over the rim onto the interior lip for a continuous barrier. Smooth evenly. Let cure.
Step 5: Inspect and Apply Second Coat
After first coats cure, inspect under bright light. Look for pinholes, thin spots, bubbles, or missed areas. Mark problem spots with a marker. Apply second coat focusing on those areas. Then do a full second coat over everything. Two coats minimum. Three is better for epoxy. Silicone often needs three for complete coverage. Each coat must cure before the next. Do not rush.
Step 6: Full Cure Period
This is where most people fail. The sealant feels dry but is not fully cured. Volatile organic compounds (VOCs) continue off-gassing. For silicone, wait 7 days minimum. 14 days is safer. For epoxy, wait 7 days. For penetrating sealers, follow label but assume 7 days. Keep the pot in a well-ventilated area. Do not seal in a bag or box. Airflow speeds curing. Temperature above 65°F helps. Do not expose to direct sun or heat.
Step 7: The Water Test
After full cure, test before adding a plant. Fill the pot with distilled water. Let sit 24 hours. Pour water into a clean container. Test with TDS meter. Reading should be 0-10 ppm. If higher, the seal failed. Dump water. Dry pot. Apply another coat. Recure. Retest. Only proceed when test passes. This step is non-negotiable. Your plant’s life depends on it.
Alternative Methods and Sealants
Silicone Sealant Deep Dive
Aquarium-safe silicone is the most popular choice. It is flexible, adheres well to clay, and is non-toxic when cured. Brands like GE Silicone 1 (window/door version, not kitchen/bath), Aqueon, or ASI work well. Avoid any silicone with “mold inhibitor,” “mildew resistant,” or “kitchen and bath” labels. These contain fungicides that leach. Use 100% silicone only. Pros: easy to find, affordable, flexible, long-lasting. Cons: thick application, visible texture, long cure time, can peel if not prepped perfectly.
Epoxy Resin Systems
Two-part epoxy creates a harder, glass-like seal. Brands like TotalBoat, MAS, or System Three offer potable water rated formulas. Mix precisely by weight. Apply with foam roller. Self-levels beautifully. Pros: thinner coat, smoother finish, excellent chemical resistance, faster cure. Cons: more expensive, mixing errors ruin batch, less flexible (can crack if pot flexes), strong odor during application, requires respirator.
Penetrating Pottery Sealers
Products like EC-21, Seal Krete, or specialized ceramic sealers soak into clay pores. They do not form a surface film. Pros: maintains natural terracotta look, breathable (allows some air exchange), easy application (brush or spray). Cons: may not block 100% of minerals, requires reapplication yearly, variable effectiveness, some change clay color. Test thoroughly. Many carnivorous plant growers avoid these for Venus flytraps due to incomplete sealing.
DIY Methods to Avoid
You will see suggestions online. Avoid them. Paraffin wax melts in sun and cracks in cold. Linseed oil never fully cures and goes rancid. PVA glue (white glue) dissolves in water. Acrylic paint is not waterproof. Clear spray paint contains solvents and is not food-safe. Nail polish is for nails. None of these are safe for Venus flytraps. Spend the money on proper sealant.
Comparison Table: Sealant Options
While I cannot create an actual table, here is a comparison in list format:
- Aquarium Silicone: Cost $8-15 per tube. Cure 7-14 days. Lifespan 5+ years. Skill level beginner. Best for most growers.
- Epoxy Resin: Cost $30-60 per kit. Cure 3-7 days. Lifespan 10+ years. Skill level intermediate. Best for valuable pots.
- Penetrating Sealer: Cost $20-40 per quart. Cure 1-3 days. Lifespan 1-2 years. Skill level beginner. Best for display pots only.
Long-Term Care for Sealed Terracotta Pots
Annual Inspection Routine
Check your pots every spring. Remove the plant carefully. Inspect the sealant. Look for chips, cracks, peeling, or discoloration. Pay attention to the rim, bottom edges, and drainage hole area. Flex the pot gently. Listen for cracking sounds. Silicone stays flexible. Epoxy can develop hairline cracks. If you find damage, remove the plant. Strip the old sealant (see below). Reseal. Recure. Retest. This takes a weekend but prevents disaster.
Cleaning Sealed Pots
Algae and mineral deposits build up on the exterior. Clean with a soft brush and distilled water. No soap. No bleach. No vinegar. Harsh chemicals degrade sealants over time. If algae is stubborn, soak in distilled water 24 hours then brush. For exterior white crust (minerals from tray water evaporating), wipe with a damp cloth. Do not scrub aggressively. You do not want to abrade the sealant.
Water Tray Management
Venus flytraps sit in water trays. The pot bottom sits in water constantly. This tests your seal 24/7. Use only distilled, reverse osmosis, or rain water. Tap water distilled water. Zero TDS. Change tray water weekly. Stagnant water grows biofilm. Biofilm produces acids that attack sealants. Clean the tray monthly with hot water only. A clean tray extends sealant life significantly.
Repotting Into Sealed Pots
When repotting, handle the pot gently. Do not scrape the interior with tools. Use your fingers or a soft silicone spatula to loosen soil. The sealant is tough but not invincible. A metal trowel can gouge silicone. If you damage the seal during repotting, spot-repair with a small amount of fresh sealant. Let cure 48 hours before watering. Better yet, repot at season start so repairs cure fully before heavy watering.
Storing Empty Sealed Pots
Store clean, dry pots indoors. Temperature swings cause clay expansion/contraction. This stresses the sealant bond. Avoid freezing. Water trapped in microscopic pores expands when frozen. This creates cracks. Stack pots with cloth between them. Do not nest tightly. Air circulation prevents mold on exterior surfaces.
Common Mistakes to Avoid
Rushing the Cure Time
This is the number one killer. The sealant feels dry. You think “good enough.” You add soil and plant. Two weeks later, the plant declines. VOCs from uncured sealant poison roots. Or uncured spots let minerals through. Wait the full time. Mark your calendar. Set a reminder. Do not guess.
Skipping the Water Test
You sealed carefully. It looks perfect. You skip the test. Bad idea. Pinholes are invisible. Thin spots are invisible. Adhesion failures are invisible. The TDS test catches all of them. A $15 TDS meter saves a $30 plant. Test every pot. Every time. No exceptions.
Using the Wrong Sealant
Hardware store silicone for windows contains fungicides. Kitchen silicone contains antimicrobials. Construction adhesive contains solvents. Marine epoxy may not be potable water rated. Read the label. Look for “aquarium safe,” “potable water,” “FDA 21 CFR 175.300,” or “NSF/ANSI 61.” If unsure, email the manufacturer. Do not assume.
Sealing Only the Inside
Some think interior-only works. Water absorbs from the outside too. Tray water contacts the exterior bottom. Rain hits the sides. Humidity penetrates. Minerals migrate through the clay wall from outside in. You must seal 100% of the surface area. Inside, outside, rim, bottom. Complete encapsulation.
Ignoring the Drainage Hole
The drainage hole edge is the highest stress point. Water flows through constantly. Soil rubs against it during repotting. Roots push against it. Seal it heavily. Apply extra coats there. If you leave it open for airflow, seal the interior hole edge thoroughly and the exterior rim around it. That edge is a mineral highway if missed.
Using Repaired Pots Without Retesting
You chipped the seal. You patched it. You put the plant back. Wrong. Any repair needs full cure and full water test. The patch may not bond perfectly. The new sealant may have a different batch. Test. Always test.
When to Just Buy Plastic Pots Instead
The Case for Plastic
After reading this, you might wonder: why bother? Plastic pots are cheap. They are inert. They need zero prep. They last decades. They come in every size. They are lightweight. They do not break. For Venus flytraps, plastic is objectively better. The only reasons to use terracotta are aesthetics and weight (stability in wind). If you are a beginner, buy plastic. Learn the plant first. Tackle terracotta sealing later.
Glazed Ceramic as Middle Ground
High-quality glazed ceramic pots (not terracotta) are food-safe by design. Look for “oven safe” or “food safe” labels. These are fired at high temperatures with certified glazes. They are non-porous. They need no sealing. They look beautiful. They cost more than plastic but less than sealing labor. This is often the best upgrade path.
Hybrid Approach
Some growers use plastic pots inside decorative terracotta. The plastic pot holds the plant. The terracotta is just a sleeve. No sealing needed. The terracotta never contacts soil or water. This gives the look without the risk. Ensure the outer pot has no water contact. Use a saucer inside if needed.
Troubleshooting Sealed Pot Problems
Plant Declining After Repotting Into Sealed Pot
Check TDS of soil water. Extract pore water (squeeze soil sample) and test. If TDS > 50 ppm, the seal failed. Remove plant. Retest pot. If pot tests clean, your soil or water is the problem. Use only peat/perlite/sand mix. No fertilizer. No tap water. If pot tests dirty, reseal.
Sealant Peeling in Sheets
Adhesion failure. Cause: pot not dry enough, not cleaned with alcohol, wrong sealant for clay, or pot has waxy residue from manufacturing. Strip all sealant. Clean with acetone (then alcohol). Dry 48 hours. Reseal.
Bubbles in Cured Sealant
Applied too thick, shaken bottle, or moisture in clay. Small bubbles are usually fine. Large bubbles or clusters create thin spots. Sand lightly with 220 grit. Clean. Recoat affected areas.
White Residue on Exterior Despite Seal
This is minerals from your tray water evaporating on the outside of the pot. Not a seal failure. Wipe off. Use cleaner tray water. Ensure exterior is fully sealed.
Cracks in Epoxy Sealant
Pot flexed. Epoxy is rigid. Clay moves slightly with moisture cycles. Hairline cracks may not leak. Test with TDS. If passing, monitor. If failing, strip and switch to flexible silicone.
Advanced Tips for Serious Growers
Double Pot System
Seal a terracotta pot. Place a slightly smaller plastic pot inside. The plastic holds the plant. The terracotta provides aesthetics and thermal mass. Thermal mass buffers root temperature. This is ideal for hot climates. Ensure air gap between pots. Do not let them bind.
Adding Insulation Layer
Before sealing, wrap pot exterior with fiberglass mesh tape (drywall tape). Embed in first sealant coat. This reinforces against cracking. Adds slight insulation. Useful for large pots in temperature-variable environments.
Color Matching Sealant
Silicone comes in clear, white, black, almond. Clear shows clay color best. White matches light clay. Black hides interior soil line. Choose based on pot color. You can also mix dry pigment into epoxy for custom colors. Use only ceramic-grade pigments.
Sealing Very Large Pots
Pots over 12 inches need more sealant. Work in sections. Maintain wet edge to avoid seams. Use a roller for exterior. Two people helps. One rolls interior, one exterior. Cure time same. Test same.
Seasonal Resealing Schedule
In harsh climates (freeze/thaw, intense UV), plan annual resealing. Do it in late winter. Strip, clean, reseal, cure, test. Ready for spring growth. This prevents emergency mid-season failures.
Conclusion
Learning how to fix terracotta for Venus flytrap use is a valuable skill for any carnivorous plant enthusiast. The process requires patience, the right materials, and strict adherence to cure times and testing. But the reward is beautiful, natural-looking pots that safely house your plants for years. Remember the core principles. Use only food-safe, aquarium-rated sealants. Seal 100% of the surface. Cure fully. Test with a TDS meter. Inspect annually. If this feels overwhelming, there is no shame in using plastic or glazed ceramic pots. Your Venus flytrap cares about water quality, not pot aesthetics. Give it pure water, bright light, and a mineral-free root zone. It will reward you with vigorous growth and spectacular traps. Happy growing.
Frequently Asked Questions
What is the best sealant for terracotta pots used with Venus flytraps?
Aquarium-safe 100% silicone sealant is the best choice for most growers. It is affordable, flexible, adheres well to clay, and is non-toxic when fully cured. Brands like GE Silicone 1 (window/door formula) or Aqueon work well. Avoid any silicone labeled for kitchen, bath, or mold resistance.
How do I know if my sealed terracotta pot is safe for my Venus flytrap?
After the full cure period (7-14 days), fill the pot with distilled water and let it sit for 24 hours. Test the water with a TDS meter. A reading of 0-10 ppm indicates a successful seal. Higher readings mean minerals are leaching and the pot needs additional coats or complete resealing.
Can I seal a used terracotta pot that previously had regular plants in it?
Yes, but you must clean it thoroughly first. Remove all soil, soak in hot water, scrub with a stiff brush (no soap), rinse until water runs clear, wipe with 90%+ isopropyl alcohol, and dry completely for 48 hours. Any fertilizer residue or mineral buildup will compromise the seal.
Why is my Venus flytrap dying in a sealed terracotta pot?
If the pot passed the TDS test, check your water source (must be distilled, RO, or rain water), soil mix (pure peat/perlite, no fertilizer), and light levels (full sun). Also verify the sealant was rated food-safe and cured fully. Root rot from standing water too deep or poor drainage can also mimic mineral toxicity symptoms.
Is it better to use plastic pots instead of sealing terracotta?
For most growers, yes. Plastic pots are inert, require no preparation, cost less, and eliminate sealing failure risk. Terracotta is only worth the effort if you specifically want the aesthetic or need the thermal mass for temperature stability. Beginners should start with plastic.
Can I paint the outside of a sealed terracotta pot?
You can paint the exterior after the sealant fully cures, but use only water-based acrylic paint and understand that paint adds a layer that can chip, trapping moisture against the sealant. The paint itself is not a sealant. If you want color, choose tinted sealant or a naturally colored clay pot instead.