How to Propagate Anthurium from Cutting
Propagating anthurium from a cutting is simple when you follow the right steps. Choose a healthy stem, make a clean cut, and root it in water or soil. With proper light, humidity, and patience, you’ll have new plants in a few weeks.
Anthuriums are loved for their glossy leaves and bright, heart‑shaped spathes. Many plant lovers want more of them without buying new pots. Learning how to propagate anthurium from cutting gives you a free way to expand your collection. The process is straightforward, but a few details make the difference between success and failure.
In this guide you will discover each step, from picking the right stem to caring for the rooted plant. We keep the language simple and the instructions clear so you can follow along even if you are new to houseplant propagation.
Before you start, gather clean tools, a suitable container, and a well‑draining medium. A little preparation goes a long way toward healthy roots and vigorous growth.
Key Takeaways
- Select a mature stem: Pick a disease‑free stem with at least two nodes.
- Cut below a node: Use sterilized scissors for a clean cut.
- Remove lower leaves: Prevent rot by stripping leaves that would sit in water or soil.
- Root in water or soil: Both methods work; choose what fits your space.
- Keep warm and humid: Bright indirect light, 70‑80 °F, and high humidity speed rooting.
- Transplant when roots are 2‑3 inches: Treat the new plant like a mature anthurium.
Quick Answers to Common Questions
Can I propagate anthurium in water only?
Yes, water propagation works well. Just change the water regularly and move the cutting to soil once roots are a few inches long.
Do I need rooting hormone for anthurium cuttings?
Rooting hormone is optional. It can speed up rooting but many cuttings root fine without it.
How long does it take for anthurium cuttings to root?
Typically two to five weeks depending on method, temperature, and humidity.
What light is best for rooting anthurium cuttings?
Bright indirect light is ideal. Direct sun can burn the tender leaves.
When should I transplant a rooted cutting to a larger pot?
Transplant when roots are two to three inches long and the plant shows new leaf growth.
📑 Table of Contents
Choosing the Right Cutting
Identify a Healthy Stem
Look for a stem that is firm, green, and free of spots. A mature stem usually has at least two nodes. Nodes are the small bumps where leaves and roots can emerge. Avoid stems that are yellow, mushy, or show signs of pests. A healthy stem stores enough energy to produce roots quickly.
Check the mother plant for overall vigor. A plant that is actively flowering or producing new leaves will give you stronger cuttings. If the mother looks stressed, wait until it recovers before taking a piece.
Timing Matters
Spring and early summer are the best times to take cuttings. The plant is actively growing, so it redirects energy to root formation. If you cut in winter, the stem may stay dormant and rot. Choose a morning when the plant is well‑hydrated. This reduces stress on the cutting.
If you live in a climate with a short growing season, you can still propagate indoors under grow lights. Just mimic the warm, bright conditions of spring.
Stem Thickness and Length
Pick a stem that is about the thickness of a pencil. Very thin stems dry out fast. Very thick stems may be woody and slower to root. A length of 4 to 6 inches with two to three nodes is ideal. This size gives enough leaf area for photosynthesis while keeping the cutting manageable.
Preparing the Cutting
Sanitize Your Tools
Clean scissors or a sharp knife with rubbing alcohol or a bleach solution. Dirty tools can introduce bacteria that cause rot. Wipe the blades and let them dry before you cut. This simple step saves many cuttings.
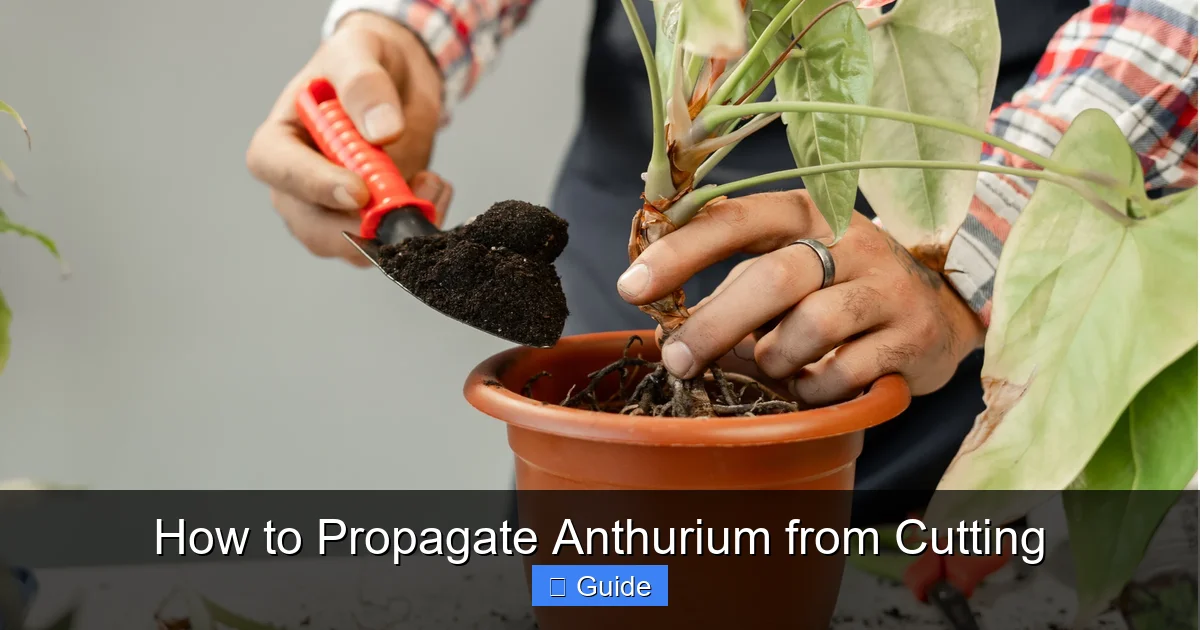
Visual guide about How to Propagate Anthurium from Cutting
Image source: i.ytimg.com
You can also dip the blades in a 10 % hydrogen peroxide solution for extra safety. Rinse with clean water afterward.
Make a Clean Cut
Cut just below a node at a 45‑degree angle. An angled cut increases the surface area for water uptake. Make the cut swift and smooth. Do not crush the stem. A clean cut heals faster and reduces infection risk.
If the stem is very thick, you may need a small pruning saw. Keep the cut surface as smooth as possible.
Remove Lower Leaves
Strip any leaves that would sit below the water line or soil surface. Leaves left in the medium decay and invite fungus. Keep the top two or three leaves intact; they continue photosynthesis and feed the cutting.
If the cutting has large leaves, you can trim them in half to reduce transpiration. This helps the cutting stay hydrated while roots form.
Optional Callusing
Some growers let the cut end air‑dry for an hour before placing it in water or soil. This callus step can lower the chance of rot. It is not required but can be useful in very humid environments.
Rooting Methods
Water Propagation Basics
Place the cutting in a clear glass or jar filled with room‑temperature water. Submerge the node but keep the leaves above water. Change the water every two to three days to keep it fresh. Roots usually appear within two to four weeks. Watch for white, firm roots. Once they reach two inches, the cutting is ready for soil.
Use filtered or distilled water if your tap water is high in chlorine. Add a tiny piece of activated charcoal to the jar to keep the water clear.
Soil Propagation Basics
Use a light, well‑draining mix such as peat‑perlite or a commercial aroid blend. Make a small hole with a pencil, insert the cutting, and firm the soil around the node. Water lightly to settle the mix. Cover the pot with a clear plastic bag or a humidity dome to keep moisture high. Vent the cover daily to prevent mold. Roots develop in three to five weeks.
A 50/50 mix of peat moss and perlite works well. You can also add a handful of orchid bark for extra aeration.
Using Rooting Hormone
Rooting hormone is optional but can speed up the process. Dip the cut end in powdered or gel hormone before placing it in water or soil. Follow the product label for dosage. Too much hormone can burn the tissue. Many growers succeed without it, so decide based on your patience level.
If you use hormone, tap off excess powder before inserting the cutting. This avoids clumping around the node.
Alternative Media: Sphagnum Moss
Wet sphagnum moss provides constant moisture and good airflow. Wrap the node in a small ball of moss, then place it in a plastic cup with a loose lid. Mist daily. This method often yields roots in two to three weeks.
Make sure the moss stays damp but not soggy. Squeeze out excess water before wrapping.
Choosing the Right Container
For water propagation, a narrow jar keeps the cutting upright. For soil, a 4‑inch pot with drainage holes is sufficient. Clear containers let you monitor root growth without disturbing the cutting.
Aftercare for New Plants
Light and Temperature
Place the rooted cutting in bright, indirect light. Direct sun scorches the tender leaves. Ideal temperature ranges from 70 °F to 80 °F (21 °C‑27 °C). Avoid cold drafts and sudden temperature swings. Consistent warmth encourages steady growth.
If natural light is low, a 12‑hour LED grow light at 200‑300 µmol m⁻² s⁻¹ works well.
Humidity Management
Young anthuriums love humidity around 70‑80 %. Keep the humidity dome on for the first week, then gradually increase ventilation. A pebble tray with water under the pot adds ambient moisture.
Misting the leaves once a day helps, but avoid water sitting in the crown.
Watering Schedule
Keep the soil evenly moist but not soggy. Water when the top inch feels dry. Overwatering leads to root rot, the most common cause of failure. Use a pot with drainage holes. If you propagate in water, transition to soil gradually by adding a little soil to the jar each day.
Bottom watering can reduce the risk of wet leaves. Place the pot in a shallow tray of water for 10 minutes, then remove.
Fertilizing Young Anthuriums
Wait until the plant shows new leaf growth before feeding. Use a balanced, water‑soluble fertilizer at half strength once a month. Too much fertilizer burns young roots. A gentle feeding supports healthy foliage and future blooms.
Switch to a bloom‑boost formula (higher phosphorus) after the plant is established and starts producing spathes.
Repotting Timeline
When roots fill the current pot and you see new leaves, move the plant to a container one size larger. Use the same well‑draining mix. Repot in spring for the quickest recovery.
Common Problems and Solutions
Rot and Mold
Black, mushy stems indicate rot. Remove the affected cutting immediately. Clean the container and replace the medium. Increase airflow and reduce humidity slightly. A fungicide spray can help if the problem persists.
Prevent rot by never letting leaves touch water and by using sterile tools.
Slow Root Growth
If roots do not appear after four weeks, check temperature and light. Cool conditions slow metabolism. Move the cutting to a warmer spot and ensure it receives bright indirect light. Adding a heat mat under the pot can make a big difference.
Also verify that the node is fully submerged in water or covered by soil.
Leaf Yellowing
Yellow leaves usually mean overwatering or low light. Adjust watering and move the cutting to brighter indirect light. Remove any fully yellow leaves to redirect energy.
Check the roots; if they are brown and mushy, trim the rot and repot in fresh medium.
Pest Issues
Mealybugs and spider mites sometimes attack cuttings. Inspect leaves daily. Wipe pests off with a cotton swab dipped in alcohol. For larger infestations, spray with neem oil following label directions. Early detection keeps the problem small.
Isolate new cuttings from other plants for two weeks to avoid spreading pests.
Brown Leaf Tips
Dry air or fertilizer burn causes brown tips. Increase humidity and flush the soil with plain water if you suspect salt buildup. Trim the brown tips with clean scissors.
Conclusion
Propagating anthurium from a cutting is a rewarding project that expands your indoor garden at little cost. By selecting a healthy stem, making a clean cut, and providing the right environment, you give each cutting the best chance to thrive. Remember to be patient; roots take time, but the payoff is a beautiful new plant that mirrors the parent. Try the method that fits your space, watch the progress, and enjoy the satisfaction of growing your own anthuriums.
Frequently Asked Questions
What type of cutting works best for anthurium propagation?
A stem cutting with at least two nodes and a few healthy leaves gives the highest success rate.
Can I use regular potting soil for rooting anthurium cuttings?
Regular potting soil is often too heavy. Use a light, well‑draining aroid mix or a peat‑perlite blend.
How do I increase humidity for my cuttings?
Cover the pot with a clear plastic bag or use a humidity dome. Mist the leaves daily and keep the medium moist.
Why are my anthurium cutting leaves turning yellow?
Yellow leaves usually mean overwatering or low light. Adjust watering and move the cutting to brighter indirect light.
Is it normal for the cutting to lose a leaf during rooting?
Yes, the cutting may shed lower leaves as it redirects energy to root formation. This is normal.
Can I propagate anthurium from a leaf cutting?
Leaf cuttings rarely produce roots. Stem cuttings with nodes are the reliable method.