How to Clean Bird Nest Fern Leaves
Cleaning bird nest fern leaves is essential for plant health and photosynthesis. Use lukewarm water and a soft cloth to gently wipe each frond, avoiding harsh chemicals that damage delicate foliage.
Bird nest ferns bring a touch of tropical elegance to any indoor space. Their bright green, wavy fronds unfurl from a central rosette that resembles a bird’s nest. But those beautiful leaves collect dust just like everything else in your home. Learning how to clean bird nest fern leaves properly keeps your plant healthy and looking its best.
Many plant owners make the mistake of using leaf shine sprays or rough cloths. These damage the delicate surface of Asplenium nidus fronds. The good news? Cleaning is simple when you know the right technique. This guide covers everything from basic dusting to deep cleaning, plus tips for preventing buildup in the first place.
Key Takeaways
- Use lukewarm water only: Cold or hot water shocks the plant and causes leaf damage.
- Choose soft materials: Microfiber cloths or soft cotton prevent scratching delicate fronds.
- Avoid commercial leaf shine products: These clog stomata and interfere with natural plant processes.
- Clean in the morning: This allows leaves to dry completely before cooler evening temperatures arrive.
- Support each leaf while cleaning: Hold the underside gently to prevent tearing or bending the frond.
- Inspect for pests during cleaning: Regular wiping helps you catch spider mites, scale, or mealybugs early.
- Maintain humidity after cleaning: Mist the plant or use a pebble tray to replace moisture lost during the process.
Quick Answers to Common Questions
Can I use leaf shine on my bird nest fern?
No, leaf shine products clog the stomata (pores) on the leaves, preventing gas exchange and photosynthesis. They also attract more dust over time. Use only lukewarm water and a soft cloth.
How often should I clean my bird nest fern?
Dry dust weekly with a microfiber cloth. Wet clean monthly with lukewarm water. Increase frequency in dusty environments or during pollen season. Adjust based on your specific conditions.
What water temperature is best for cleaning?
Lukewarm water only. Test on your wrist — it should feel neutral, not hot or cold. Cold water shocks tropical plants and causes leaf damage. Hot water destroys cell structure.
Is it okay to get water in the center crown?
No, water trapped in the crown causes crown rot. Tilt the plant away from the center while cleaning. Blot any moisture immediately with a cotton swab or dry cloth.
Can I shower my bird nest fern to clean it?
Yes, but use lukewarm water with gentle pressure for only 30 seconds. Tilt the plant so water runs off the leaves, not into the crown. Shake gently and blot dry afterward.
📑 Table of Contents
- Why Clean Bird Nest Fern Leaves Matters
- Understanding Bird Nest Fern Anatomy
- Essential Tools and Materials
- Step-by-Step Cleaning Process
- Cleaning Frequency and Schedule
- Common Mistakes to Avoid
- Troubleshooting Cleaning Issues
- Alternative Cleaning Methods
- Preventing Dust Buildup
- Caring for Bird Nest Ferns Beyond Cleaning
- Conclusion
Why Clean Bird Nest Fern Leaves Matters
Photosynthesis Depends on Clean Surfaces
Dust blocks light from reaching the chlorophyll in leaves. Even a thin layer reduces photosynthesis efficiency. Your fern produces less energy. Growth slows down. New fronds emerge smaller. The plant becomes weaker over time.
Think of dust like a dirty window. Sunlight cannot pass through effectively. Your bird nest fern needs every bit of available light, especially indoors. Clean leaves maximize light absorption. This matters most in winter when daylight hours are short.
Pest Prevention Through Regular Inspection
Cleaning time is inspection time. Spider mites love dusty conditions. They hide on leaf undersides. Scale insects attach to midribs. Mealybugs cluster in the crown. Wiping each frond reveals these problems early.
Early detection saves plants. A few spider mites wash away easily. An infestation requires aggressive treatment. Make cleaning a weekly habit. You will spot trouble before it spreads.
Stomata Function and Gas Exchange
Leaves breathe through tiny pores called stomata. Dust clogs these openings. Carbon dioxide cannot enter. Oxygen and water vapor cannot exit. The plant essentially suffocates.
Commercial leaf shine products create a worse problem. They seal stomata completely. The waxy coating looks shiny but prevents gas exchange. Your fern may look glossy but struggles internally. Stick to water only.
Aesthetic Appeal and Home Hygiene
Clean plants look vibrant. Dusty plants look neglected. The difference is obvious. Guests notice healthy foliage. You feel better about your space. Clean leaves also reduce airborne dust in your home.
Bird nest ferns have a unique texture. The wavy edges catch more dust than flat leaves. Regular cleaning maintains that fresh, tropical look. It becomes a satisfying ritual rather than a chore.
Understanding Bird Nest Fern Anatomy
The Central Rosette Structure
Asplenium nidus grows from a central crown. New fronds emerge coiled like fiddleheads. They unfurl slowly over weeks. The crown collects water and debris in nature. This mimics the forest floor environment.

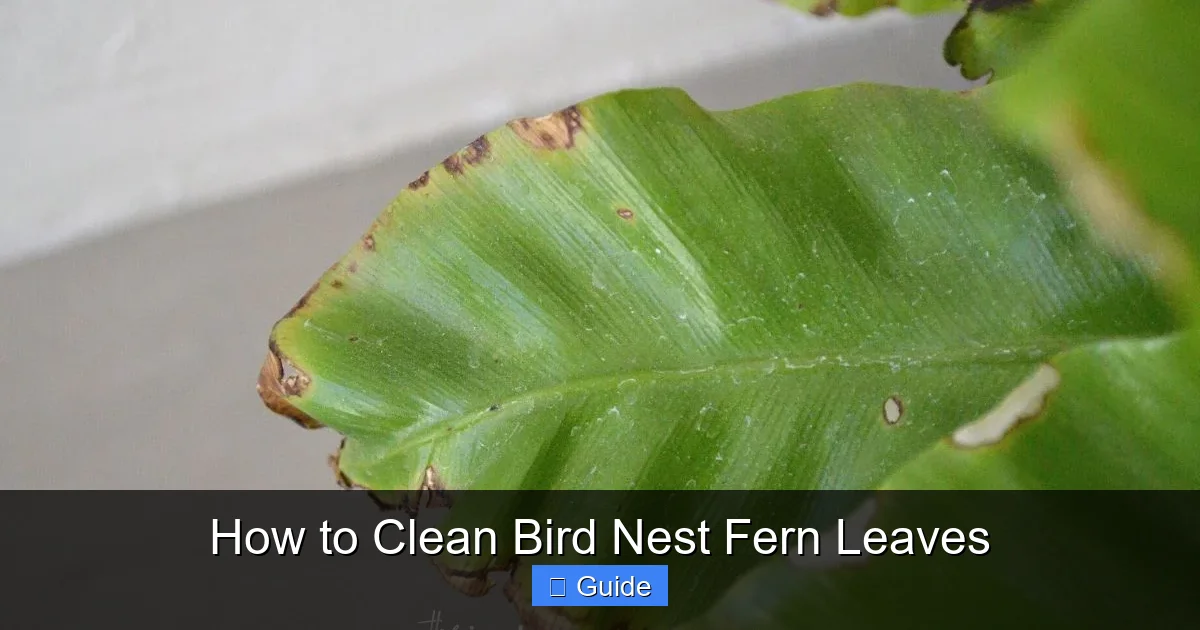
Visual guide about How to Clean Bird Nest Fern Leaves
Image source: i.ytimg.com
Indoors, the crown traps dust and dead insects. Water sitting in the crown causes rot. Cleaning must address this area carefully. Never pour water directly into the center. Use a cotton swab or soft brush instead.
Frond Texture and Delicacy
Bird nest fern fronds feel slightly leathery but tear easily. The midrib runs down the center. Veins branch outward. The wavy margins are the most fragile part. Handle each leaf with two hands.
Young fronds are extremely tender. Wait until they fully harden before cleaning. This takes two to three weeks after unfurling. Cleaning too early causes permanent deformation.
Root System Considerations
Bird nest ferns are epiphytes in nature. They grow on trees, not in soil. Their roots need air circulation. Heavy, wet potting mix causes root rot. Cleaning water that runs into the pot affects root health.
Use well-draining mix. Water at the soil level, not over the leaves. Excess moisture around roots invites fungus. Clean leaves but keep the crown and soil surface relatively dry.
Essential Tools and Materials
Choosing the Right Cloth
Microfiber cloths work best. They trap dust instead of pushing it around. The fine fibers reach into leaf texture. Wash new microfiber cloths before first use. This removes manufacturing residues.
Soft cotton t-shirts work in a pinch. Cut into squares. Avoid paper towels. They leave lint. They tear when wet. They scratch delicate surfaces. Terry cloth is too rough. Stick with smooth, soft fabrics.
Water Temperature Matters
Lukewarm water only. Test on your wrist. It should feel neutral. Cold water shocks tropical plants. Hot water damages cell structure. Room temperature works if lukewarm is not available.
Fill a spray bottle for misting. Fill a bowl for cloth dipping. Keep both at the same temperature. Consistency prevents thermal shock. Let tap water sit overnight if heavily chlorinated.
Support Tools for Large Specimens
Large fronds need support. Use your non-dominant hand. Place it flat under the leaf. Clean with the other hand. Move support as you work down the frond. Never pull or tug.
A second person helps with massive plants. One supports. One cleans. Communicate clearly. Move slowly. Rushing causes tears.
Optional but Helpful Items
A soft paintbrush removes dust from the crown. Cotton swabs reach tight spaces. A small handheld vacuum on lowest setting with brush attachment works for heavy dust. Never use the vacuum directly on leaves.
Neem oil solution treats pests found during cleaning. Mix one teaspoon neem oil per quart water. Add a drop of mild dish soap. Test on one leaf first. Wait 24 hours. Check for damage.
Step-by-Step Cleaning Process
Preparation Phase
Gather all materials before starting. Move the plant to a work area if possible. A bathtub or shower stall contains mess. Kitchen sink works for smaller plants. Lay towels to protect surfaces.
Inspect the plant first. Note damaged areas. Identify pests. Plan your approach. Remove dead or yellowing fronds at the base. Use clean, sharp scissors. Cut close to the crown without damaging it.
Dry Dusting First
Start with a dry microfiber cloth. Gently wipe each frond top and bottom. Support the leaf from underneath. Work from base to tip. Follow the vein direction. This removes loose dust before wet cleaning.
Use a soft brush for the crown area. Sweep debris outward. Do not push dust deeper into the center. Tilt the plant slightly if needed. Let gravity help. Tap the pot gently to dislodge stubborn particles.
Wet Cleaning Technique
Dampen your cloth. Wring it thoroughly. It should feel moist, not dripping. Excess water runs into the crown. This causes rot. Fold the cloth for a clean surface.
Hold the frond base with one hand. Wipe from base to tip with the other. Use light pressure. Flip the cloth frequently. Rinse the cloth often in clean water. Change water when it looks dirty.
Clean the underside too. Pests hide there. Stomata concentrate on the bottom surface. Turn the leaf gently. Support it fully. Do not bend beyond natural curve.
Detail Work for Crown and Crevices
Use cotton swabs for the crown. Dampen slightly. Swipe outward from center. Use multiple swabs. Do not reuse dirty ones. A soft paintbrush works for wider areas.
Check where fronds meet the crown. Scale insects attach here. Mealybugs leave white cottony residue. Remove gently with alcohol-dipped swab if found. Do not pour alcohol on the plant.
Final Rinse Option
For heavily dusty plants, a gentle shower helps. Use lukewarm water. Low pressure only. Handheld showerhead works best. Tilt the plant. Water runs off, not into crown.
Limit shower to 30 seconds. Shake gently afterward. Blot excess water with dry cloth. Focus on crown area. Return to bright, indirect light. Good air circulation speeds drying.
Post-Cleaning Care
Do not fertilize immediately. Wait one week. The plant adjusts. Clean leaves absorb light better. Fertilizer on stressed roots causes burn. Resume normal care after seven days.
Monitor for stress signs. Drooping fronds indicate shock. Brown tips suggest water issues. New growth shows recovery. Patience pays off. Your fern will reward you with fresh, vibrant fronds.
Cleaning Frequency and Schedule
Weekly Light Dusting
Quick dry wipe takes five minutes. Do it during regular plant checks. Sunday morning works well. Coffee in hand. Music playing. Make it enjoyable. Consistency prevents buildup.
Use a dedicated plant duster. Keep it near your plants. No excuses. Weekly dusting means deep cleaning only quarterly. Less work overall. Healthier plant always.
Monthly Deep Cleaning
Wet wipe once per month. More often in dusty environments. Construction nearby? Clean biweekly. Pets shedding? Clean biweekly. Open windows in pollen season? Clean biweekly.
Schedule it. Calendar reminder. Phone alarm. Pair with another monthly task. Water filter change. Smoke detector test. Bill paying day. Habit stacking works.
Seasonal Adjustments
Winter heating creates dry air. More dust circulates. Clean more often. Summer humidity reduces airborne dust. Clean less often. But check for pests more. They thrive in warmth.
Spring brings pollen. Clean after pollen season peaks. Fall brings heater startup dust. Clean when you first turn on heat. Adapt to your specific environment. Observe your plant.
Special Circumstances
After moving? Clean immediately. Moving stirs dust. New home, new dust. After construction? Clean daily for a week. Fine particles settle everywhere. After pest treatment? Clean per product instructions.
New plant from nursery? Quarantine two weeks. Clean before introducing to collection. Nurseries use leaf shine. Remove it. Check for hitchhiking pests. Protect your other plants.
Common Mistakes to Avoid
Using Leaf Shine Products
This is the number one error. Commercial sprays clog stomata. They attract more dust. They create dependency. Leaves look dull without them. The cycle continues. Just say no.
Mayonnaise, milk, banana peels, and oil home remedies cause the same problems. They rot. They smell. They attract insects. They breed fungus. Water works. Trust the process.
Cleaning With Cold Water
Tropical plants hate cold shock. Ice water causes cell damage. Leaves develop brown patches. Growth stunts. Roots suffer too. Always use lukewarm water. No exceptions.
If your tap runs cold, fill containers the night before. Room temperature by morning. Or mix hot and cold. Test on wrist. Comfortable for you means comfortable for your fern.
Scrubbing Too Hard
Bird nest fern fronds tear easily. The wavy edges are fragile. The midrib snaps if bent backward. Gentle pressure only. Let the cloth do the work. Time, not force, removes dirt.
Stubborn spots? Dampen cloth more. Hold longer. Wipe again. Repeat. Patience preserves leaves. A torn frond never repairs. The plant wastes energy sealing the wound.
Getting Water in the Crown
The central rosette holds water. In nature, this provides moisture. Indoors, it causes crown rot. Fungus thrives. Bacteria multiply. The growing point dies. The plant cannot recover.
Tilt plant away from crown while cleaning. Blot immediately if water enters. Use cotton swabs to absorb. Increase air circulation. Watch for mushy, brown center. Act fast if detected.
Cleaning New Fronds Too Soon
Emerging fronds are tender. The tissue is soft. Water pressure damages them. Cloth friction deforms them. Wait until fully hardened. Two to three weeks minimum. Longer in low light.
How to tell? Color deepens. Texture firms. Frond holds shape unassisted. No longer floppy. Then clean gently. Treat new growth with extra care always.
Troubleshooting Cleaning Issues
Brown Tips After Cleaning
Brown tips usually mean water quality issues. Fluoride and chlorine damage sensitive ferns. Use filtered water. Rainwater is ideal. Distilled works. Let tap water sit 24 hours minimum.
Low humidity also causes brown tips. Cleaning removes protective dust layer temporarily. Increase humidity after cleaning. Pebble tray. Humidifier. Group plants. Misting helps briefly.
Water Spots on Leaves
Hard water leaves mineral deposits. White chalky spots. They block light. They look unsightly. Use distilled or rainwater for final wipe. Or wipe with dry cloth immediately after wet cleaning.
Vinegar solution removes existing spots. One teaspoon white vinegar per cup water. Test first. Wipe gently. Rinse with clean water. Dry thoroughly. Prevent future spots with better water.
Fronds Tearing During Cleaning
Tears happen. Do not panic. Trim torn edges with clean scissors. Cut at an angle. Follow natural shape. The plant seals the cut. No treatment needed.
Prevent future tears. Support better. Move slower. Use two hands always. Clean when leaf. Clean when relaxed, not rushed. Morning energy beats evening fatigue.
Pest Discovery During Cleaning
Found spider mites? Tiny webs. Speckled leaves. Isolate plant immediately. Shower thoroughly. Treat with neem oil. Repeat weekly for three weeks. Monitor closely.
Found scale? Brown bumps on stems and midribs. Scrape off with fingernail. Swab with alcohol. Spray neem oil. Check daily. Persistence wins.
Found mealybugs? White cottony masses. Remove with alcohol swab. Spray neem oil. Check crown daily. They hide deep. Systemic insecticide for severe cases.
Alternative Cleaning Methods
Compressed Air for Dust Only
Canned air blows dust off. Use short bursts. Hold upright. Keep 12 inches away. Cold propellant damages leaves if too close. Good for quick touch-ups. Not for sticky residue.
Do not use air compressor. Oil in lines. Too much pressure. Shreds leaves. Canned air only. Use outdoors or in garage. Dust goes everywhere.
Soft Brush for Delicate Work
Makeup brushes work beautifully. Soft bristles. Various sizes. Clean dry dust from crown. Reach between frond waves. No water needed. Great for weekly maintenance.
Paintbrushes work too. Natural bristles. Clean unused ones only. Wash new brushes first. Remove loose bristles. Dedicate to plants only.
Shower Method for Large Plants
Take plant to shower. Lukewarm water. Gentle spray. Rotate plant. 30 seconds max. Tilt to drain crown. Shake gently. Blot with towels. Air dry in bright indirect light.
Best for plants too large to move easily. Put on plant caddy with wheels. Roll to bathroom. Roll back. Minimal lifting. Protect your back.
Natural Rain Cleaning
Summer rain cleans perfectly. Move plant outside during gentle rain. Avoid heavy downpours. Avoid direct sun afterward. Bring in before night chill. Nature does it best.
Check for hitchhikers before bringing in. Slugs love ferns. Earwigs hide in crown. Inspect thoroughly. Quarantine a few days. Safe integration.
Preventing Dust Buildup
Air Purification Helps
HEPA filters reduce airborne dust. Run in plant room. Clean filters monthly. Less dust settles. Less cleaning needed. Healthier air for you too.
Place plants away from air vents. Forced air blows dust directly on leaves. HVAC systems circulate household dust. Distance helps. Six feet minimum.
Humidity Reduces Static
Dry air creates static electricity. Static attracts dust like a magnet. Maintain 50-60% humidity. Humidifier. Pebble trays. Plant grouping. Misting helps temporarily.
Hygrometer monitors levels. Inexpensive. Digital reads accurately. Adjust accordingly. Winter needs more help. Summer often sufficient naturally.
Strategic Placement Matters
High shelves collect more dust. Heat rises. Dust rides convection currents. Lower placement stays cleaner. But light requirements come first. Balance both needs.
Kitchen proximity adds grease particles. Bathroom adds mineral deposits from steam. Bedroom usually cleanest. Living room varies. Observe your spaces.
Regular Home Cleaning Reduces Plant Work
Vacuum with HEPA filter. Damp mop floors. Dust surfaces weekly. Wash bedding hot. Groom pets outside. Less source dust means less settled dust. Whole house approach works.
Change furnace filters monthly. Clean dryer vent. Seal drafts. Minimize tracked-in dirt. Shoes off at door. Every reduction helps your plants.
Caring for Bird Nest Ferns Beyond Cleaning
Watering Practices That Support Clean Leaves
Water at soil level. Long-spout watering can. Avoid splashing leaves. Wet leaves attract dust. Wet crown causes rot. Morning watering allows drying time.
Bottom watering works well. Set pot in water tray. Soil absorbs from below. Leaves stay dry. Roots get even moisture. Drain thoroughly after 30 minutes.
Fertilizing for Strong Fronds
Strong fronds resist damage. Fertilize monthly spring through summer. Half-strength balanced fertilizer. Skip winter. Flush soil quarterly to prevent salt buildup.
Organic options work well. Fish emulsion. Seaweed extract. Worm casting tea. Gentle nutrition. Builds resilient tissue. Clean leaves on strong plants stay clean longer.
Repotting Refreshes Everything
Repot every two to three years. Fresh mix drains better. Roots breathe easier. Plant grows stronger. Remove old mix gently. Trim dead roots. Position at same depth.
Spring repotting aligns with growth surge. Plant recovers fast. New fronds emerge clean. Old dusty fronds naturally shed. Cycle continues beautifully.
Propagation Creates Clean Starts
Bird nest ferns propagate by spores. Difficult for beginners. Division works for mature plants. Separate crowns carefully. Each needs roots. Pot individually.
New plants start clean. No dust history. No pest baggage. Perfect specimens. Share with friends. Expand your collection. Enjoy the process.
Conclusion
Learning how to clean bird nest fern leaves transforms plant care from guesswork into confidence. The method is simple: lukewarm water, soft cloth, gentle touch, regular schedule. No special products needed. No expensive tools required. Just attention and consistency.
Your bird nest fern will reward you with glossy, vibrant fronds that catch light beautifully. Photosynthesis improves. Pests stay away. The plant grows stronger. You develop a deeper connection through hands-on care.
Start this week. Five minutes per plant. Weekly dry dusting. Monthly wet wipe. Seasonal deep clean. Build the habit. Enjoy the results. Your tropical treasure deserves nothing less than clean, breathing leaves.
Remember: every expert started as a beginner. You will make mistakes. Leaves may tear. Water may splash the crown. Learn from each session. Adjust your technique. The plant forgives. It keeps growing. So do you.
Frequently Asked Questions
Why are my bird nest fern leaves turning brown after cleaning?
Brown tips usually indicate water quality issues like fluoride or chlorine sensitivity, or low humidity. Use filtered, rain, or distilled water for cleaning. Increase humidity with a pebble tray or humidifier after cleaning to prevent moisture loss from freshly wiped leaves.
Can I use vinegar or lemon juice to clean bird nest fern leaves?
Avoid vinegar, lemon juice, or any acidic solutions on bird nest fern leaves. These can damage the delicate leaf tissue and alter the surface pH. Plain lukewarm water is the safest and most effective cleaner for these sensitive tropical plants.
Should I clean new fronds that are still unfurling?
No, wait until new fronds have fully hardened — typically two to three weeks after unfurling. Young fronds are extremely tender and easily damaged by cloth friction or water pressure. Clean only mature, firm leaves.
What should I do if I find pests while cleaning my fern?
Isolate the plant immediately. Remove visible pests with alcohol-dipped cotton swabs. Shower the plant with lukewarm water. Treat with neem oil solution weekly for three weeks. Monitor daily and check neighboring plants for spread.
Can I use a feather duster on my bird nest fern?
Feather dusters simply redistribute dust and can scratch delicate fronds. Use a clean microfiber cloth or soft paintbrush instead. These trap dust particles and reach into the wavy leaf texture without causing damage.
How do I clean the crown area without causing rot?
Use a dry soft paintbrush or cotton swabs to gently sweep debris outward from the center. Never pour water into the crown. If moisture enters, blot immediately with dry cotton swabs and increase air circulation around the plant.