Complete Guide to Stackable for Monstera Deliciosa
Stackable supports are essential for Monstera deliciosa as they mimic the plant’s natural climbing habit and prevent leggy growth. This complete guide covers everything from choosing the right moss pole or trellis to installation techniques, maintenance, and troubleshooting common issues like leaning poles or root attachment problems.
If you’ve ever watched a Monstera deliciosa stretch toward the ceiling with increasingly smaller leaves, you already know the struggle. These magnificent plants aren’t meant to trail. They’re meant to climb. In their native Central American rainforests, Monsteras scale towering trees using thick aerial roots that grip bark and absorb moisture from the humid air. When we bring them indoors without proper support, they lose their way. The result? Leggy stems, undersized leaves, and a plant that looks more sad than spectacular.
That’s where stackable supports come in. Unlike single-piece moss poles or flimsy stakes that your Monstera will outgrow in a single season, stackable systems grow with your plant. You add sections as needed. You adjust height without disturbing roots. You create a permanent climbing framework that lasts for years. This guide walks you through everything you need to know about choosing, installing, maintaining, and troubleshooting stackable supports for your Monstera deliciosa. Whether you’re a first-time plant parent or a seasoned collector, you’ll find practical advice you can use today.
Key Takeaways
- Stackable supports mimic natural growth: Monstera deliciosa is an epiphytic climber that needs vertical support to develop large, fenestrated leaves.
- Moss poles retain moisture for aerial roots: Sphagnum moss poles encourage aerial root attachment and provide consistent humidity for healthier growth.
- Install supports early for best results: Adding a stackable pole during repotting minimizes root disturbance and trains the plant from a young age.
- Secure stems gently with soft ties: Use plant velcro, twine, or clips to attach stems without damaging the delicate petioles or stems.
- Extend poles as the plant grows: Stackable designs allow you to add sections incrementally, preventing the need for complete replacement.
- Monitor for common issues: Watch for leaning poles, dry moss, root rot at the base, and pests hiding in the support structure.
- Regular maintenance ensures longevity: Mist moss poles weekly, check tie tightness monthly, and clean supports annually to prevent disease buildup.
Quick Answers to Common Questions
When is the best time to install a stackable support for my Monstera?
The best time is during repotting in early spring, when the plant enters active growth. This allows you to anchor the pole securely without damaging roots, and the plant will quickly attach new aerial roots to the support.
How often should I mist my stackable moss pole?
Mist your moss pole two to three times per week, or whenever the surface feels dry to the touch. In dry indoor environments, daily misting may be necessary. The moss should stay consistently damp like a wrung-out sponge.
Can I use a stackable trellis instead of a moss pole?
Yes, but trellises don’t retain moisture for aerial root attachment. You’ll need to maintain higher ambient humidity and mist stems directly. Many growers combine a central moss pole with a surrounding trellis for the best results.
What do I do if my stackable pole starts leaning?
Check if the base is buried deeply enough (8-12 inches) and the pot is wide enough. Repot into a heavier container if needed, or add a guy wire from the pole top to a secure anchor. Pruning top-heavy growth also reduces leverage.
How do I extend a stackable pole when my Monstera outgrows it?
When growth reaches within 6 inches of the top, remove the cap, slide on the next section, ensure a tight connection, and replace the cap. Wrap the joint with damp sphagnum moss to create a continuous moist surface for aerial roots.
📑 Table of Contents
- Understanding Why Monstera Deliciosa Needs Vertical Support
- Types of Stackable Supports for Monstera Deliciosa
- Choosing the Right Stackable Support for Your Plant
- Step-by-Step Installation Guide
- Maintenance and Care for Long-Term Success
- Troubleshooting Common Stackable Support Issues
- Advanced Techniques for Spectacular Growth
- Conclusion
Understanding Why Monstera Deliciosa Needs Vertical Support
The Natural Climbing Habit
Monstera deliciosa belongs to a group of plants called hemiepiphytes. They start life on the forest floor, then climb toward the canopy using aerial roots that anchor into tree bark. This climbing behavior isn’t just for show. It’s how the plant accesses brighter light, which triggers the development of those iconic fenestrations — the splits and holes that make Monsteras so desirable. Without vertical support, your plant stays in “juvenile mode” indefinitely. The leaves remain small, solid, and heart-shaped. The internodes (spaces between leaves) stretch long and weak. The plant essentially gives up on becoming its best self.
What Happens Without Support
An unsupported Monstera doesn’t just look untidy. It suffers physiologically. The stems become top-heavy and prone to snapping under their own weight. Aerial roots dangle uselessly in the air, unable to absorb atmospheric moisture or anchor the plant. The plant expends energy producing long, weak petioles instead of investing in leaf size and fenestration. Over time, the base becomes bare and woody while all the growth concentrates at the tips. This creates a vicious cycle: the heavier the top growth, the more the stems bend, the less light reaches lower leaves, the more the plant stretches. A stackable support breaks this cycle entirely.
Benefits of Stackable Systems Over Fixed Supports
Traditional moss poles come in fixed lengths — usually two to four feet. Once your Monstera outgrows them, you face a dilemma: repot the entire plant with a taller pole (risking root damage and transplant shock) or let the plant flop over. Stackable supports solve this elegantly. Most systems use a modular design where hollow tubes or stakes connect via internal couplers or external sleeves. You buy a base unit, then add extension sections as your plant grows. Some brands offer snap-together plastic segments. Others use bamboo or metal tubes with threaded connections. The principle remains the same: infinite adjustability without disturbing the root ball. This means you can start with a modest eighteen-inch pole for a juvenile plant and build up to six feet or more over several years, all while the plant stays happily settled in its pot.
Types of Stackable Supports for Monstera Deliciosa
Stackable Moss Poles
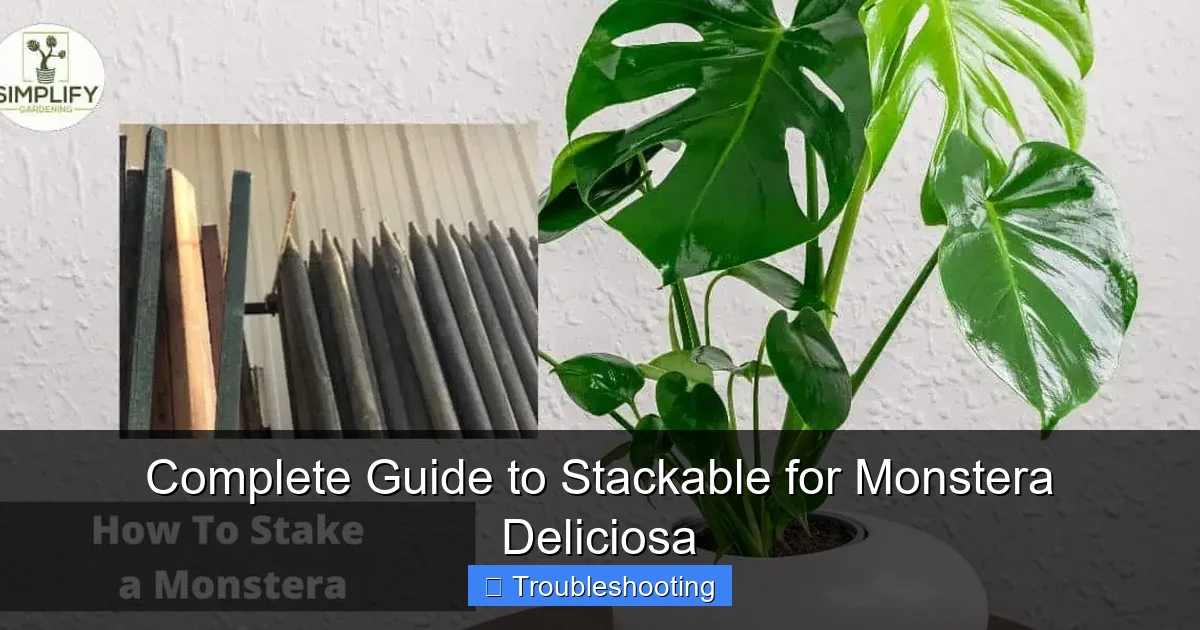
These are the gold standard for serious Monstera growers. A stackable moss pole consists of a rigid central core — usually PVC pipe, coated metal, or sturdy plastic — wrapped in sphagnum moss and secured with plastic mesh or fishing line. The modular design allows you to stack additional moss-wrapped sections on top as the plant climbs. High-quality versions feature a water reservoir at the top or a wicking system that draws moisture up through the moss, keeping it evenly damp without daily misting. The sphagnum moss provides the ideal texture for aerial roots to grip and penetrate. It also creates a humid microclimate around the stem, encouraging larger leaf development. Look for poles with a diameter of at least two inches. Narrow poles dry out too fast and offer insufficient surface area for root attachment.
Visual guide about Complete Guide to Stackable for Monstera Deliciosa
Image source: i.ytimg.com
Stackable Coir Poles
Coir poles use coconut fiber instead of sphagnum moss. They’re more durable and resistant to decomposition, often lasting three to five years before needing replacement. The texture is rougher, which some growers find less appealing for root attachment, but many Monsteras adapt well. Stackable coir poles typically use a similar modular tube design with coir-wrapped sections that slide together. They’re lighter than moss poles and don’t require as frequent moisture maintenance. However, they don’t hold water as well, so aerial roots may take longer to attach. If you choose coir, soak each section thoroughly before installation and consider wrapping the joints with additional coir fiber to create a seamless climbing surface.
Stackable Trellis Systems
For a more architectural look, stackable trellises offer clean lines and excellent structural support. These usually consist of metal or heavy-duty plastic grid panels that connect vertically. Some feature adjustable width, allowing you to expand the trellis as the plant spreads laterally. Trellises work well for Monsteras with multiple stems or for growers who prefer to train their plant in a specific shape — fan, espalier, or column. The open grid makes it easy to secure stems with ties and provides ample air circulation. However, trellises don’t provide the moisture-retentive surface that encourages aerial root attachment. You’ll need to mist the stems more frequently or provide a separate humidity source. Many growers combine a trellis with a moss pole at the center for the best of both worlds.
DIY Stackable Options
Budget-conscious plant parents can build effective stackable supports using readily available materials. A popular DIY approach uses PVC pipe (one to two inch diameter) cut into twelve to eighteen-inch sections. Drill holes along the length for aerial roots to enter, then wrap each section in sphagnum moss secured with landscape fabric and zip ties. Connect sections using PVC couplers. Another option: bamboo stakes with metal threaded inserts epoxied into the ends, allowing you to screw sections together. Wrap the bamboo in coir or moss. For a minimalist look, use stainless steel cable or rope tensioned between floor and ceiling anchors, with the plant tied to the cable. DIY supports let you customize height, diameter, and appearance exactly to your space and plant.
Choosing the Right Stackable Support for Your Plant
Assessing Your Monstera’s Size and Stage
A juvenile Monstera with three to five leaves needs a very different support than a mature specimen with ten-foot vines. For young plants (under two feet tall), start with a single eighteen to twenty-four-inch stackable moss pole section. This provides enough height for the first year of growth without overwhelming the pot. For adolescent plants (two to four feet), install a base section plus one extension — thirty-six to forty-eight inches total. Mature plants need full-height systems from the start, or you’ll be adding sections constantly. Measure from the soil surface to the highest growth point, then add twelve to eighteen inches for future growth. That’s your minimum starting height. Remember: it’s always better to have extra pole above the plant than to run out of climbing space mid-season.
Visual guide about Complete Guide to Stackable for Monstera Deliciosa
Image source: monsteraexpert.com
Pot Size and Stability Considerations
The support must be stable in the pot. A tall, top-heavy pole in a small, lightweight container will tip over the moment your Monstera puts on significant top growth. As a rule, the pot diameter should be at least one-third the planned pole height. For a four-foot pole, use a pot at least sixteen inches wide. For a six-foot pole, aim for twenty inches or more. If your decorative pot is narrow, use a heavier cache pot or add weight to the base — a layer of large river rocks at the bottom works well. Some stackable systems include a wide base plate or tripod feet for added stability. These are worth the extra cost if you’re growing in lightweight containers. Always test stability after installation by gently wiggling the pole. It should feel solid, not wobbly.
Indoor vs. Outdoor Considerations
Indoor Monsteras face lower light, lower humidity, and less air movement than their outdoor counterparts. This affects support choice. Indoors, moss poles shine because they boost local humidity — critical in heated or air-conditioned homes. The moisture reservoir feature becomes valuable when you can’t mist daily. Outdoors, coir poles often perform better. They withstand rain, sun, and temperature swings without breaking down as quickly. Metal trellises work well outside too, provided they’re powder-coated or stainless to resist rust. If you move your Monstera seasonally, choose a support that transitions well. Modular PVC-based systems with moss wrap handle both environments beautifully. Just remember to adjust watering — outdoor poles dry faster in wind and sun.
Aesthetic Preferences and Space Constraints
Your support is visible. It becomes part of your decor. Moss poles have a natural, organic look that blends with the plant. They’re green-brown and textured. Coir poles are lighter, more reddish-brown, with a uniform fibrous appearance. Metal trellises come in black, white, bronze, green — choose a finish that complements your pot and room. Bamboo stakes offer a warm, natural aesthetic. Consider the footprint too. A single pole takes minimal floor space. A trellis panel needs width. A tripod base needs clearance on three sides. If your Monstera sits in a corner, a pole against the wall works perfectly. If it’s a room centerpiece, a decorative trellis or multi-pole arrangement might look better. There’s no wrong choice — only what fits your space and style.
Step-by-Step Installation Guide
Best Time to Install
The absolute best time to install a stackable support is during repotting. This is when the root ball is exposed, making it easy to position the pole base centrally and securely. You can anchor the pole deep in the fresh soil, ensuring maximum stability. If you’re not due for repotting, you can still install a support — just take extra care. The next best time is early spring, at the start of the active growing season. The plant will quickly produce new aerial roots that find and attach to the support. Avoid installing in late fall or winter when growth slows. The plant won’t attach as readily, and you risk damaging dormant roots. If you must install off-season, be gentle and expect slower attachment.
Preparing the Support
Before installation, prepare your stackable sections. For moss poles, soak each section in a bucket of room-temperature water for fifteen to twenty minutes until fully saturated. Squeeze gently to remove excess — the moss should be damp, not dripping. This pre-hydration jump-starts the humidity microclimate and makes the moss more receptive to aerial roots. For coir poles, a five-minute soak suffices. For trellises, wipe down with a diluted neem oil solution (one teaspoon per quart water) to prevent introducing pests. Assemble the number of sections you need for the initial height, leaving extensions aside for later. Check that all connections are secure. If using a system with a water reservoir, fill it now. Have your ties ready: soft plant velcro, natural jute twine, or plastic plant clips. Avoid wire ties or anything that can cut into stems.
Positioning in the Pot
Place the assembled pole in the pot before adding the plant (if repotting) or carefully work it down alongside the root ball (if not). Position it slightly off-center, toward the back of the pot, so the plant climbs forward into the viewing angle. Push the base at least six to eight inches into the soil for stability. For tall poles, aim for ten to twelve inches of burial. If you hit large roots, don’t force it. Adjust the angle slightly or trim the pole base if the design allows. Once positioned, backfill with fresh potting mix, firming gently around the base. The pole should not move when you wiggle it. Water thoroughly to settle the soil. If the pole leans after watering, straighten it and add more soil around the base.
Attaching the Plant
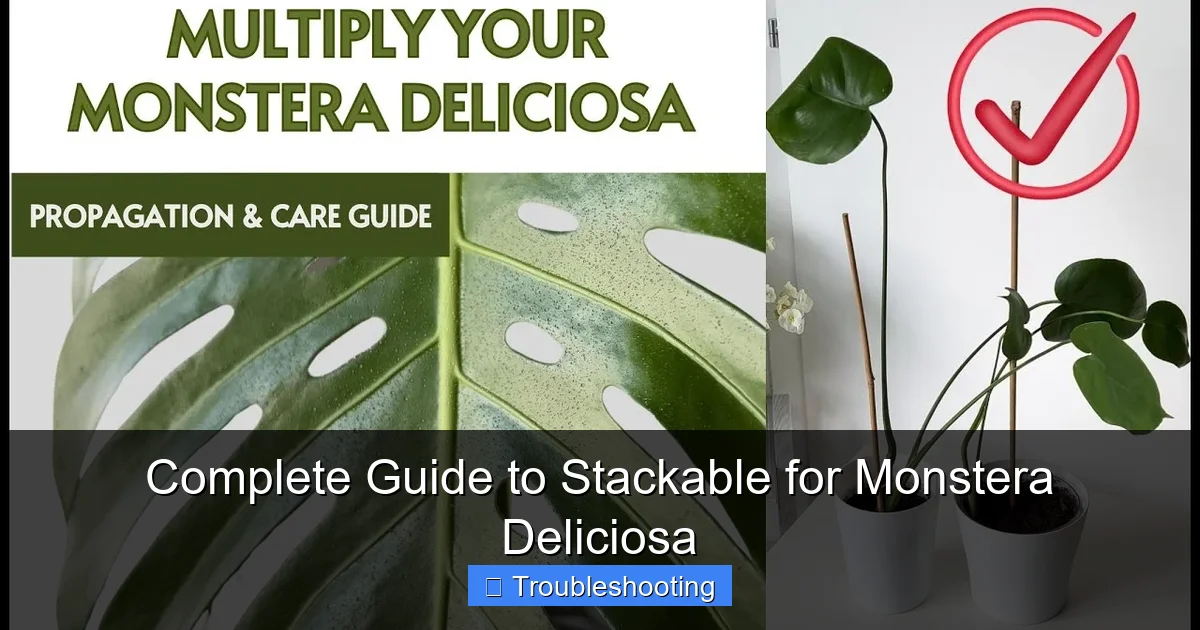
This is where patience pays off. Start with the thickest, most mature stem. Gently guide it toward the pole. If it resists, don’t force it — Monsteras can snap at the nodes. Instead, tie the stem at its current angle, then gradually reposition over several weeks by adjusting the ties. Use a figure-eight tie pattern: loop around the pole, cross over, loop around the stem. This prevents the tie from sliding down and allows some movement. Space ties every eight to twelve inches along the stem. Attach aerial roots directly to the moss by pressing them against the surface and securing with a tie or simply tucking them under the mesh. For multiple stems, fan them out around the pole, giving each its own climbing path. Don’t overcrowd. Air circulation between stems prevents fungal issues.
Adding Extensions as the Plant Grows
The beauty of stackable systems is adding height incrementally. When the highest growth point reaches within six inches of the pole top, it’s time to extend. Remove the top cap or reservoir if present. Slide the next section onto the coupler or into the sleeve. Ensure a tight connection — wiggle to test. If your system uses a water wick, thread the new wick through the connection before joining. Replace the cap or reservoir. The plant will continue climbing seamlessly. Pro tip: before adding the new section, mist the joint area heavily and wrap with a strip of damp sphagnum moss. This creates a continuous moist surface across the connection, preventing a “dry gap” that aerial roots might hesitate to cross.
Maintenance and Care for Long-Term Success
Watering and Humidity Management
A stackable moss pole is only effective if it stays moist. Dry moss repels aerial roots. Check moisture weekly by pressing your finger into the moss at several heights. It should feel like a wrung-out sponge. If dry sponge — damp but not soggy. Mist the pole thoroughly two to three times per week, more in dry winter air. For poles with reservoirs, check the water level weekly and refill as needed. A simple trick: insert a chopstick or moisture meter into the moss at different heights. If it comes out clean, the pole is too dry. In very dry homes, consider a humidifier near the plant or a pebble tray under the pot. Coir poles need less frequent watering — once a week is usually sufficient — but benefit from occasional deep soaking. Trellises don’t hold moisture, so focus on ambient humidity and misting the stems directly.
Checking and Adjusting Ties
Ties that are too tight girdle stems. Ties that are too loose allow stems to pull away from the pole. Check all ties monthly during the growing season. Gently slide a finger under each tie. You should feel slight tension but be able to move the tie easily. As stems thicken, loosen or replace ties. Remove any ties that have cut into the stem — you’ll see a groove or discoloration. Re-tie above or below the damaged area. Velcro ties are ideal because they’re infinitely adjustable. Twine works well but degrades over time; replace annually. Clips are convenient but can pop off heavy stems; use them only on younger growth. Always tie below a node, not on the internode. This distributes stress to the strongest part of the stem.
Fertilizing Considerations
Your Monstera’s fertilizer needs don’t change with a support, but the support can affect nutrient delivery. If you use a moss pole with a reservoir, avoid adding liquid fertilizer to the reservoir water. The concentrated salts can burn aerial roots and encourage algae growth. Instead, fertilize the soil normally. Some growers foliar feed by adding dilute fertilizer to their misting water (quarter strength). This can benefit aerial roots directly but isn’t necessary if soil fertilization is adequate. Watch for salt buildup on the pole surface — a white crust indicates over-fertilization or hard water. Flush the pole by running lukewarm water through it for several minutes, then allow to drain completely.
Cleaning and Pest Prevention
Supports can harbor pests. Mealybugs love the crevices of moss poles. Spider mites thrive in dry coir. Scale insects attach to trellis bars. Inspect your support monthly. Use a flashlight to check joints, mesh overlaps, and the base where the pole meets soil. If you find pests, treat immediately. For moss poles, you can carefully unwrap a section, treat the core, and rewrap — but this disturbs attached roots. Better: spray the entire pole with insecticidal soap or neem oil, ensuring coverage in all crevices. Repeat weekly for three weeks. Annually, consider deep cleaning. For moss poles, this means replacing the outer moss layer (the inner core stays). For coir and trellises, scrub with a stiff brush and ten percent bleach solution, rinse thoroughly, and dry completely before reinstalling. This prevents disease carryover and keeps the support looking fresh.
Troubleshooting Common Stackable Support Issues
Leaning or Unstable Pole
A leaning pole is the most common complaint. It usually stems from one of three causes: insufficient burial depth, too-small pot, or top-heavy plant growth. First, check the base. Can you wiggle the pole? If yes, the base isn’t anchored deeply enough. Solution: repot with deeper pole placement, or add a stabilizing bracket. Some stackable systems offer L-brackets that screw into the pot rim. If the pot is too small, upgrade to a wider, heavier container. If the plant is top-heavy, you have two options: prune back some top growth to reduce leverage, or add a guy wire. Attach a thin, coated wire from the pole top to a secure anchor — a curtain rod, wall hook, or ceiling anchor. Tension it just enough to straighten the pole. Camouflage the wire with a climbing vine or decorative element.
Aerial Roots Not Attaching
You’ve provided a perfect moss pole, but the aerial roots just dangle. Frustrating, but fixable. First, check moisture. Dry moss won’t attract roots. Increase misting frequency. Second, check humidity. Roots need ambient humidity above fifty percent to activate attachment behavior. Add a humidifier. Third, the roots may be too old. Aerial roots that have been dry for months lose their ability to attach. You can’t force them. Focus on encouraging new roots by keeping the pole consistently moist and the air humid. Fourth, gently press existing roots against the moss and secure with a tiny piece of floral tape or a loose tie. Physical contact triggers attachment hormones. Fifth, some Monsteras are just stubborn. Try wounding the pole surface slightly — scrape the moss with a fork to expose fresh fibers. This releases compounds that signal roots to grow.
Mold, Algae, or Unpleasant Odors
A healthy moss pole smells earthy, like a forest floor. Sour, musty, or rotten smells indicate anaerobic conditions — too wet, not enough air. White fuzzy mold on the surface is usually harmless saprophytic fungi, but thick mats can block root attachment. Green algae indicates excess light and moisture. Solutions: reduce watering frequency. Ensure the pole drains well — some designs trap water at section joints. Drill small drainage holes at the bottom of each section if needed. Increase air circulation with a small fan. Remove visible mold by gently wiping with a cloth dipped in diluted hydrogen peroxide (one part peroxide to four parts water). If the odor persists or the moss turns black and slimy, replace the affected section. This is why stackable systems shine — you swap one section, not the whole pole.
Pests in the Support Structure
Mealybugs in the moss. Spider mites in the coir. Fungus gnats breeding in the damp base. These are real issues. Prevention is easier than cure. Quarantine new plants before introducing them near your supported Monstera. Inspect the pole monthly as described earlier. Use systemic insecticide granules in the soil (follow label rates) for season-long protection against sucking insects. For fungus gnats, allow the top inch of soil to dry between waterings and add a layer of sand or diatomaceous earth on the soil surface. Yellow sticky traps near the pole catch flying adults. If infestation occurs, treat the plant and pole simultaneously. For severe cases, you may need to dismantle the pole, treat the plant with a systemic, replace the moss/coir, and reassemble. It’s drastic but sometimes necessary.
Plant Outgrowing the Support Diameter
Your Monstera has thickened into a magnificent specimen, but the two-inch pole looks comically small. The stems are crushing against the mesh. Aerial roots have nowhere to go. This is a good problem — it means you’ve grown a healthy plant. Solutions: wrap additional moss around the existing pole to increase diameter. Use landscape fabric to hold it in place. Or, install a second pole beside the first and train some stems to it. For a permanent fix, upgrade to a larger-diameter stackable system (three to four inches). This requires repotting but gives your plant room to grow for years. Some manufacturers sell “expansion sleeves” — larger mesh tubes that slide over the existing pole and get packed with fresh moss. Check if your brand offers this.
Section Connection Failures
Over time, the joints between stackable sections can loosen, crack, or separate. This creates gaps that roots won’t cross and instability that worsens with height. Plastic couplers become brittle with UV exposure. Metal threads strip. Bamboo swells and shrinks with humidity changes. Inspect connections every six months. Tighten threaded joints. Replace cracked plastic couplers (keep spares on hand). For friction-fit joints, wrap the connection with waterproof tape or a rubber coupling sleeve. If a section is damaged, the modular design lets you replace just that piece. Keep the old section as a spare for lower heights or cut it down for a smaller plant. This repairability is a major advantage over one-piece poles.
Advanced Techniques for Spectacular Growth
Double-Poling for Fuller Plants
One pole, one stem — that’s the basic approach. But Monsteras often produce multiple active growth points. Instead of cramming them all on one pole, install two or three stackable poles in a triangle formation within the same pot. Train each main stem to its own pole. This creates a stunning multi-trunk specimen with 360-degree foliage. The poles support each other structurally too — a triangle of three poles is incredibly stable. Space them evenly around the pot perimeter. Use a pot at least eighteen inches wide for three poles. Water and maintain each pole independently. The result looks like a mature rainforest specimen, with layered foliage at multiple heights. This technique works especially well for variegated Monsteras where you want to display every precious leaf.
Creating a Living Wall Effect
Take stackable supports horizontal. Mount a series of short stackable sections (twelve to eighteen inches each) on a wall in a grid pattern, using heavy-duty brackets. Train your Monstera to climb up one section, across to the next, up again — creating a zigzag or serpentine pattern. This transforms a single plant into a living tapestry. Use clear command hooks or small eye screws to guide stems horizontally between sections. The key is frequent tying — horizontal stems want to droop. Check ties weekly. This technique works best with mature plants that have multiple long stems. It’s high-maintenance but incredibly rewarding visually. Ensure the wall can handle moisture — use a waterproof backing board behind the brackets.
Combining Support Types
Why choose one? A central stackable moss pole for aerial root attachment and humidity, surrounded by a decorative metal trellis for lateral training and structural backup. The moss pole handles the main stem. The trellis catches side shoots and provides attachment points for ties. This hybrid approach gives you the physiological benefits of moss with the aesthetic flexibility of a trellis. Install the moss pole first, centered. Then position the trellis around it, securing the trellis legs in the soil. Tie the trellis to the moss pole at two or three heights for stability. As the plant grows, use the trellis to fan out stems for maximum light exposure. This is my personal favorite setup for specimen Monsteras.
Propagation While Climbing
Here’s a pro trick: your stackable support can double as a propagation station. When your Monstera produces a long stem with multiple nodes, instead of training the whole thing up, air-layer a node directly on the pole. Wrap damp sphagnum moss around a node, secure with plastic wrap and ties, wait for roots to form (two to six weeks), then cut below the new roots. The rooted section stays attached to the pole — instant new growth point. The mother plant continues climbing. You’ve effectively multiplied the growing tips without taking cuttings. This works beautifully on stackable moss poles because the moisture is already there. Just ensure the air-layer wrap doesn’t damage the pole mesh. I’ve turned single-stem Monsteras into bushy multi-head specimens in one season using this method.
Conclusion
Your Monstera deliciosa wants to climb. It’s written in its DNA, shaped by millions of years of rainforest evolution. When you provide a quality stackable support, you’re not just propping up a plant — you’re unlocking its genetic potential. The difference between a supported and unsupported Monstera is night and day: larger leaves, deeper fenestrations, stronger stems, healthier roots, and a plant that commands attention rather than asking for it. Stackable systems make this achievable for any grower, in any space, at any budget. Start with a single moss pole section. Add height as your plant earns it. Maintain it with simple weekly habits. Troubleshoot issues early. And don’t be afraid to get creative — double poles, living walls, hybrid setups, air-layering on the pole itself. Your Monstera will thank you with the kind of growth that makes other plant parents ask, “How did you do that?” The answer is simple. You gave it something to climb. And you made sure that something could grow right along with it.
Frequently Asked Questions
What diameter stackable pole is best for Monstera deliciosa?
Choose a pole with at least a 2-inch diameter. Narrower poles dry out too quickly and don’t provide enough surface area for aerial roots to attach properly. For mature plants, 3-4 inch diameters are ideal.
Do I need to replace the moss on my stackable pole?
Yes, the outer moss layer typically needs replacement every 1-2 years as it breaks down. With stackable systems, you can replace just the affected sections rather than the entire pole, which is a major advantage.
Can I use a stackable support for a Monstera that’s already large and unsupported?
Absolutely. Install the pole during the next repotting, or carefully work it in alongside the root ball. Gently tie the main stems to the pole, gradually training them upright over several weeks to avoid snapping.
Why are my Monstera’s aerial roots not attaching to the moss pole?
Common reasons include: the moss is too dry, ambient humidity is below 50%, the roots are old and no longer viable, or the plant needs more time. Keep the pole consistently moist, increase humidity, and gently press new roots against the surface.
How do I prevent mold on my stackable moss pole?
Ensure good air circulation, avoid overwatering the pole, and allow the surface to dry slightly between mistings. If mold appears, wipe with diluted hydrogen peroxide (1:4 ratio) and reduce watering frequency.
Can I make my own stackable moss pole?
Yes. Use PVC pipe sections (1-2 inch diameter) connected with couplers. Drill holes for root entry, wrap each section in sphagnum moss secured with landscape fabric and zip ties. This DIY approach costs a fraction of commercial systems.