How to Maintain Terracotta for Begonia
Terracotta pots are ideal for begonias because they provide excellent drainage and breathability. This guide covers everything you need to know about how to maintain terracotta for begonia health, from initial preparation and sealing to seasonal cleaning and storage tips that keep your pots and plants thriving year-round.
If you grow begonias, you already know these plants have personality. They want good drainage. They hate wet feet. They thrive when their roots can breathe. That is exactly why terracotta and begonias are such a perfect match. The porous clay pulls excess moisture away from the root zone. It lets air move through the pot walls. It creates the slightly dry, well-aerated conditions that begonias love.
But terracotta needs care too. The same porosity that helps your begonia also pulls minerals from water and fertilizer. It builds up white crusts. It can harbor fungi between seasons. In winter, trapped moisture freezes and cracks the clay. Learning how to maintain terracotta for begonia success means understanding the pot as much as the plant. This guide walks you through every step. From the day you bring a new pot home to the day you store it for winter. You will learn cleaning tricks, sealing strategies, moisture management, and seasonal routines that keep both pot and plant happy for years.
Key Takeaways
- Choose the right pot size: Select a terracotta pot 1-2 inches larger than the root ball to prevent waterlogging and give roots room to grow.
- Soak new pots before planting: Submerge new terracotta in water for 24 hours to saturate the clay and prevent it from wicking moisture away from begonia roots.
- Seal the exterior only: Apply a breathable sealant to the outside of the pot to reduce mineral buildup while keeping the interior porous for root health.
- Clean mineral deposits regularly: Scrub white salt crusts with a vinegar solution every few months to maintain porosity and prevent root damage.
- Monitor moisture daily: Terracotta dries faster than plastic. Check soil moisture every morning and water when the top inch feels dry.
- Protect from freeze-thaw cycles: Move pots indoors or wrap them in bubble wrap during winter to prevent cracking in cold climates.
- Sterilize between seasons: Bake empty pots at 200°F for 30 minutes or soak in a bleach solution to kill pathogens before replanting.
Quick Answers to Common Questions
How often should I water begonias in terracotta pots?
Check daily and water when the top inch of soil feels dry. Terracotta dries faster than plastic, so you may need to water every 1-3 days depending on climate and season.
Can I seal the inside of a terracotta pot for begonias?
No, sealing the interior blocks the porosity that makes terracotta beneficial for begonias. Only seal the exterior if desired, using a breathable penetrating sealer.
What is the white crust on my terracotta pot and is it harmful?
The white crust is efflorescence—mineral salts from water and fertilizer. It is not directly harmful but can clog pores over time. Clean with a vinegar solution periodically.
How do I prevent terracotta pots from cracking in winter?
Keep pots bone dry if they must freeze, or move them above freezing. For outdoor plants, wrap pots in bubble wrap, elevate on pot feet, and place against a protected wall.
Should I use gravel at the bottom of terracotta pots for drainage?
No, gravel creates a perched water table that keeps roots wetter. Use a piece of landscape fabric or a coffee filter over the drainage hole instead.
📑 Table of Contents
Why Terracotta Works So Well for Begonias
The Science of Porous Clay
Terracotta is fired at relatively low temperatures. Usually around 1,000 to 1,150 degrees Celsius. This leaves microscopic pores throughout the clay body. Water molecules move through these pores by capillary action. When soil is wet, moisture migrates toward the drier outer surface. There it evaporates. This constant evaporation creates a cooling effect. It also draws air into the root zone as water leaves. Roots get oxygen. They do not sit in stagnant water. For begonias, which are prone to root rot and fungal issues, this is a lifesaver.
Natural Temperature Regulation
Clay has thermal mass. In hot weather, the thick walls absorb heat during the day. They release it slowly at night. This buffers root temperature swings. Begonias prefer stable conditions. They struggle when roots bake in afternoon sun or chill on cold nights. A terracotta pot acts like insulation. Plastic pots cannot do this. They heat up fast. They cool down fast. They transmit temperature extremes directly to the root ball.
Weight and Stability
Mature begonias can get top-heavy. Especially cane-type and shrub-like varieties. A terracotta pot provides a low center of gravity. It will not tip over in a breeze. This matters outdoors. It matters on balconies. It matters if you have pets that brush past plants. The weight also means the pot stays put when you water. Lightweight plastic pots sometimes float or shift when you pour water in.
Aesthetic Harmony
Let us be honest. Terracotta looks good. The warm orange-brown tones complement begonia foliage. Green leaves pop against the earthy background. Pink, red, and white flowers stand out. As the pot ages, it develops a patina. Moss may grow on the rim. Mineral stains create character. The pot becomes part of the display. Not just a container.
Preparing a New Terracotta Pot for Your Begonia
The Critical Soaking Step
Never plant directly into a dry new terracotta pot. The clay is thirsty. It will pull water from the potting mix before your begonia roots can reach it. This creates a false dry zone. The soil looks moist. But the root ball is bone dry. Soak the pot first. Fill a bucket or tub with room temperature water. Submerge the pot completely. You will see bubbles rise from the clay. That is air escaping from the pores. Let it soak for at least two hours. Overnight is better. For large pots, 24 hours is ideal. The clay should feel cool and damp all the way through when you remove it.
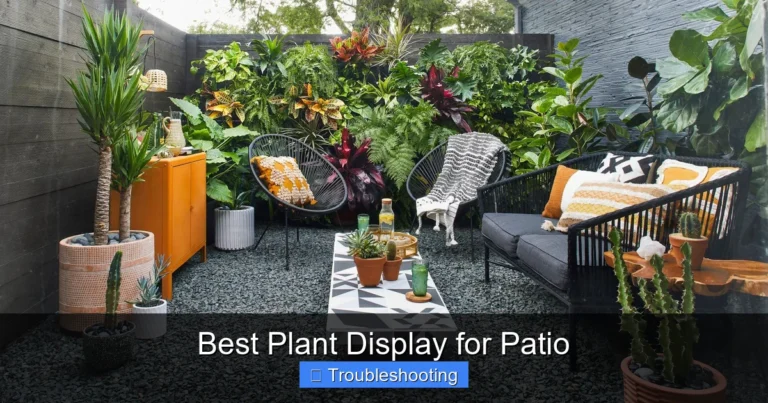
Visual guide about How to Maintain Terracotta for Begonia
Image source: cdn.apartmenttherapy.info
Checking for Defects
While the pot soaks, inspect it. Look for hairline cracks. Tap the rim gently with a knuckle. A clear ring means solid clay. A dull thud suggests a crack. Check the drainage hole. It should be clean and unobstructed. Some pots have rough edges around the hole. Sand these smooth with a piece of sandpaper. Sharp edges can cut roots or tear landscape fabric.
To Seal or Not to Seal
This is a debated topic. Sealing the exterior reduces mineral buildup on the outside. It slows evaporation slightly. It can extend the pot’s life in freeze-thaw climates. But sealing the interior is a mistake. It blocks the porosity that makes terracotta valuable for begonias. If you seal, use a breathable penetrating sealer. Not a film-forming paint or varnish. Apply only to the outside. Let it cure fully before adding soil. Many growers skip sealing entirely. They accept the patina. They clean the exterior when needed. This is the simplest approach. It preserves full breathability.
Adding a Drainage Layer
Place a piece of landscape fabric over the drainage hole. Or use a coffee filter. Or a shard of broken pottery curved side up. This keeps soil from washing out. It lets water drain freely. Do not use gravel. The old advice about a gravel layer is wrong. It creates a perched water table. Water sits above the gravel. Roots stay wetter. The fabric barrier is all you need.
Daily and Weekly Maintenance Routines
Mastering the Moisture Check
Terracotta changes how you water. The pot surface tells a story. A dark damp patch at the bottom means the soil is still wet. A uniformly light pot means it is dry throughout. Learn to read these signs. But do not rely only on the pot. Stick your finger in the soil. Top inch dry? Water. Still damp? Wait. Begonias prefer to approach dryness between waterings. They do not want to bone dry. They do not want constant moisture. The finger test is your best tool. Do it every morning. It takes three seconds.
Watering Technique Matters
Water thoroughly. Until water runs out the drainage hole. This flushes accumulated salts. It ensures the entire root ball gets moist. Do not water in small sips. That leaves dry pockets. It encourages shallow roots. After watering, empty the saucer. Do not let the pot sit in runoff. That defeats the drainage purpose. The pot will wick that water back up. Roots stay soggy.
Managing the Saucer Situation
Use a saucer. But manage it. Terracotta saucers are porous too. They will leak onto your furniture or floor. Place a waterproof tray under the saucer. Or use a plastic saucer inside the terracotta one. Check saucers after watering. Dump excess water within 30 minutes. Standing water breeds mosquitoes. It keeps the pot bottom constantly wet. That invites root rot and algae growth.
Fertilizing in Terracotta
Fertilizer salts build up faster in terracotta. The evaporation pulls dissolved minerals to the pot walls. They crystallize there. You see white crusts. This is normal. But too much salt burns roots. Use half-strength fertilizer. Apply every two weeks during active growth. Once a month, water with plain water until it runs freely. This leaches excess salts. If you see heavy crusting on the soil surface, scrape off the top half-inch. Replace with fresh mix.
Rotating for Even Growth
Begonias lean toward light. Rotate the pot a quarter turn each week. This keeps growth symmetrical. It also exposes all sides of the pot to air and light. Even drying prevents one side from staying damp longer. Damp sides grow algae and moss faster. Rotation is a simple habit. It pays off in plant shape and pot cleanliness.
Deep Cleaning and Mineral Removal
Understanding Efflorescence
That white powdery crust on your terracotta? It is called efflorescence. Minerals from water and fertilizer. Calcium. Magnesium. Potassium. They dissolve in soil water. The water migrates through the clay. It evaporates at the surface. Minerals stay behind. They crystallize. This is not harmful to the plant directly. But heavy buildup clogs pores. It reduces breathability. It can wick moisture too aggressively. Clean it periodically.
The Vinegar Soak Method
For empty pots, vinegar works wonders. Mix one part white vinegar to four parts water. Submerge the pot. Let it soak for 30 minutes to an hour. The acid dissolves mineral crystals. You will see fizzing. That is the reaction. After soaking, scrub with a stiff nylon brush. Not wire. Wire damages clay. Rinse thoroughly. Let the pot dry completely in sun. The vinegar smell vanishes as it dries. This restores porosity. It brightens the clay color.
Cleaning Planted Pots
You cannot soak a pot with a begonia in it. But you can clean the exterior. Mix the same vinegar solution in a spray bottle. Spray the outside. Let it sit five minutes. Scrub with a brush. Wipe with a damp cloth. Avoid getting vinegar on the soil. A little runoff is fine. But do not saturate the root zone. For stubborn interior rim crusts, use a damp cloth with vinegar. Wipe carefully. Do not let solution drip into soil.
Baking Soda for Algae and Moss
Green algae or moss on the pot? That means constant dampness and shade. Mix two tablespoons baking soda per quart of water. Spray affected areas. Let it sit. Scrub gently. Baking soda is mildly alkaline. It kills algae without harsh chemicals. Rinse well. Then address the cause. Improve air circulation. Reduce watering frequency. Move to brighter light. The pot will stay cleaner longer.
Pressure Washing Caution
Pressure washers clean terracotta fast. But they can damage old or thin-walled pots. The high pressure erodes clay. It widens pores. It can crack the pot. If you use one, keep the nozzle at least 18 inches away. Use a wide fan tip. Low pressure setting. Test on an inconspicuous area first. Hand scrubbing is safer. It takes longer. But it preserves the pot.
Seasonal Care and Overwintering
Spring Awakening
As days lengthen, your begonia wakes up. Check the pot for winter damage. Hairline cracks may have expanded. If a crack goes through the wall, the pot may fail. Repot into a sound container. Fresh soil. Clean pot. This is also the time to divide or upgrade pot size. If roots circle the bottom, go up one size. Not two. Begonias like snug roots. Too much soil stays wet too long.
Summer Heat Management
Terracotta dries fast in summer. You may water daily. Twice daily in extreme heat. Mulch the soil surface. Use fine bark. Or cocoa hulls. Or pebbles. Mulch slows evaporation. It keeps roots cooler. It reduces salt crusting on the soil surface. Group pots together. They create a humid microclimate. They shade each other’s sides. This reduces watering frequency.
Fall Transition
As temperatures drop, reduce watering. Begonias slow down. They use less water. The pot stays damp longer. Check before watering. Do not water on a schedule. Water on need. Stop fertilizing by early fall. Let the plant harden off. Clean the pot exterior before moving indoors. You do not want to bring pests or algae inside.
Winter Storage for Empty Pots
If you empty pots for winter, store them dry. Stack them with newspaper between each pot. This prevents rims from chipping. It allows air circulation. Store in a garage, shed, or basement. Above freezing is best. If they must freeze, ensure they are bone dry. Any moisture in pores expands as ice. That cracks clay. Dry clay survives freezing. Wet clay does not.
Winter Care for Indoor Begonias
Indoor air is dry. Terracotta wicks moisture fast. You may need to water more often than expected. But the plant is semi-dormant. It uses less water. Check soil daily. Water only when dry. Humidity trays help. Pebbles in a saucer with water. Pot sits on pebbles. Not in water. This raises local humidity. It reduces transpiration stress. Keep pots away from heating vents. Hot dry air bakes the clay. It pulls moisture from the root ball relentlessly.
Freeze Protection for Outdoor Pots
In marginal zones, you can leave pots out. But protect them. Wrap the pot in bubble wrap. Secure with tape. Cover the soil surface with mulch. Move against a south-facing wall. Under an overhang. The wall radiates stored heat. The overhang keeps rain and snow off. Do not let the pot sit on frozen concrete. Elevate on pot feet or bricks. This allows drainage. It breaks thermal contact with the cold ground.
Troubleshooting Common Terracotta Problems
Cracked Pots
Small hairline cracks on the exterior are often cosmetic. They do not go through the wall. Monitor them. If they widen, the pot is failing. For a crack that leaks, you have options. Silicone sealant on the outside can patch it. But this blocks pores in that area. Epoxy works too. But the repair will be visible. For valuable pots, consider the Japanese art of kintsugi. Gold epoxy highlights the crack. It becomes a feature. For growing begonias, a cracked pot that still holds soil is fine. Just watch for rapid drying patterns. If one side dries much faster, roots there may stress.
White Crust That Won’t Come Off
Heavy mineral buildup sometimes resists vinegar. Try a stronger solution. One part vinegar to one part water. Soak longer. Two hours. For extreme cases, use a commercial efflorescence remover. Follow label directions. These contain stronger acids. Wear gloves. Rinse extremely well. Any residue will harm your begonia. After cleaning, the clay may look lighter. Almost pink. That is fresh clay exposed. It will darken with use.
Green Mold Inside the Pot
Green or black fuzzy growth inside the rim? That is mold. It thrives in constant dampness. Remove the plant. Scrub the interior with a 10% bleach solution. One part bleach to nine parts water. Rinse until bleach smell is gone. Let dry in direct sun. UV kills remaining spores. Repot in fresh soil. Check your watering. You are likely keeping it too wet. Improve air flow around the pot.
Pot Feet Sticking to the Bottom
Terracotta pot feet sometimes fuse to the pot. Mineral deposits cement them. Do not force them. Soak the bottom in vinegar solution. Just the foot area. Use a shallow pan. Let it sit. The acid dissolves the minerals. Twist gently. They should release. To prevent this, lift pots occasionally. Or use plastic pot feet. They do not bond to clay.
Salt Burn on Roots
If your begonia shows brown leaf edges, stunted growth, or wilting despite moist soil, check for salt burn. Tip the plant out. Look at roots. Brown, crispy tips mean salt damage. The soil may have a white crust. Flush the pot. Run water through for five minutes. Let drain. Repeat next day. If severe, repot in fresh mix. Clean the pot with vinegar first. Going forward, fertilize less. Leach monthly.
Advanced Tips for Long-Term Success
Double Potting for Display
Want the look of terracotta but easier care? Double pot. Keep the begonia in a plastic nursery pot. Slip it into a decorative terracotta pot. Add sphagnum moss between pots. This hides the plastic. The terracotta still breathes. The moss holds humidity. You can lift the inner pot to check roots. To water. To clean. The outer pot stays clean. This is great for valuable or antique terracotta you do not want to risk.
Custom Soil Mixes for Terracotta
Standard potting mix may dry too fast in terracotta. Adjust it. Add more moisture-retentive ingredients. Coconut coir. Peat moss. Vermiculite. A good begonia mix for terracotta: two parts peat-based mix, one part perlite, one part fine orchid bark, half part worm castings. This holds moisture evenly. It drains well. It resists compaction. The bark creates air pockets. The castings feed slowly. Test your mix. Water it. See how long it stays moist. Adjust ratios for your climate.
Using Pot Feet and Risers
Always elevate terracotta pots. Pot feet. Bricks. Specialized risers. Even indoors. This allows air under the pot. The bottom dries evenly. No damp ring on your shelf. No water suction into the surface below. Outdoors, it prevents the pot from bonding to the patio. It lets earthworms and beneficial insects enter the drainage hole. They aerate the soil. They break down organic matter. It is a small thing. It makes a big difference.
Marking Pots for Rotation
If you grow many begonias, mark your pots. A dab of paint on the rim. A numbered tag. This helps you track which plants need repotting. Which had pest issues. Which are due for soil refresh. It turns maintenance into a system. Not a guessing game. Keep a simple notebook. Pot number. Date repotted. Variety. Notes. Your future self will thank you.
Repurposing Old Terracotta
Pots eventually crack beyond use. Do not throw them away. Break them into shards. Use as drainage material in larger pots. The curved pieces create excellent air gaps. Or use shards as plant markers. Write variety names with permanent marker. Stick in soil. They last years. Large broken pieces become garden edging. They mark paths. They create microclimates for small plants. Terracotta returns to the earth. It came from clay. It goes back to clay.
Conclusion
Learning how to maintain terracotta for begonia health is not complicated. It is a series of small habits. Soak new pots. Check moisture daily. Clean mineral buildup quarterly. Protect from winter freeze. Rotate for even growth. These actions take minutes. They reward you with healthier plants. Longer-lasting pots. A deeper connection to your growing space.
Terracotta has been used for thousands of years. The principles have not changed. Clay breathes. Water evaporates. Roots get air. Plants thrive. Your begonias will show their gratitude in lush foliage. Abundant blooms. Vigorous growth. The pots will age gracefully alongside them. Each season adds character. Each cleaning reveals fresh clay. Each crack tells a story. This partnership between plant and pot is gardening at its most elemental. Start today. Your begonias are waiting.
Frequently Asked Questions
How do I prepare a new terracotta pot before planting a begonia?
Soak the new pot in water for at least 2 hours (overnight is better) to saturate the clay pores. This prevents the dry pot from pulling moisture away from the begonia’s root ball after planting.
What is the best soil mix for begonias in terracotta pots?
Use a well-draining mix with extra moisture retention: two parts peat-based potting mix, one part perlite, one part fine orchid bark, and half part worm castings. This balances drainage with the faster evaporation of terracotta.
How do I clean mineral deposits off a terracotta pot with a plant in it?
Spray the exterior with a 1:4 vinegar-to-water solution, let sit 5 minutes, then scrub with a nylon brush and wipe clean. Avoid getting solution on the soil surface.
Can terracotta pots stay outside in freezing temperatures?
Only if completely dry. Any moisture in the clay pores will expand as ice and crack the pot. For planted pots, wrap in bubble wrap, elevate on feet, and place in a protected location.
Why does my terracotta pot develop green algae or moss?
Constant dampness and shade encourage algae growth. Improve air circulation, reduce watering frequency, and move to brighter light. Clean with a baking soda solution (2 tbsp per quart water).
How often should I repot a begonia in a terracotta container?
Repot annually in spring for young plants, every 2-3 years for mature specimens. Signs it’s time: roots circling the bottom, water running straight through, or declining vigor despite proper care.