Planting Coral Bells in the Fall
Fall is the ideal season for planting coral bells because cool temperatures reduce transplant shock while warm soil encourages root growth. Follow our complete guide for site selection, planting techniques, and winter protection to ensure your Heuchera thrives come spring.
There is something magical about planting coral bells in the fall. The air turns crisp. The summer crowds at garden centers thin out. And those gorgeous Heuchera plants? They are often on sale. But the real magic happens underground. While you sip cider and watch leaves change, your new coral bells are busy building strong root systems. They wake up in spring ready to put on a show that makes the neighbors jealous.
I learned this lesson the hard way. Years ago I waited until spring to plant a dozen coral bells. They struggled. They sulked. Half of them did not make it through that first summer heat wave. The next autumn I tried again. I planted in October. I mulched well. I basically ignored them until March. Every single plant survived. They bloomed earlier. They grew larger. They looked like they had been in the ground for years. That is the power of planting coral bells in the fall.
Key Takeaways
- Optimal timing: Plant coral bells 6 to 8 weeks before your first hard frost for best root establishment
- Soil preparation: Amend planting areas with organic matter to improve drainage and provide nutrients
- Proper depth: Keep the crown at soil level to prevent rot and ensure healthy growth
- Water wisely: Water deeply after planting and maintain consistent moisture until ground freezes
- Mulch protection: Apply 2 to 3 inches of mulch after the ground freezes to prevent frost heaving
- Variety selection: Choose cultivars suited to your hardiness zone and light conditions
- Spring payoff: Fall-planted coral bells emerge stronger and bloom earlier than spring plantings
Quick Answers to Common Questions
When is the latest I can plant coral bells in the fall?
Plant at least 6 to 8 weeks before your average first hard frost date. This gives roots time to establish before the ground freezes solid.
Do coral bells need full sun or shade?
Most varieties prefer morning sun with afternoon shade. Dark-leaved types tolerate more sun. Light-colored varieties need more shade to prevent scorching.
How deep should I plant coral bells?
Plant at the same depth they grew in their nursery pot. The crown where stems meet roots must sit at soil level. Planting too deep causes crown rot.
Should I fertilize coral bells when planting in fall?
No. Do not fertilize in fall. It encourages tender growth that winter will kill. Wait until spring when new growth emerges to apply a slow-release fertilizer.
How often should I water fall-planted coral bells?
Water deeply after planting. Then check soil moisture weekly. Water when the top inch feels dry. Continue until the ground freezes hard.
📑 Table of Contents
- Why Fall Is the Perfect Time for Planting Coral Bells
- Choosing the Right Coral Bells Variety for Your Garden
- Preparing Your Garden Bed for Fall Planting
- Step-by-Step Guide to Planting Coral Bells in the Fall
- Caring for Newly Planted Coral Bells Through Winter
- Common Mistakes to Avoid When Planting in Autumn
- Spring Care for Fall-Planted Coral Bells
- Design Ideas for Coral Bells in the Landscape
- Troubleshooting Common Coral Bells Problems
- Conclusion
Why Fall Is the Perfect Time for Planting Coral Bells
Nature’s Perfect Timing
Fall planting works with nature instead of against it. Soil temperatures stay warm long after air temperatures drop. Warm soil encourages root growth. Cool air reduces stress on foliage. Rainfall typically increases. This combination creates ideal conditions for planting coral bells in the fall. The plants focus energy below ground where it matters most.
Spring planting forces plants to juggle too many tasks. They must grow roots. They must produce leaves. They must flower. They must survive summer heat. All at once. Fall planting removes most of these pressures. The plant says thank you by establishing a massive root system before winter arrives.
Reduced Transplant Shock
Transplant shock kills more coral bells than anything else. Moving from a cozy nursery pot to garden soil is traumatic. Roots get damaged. Leaves lose moisture faster than roots can replace it. Fall weather minimizes this shock. Cooler temperatures mean less water loss through leaves. Higher humidity helps too. The plant recovers faster and stronger.
Head Start on Spring Growth
Fall-planted coral bells hit the ground running in spring. Their roots are already established. They do not waste weeks adjusting to their new home. They immediately channel energy into foliage and flowers. You get bigger plants. More blooms. Earlier color. It is like gaining a full growing season for free.
Better Selection at Nurseries
Smart gardeners know fall brings the best selection. Nurseries clear inventory before winter. You find unique varieties. Rare cultivars. Larger specimens. All at discounted prices. I once scored a ‘Caramel’ coral bells for half price in late October. It is now the star of my shade garden.
Pest and Disease Pressure Drops
Many pests go dormant or die off in fall. Fungal diseases slow down with cooler temperatures. Your new plants face fewer threats during their vulnerable establishment period. They enter winter clean and healthy. This advantage carries into the next growing season.
Choosing the Right Coral Bells Variety for Your Garden
Understanding Heuchera Diversity
Coral bells offer incredible variety. Foliage colors range from deep purple to bright lime green. Silver. Bronze. Peach. Near black. Some leaves have dramatic veining. Others show ruffled edges. Flowers vary too. White. Pink. Red. Cream. Some bloom for months. Others put on a brief but spectacular show. Knowing your options helps you choose wisely.
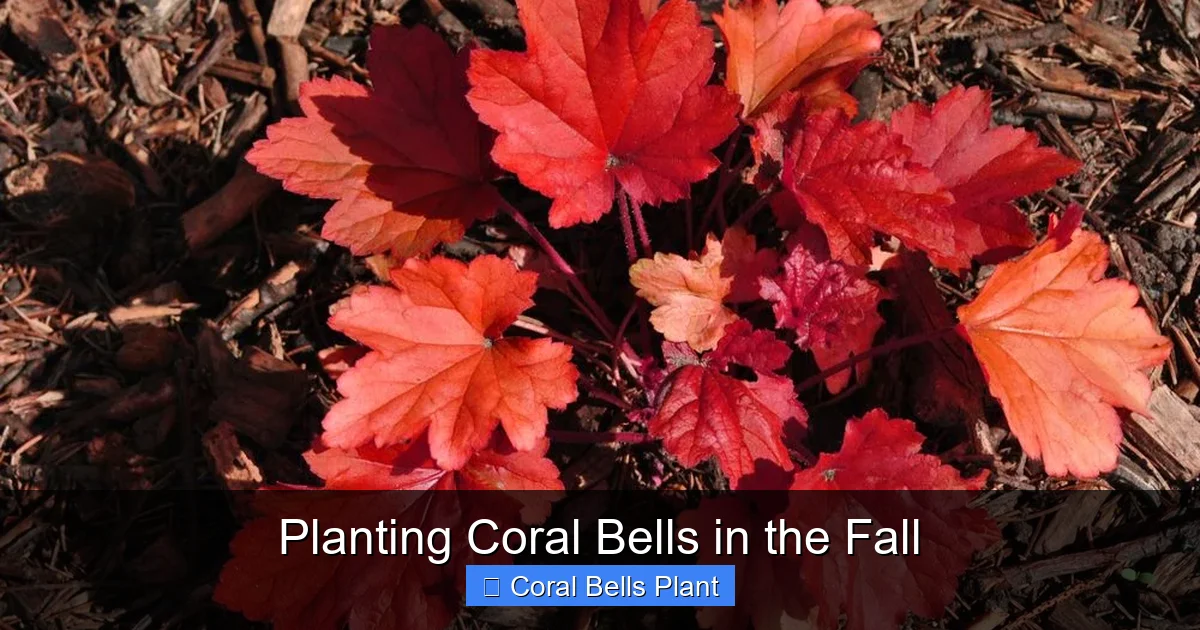
Visual guide about Planting Coral Bells in the Fall
Image source: gardenloversclub.com
Matching Varieties to Light Conditions
Light requirements vary significantly among cultivars. Dark-leaved varieties like ‘Palace Purple’ and ‘Obsidian’ tolerate more sun. They hold their color better with some direct light. Light-colored varieties like ‘Lime Rickey’ and ‘Citronelle’ prefer shade. Their foliage scorches in afternoon sun. Silver varieties like ‘Silver Scrolls’ need protection from intense light. Read labels carefully. Match the plant to your site.
Considering Your Hardiness Zone
Most coral bells thrive in zones 4 through 9. Some varieties handle zone 3 with protection. Others prefer the milder winters of zone 8 or 9. ‘Northern Exposure’ series was bred specifically for cold climates. ‘Southern Comfort’ handles heat and humidity better. Check your zone. Choose accordingly. This step prevents heartbreak come spring.
Foliage First Flowers Second
Modern breeding focuses on foliage. Flowers are a bonus. Decide what matters most. Want year-round foliage interest? Choose evergreen varieties like ‘Forever Purple’ or ‘Wild Rose’. Want a floral display? Look for heavy bloomers like ‘Paris’ or ‘Rave On’. Some varieties like ‘Fire Alarm’ offer both stunning foliage and prolific flowers.
Size Matters
Coral bells range from tiny 6-inch mounds to 2-foot wide specimens. ‘Little Cutie’ series stays compact. Perfect for containers. ‘Big Top’ series lives up to its name. Great for filling large spaces. Consider mature size when spacing plants. Crowding leads to poor air circulation. Disease follows. Give each plant room to shine.
Deer and Rabbit Resistance
Good news for wildlife-plagued gardens. Coral bells rank high on deer-resistant lists. Rabbits usually avoid them too. The fuzzy leaves and astringent taste deter browsing. No plant is completely proof. But coral bells are rarely the first choice for hungry critters. This makes them valuable in rural and suburban gardens alike.
Preparing Your Garden Bed for Fall Planting
Site Selection Strategies
Walk your property at different times of day. Note sun patterns. Morning sun with afternoon shade suits most varieties. Full shade works for lime and gold types. Avoid areas where water pools after rain. Coral bells hate wet feet. Crown rot kills quickly in soggy soil. Good drainage is non-negotiable.
Soil Testing Made Simple
Grab a soil test kit from your extension office or garden center. Coral bells prefer slightly acidic to neutral soil. pH 6.0 to 7.0 is ideal. The test reveals nutrient levels too. Amend based on results. This small step prevents big problems later. I test every new bed. Every single time. It saves money on failed plants.
Improving Drainage in Heavy Clay
Clay soil challenges many gardeners. Coral bells struggle in it. But you can fix it. Mix in coarse sand. Add compost. Incorporate fine pine bark. Create raised beds if drainage is truly terrible. Mound planting works too. Plant slightly high. Slope soil away from the crown. These tricks have saved countless coral bells in my clay-heavy garden.
Boosting Organic Matter
Compost is your best friend. Work 2 to 3 inches into the top 8 to 10 inches of soil. Leaf mold works beautifully. Well-rotted manure too. Organic matter improves drainage in clay. It retains moisture in sand. It feeds beneficial microbes. It creates the loose, crumbly texture coral bells love. Do not skip this step.
Removing Weeds and Grass
Clear the planting area completely. Remove grass roots. Dig out perennial weeds. Get every piece of bindweed. Every fragment of Bermuda grass. They will return with a vengeance if you do not. Lay cardboard or newspaper as a barrier. Cover with mulch. Wait a few weeks if possible. Then plant. Your future self will thank you.
Planning for Visual Impact
Arrange plants in their pots before digging. Step back. View from different angles. Consider bloom time. Foliage contrast. Height progression. Plant in odd numbers. Groups of three or five look natural. Create drifts rather than polka dots. Think about winter interest too. Evergreen varieties provide structure when everything else is brown.
Step-by-Step Guide to Planting Coral Bells in the Fall
Timing Your Planting Perfectly
Aim to plant 6 to 8 weeks before your average first hard frost. This window gives roots time to establish. In zone 5 that means late September to early October. Zone 6 pushes to mid-October. Zone 7 extends to early November. Zone 8 gardeners can plant through November. Check your local frost dates. Count backward. Mark your calendar.
Gathering Your Tools and Materials
Keep it simple. You need a garden spade or trowel. A garden fork for loosening soil. A watering can or hose with gentle nozzle. Mulch. Compost. Maybe a soil knife for tight spaces. Gloves. Kneeling pad if you are fancy. That is it. No special equipment required.
Preparing the Plant
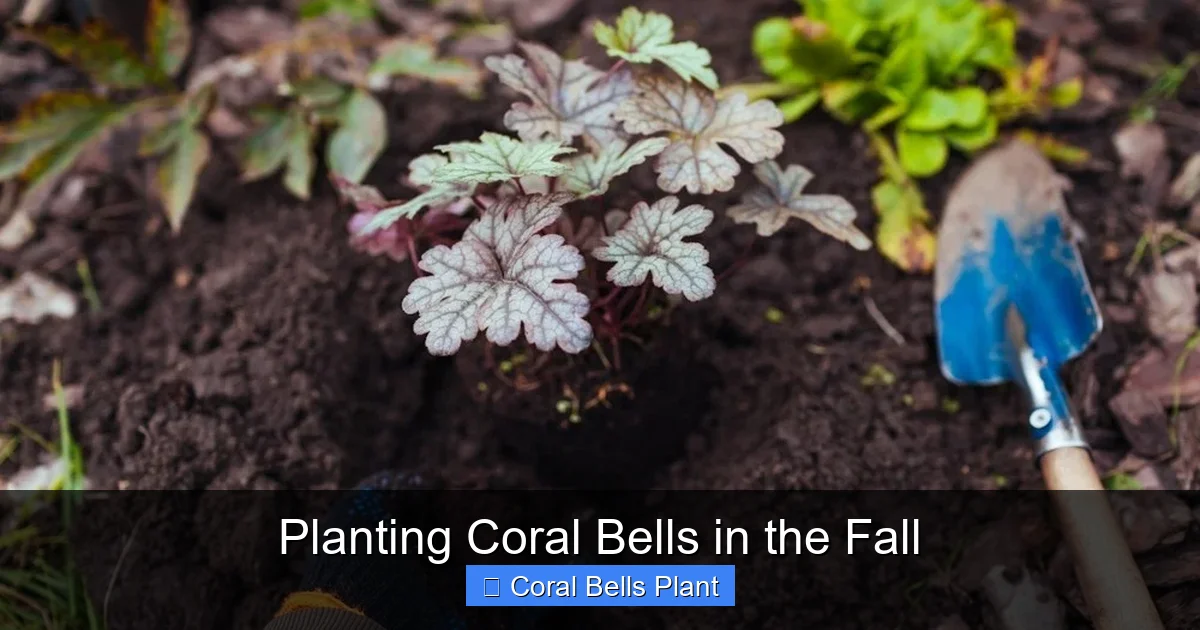
Water your coral bells thoroughly an hour before planting. Hydrated plants handle transplant better. Gently remove from the pot. Squeeze the sides. Tip upside down. Catch the root ball. Never pull by the stems. If roots circle the pot, tease them apart. Make vertical cuts if they are really bound. This encourages outward growth.
Digging the Perfect Hole
Dig a hole twice as wide as the root ball. Same depth. No deeper. The crown must sit at soil level. Planting too deep causes crown rot. Planting too shallow exposes roots. Width matters more than depth. Wide holes let roots spread easily. Rough up the sides with your fork. Smooth walls can trap roots.
Positioning and Backfilling
Place the plant in the hole. Check the crown level. Adjust by adding or removing soil. Spread roots outward. Backfill with your amended soil. Firm gently with your hands. Do not stomp. Air pockets kill roots. Water halfway through backfilling to settle soil. Finish backfilling. Water again thoroughly.
Spacing for Success
Space plants according to mature width. Most varieties need 12 to 18 inches between centers. Large varieties want 24 inches. Check the label. Proper spacing ensures good air flow. It reduces disease. It lets each plant develop its natural form. Crowded plants compete for water and nutrients. Nobody wins.
Watering In Your New Plants
Water deeply immediately after planting. Soak the root zone completely. This eliminates air pockets. It ensures soil contacts roots. Use a gentle stream. Avoid washing away soil. Check moisture daily for the first week. Water when the top inch feels dry. Consistent moisture is critical during establishment.
Applying Initial Mulch
Apply 1 to 2 inches of mulch after planting. Keep it away from the crown. Leave a 2-inch gap around the stems. Mulch conserves moisture. It moderates soil temperature. It suppresses weeds. Shredded leaves work great. Pine straw too. Bark chips are fine. Avoid piling mulch against the crown. That invites rot.
Caring for Newly Planted Coral Bells Through Winter
Watering Schedule Until Freeze
Keep watering until the ground freezes. Check soil moisture weekly. Water deeply when dry. Fall winds dry out plants faster than you think. Evergreen varieties lose moisture through leaves all winter. Hydrated roots survive freezing better. Dry roots die. This is the most common cause of winter loss.
When to Apply Winter Mulch
Wait until the ground freezes hard. Usually late November or December. Then add 2 to 3 inches of loose mulch. Straw works well. Pine needles too. Shredded leaves if you have them. This late mulch prevents freeze-thaw cycles. It keeps the ground frozen. It prevents frost heaving that pushes plants out of the ground.
Protecting from Winter Winds
Exposed sites need wind protection. Burlap screens work. Snow fencing too. Evergreen branches stuck in the ground create a natural shield. Focus on the windward side. Protection reduces desiccation. It prevents leaf scorch. It keeps plants looking good until spring.
Dealing with Frost Heaving
Check plants during warm spells in January and February. Frost heaving pushes crowns above soil. Exposed roots freeze and die. If you see heaving, gently press plants back down. Add more mulch. Water if soil is thawed and dry. Quick action saves plants.
Container Considerations
Potted coral bells need extra protection. Roots freeze faster in containers. Move pots to an unheated garage. Or sink them in the ground. Or group them together and mulch heavily. Water monthly if soil thaws. Do not let them dry out completely. Spring recovery is slower for container plants.
What Not to Do in Winter
Do not fertilize after August. Late fertilizer encourages tender growth. That growth dies in winter. Do not prune in fall. Leaves protect the crown. Remove dead foliage in early spring. Do not worry if leaves look rough. They will be replaced. Do not panic if plants heave slightly. Fix it when you see it.
Common Mistakes to Avoid When Planting in Autumn
Planting Too Late
This is the number one killer. Planting in late November in zone 5 dooms plants. Roots need time. Six weeks minimum. Eight is better. If you missed the window, overwinter in a protected spot. Plant first thing in spring. Do not gamble with frozen ground.
Burying the Crown
Crown rot is the silent killer. The crown is assassin. It strikes when soil covers the crown. Water collects there. Fungi move in. The plant collapses. Always plant at the same depth as the pot. Check after watering. Soil settles. Adjust if needed. Mulch pulls away from stems. Always.
Skipping Soil Preparation
Planting in unimproved clay or sand wastes money. The plant struggles. It never reaches potential. It dies slowly. Take the time. Amend the soil. Your plants will reward you for decades. Coral bells are long-lived perennials. Give them a good start.
Overwatering or Underwatering
Both kill. Soggy soil causes root rot. Dry soil causes desiccation. Check before watering. Stick your finger in the soil. Top inch dry? Water. Still moist? Wait. Simple. Consistent. This habit separates successful gardeners from frustrated ones.
Choosing Wrong Varieties for the Site
Sun lovers in shade get leggy. Shade lovers in sun burn. Zone 4 plants in zone 3 die. Heat-sensitive varieties in zone 9 melt. Read the tag. Research online. Ask nursery staff. Match plant to place. It sounds obvious. But we all get seduced by pretty leaves.
Neglecting Winter Protection
Fall planting is not “plant and forget.” Winter care matters. Mulch after freeze. Water until freeze. Check for heaving. Protect from wind. These small efforts make the difference between thriving and dead plants. I lost a beautiful ‘Berry Smoothie’ one winter because I forgot to mulch. Never again.
Crowding Plants
It is tempting to plant close for instant impact. Resist. Crowded plants compete. Air flow decreases. Disease increases. You end up dividing sooner. Or losing plants entirely. Space for mature size. Fill gaps with annuals if you need immediate fullness. Patience pays.
Spring Care for Fall-Planted Coral Bells
Removing Winter Mulch
Pull back heavy winter mulch in early spring. Do it gradually. A little at a time over a week. Sudden exposure shocks plants. Leave a light layer as weed suppression. Watch for new growth. It emerges from the crown. Do not damage those precious new leaves.
Cleaning Up Winter Damage
Remove dead or damaged leaves. Cut at the base. Use clean scissors. Do not pull. Pulling damages the crown. Leave any green leaves. They are photosynthesizing. The plant needs that energy. Fresh growth appears quickly once temperatures warm.
Spring Fertilizing
Apply a balanced slow-release fertilizer when new growth appears. Scratch it into the soil surface. Water well. Do not overdo it. Coral bells are light feeders. Too much fertilizer creates weak growth. It reduces winter hardiness. A single spring application is plenty.
Dividing Established Clumps
Fall-planted coral bells rarely need dividing the first spring. Wait 3 to 4 years. Then divide in early spring or fall. Dig the whole clump. Pull apart into sections. Each needs roots and crown. Replant immediately. Water well. Divisions establish fast.
Monitoring for Pests
Watch for vine weevil notches on leaves. Check roots for grubs if plants decline. Slugs love new spring growth. Use beer traps or diatomaceous earth. Deer rarely bother them. Rabbits might nibble new shoots. Spray repellent if needed. Healthy plants resist pests better.
Enjoying the Show
Sit back and enjoy. Your fall planting effort pays off. Foliage unfurls in stunning colors. Flower spikes rise. Hummingbirds visit. Bees buzz. The garden looks professional. You look like a genius. All because you planted coral bells in the fall.
Design Ideas for Coral Bells in the Landscape
Shade Garden Stars
Coral bells shine in shade. Pair them with hostas. The bold hosta leaves contrast beautifully with ruffled Heuchera foliage. Add ferns for texture. Japanese painted ferns echo silver varieties. Brunnera adds blue flowers. Hellebores bloom early. The combination provides year-round interest.
Container Combinations
Coral bells thrive in pots. Use them as the “filler” in thriller-filler-spiller designs. Pair with trailing ivy or creeping jenny. Add a tall grass or canna for height. The foliage color lasts all season. Unlike flowers that fade. Move containers to follow sun or shade as seasons change.
Border Edging Excellence
Line a pathway with coral bells. Their mounding habit creates a neat edge. Choose a single variety for uniformity. Or mix colors for a tapestry effect. ‘Caramel’ transitions beautifully from spring peach to summer amber. ‘Lime Rickey’ glows at dusk. Edging plants get viewed up close. Coral bells reward close inspection.
Rock Garden Gems
Tuck coral bells between rocks. They love the drainage. The stones warm the soil early. They keep roots cool in summer. Small varieties like ‘Petite Pearl Fairy’ fit perfectly. Their flowers attract pollinators to the rock garden. The foliage softens hard edges.
Woodland Garden Naturalizing
Plant drifts under deciduous trees. They get spring sun before leaves emerge. Summer shade protects foliage. Fall leaf litter provides natural mulch. Native Heuchera species like Heuchera americana naturalize beautifully. They self-sow gently. Create a living carpet.
Pollinator Garden Powerhouse
Hummingbirds adore coral bells flowers. Bees too. Plant near seating areas to watch the show. Choose heavy bloomers like ‘Paris’ or ‘Electric Lime’. The flowers last for weeks. Deadheading encourages more blooms. Your garden becomes a wildlife haven.
Troubleshooting Common Coral Bells Problems
Crown Rot Diagnosis and Treatment
Symptoms include wilting despite moist soil. Blackened crown. Foul smell. Leaves pull off easily. Act fast. Dig the plant. Wash roots. Cut away all rotted tissue. Dust with sulfur or cinnamon. Replant in fresh, well-draining soil. Water sparingly. Sometimes it works. Sometimes the plant is too far gone.
Leaf Scorch Solutions
Brown crispy leaf edges indicate too much sun or not enough water. Move the plant if possible. Or provide afternoon shade. Increase watering. Mulch heavily. Scorched leaves will not recover. But new growth will be fine if conditions improve. Prevention beats cure.
Poor Flowering Fixes
Lots of leaves but few flowers? Could be too much nitrogen. Too much shade. Wrong variety. Young plants flower less. Divide old woody clumps. Ensure adequate phosphorus. Some varieties are bred for foliage not flowers. Accept it or replace.
Fungal Disease Management
Powdery mildew appears as white dust on leaves. Rust shows orange pustules underneath. Improve air circulation. Water at soil level. Remove affected leaves. Apply neem oil or sulfur fungicide. Resistant varieties help. ‘Caramel’ and ‘Citronelle’ show good resistance.
Vine Weevil Control
Adults notch leaf edges at night. Larvae eat roots. Plants wilt and die. Check at night with a flashlight. Catch adults. Apply beneficial nematodes to soil in spring and fall. They kill larvae. Sticky barriers on pots catch climbers. Vigilance prevents disaster.
Winter Damage Recovery
Spring reveals winter damage. Brown leaves. Heaved crowns. Broken stems. Do not panic. Cut away dead material. Water well. Fertilize lightly. Most coral bells bounce back remarkably. They are tougher than they look. Give them time.
Conclusion
Planting coral bells in the fall is one of the smartest gardening moves you can make. The conditions are perfect. The plants are ready. The payoff is huge. You get stronger plants. Earlier blooms. Less work next spring. More money in your pocket from fall sales. What is not to love?
Remember the key points. Time it right. Prepare your soil. Plant at the correct depth. Water consistently. Mulch after the ground freezes. Choose varieties suited to your site. Avoid the common mistakes. Your coral bells will reward you with years of stunning foliage and delicate flowers.
I have planted coral bells in spring. I have planted in fall. Fall wins every time. The plants establish faster. They survive winter better. They explode with growth in spring. It is not even close. This autumn, head to your local nursery. Pick out some gorgeous Heuchera. Get them in the ground. Then sit back and wait for the magic. Your garden will thank you. Your future self will thank you. And those coral bells? They will show off like the stars they are.
Frequently Asked Questions
Can I plant coral bells in October?
Yes, October is ideal for planting coral bells in fall for most zones. Aim to plant 6 to 8 weeks before your first hard frost. In zones 5-6, early to mid-October works well. Zone 7 gardeners can plant through late October. Zone 8 can extend into November.
Do coral bells come back every year?
Yes, coral bells are perennial plants that return year after year in zones 4 through 9. They are long-lived when planted in well-draining soil with proper care. Some varieties may need division every 3 to 4 years to maintain vigor.
Will coral bells survive winter in containers?
Container-grown coral bells need extra winter protection. Roots freeze faster in pots. Move containers to an unheated garage, sink them in the ground, or group them together and mulch heavily. Water monthly during winter thaws.
Why are my coral bells dying after fall planting?
Common causes include planting too deep (crown rot), planting too late (insufficient root establishment), poor drainage, underwatering before freeze, or frost heaving. Check crown depth, ensure good drainage, and apply winter mulch after ground freezes.
Should I cut back coral bells in the fall?
No, do not cut back coral bells in fall. The foliage protects the crown through winter. Remove dead or damaged leaves in early spring when new growth appears. Evergreen varieties keep their leaves year-round.
What is the best mulch for coral bells in winter?
Loose, airy mulches work best. Straw, pine needles, shredded leaves, or evergreen boughs prevent compaction. Apply 2 to 3 inches after the ground freezes. Keep mulch away from the crown to prevent rot. Remove gradually in spring.