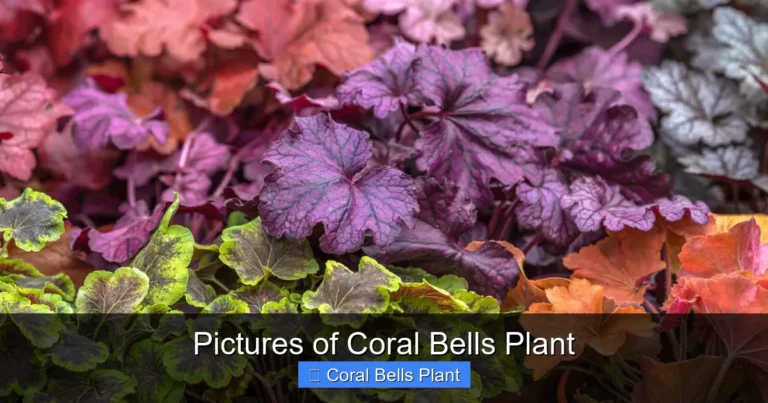
Planting Coral Bells in Containers
Coral bells thrive in containers when you choose the right pot, soil, and variety. This guide covers everything from planting steps to ongoing care for beautiful potted heuchera all season long.
Key Takeaways
- Choose wide, shallow pots: Coral bells have shallow roots and need good drainage to prevent crown rot.
- Use well-draining potting mix: A blend of peat, perlite, and compost works best for healthy root growth.
- Pick the right variety: Some coral bells handle sun better while others prefer deep shade.
- Plant at the correct depth: Keep the crown slightly above soil level to prevent rot and disease.
- Water consistently but carefully: Keep soil evenly moist but never soggy for optimal growth.
- Fertilize lightly in spring: A slow-release balanced fertilizer supports foliage color and flower production.
- Divide every few years: Refresh crowded plants in early spring or fall to maintain vigor.
Quick Answers to Common Questions
What size pot do coral bells need?
A 12-inch wide by 8-inch deep pot works for a single plant. Choose wider over deeper since roots spread horizontally.
Can coral bells take full sun in containers?
Dark-leaved varieties tolerate 4-6 hours of morning sun. Light-colored varieties need shade. Afternoon sun scorches most types.
How often should I water potted coral bells?
Check soil daily in summer. Water when the top 2 inches feel dry. Water thoroughly until it drains from the bottom.
Do coral bells come back every year in pots?
Yes, they are perennials. In zones 5+, protect pots in winter. In colder zones, move to an unheated garage or sink in the ground.
When should I divide my container coral bells?
Divide every 3-4 years in early spring when the center gets woody and growth slows. Each division needs roots and several growth points.
📑 Table of Contents
- Why Grow Coral Bells in Containers?
- Choosing the Right Container
- Selecting the Best Potting Mix
- Picking the Perfect Coral Bells Variety
- Step-by-Step Planting Guide
- Ongoing Care and Maintenance
- Troubleshooting Common Problems
- Design Ideas for Stunning Containers
- Dividing and Repotting
- Seasonal Care Calendar
- Conclusion
Why Grow Coral Bells in Containers?
Coral bells bring amazing color to any space. Their ruffled leaves come in purple, silver, chartreuse, caramel, and near-black shades. They work great in pots because they stay compact. You can move them to find perfect light. You can also bring them close to seating areas to enjoy their texture up close.
Container growing solves drainage problems. Heavy clay soil in gardens often causes root rot. A pot lets you control the soil mix completely. This is a huge advantage for these plants. They hate wet feet more than almost anything else.
Pots also let you play with design. Mix coral bells with trailing plants like creeping jenny. Add height with grasses or ferns. The color combinations are endless. You can change the look each season by swapping companion plants.
Choosing the Right Container
Size Matters Most
Coral bells have shallow root systems. They spread horizontally more than vertically. Choose a pot that is wider than it is deep. A 12-inch diameter pot works well for a single plant. For a mixed container, go 18 inches or wider. This gives roots room to spread without drowning in excess soil.
Depth of 8 to 10 inches is plenty. Deeper pots hold too much moisture at the bottom. This creates a perched water table. The roots sit in soggy conditions even when the top feels dry. Shallow wide pots mimic their natural growing conditions on rocky slopes.
Material Options
Terracotta pots are classic and breathable. They wick moisture away from roots. This helps prevent rot. But they dry out fast in summer heat. You will water more often. Glazed ceramic holds moisture longer. It comes in many colors to match your decor. It is heavier and harder to move.
Plastic pots are lightweight and affordable. Modern versions look like stone or terra cotta. They retain water well. This is good for forgetful waterers. Fabric grow bags are a newer option. They provide excellent drainage and air pruning. Roots stop circling when they hit the fabric edge. This creates a healthier root structure.
Drainage Is Non-Negotiable
Every pot needs drainage holes. Multiple holes are better than one. If your decorative pot lacks holes, use it as a cachepot. Place a plastic nursery pot with holes inside. Empty the outer pot after watering. Never let coral bells sit in standing water. Crown rot develops fast in those conditions.
Add a layer of coarse gravel or broken pottery at the bottom. This keeps soil from washing out. It does not improve drainage despite popular belief. The soil physics creates a perched water table above the gravel. But it does keep holes clear.
Selecting the Best Potting Mix
What Coral Bells Need
These plants want moisture-retentive but fast-draining soil. Think of a wrung-out sponge. Damp but not dripping. The mix must hold water for roots to access. Yet excess must drain away within minutes. Heavy garden soil fails both tests. It compacts and suffocates roots.
Commercial potting mixes vary widely. Avoid those with moisture control crystals. These hold too much water for coral bells. Avoid mixes heavy on fine peat. They become hydrophobic when dry. Water runs straight down the sides without wetting the root ball.
DIY Mix Recipe
Make your own blend for best results. Combine two parts high-quality peat moss or coconut coir. Add one part perlite or coarse sand. Mix in one part compost or worm castings. The peat or coir holds moisture. Perlite creates air pockets. Compost feeds slowly and adds beneficial microbes.
Coconut coir is more sustainable than peat. It rewets easily. It breaks down slower. Either works well. Perlite is lightweight volcanic glass. It does not decompose. Coarse sand works too but adds weight. Use builder’s sand, not play sand. Play sand is too fine and compacts.
Adding Slow-Release Fertilizer
Mix in a balanced slow-release fertilizer at planting time. Look for something like 14-14-14 or 10-10-10. Follow package rates for container size. This feeds steadily for three to four months. You avoid the feast-famine cycle of liquid feeding. The plants get consistent nutrition for steady growth.
Do not over-fertilize. Too much nitrogen creates lush green leaves. You lose the vibrant colors that make coral bells special. Excess fertilizer also burns tender roots. It builds up salts in the soil. Flush pots monthly with clear water to prevent salt accumulation.
Picking the Perfect Coral Bells Variety
Sun Tolerance Varies Widely
Not all coral bells handle the same light. This is crucial for container success. Dark-leaved varieties like ‘Palace Purple’ or ‘Obsidian’ tolerate more sun. They keep their color best with four to six hours of morning light. Afternoon sun in hot climates will scorch them.
Light-colored varieties need more shade. Chartreuse ‘Lime Rickey’ or silver ‘Silver Scrolls’ burn easily. They prefer dappled shade or morning sun only. Deep shade works but reduces flowering. Full deep shade makes leaves larger but less colorful. Know your variety before placing the pot.
Top Varieties for Containers
‘Caramel’ is a standout for pots. Its amber leaves shift to peach and gold through seasons. It handles heat and humidity better than most. ‘Berry Smoothie’ offers rose-pink leaves that darken to purple. It stays compact at 8 to 10 inches tall. ‘Forever Purple’ keeps intense color all season. It resists fading in summer heat.
‘Electric Lime’ brings neon chartreuse to shady spots. It glows in low light. ‘Midnight Rose’ has dark purple leaves splashed with hot pink. The pattern changes as leaves mature. ‘Delta Dawn’ shows gold leaves with red centers. It is a vigorous grower that fills pots fast.
Consider Flower Power Too
Most people grow coral bells for foliage. But the flowers add delicate charm. Tiny bells on wiry stems rise above leaves in late spring. Colors range from white to pink to coral red. ‘Green Spice’ has green leaves with silver overlay and pink flowers. ‘Paris’ reblooms through summer with rose-pink flowers.
If you want flowers for cutting, choose varieties bred for bloom. The ‘Dolce’ series offers strong flowering. ‘Appletini’ has ruby-red flowers over chartreuse leaves. Deadhead spent stems to encourage rebloom. Cut flowers last about a week in vases.
Step-by-Step Planting Guide
Timing Your Planting
Spring is ideal for planting coral bells in containers. Soil warms up. Roots establish before summer heat. Nurseries have the best selection. Fall works well too in zones 6 and warmer. Roots grow through winter. Plants burst forth in spring. Avoid planting in summer heat or winter freeze.
If you buy plants in summer, keep them in nursery pots. Place in bright shade. Water daily. Plant in early fall when temperatures drop. This reduces transplant shock. The plants focus on roots not top growth.
Preparing the Pot
Clean used pots with a 10% bleach solution. Rinse well. This kills lingering pathogens. Cover drainage holes with mesh screen or coffee filters. This keeps soil in while letting water out. Do not use gravel layers. They hinder drainage as explained earlier.
Fill pot halfway with your potting mix. Tamp lightly with your fingers. Do not pack hard. Roots need air spaces. Create a mound in the center. This supports the crown at proper height. The crown should sit slightly above the final soil line.
Removing the Plant
Water the nursery pot an hour before transplanting. Moist root balls hold together better. Turn the pot upside down. Tap the rim on a hard surface. The plant should slide out. If roots circle the bottom, gently tease them apart. Use your fingers or a cultivator tool. This encourages outward growth.
Check the crown. It is where leaves meet roots. This must stay above soil. Buried crowns rot quickly. If the plant sits too deep in its nursery pot, remove excess soil. Expose the crown before planting.
Positioning and Backfilling
Set the plant on the central mound. Spread roots downward and outward. The crown should sit half an inch above the pot rim. This allows for watering space. It also prevents soil from washing over the crown. Adjust the mound height as needed.
Fill around roots with potting mix. Work it in with fingers. Eliminate air pockets. Do not bury the crown. Stop when soil reaches the crown base. Firm gently. Water thoroughly until water runs out drainage holes. This settles the soil. Add more mix if it settles below the crown.
Mulching the Surface
Apply a thin layer of fine mulch. Shredded bark or leaf mold works well. Keep mulch away from the crown. Leave a one-inch gap. Mulch conserves moisture. It moderates soil temperature. It prevents soil splash on leaves during watering. This reduces fungal issues.
Avoid thick mulch layers. They hold too much moisture against stems. One inch is plenty. Replenish as it breaks down. Do not use rubber mulch or stones. They heat up roots in summer. They do not improve soil as organic mulch does.
Ongoing Care and Maintenance
Watering Wisdom
Consistent moisture is key. Check soil daily in summer. Stick your finger in two inches. If dry at that depth, water. Water until it flows from drainage holes. This ensures the whole root ball gets wet. Light sprinklings create shallow roots. They dry out faster.
Morning watering is best. Leaves dry before night. Wet leaves overnight invite fungal diseases. Water the soil, not the foliage. Use a watering can with a long spout. Or a wand attachment on a hose. Drip irrigation works great for multiple pots.
Reduce watering in fall. Plants enter dormancy. Wet cold soil kills roots. In winter, water only during warm dry spells. Check monthly. The soil should not be bone dry. But never soggy. Elevate pots on pot feet. This improves drainage and air flow.
Feeding Schedule
The slow-release fertilizer at planting lasts three to four months. In early summer, top-dress with compost. Scratch a half-inch layer into the surface. Water it in. This gives a gentle mid-season boost. Alternatively, use liquid fertilizer at quarter strength every two weeks.
Stop fertilizing by late July. New growth needs time to harden before frost. Tender growth freezes easily. In warm climates, you can feed lightly through fall. But always use low nitrogen formulas. High nitrogen reduces winter hardiness.
Grooming for Good Looks
Remove damaged or yellow leaves anytime. Pull them gently from the base. This improves air flow. It removes disease entry points. It keeps the plant looking fresh. In early spring, do a major cleanup. Remove all winter-damaged foliage. Cut back to fresh growth at the crown.
Deadhead flower stems after blooming. Cut at the base. This redirects energy to leaves. Some varieties rebloom if deadheaded promptly. Leave a few stems if you want seeds. But seedlings rarely match the parent. Most coral bells are hybrids.
Winter Protection
Containers freeze faster than ground soil. Roots die at temperatures that in-ground plants survive. In zones 5 and colder, move pots to an unheated garage. Or sink them in the ground up to the rim. Mulch heavily with straw or leaves. Cover with evergreen boughs.
In zones 6 to 7, group pots against a protected wall. Mulch heavily. Wrap pots with bubble wrap or burlap. This insulates roots. Water before hard freezes. Moist soil insulates better than dry. Do not fertilize in winter. Let plants rest.
Troubleshooting Common Problems
Crown Rot
This is the number one killer. Symptoms include wilting despite wet soil. Leaves turn yellow then brown. The crown feels mushy. Black rot spreads up stems. It happens from buried crowns, poor drainage, or overwatering. Prevention is everything.
If caught early, dig up the plant. Cut away all rotted tissue. Dust with fungicide. Repot in fresh sterile mix. Keep drier than normal. Many plants recover if the roots are still white and firm. But advanced cases are fatal.
Leaf Scorch
Brown crispy edges indicate too much sun or heat. Move the pot to shadier spot. Increase watering frequency. Do not fertilize stressed plants. Remove badly damaged leaves. New growth will adapt to the light level. Morning sun is gentler than afternoon.
Reflected heat from walls or pavement intensifies scorch. Light-colored surfaces bounce heat up. Move pots a few feet away. Use larger companion plants to cast shade. A shade cloth during heat waves helps.
Pest Issues
Vine weevils are the main pest. Adults notch leaf edges at night. Larvae eat roots underground. Plants wilt and die suddenly. Check roots if a plant declines inexplicably. White C-shaped grubs confirm the diagnosis. Treat with beneficial nematodes in spring and fall.
Slugs and snails love the tender leaves. They leave slime trails and irregular holes. Use beer traps or copper tape on pot rims. Diatomaceous earth works when dry. Hand pick at night with a flashlight. Iron phosphate baits are safe for pets.
Aphids cluster on new growth and flower stems. They distort leaves and spread viruses. Blast off with strong water spray. Insecticidal soap works on contact. Ladybugs and lacewings eat them naturally. Avoid broad-spectrum insecticides.
Fungal Diseases
Powdery mildew appears as white dust on leaves. It thrives in humid, stagnant air. Space pots for air flow. Water at soil level. Remove affected leaves. Spray with neem oil or potassium bicarbonate. Resistant varieties help.
Rust shows as orange pustules on leaf undersides. Leaves yellow and drop. Remove infected leaves immediately. Do not compost. Improve air circulation. Avoid overhead watering. Fungicides help if applied early.
Design Ideas for Stunning Containers
Monochromatic Magic
Plant three shades of one color family. Deep purple ‘Black Pearl’, medium ‘Plum Pudding’, and silver ‘Silver Scrolls’. The silver reflects light. The purples create depth. Add a trailing silver plant like dichondra. This sophisticated look works in modern or formal settings.
For warm tones, combine ‘Caramel’, ‘Peach Flambe’, and ‘Georgia Peach’. Add golden creeping jenny to spill over edges. The chartreuse highlights the peach tones. This glows in evening light. Perfect for a patio dining area.
Bold Contrasts
Pair dark leaves with bright partners. ‘Obsidian’ coral bells with chartreuse hakone grass. The grass moves in breeze. The coral bells stay mound-shaped. Add white calibrachoa for flowers all summer. This high-contrast combo stops traffic.
Try ‘Lime Rickey’ with deep purple sweet potato vine. The vine trails dramatically. The coral bells hold the center. Add pink petunias for flower power. This combination loves morning sun. Afternoon shade keeps colors vivid.
Shade Garden Elegance
Create a woodland vignette. Use ‘Berry Smoothie’ coral bells as the star. Surround with Japanese painted fern. The fern’s silver and burgundy fronds echo the coral bells. Add white foamflower for spring blooms. Plant snowdrops or crocus bulbs underneath for late winter surprise.
For year-round interest, add evergreen carex sedges. ‘Ice Dance’ has white-edged leaves. ‘Everillo’ is bright gold. These grasses stay attractive in winter. The coral bells may die back but return in spring. The container always has presence.
Dividing and Repotting
When to Divide
Coral bells benefit from division every three to four years. The center gets woody and dies out. Flowering decreases. Leaves get smaller. Early spring is best. Just as new growth emerges. Fall works too, six weeks before ground freeze.
Signs it’s time: the plant looks like a donut. Green only on the edges. Bare center. Reduced vigor. Fewer flowers. The pot feels tight. Roots circle the bottom. Water runs straight through.
How to Divide
Remove the plant from its pot. Shake off excess soil. Wash roots gently with a hose. You can see natural divisions. Each section needs healthy roots and several growth points. Use a clean sharp knife. Cut between crowns. Each division should be fist-sized or larger.
Trim any dead or rotted roots. Cut back foliage by half. This reduces water loss while roots recover. Replant divisions in fresh mix. Water well. Keep in bright shade for two weeks. Do not fertilize for a month. They will establish quickly.
Repotting Without Dividing
If the plant is not overcrowded, just repot. Move up one pot size. Two inches wider maximum. Too large a pot holds excess water. Follow the same planting steps. Fresh mix revitalizes the plant. Do this every two years even without dividing.
Top-dressing is an alternative. Remove the top two inches of old mix. Replace with fresh compost-enriched mix. This works for large pots that are hard to move. Do it annually in spring. It refreshes nutrients and improves texture.
Seasonal Care Calendar
Spring Awakening
March to April: Clean up winter damage. Remove dead leaves. Apply slow-release fertilizer. Top-dress with compost. Divide if needed. Water as growth resumes. Watch for late frosts. Cover tender new leaves if freeze threatens.
May: Peak foliage color. Flower stems emerge. Deadhead if desired. Monitor for pests. Aphids love new growth. Water consistently. Mulch if not done earlier. Enjoy the show.
Summer Maintenance
June: Flowers bloom. Cut for bouquets. Deadhead spent stems. Watch for leaf scorch in heat. Move pots if needed. Water daily in extreme heat. Check soil moisture morning and evening.
July: Foliage may fade in intense sun. Ensure adequate shade. Continue watering. Stop fertilizing. Remove any diseased leaves promptly. Air flow prevents mildew.
August: Hottest month. Prioritize water. Morning only. Reduce stress. No fertilizing. No dividing. Just maintenance. Plan fall changes.
Fall Preparation
September: Cooler nights return. Colors intensify. Great time to plant new containers. Divide established plants. Add fall companions like ornamental kale. Reduce watering frequency.
October: Final cleanup. Remove spent flowers. Cut back any ratty foliage. Apply winter mulch. Move tender pots to protected spots. Stop watering unless very dry.
November: Dormancy begins. Pots in cold frames or garages. Check monthly for moisture. No fertilizer. No pruning. Let nature rest.
Winter Rest
December to February: Minimal care. Water only during warm dry spells. Check for heaving from freeze-thaw cycles. Press plants back gently. Brush heavy snow off to prevent breakage. Dream of spring.
Conclusion
Planting coral bells in containers rewards you with months of incredible foliage color. These versatile plants ask for little but give so much. The key points are simple. Choose wide shallow pots with excellent drainage. Use a light, airy potting mix. Match the variety to your light conditions. Plant high, keeping the crown proud. Water consistently but never soggy. Feed lightly. Protect from winter extremes.
Start with one pot this season. Pick a variety that catches your eye. Follow the steps in this guide. You will see why gardeners become obsessed with these plants. The color range is addictive. The texture is irresistible. The care is manageable. Before you know it, you will have a collection. Each pot a jewel in your outdoor space.
Container gardening with coral bells lets you garden anywhere. Balcony, patio, porch, or driveway. No ground required. No heavy digging. Just beauty in a pot. Happy planting.
Frequently Asked Questions
What is the best potting mix for coral bells in containers?
Use a well-draining mix of two parts peat moss or coconut coir, one part perlite, and one part compost. Avoid moisture-control mixes and heavy garden soil which retain too much water and cause crown rot.
Can I grow coral bells indoors as houseplants?
Coral bells can grow indoors temporarily but prefer outdoor conditions. They need bright indirect light, cool temperatures, high humidity, and a winter dormancy period. They typically decline without seasonal changes.
Why are my coral bells leaves turning brown and crispy?
Brown crispy edges usually indicate too much sun, heat stress, or underwatering. Move the pot to a shadier location, increase watering frequency, and ensure the soil stays evenly moist but not soggy.
How do I prevent vine weevils in my potted coral bells?
Apply beneficial nematodes to the soil in spring and fall. These microscopic worms kill vine weevil larvae. Check roots annually when repotting. Remove any white C-shaped grubs you find.
Should I cut back coral bells in the fall?
Leave foliage in place through winter. It protects the crown from freeze-thaw cycles. Clean up dead leaves in early spring when new growth emerges. This provides better winter survival.
Can I plant coral bells with other plants in the same container?
Yes, coral bells make excellent container companions. Pair them with shade-loving plants like ferns, hostas, foamflower, carex sedges, or trailing plants like creeping jenny. Ensure all plants share similar light and water needs.