Oxalis Root Rot Treatment
Oxalis root rot treatment starts with early detection of yellowing leaves and mushy roots. Quick action like repotting in fresh, well-draining soil and adjusting watering habits can save your plant from permanent damage.
There is nothing quite like the sinking feeling of watching your favorite oxalis decline. One day the shamrock leaves are perky and purple-green. The next they droop, yellow, and refuse to bounce back after watering. You check the soil. It feels wet. You water anyway, thinking the plant is thirsty. The problem gets worse. Sound familiar? You are not alone. Root rot is the number one killer of indoor oxalis, and it sneaks up fast. The good news? If you catch it early and follow a solid oxalis root rot treatment plan, your plant can make a full comeback.
This guide walks you through every step. We cover how to spot the warning signs, why rot happens in the first place, and the exact process to rescue your plant. You will learn which tools you need, which soil mix works best, and how to adjust your care routine so rot never returns. Whether you grow the classic purple shamrock (Oxalis triangularis), the green four-leaf variety (Oxalis tetraphylla), or any of the other 500-plus species, the principles stay the same. Healthy roots equal a happy plant. Let us dig in.
Key Takeaways
- Early detection saves plants: Yellow leaves, wilting despite wet soil, and foul-smelling roots signal root rot before it becomes fatal.
- Overwatering is the main cause: Oxalis needs soil that dries between waterings; soggy conditions invite fungal pathogens like Pythium and Phytophthora.
- Repotting is essential: Remove all mushy, dark roots, treat healthy tissue with fungicide, and replant in sterile, well-draining mix.
- Pot choice matters: Use containers with drainage holes and avoid oversized pots that hold excess moisture around roots.
- Adjust care after treatment: Water only when the top inch of soil feels dry, provide bright indirect light, and ensure good air circulation.
- Propagation is a backup plan: If the main plant fails, healthy leaf stems can root in water or moist perlite to start new plants.
- Prevention beats cure: Consistent moisture monitoring, proper soil mix, and seasonal watering adjustments keep root rot away long-term.
Quick Answers to Common Questions
How do I know if my oxalis has root rot?
Look for yellowing leaves, wilting despite wet soil, mushy dark roots, and a sour smell. Gently unpot to confirm.
Can I save an oxalis with no roots left?
If the bulbs or rhizomes are still firm, yes. Trim all rot, treat with fungicide, and replant in barely moist perlite until new roots form.
What is the best soil mix to prevent oxalis root rot?
Use two parts peat-based potting soil, one part coarse perlite, one part fine orchid bark, plus a handful of horticultural charcoal for drainage and aeration.
How often should I water oxalis after treating root rot?
Water only when the top inch of soil feels dry. Check with your finger every two to three days. Never water on a fixed schedule.
Should I fertilize my oxalis right after repotting for root rot?
No. Wait at least four weeks until you see new growth. Then use quarter-strength balanced fertilizer monthly.
📑 Table of Contents
Understanding Oxalis Root Rot
What Is Root Rot?
Root rot is a disease caused by soil-borne fungi and water molds. The most common culprits for oxalis are Pythium, Phytophthora, Rhizoctonia, and Fusarium. These pathogens exist in almost all soils. They only become a problem when conditions favor them. What conditions? Excess moisture and low oxygen. When soil stays soggy, roots suffocate. They die back. The pathogens then invade the dead tissue and move into living roots. The cycle accelerates. Within days a healthy root system turns to brown mush.
Why Oxalis Is Vulnerable
Oxalis grows from small bulbs or rhizomes just below the soil surface. These storage organs hold water and nutrients. They are adapted to seasonal dormancy. In nature, the soil dries out between rains. Indoors, well-meaning owners water on a schedule. The soil never dries. The bulbs rot from the bottom up. The thin fibrous roots have no defense. Once the rot reaches the bulb, the plant collapses. Understanding this biology helps you see why oxalis root rot treatment must address both the infection and the environment.
Common Myths
Myth: “Oxalis likes constant moisture because it looks tropical.” False. Most cultivated oxalis come from regions with distinct wet and dry seasons. Myth: “Yellow leaves always mean nitrogen deficiency.” False. Yellowing with wet soil usually means root failure, not hunger. Myth: “A bigger pot gives roots room to grow.” False. Oversized pots hold water too long. They are a rot trap.
Identifying Symptoms Early
Above-Ground Clues
The first signs appear in the foliage. Leaves lose their vibrant color. They turn pale green, then yellow, starting at the base of the plant. Stems become soft and may bend at the soil line. The whole plant looks wilted even though the soil is damp. This “false wilt” is a classic red flag. The roots cannot take up water because they are rotting. The plant dehydrates from the inside out. Flowers may fail to open or drop prematurely. Growth slows or stops completely.
Visual guide about Oxalis Root Rot Treatment
Image source: i.ytimg.com
Below-Ground Evidence
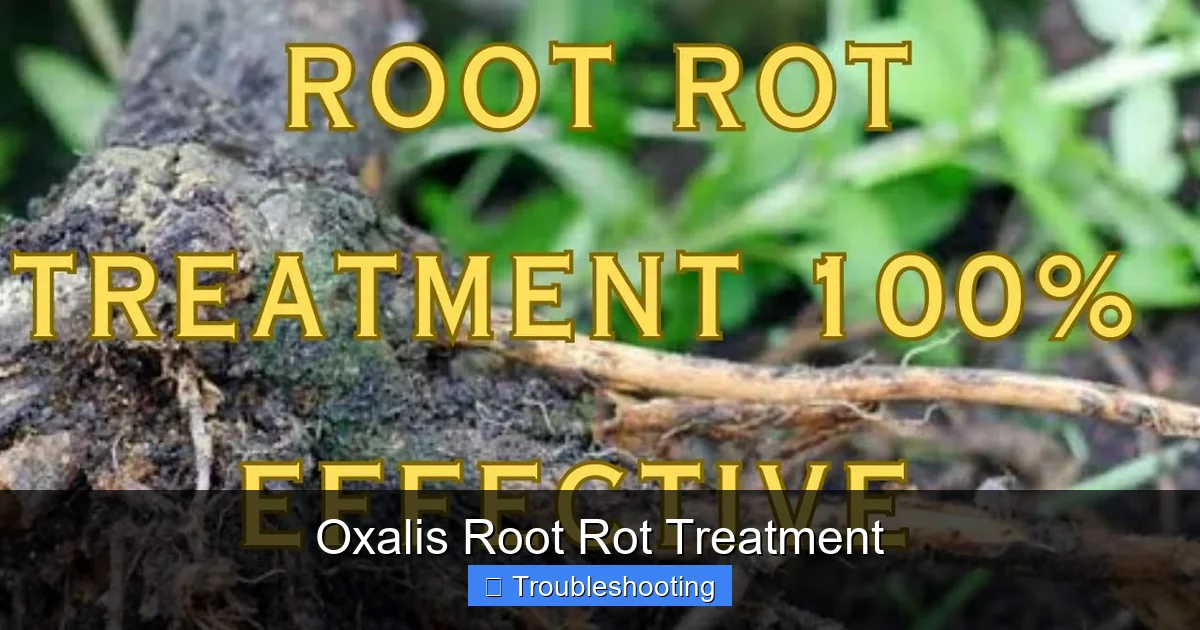
You must inspect the roots to confirm. Gently slide the plant out of its pot. Healthy oxalis roots are white or pale tan, firm, and crisp. They hold the soil in a loose root ball. Rotted roots are dark brown or black. They feel mushy, slimy, or hollow. The outer cortex slips off the central stele when tugged — a telltale sign called “root sloughing.” A sour, swampy, or mushroomy smell often accompanies advanced rot. The bulbs or rhizomes may show soft, sunken, dark spots.
Stages of Severity
Stage 1: Only the smallest feeder roots are affected. The plant looks slightly off-color. Recovery is nearly guaranteed with prompt action. Stage 2: Significant portions of the root system are blackened. Some bulbs are soft. The plant wilts daily. Aggressive treatment can still work. Stage 3: Most roots are gone. Bulbs are mushy. Stems collapse at the base. Survival is unlikely, but you may salvage a few healthy bulblets for propagation.
Immediate Rescue Steps
Gather Your Supplies
Before you unpot, have everything ready. You need: clean scissors or pruning shears (sterilized with rubbing alcohol), a new or sterilized pot with drainage holes, fresh well-draining potting mix (recipe below), a small brush or chopstick, hydrogen peroxide (3%) or a copper-based fungicide, gloves, newspaper or a tarp for mess, and a watering can with a narrow spout. Work in a shaded, well-ventilated area. Speed matters. Exposed roots dry out fast.
Unpot and Assess
Tip the pot sideways. Tap the rim against a sturdy surface. Slide the root ball out. Do not yank the stems. If the plant is stuck, run a knife around the inside edge. Once free, gently shake off loose soil. Use the brush or chopstick to tease away more medium. Rinse the roots under lukewarm running water if they are heavily coated. This reveals the true extent of damage. Take a moment. Photograph if you want a record. Then move to surgery.
Trim Away Rot
Cut off every root that is brown, black, mushy, or hollow. Cut back to firm, white tissue. Sterilize your blades between cuts if you see active fungal fuzz. If a bulb or rhizome has a soft spot, slice that section away until only firm tissue remains. Dust the cut surfaces with cinnamon powder (a natural antifungal) or dip them in a hydrogen peroxide solution (one part peroxide to four parts water) for thirty seconds. Let them air dry for fifteen minutes. This drying step helps callus the wounds.
Treat Remaining Healthy Tissue
After trimming, spray or dip the entire root system and bulb surfaces with a copper fungicide or a hydrogen peroxide rinse. Follow label rates for the fungicide. For peroxide, use the same one-to-four ratio. This kills lingering spores. Do not skip this. Even roots that look clean can harbor microscopic pathogens. Let the plant sit on clean paper towels while you prepare the new pot.
Repotting for Recovery
Choosing the Right Pot
Select a pot just large enough to hold the remaining root ball with about one inch of fresh mix around the sides. Terra cotta is ideal. It wicks moisture away from the root zone. Plastic works if you are disciplined with watering. Ensure multiple drainage holes. Cover holes with a square of mesh or a coffee filter to keep soil in while letting water out. Do not use gravel at the bottom. It creates a perched water table that keeps roots wetter.
The Perfect Soil Mix
Oxalis needs a mix that drains in seconds but holds enough moisture for the thin roots. A proven recipe: two parts high-quality peat-based potting soil, one part coarse perlite, one part fine orchid bark or coconut husk chips, and a handful of horticultural charcoal. The charcoal absorbs excess moisture and filters toxins. Mix thoroughly. Moisten slightly before use — it should clump when squeezed but crumble when poked. Never reuse old soil. It harbors pathogens.
Planting Technique
Place a shallow layer of mix in the pot. Position the oxalis so the bulbs sit at the same depth they were before — usually just below the surface. Spread the roots outward gently. Fill around them with mix. Tap the pot to settle. Do not pack down hard. Leave a half-inch watering rim at the top. Water lightly, just enough to settle the mix around roots. Excess must drain freely. Place the pot in bright indirect light. No direct sun for the first week.
Post-Treatment Care Protocol
Watering Strategy
The golden rule: water only when the top inch of soil feels dry to your fingertip. Stick your finger in. If it feels cool and damp, wait. When you water, water thoroughly until it runs out the bottom. Empty the saucer after ten minutes. Never let the pot sit in water. In winter, when oxalis often goes semi-dormant, cut watering by half. Growth slows. Roots use less. Overwatering during dormancy is the top cause of relapse.
Light and Temperature
Bright indirect light drives photosynthesis, which fuels root regeneration. An east-facing window or a few feet back from a south window works well. Avoid hot afternoon sun on a recovering plant. Ideal temperatures: 65 to 75 degrees Fahrenheit (18 to 24 Celsius) by day, not below 60 at night. Keep away from heating vents, AC drafts, and cold windowpanes. Consistent conditions reduce stress.
Humidity and Airflow
Oxalis enjoys moderate humidity (40 to 60 percent). If your air is dry, group plants together or use a pebble tray. Do not mist the foliage. Wet leaves invite fungal leaf spots. Good airflow is critical. A small fan on low, running a few hours daily, keeps the soil surface drying evenly and discourages mold. Stagnant air is a silent partner to root rot.
Fertilizing After Rot
Hold off on fertilizer for at least four weeks after repotting. The plant has no roots to absorb it. Salts will accumulate and burn tender new root tips. When you see fresh growth — new leaves unfurling — start with a quarter-strength balanced liquid fertilizer (like 10-10-10 or 20-20-20) once a month. Increase to half-strength only when the plant is fully established and growing vigorously.
Preventing Future Outbreaks
Build a Watering Routine
Ditch the calendar. Water by feel. Check every two to three days. Lift the pot. A light pot means dry soil. A heavy pot means wait. Some growers use a wooden skewer. Insert it deep. Pull it out. If it comes out clean and dry, water. If soil clings, wait. This habit alone prevents ninety percent of root rot cases.
Seasonal Adjustments
Oxalis has a natural rhythm. In spring and summer, it grows actively. Water more often. In fall, growth slows. Taper watering. In winter, many varieties go dormant. Leaves may die back completely. This is normal. Stop watering almost entirely. Just a splash every three to four weeks to keep bulbs from desiccating. Resume normal care when new shoots appear in late winter.
Soil Maintenance
Repot annually in early spring, just before the growth surge. Fresh mix restores aeration and removes salt buildup. Inspect roots each time. Catching a few dark tips early is far easier than a full rescue. If the plant has outgrown its pot, go up only one size. Resist the urge to “give it room.”
Tool Hygiene
Always sterilize cutting tools between plants. A dip in seventy percent isopropyl alcohol for thirty seconds works. Wash pots with hot soapy water and a ten percent bleach solution before reuse. Rinse well. Clean tools stop cross-contamination.
Quarantine New Plants
Any new oxalis — or any plant — should stay isolated for two weeks. Check for pests, fungal spots, and root health (gently pop it out of the nursery pot). Many root rot infections come home from the garden center. A short quarantine saves your whole collection.
Propagation as Insurance
When to Propagate
If your main plant is in Stage 3 decline, or if you simply want backups, propagation is easy. Oxalis grows readily from bulb divisions, leaf stem cuttings, and even seed. The best time is early spring, but you can try anytime the plant has healthy tissue.
Bulb Division
During repotting, separate the small offset bulbs (bulblets) clustered around the mother bulb. Each should have a tiny root nub or at least a visible growing point. Plant them individually in small pots of the same mix. Water lightly. They establish fast.
Leaf Stem Cuttings
Choose a healthy leaf with its petiole (stem) intact. Cut just below a node if visible. Place the stem in a jar of water or stick it into moist perlite. Cover loosely with a plastic bag for humidity. Roots appear in two to three weeks. Pot up when roots are an inch long. This works surprisingly well for Oxalis triangularis.
Seed (Advanced)
If your oxalis flowers and sets seed, you can collect the explosive pods. Sow fresh on moist peat-perlite. Keep warm and bright. Germination is erratic but fun. Seedlings vary. You might discover a new favorite form.
Troubleshooting Common Setbacks
Plant Keeps Declining After Repot
Check three things. One: Is the new mix truly draining? Squeeze a handful. It should not drip. Two: Are you watering too soon? Back off. Three: Is the pot too big? Downsize. Sometimes the shock of repotting plus residual infection overwhelms a weak plant. If more roots rot, repeat the trim-and-repot process. It feels harsh, but it can work.
New Growth Is Pale or Stunted
This usually means insufficient light or nutrient deficiency after the no-fertilizer period. Move to brighter light. Apply quarter-strength fertilizer. Check for spider mites — they love stressed oxalis. Look for fine webbing and stippled leaves. Treat with insecticidal soap if found.
Mold on Soil Surface
White or yellow fuzzy mold (saprophytic fungi) is harmless but signals overly wet surface conditions. Scrape it off. Increase airflow. Let the top half-inch dry completely between waterings. A thin layer of coarse sand or fine gravel on top deters mold and fungus gnats.
Fungus Gnats
These tiny black flies breed in wet soil. Their larvae chew root hairs. Sticky yellow traps catch adults. Let soil dry deeper. Apply Bacillus thuringiensis israelensis (BTI) granules or mosquito bits to the soil. They kill larvae safely. Control gnats fast — they spread fungal spores.
Special Considerations by Variety
Oxalis Triangularis (Purple Shamrock)
The most popular houseplant oxalis. Its deep purple leaves fold at night. It goes dormant in summer heat or winter short days. During dormancy, the whole plant may disappear. Do not panic. Stop watering. Store the pot in a cool, dark place for six to eight weeks. Then bring it back to light and water. It will explode with new growth.
Oxalis Tetraphylla (Iron Cross / Four-Leaf Clover)
Green leaves with a purple center blotch. Less dramatic dormancy. It prefers slightly more consistent moisture but still hates soggy feet. Treat it like a succulent-adjacent plant. Bright light keeps the cross marking vivid.
Oxalis Versicolor (Candy Cane Sorrel)
Grown for its red-and-white striped flower buds. It is a winter bloomer. Keep it slightly cooler (55 to 65 F) in fall to trigger buds. Water sparingly until buds show, then increase slightly. Rot risk is high during the cool, low-light initiation phase.
Outdoor Oxalis (Weedy Types)
Species like Oxalis stricta (yellow wood sorrel) and Oxalis corniculata (creeping woodsorrel) are lawn weeds. They rarely get root rot because they grow in open, draining soil. If you cultivate them intentionally (some are edible), apply the same drainage principles.
Conclusion
Root rot feels like a death sentence for your oxalis. It is not. With a clear oxalis root rot treatment plan — diagnose, trim, treat, repot, adjust — you can turn a mushy disaster into a fresh start. The key is respecting the plant’s biology. Oxalis wants a drink, then a dry spell. It wants light, air, and a snug pot. Give it those, and it rewards you with dancing leaves and cheerful blooms year after year. Keep this guide handy. Check your plants weekly. Trust your finger over the calendar. And remember: every expert grower has lost plants to rot. The difference is they learned the lesson and grew better next time. You will too.
Frequently Asked Questions
Can oxalis recover from severe root rot?
Yes, if at least some firm bulbs or rhizomes remain. Remove all mushy tissue, treat with hydrogen peroxide or copper fungicide, and repot in fresh, well-draining mix. Keep barely moist and in bright indirect light until new growth appears.
Why does my oxalis keep getting root rot even after repotting?
Common causes include using a pot without drainage holes, an oversized pot that holds water, a soil mix that retains too much moisture, or watering before the top inch of soil dries. Check all four factors and adjust.
Is hydrogen peroxide safe for oxalis roots?
Yes, a diluted solution of one part 3% hydrogen peroxide to four parts water is safe for a brief dip or rinse. It kills pathogens and adds oxygen to the root zone. Do not use stronger concentrations or soak for more than thirty seconds.
When should I repot my oxalis to prevent root rot?
Repot annually in early spring before active growth resumes. This refreshes the soil, restores aeration, and lets you inspect roots for early signs of trouble. Only go up one pot size if the plant is root-bound.
Can I propagate oxalis from a leaf cutting if the roots are gone?
Yes. Choose a healthy leaf with its stem attached. Place the stem in water or moist perlite, cover lightly for humidity, and roots will form in two to three weeks. This works well for Oxalis triangularis and many other species.
Does cinnamon really help treat root rot on oxalis?
Cinnamon has natural antifungal properties and can help seal fresh cuts on bulbs and roots. Dust trimmed surfaces lightly before replanting. It is a helpful supplement but not a substitute for proper drainage and watering habits.