Best Drip for Tropical Plants
Choosing the best drip for tropical plants means matching water delivery to high humidity needs, using adjustable emitters, and preventing clogs with proper filtration. A well‑designed drip system saves water, reduces disease, and keeps foliage vibrant year‑round.
When you grow tropical plants, water is more than a necessity—it’s a lifeline that mimics the frequent, gentle rains of their native habitats. A drip irrigation system can deliver that steady moisture without soaking leaves, which helps prevent fungal issues common in humid environments. In this guide we walk through everything you need to know to select and fine‑tune the best drip for tropical plants, from emitter choice to scheduling and troubleshooting.
Whether you tend a balcony collection of orchids, a greenhouse full of monstera, or an outdoor shade garden of ferns, the principles remain the same. You want a system that provides consistent, low‑volume water directly to the root zone, adapts to varying plant sizes, and stands up to the heat and UV exposure typical of tropical climates. Let’s dive into the details.
Key Takeaways
- Match flow rate to plant size: Small tropicals need 0.5–1 GPH emitters; larger specimens thrive with 2–4 GPH.
- Use pressure‑compensating emitters: They deliver consistent water even on sloped beds.
- Install a fine mesh filter: Prevents debris from clogging the tiny openings typical of tropical setups.
- Schedule frequent, short cycles: Mimics natural rainforest showers and keeps root zones evenly moist.
- Monitor soil moisture daily: Use a probe or smart sensor to avoid over‑watering.
- Choose UV‑resistant tubing: Extends system life under intense tropical sun.
- Plan for easy maintenance access: Quick‑connect fittings make cleaning and emitter replacement simple.
Quick Answers to Common Questions
What flow rate should I use for small tropical pots?
Use 0.5–1 GPH emitters for small pots to deliver gentle, frequent moisture.
How often should I run the drip cycles in summer?
Run 5‑minute cycles 4–6 times per day, adjusting based on soil moisture readings.
Can I use a regular garden hose filter for my drip system?
A standard hose filter is usually too coarse; install a 150‑mesh (100‑micron) filter for best results.
What causes emitters to clog quickly?
Fine debris, algae, and mineral buildup clog tiny orifices; regular filter cleaning and periodic vinegar soaks prevent this.
Is a timer necessary for tropical drip irrigation?
Yes, a programmable timer ensures consistent short cycles that mimic natural rainforest showers.
📑 Table of Contents
Understanding Tropical Plant Water Needs
High humidity, shallow roots
Tropical species often develop shallow, widespread root mats that absorb moisture quickly. They prefer frequent, light watering rather than deep soakings. A drip system that runs several short cycles per day mirrors this natural pattern and keeps the root zone evenly moist without waterlogging.
Sensitivity to leaf wetness
Many tropicals, especially orchids and bromeliads, develop leaf spots when water sits on foliage. Drip emitters placed at soil level keep leaves dry, reducing disease pressure. This is a key advantage over overhead sprinklers.
Nutrient delivery
Because tropical soils are often low in nutrients, integrating a fertilizer injector into your drip line can provide a steady feed. Choose a water‑soluble formula designed for tropicals and set the injector to a low concentration for each cycle.
Choosing the Right Drip Components
Emitters: flow rate and pressure compensation
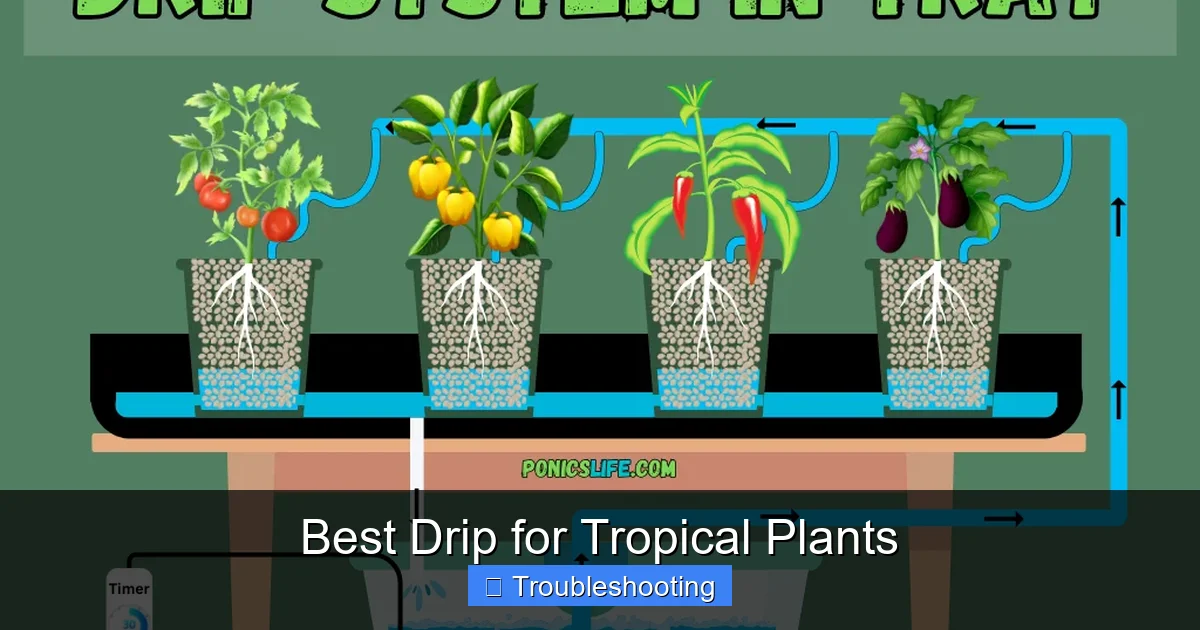
For the best drip for tropical plants, select pressure‑compensating emitters rated between 0.5 and 4 gallons per hour (GPH). Small pots and delicate seedlings do well with 0.5–1 GPH, while larger containers or in‑ground beds benefit from 2–4 GPH. Pressure compensation ensures each plant receives the same volume even if the line runs uphill or downhill.
Visual guide about Best Drip for Tropical Plants
Image source: ponicslife.com
Tubing: UV‑resistant and flexible
Polyethylene tubing with a UV stabilizer lasts years under intense sun. Choose ½‑inch mainline for the backbone and ¼‑inch micro‑tubing for individual emitters. The smaller diameter reduces pressure loss and makes it easier to snake around tight plant groupings.
Filtration: fine mesh is essential
Tropical setups often use very small emitter orifices. A 150‑mesh (100‑micron) filter at the system head stops sand, algae, and organic debris from clogging those tiny openings. Clean the filter monthly during peak growth.
Fittings and quick‑connects
Barbed fittings with lock‑nuts provide a secure seal, but quick‑connect push‑fit couplings make seasonal re‑configuration painless. Keep a few spare couplings on hand for rapid repairs.
Designing the Layout for Maximum Efficiency
Zone by water demand
Group plants with similar water needs into the same zone. For example, place all high‑water‑use aroids together and low‑water‑use succulents in a separate zone. This lets you program each zone with its own schedule, avoiding over‑watering the drought‑tolerant specimens.
Emitter placement
Position emitters 2–3 inches from the stem, aimed at the root ball. For hanging baskets, use a stake‑mounted emitter that drips onto the moss surface. Avoid placing emitters directly on the crown of orchids; instead, target the media surrounding the roots.
Loop versus linear runs
A looped mainline balances pressure across all emitters, which is ideal for larger installations. For small balconies, a simple linear run with a pressure regulator at the start works fine. In either case, keep total line length under 200 feet to maintain adequate pressure.
Incorporating a timer and rain sensor
A programmable timer with multiple start times per day lets you run 5‑minute cycles every 3–4 hours. Add a rain sensor to pause cycles during natural showers, saving water and preventing root rot.
Programming the Ideal Watering Schedule
Frequency and duration
Start with 4 cycles per day, each 3–5 minutes long, delivering roughly 0.25–0.5 inches of water per cycle. Adjust based on soil moisture readings. In hotter months, increase to 6 cycles; in cooler periods, drop to 2–3.
Seasonal adjustments
Tropical plants often experience a growth surge in spring and summer. Raise emitter flow or add an extra cycle during these months. In winter, reduce frequency but keep each cycle long enough to wet the entire root zone.
Using soil moisture sensors
Capacitive probes connected to a smart controller can automatically skip a cycle when the substrate is already at field capacity. This data‑driven approach eliminates guesswork and conserves water.
Troubleshooting Common Drip Issues
Clogged emitters
If a plant looks wilted while neighbors thrive, check its emitter. Remove the emitter, soak in vinegar for 30 minutes, then rinse. Replace if flow remains low. Regular filter cleaning prevents most clogs.
Uneven water distribution
Pressure drops at the end of a long line cause the last emitters to under‑deliver. Add a pressure‑compensating regulator mid‑line or split the run into two shorter loops.
Algae growth in tubing
Clear or translucent tubing encourages algae. Use opaque black tubing or add a UV‑blocking sleeve. Flush the system with a mild hydrogen peroxide solution (1 % concentration) once per season.
Leaks at fittings
Tighten lock‑nuts or replace worn O‑rings. A small drip at a fitting can waste gallons over a week and create soggy spots that attract pests.
Maintaining Your System for Longevity
Monthly visual inspection
Walk the line, look for kinks, cracked tubing, or emitters that have shifted. Early detection saves water and protects plant health.
Seasonal flush
At the start of each growing season, run the system at full pressure for 10 minutes with the filter removed. This clears sediment buildup.
Winterizing in cooler zones
If temperatures dip below 50 °F, drain the lines and store emitters indoors. In true tropical climates, you can run year‑round but reduce cycle frequency.
Record keeping
Log flow rates, timer settings, and any adjustments in a notebook or digital app. Over time you’ll spot patterns that guide future tweaks.
Conclusion
Finding the best drip for tropical plants is a blend of science and observation. By matching emitter flow to plant size, using pressure‑compensating components, filtering water, and programming frequent short cycles, you create a micro‑rainforest that keeps roots happy and leaves dry. Regular maintenance and smart scheduling turn a good system into a great one, letting your tropical collection thrive with minimal effort. Start small, monitor closely, and adjust—your plants will thank you with lush growth and vibrant color.
Frequently Asked Questions
How do I know if my tropical plants are getting enough water?
Check the soil 1–2 inches below the surface; it should feel evenly moist but not soggy. A moisture probe gives precise readings.
Can I fertilize through the drip system?
Yes, use a water‑soluble fertilizer injector set to a low concentration for each watering cycle.
What type of tubing resists UV damage best?
Black polyethylene tubing with a UV stabilizer rating lasts the longest under intense sun.
Should I bury the drip lines or leave them on the surface?
Surface placement makes inspection easy; cover with mulch to reduce evaporation and protect tubing.
How do I prevent root rot with drip irrigation?
Schedule frequent short cycles, ensure good drainage, and use a moisture sensor to avoid over‑watering.
Can I expand my drip system later?
Absolutely. Use quick‑connect fittings and extra tubing to add zones or emitters as your collection grows.