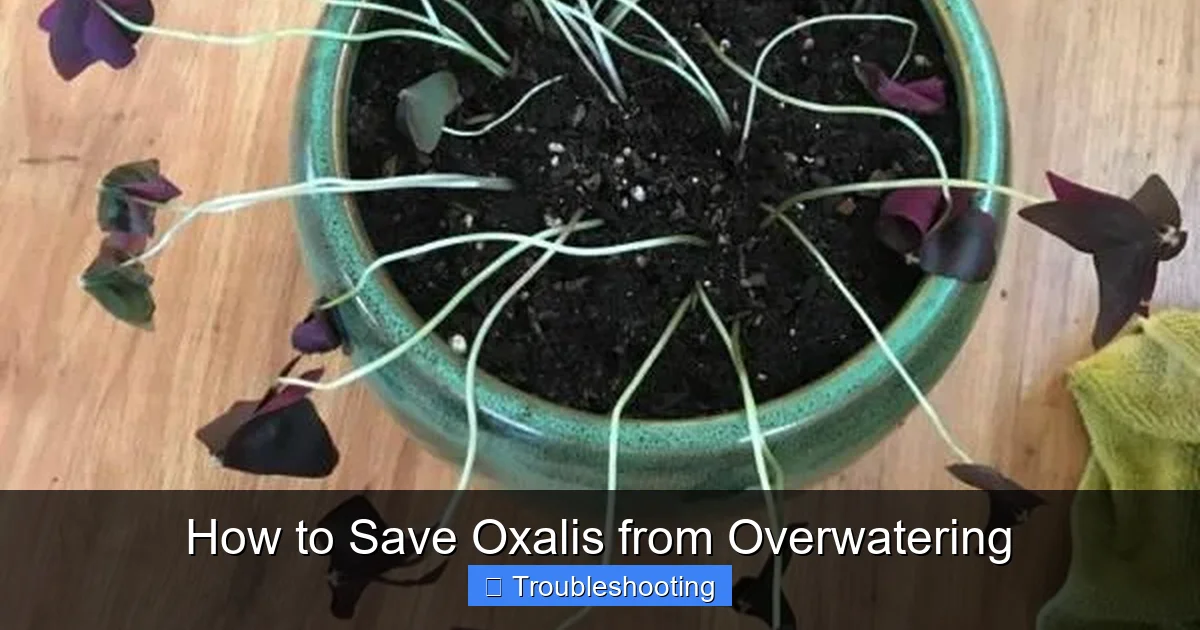
How to Save Oxalis from Overwatering
Overwatering is the number one killer of oxalis plants, but quick action can save your shamrock. This guide walks you through spotting early warning signs, treating root rot, repotting correctly, and adjusting your watering routine so your oxalis thrives again.
Key Takeaways
- Yellow leaves and mushy stems signal overwatering: These are the first visible signs your oxalis is drowning.
- Root rot spreads fast: Black, smelly roots mean you must act immediately to save the plant.
- Repot in fresh, well-draining soil: Remove all rotted roots and use a pot with drainage holes.
- Water only when the top inch of soil is dry: Oxalis prefers to dry out slightly between waterings.
- Dormancy is normal: Don’t mistake seasonal die-back for overwatering — oxalis needs rest periods.
- Improve airflow and light: Bright indirect light and good air circulation help soil dry properly.
- Prevention beats cure: A consistent check-and-water routine keeps oxalis healthy long-term.
Quick Answers to Common Questions
How long does it take for oxalis to recover from overwatering?
Recovery typically takes three to six weeks. New growth appears once healthy roots re-establish. Severe cases with only rhizomes left may take eight weeks or longer.
Can I save oxalis if all the leaves have fallen off?
Yes. As long as the rhizomes (bulbs) are firm and not mushy, the plant can regrow from the base. Repot in fresh dry soil and wait for new shoots.
Should I fertilize my oxalis after repotting for root rot?
No. Wait at least six weeks after repotting before fertilizing. Damaged roots cannot process nutrients, and fertilizer salts can burn tender new roots.
Why does my oxalis keep getting root rot even after repotting?
Usually the soil mix retains too much water, the pot lacks drainage holes, or you’re watering on a schedule instead of checking soil moisture first.
Is it normal for oxalis to die back completely in summer?
Yes. Many oxalis varieties go dormant in summer heat. The foliage dies back to the ground. Stop watering, keep the pot cool and dark, and resume care in fall when new growth appears.
📑 Table of Contents
- Why Oxalis Overwatering Happens So Easily
- Spotting the Signs of Overwatered Oxalis
- Immediate Triage: What to Do Right Now
- Repotting for Recovery
- Adjusting Your Watering Routine Long-Term
- Dealing with Dormancy vs. Death
- Preventing Future Overwatering Disasters
- Advanced Recovery: When Things Get Complicated
- Oxalis Varieties and Their Specific Quirks
- Common Myths About Oxalis Care
- Creating the Ideal Environment for Long-Term Health
- Conclusion: Patience Wins with Oxalis
Why Oxalis Overwatering Happens So Easily
Oxalis, often called the shamrock plant or false shamrock, charms plant lovers with its delicate clover-like leaves and dainty flowers. But behind that pretty facade lies a plant that is surprisingly easy to kill with kindness. Overwatering is the single most common reason oxalis plants decline, and it happens to beginners and experienced growers alike.
The trouble starts because oxalis looks thirsty even when it isn’t. Those thin, papery leaves can droop dramatically when the plant is dry, but they also droop when the roots are rotting from too much water. Many well-meaning plant parents see the droop, reach for the watering can, and accidentally finish off a plant that was already struggling. Understanding the unique water needs of oxalis is the first step to saving yours.
Oxalis grows from small bulbs or rhizomes that store water and nutrients. This adaptation helps the plant survive dry periods in its native habitats. But it also means the roots are prone to rot if they sit in soggy soil. The bulbs essentially suffocate and turn to mush when oxygen can’t reach them. Once rot sets in, it spreads quickly through the connected rhizome system. That’s why catching the problem early makes all the difference.
Spotting the Signs of Overwatered Oxalis
Before you can save your oxalis, you need to be certain overwatering is the real problem. Several issues cause similar symptoms, so let’s break down the specific clues that point to too much water.
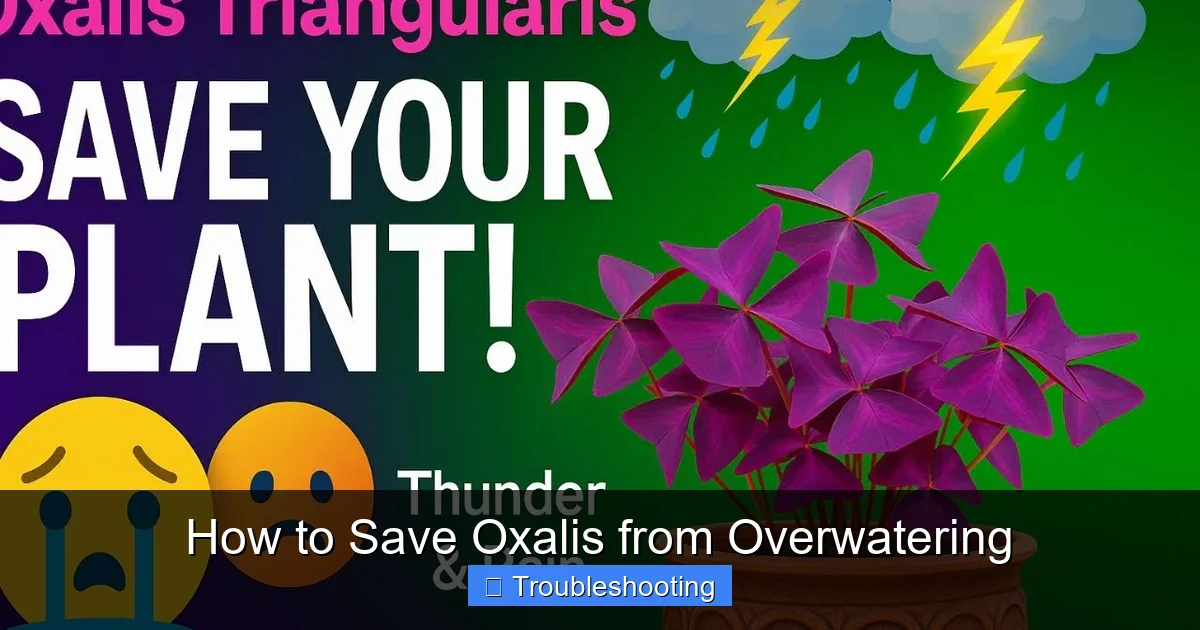
Visual guide about How to Save Oxalis from Overwatering
Image source: i.ytimg.com
Yellowing Leaves Starting at the Bottom
The classic sign of overwatering is yellow leaves, especially on the lower stems. The oldest leaves sacrifice themselves first as the plant tries to survive. If you see a wave of yellow moving upward from the base, and the soil feels wet, overwatering is likely the culprit. Healthy oxalis leaves are a rich green or deep purple depending on the variety. Yellow means the roots aren’t functioning properly.
Mushy, Translucent Stems
Gently squeeze a stem between your fingers. A healthy oxalis stem feels firm and slightly crisp. An overwatered stem feels soft, mushy, or even slimy. In advanced cases, the stem may look translucent or water-soaked. This tissue damage is irreversible — those stems won’t recover even if you fix the watering.
Soil That Stays Wet for Days
Stick your finger into the soil up to the second knuckle. If it feels wet several days after watering, your drainage is insufficient or you’re watering too often. Oxalis soil should dry out in the top inch within two to three days. Consistently soggy soil means the roots are drowning.
Fungus Gnats Flying Around
Those tiny black flies hovering over your plant? They’re fungus gnats, and they love constantly moist soil. Their larvae feed on organic matter and root hairs in wet conditions. A fungus gnat infestation is a strong secondary indicator that your oxalis has been overwatered.
Foul Smell from the Pot
This is the smell of anaerobic decomposition — rot. Healthy soil smells earthy. Rotting soil smells sour, musty, or like swamp water. If you catch a whiff when you lean close, root rot is already active.
Leaf Drop and Sudden Collapse
In severe cases, the entire plant may seem to melt overnight. Leaves drop at a touch. Stems collapse at the soil line. This dramatic collapse happens when rot has traveled through the rhizomes and severed the connection between roots and shoots. It looks terrifying, but even at this stage, you might save the bulbs.
Immediate Triage: What to Do Right Now
You’ve confirmed overwatering. Now what? Speed matters. Every day the roots sit in wet soil, more tissue dies. Follow these steps in order.
Stop Watering Immediately
Put the watering can away. Do not water again until you’ve assessed the roots and repotted if needed. This sounds obvious, but many people keep watering on a schedule even when the plant shows distress. Break the schedule. The plant dictates the timeline now.
Remove the Plant from Its Pot
Gently tip the pot sideways and slide the root ball out. If it’s stuck, run a knife around the inside edge. Don’t yank the stems — they’ll break. You want to see the root system intact so you can evaluate the damage.
Inspect the Roots and Rhizomes
Healthy oxalis roots are white or pale tan, firm, and smell clean. The rhizomes (those little pinecone-like bulbs) should be firm and plump. Rotted roots are black, brown, mushy, and pull away easily. Rotted rhizomes feel soft or hollow and may have a dark, wet appearance. Take a moment to assess the percentage of damage. If more than fifty percent of the root mass is rotted, recovery will be slower but still possible.
Trim Away All Rotted Material
Use clean, sharp scissors or pruning shears. Sterilize them with rubbing alcohol between cuts to avoid spreading pathogens. Cut off every black, mushy root. Slice away any soft spots on the rhizomes until you reach firm, healthy tissue. It feels brutal, but leaving any rot behind guarantees it will spread. Dust the cut surfaces with cinnamon powder — a natural antifungal — or use a commercial fungicide powder if you have it.
Wash the Roots Gently
Rinse the remaining healthy roots under lukewarm running water. This removes old soil that may harbor fungal spores. Be gentle — the remaining roots are fragile. Let excess water drain off before the next step.
Repotting for Recovery
Repotting is non-negotiable after root rot. The old soil is contaminated. The pot may not have adequate drainage. A fresh start gives your oxalis the best chance.
Choose the Right Pot
Select a pot with drainage holes — plural. One hole isn’t enough for oxalis. Terra cotta is ideal because it wicks moisture away from the soil. If you prefer ceramic or plastic, make sure there are multiple drainage holes and consider adding a layer of pebbles at the bottom (though this is debated, many growers find it helps). The pot should be only slightly larger than the remaining root mass. Oxalis likes to be a bit snug. A huge pot holds too much soil, which stays wet too long.
Use a Fast-Draining Soil Mix
Standard potting soil retains too much water for recovering oxalis. Make your own mix: two parts quality potting soil, one part perlite, one part coarse sand or orchid bark. This creates air pockets that let oxygen reach the roots. Some growers add a handful of horticultural charcoal to absorb excess moisture and filter impurities. Moisten the mix slightly before using — it should hold together when squeezed but crumble easily.
Plant at the Correct Depth
Place a layer of soil in the new pot. Position the oxalis so the rhizomes sit just below the soil surface — about half an inch deep. The crown (where stems emerge) should be at or slightly above soil level. Backfill gently, tapping the pot to settle soil without compacting it. Don’t bury the stems.
Hold Off on Watering
This is the hardest part for most people. After repotting, do not water for three to five days. Let the cut roots callus over. The plant has enough stored moisture in its rhizomes to survive this pause. Watering too soon reintroduces the exact conditions that caused the rot. Place the pot in bright indirect light and wait.
Adjusting Your Watering Routine Long-Term
Saving your oxalis once is great. Keeping it alive means changing how you water forever. The “once a week” schedule doesn’t work for oxalis. Here’s the method that does.
The Finger Test — Every Time
Before every watering, stick your finger into the soil up to the second knuckle. If the soil feels dry at your fingertip, water. If it feels even slightly cool or damp, wait. Check again tomorrow. This simple habit prevents ninety percent of overwatering cases. No moisture meter needed. Your finger is more accurate and always with you.
Water Thoroughly, Then Wait
When you do water, water deeply. Pour slowly until water runs out the drainage holes. This ensures the entire root zone gets moistened and encourages roots to grow downward. Then — and this is crucial — empty the saucer. Never let your oxalis sit in a puddle. That standing water gets wicked back up into the soil, keeping the bottom roots wet.
Adjust for Seasons
Oxalis grows actively in spring and fall. It often goes dormant in summer heat and winter cold. During active growth, it drinks more. During dormancy, it drinks very little — sometimes nothing for weeks. Learn your plant’s rhythm. If the leaves start dying back and the plant looks like it’s giving up, check the calendar. It might just be nap time. Reduce watering dramatically during dormancy. The soil should stay barely moist, not wet.
Consider Bottom Watering
Some oxalis growers swear by bottom watering. Place the pot in a tray of water for ten to fifteen minutes, letting the soil absorb moisture from below. Then remove and drain. This keeps the crown and upper soil drier, reducing rot risk at the stem base. It also encourages deeper root growth. Try it if top watering keeps causing issues.
Watch the Leaves for Clues
Oxalis leaves are expressive. They fold up at night (nyctinasty) and open in daylight. But they also fold when thirsty. If leaves stay folded during the day and the soil is dry, the plant wants water. If leaves are yellow, mushy, or dropping and the soil is wet, you’ve overdone it. Learn to read your specific plant.
Dealing with Dormancy vs. Death
One of the biggest mistakes oxalis owners make is confusing dormancy with overwatering damage. Oxalis species — especially the popular Oxalis triangularis (purple shamrock) and Oxalis regnellii (green shamrock) — have pronounced dormancy periods. Understanding this cycle saves you from panic-watering a resting plant.
Signs of Normal Dormancy
Dormancy usually hits in late spring or early summer as temperatures rise, and again in winter. The plant stops producing new leaves. Existing leaves yellow and die back systematically. The whole plant may disappear above ground, leaving just soil in the pot. This looks like death. It’s not. The rhizomes underground are alive and waiting.
How to Tell the Difference
Check the rhizomes. Gently brush away a little soil near the edge of the pot. Healthy dormant rhizomes are firm, plump, and white or pale pink inside. Rotted rhizomes are mushy, black, and smelly. If the rhizomes look good, your plant is just sleeping. Stop watering almost entirely. Keep the pot in a cool, dark place (a closet works) for four to eight weeks. Then bring it back to light, water lightly, and watch for new growth.
Caring for a Dormant Oxalis
During dormancy, the plant needs almost no water. A light misting every two to three weeks is plenty — just enough to keep the rhizomes from shriveling. No fertilizer. No bright light. Cool temperatures (fifty to sixty degrees Fahrenheit) help maintain dormancy. When you see tiny green shoots emerging, the rest period is over. Resume normal care gradually.
Preventing Future Overwatering Disasters
An ounce of prevention saves a pound of cure. These habits keep your oxalis out of the danger zone.
Upgrade Your Drainage Game
If your pot has one tiny drainage hole, drill more. Use a masonry bit for ceramic, a standard bit for plastic. Four to six quarter-inch holes transform a risky pot into a safe one. Add a layer of mesh or a coffee filter over the holes to keep soil in while letting water out.
Use a Moisture Meter as a Backup
While the finger test is king, a cheap moisture meter adds confidence. Probe at root depth in several spots. Readings of one to two (on a ten-point scale) mean water. Three or above means wait. Calibrate yours by testing known dry and wet soil first.
Group Plants with Similar Needs
Don’t put your oxalis next to a thirsty fern or peace lily. You’ll water the fern and drown the oxalis. Group oxalis with other plants that like to dry out — succulents, snake plants, zz plants. Then you can water the whole group on the same “check first” schedule.
Set a Reminder to Check, Not to Water
Phone reminders that say “Water plants” create overwatering. Change the reminder to “Check plant soil.” The action is checking. Watering only happens if the check says so. This tiny mindset shift changes everything.
Improve Air Circulation
Stagnant air slows evaporation. A small fan on low, running a few hours a day, helps soil dry evenly. It also strengthens stems and discourages fungal spores from settling. Just don’t blow directly on the plant — indirect airflow is best.
Choose the Right Soil from the Start
When you buy a new oxalis, repot it immediately into your fast-draining mix. Nursery soil is often peat-heavy and stays wet too long. Starting with the right medium prevents the first overwatering incident.
Advanced Recovery: When Things Get Complicated
Sometimes standard triage isn’t enough. Here’s how to handle the tough cases.
Saving Just the Rhizomes
If all roots and stems are gone but the rhizomes are firm, you can still regrow the plant. Plant the rhizomes in fresh mix, barely covered. Keep the soil barely moist — mist only. Place in a clear plastic bag or under a humidity dome to create a mini greenhouse. Vent daily. In two to four weeks, shoots should appear. Then gradually acclimate to normal conditions.
Treating Persistent Fungal Infections
If rot returns after repotting, a systemic fungicide may be needed. Look for products containing thiophanate-methyl or copper octanoate labeled for ornamental plants. Follow label directions exactly. Drench the soil, not the leaves. Repeat in fourteen days. Always combine chemical treatment with cultural fixes — better drainage, less water — or the problem will return.
Propagating as Insurance
While your main plant recovers, take a few healthy rhizomes and pot them separately. This gives you backup plants. Oxalis propagates easily from rhizome divisions. Each piece with a visible bud or shoot can become a new plant. It’s free insurance against total loss.
Dealing with Pest Complications
Overwatered plants attract pests — fungus gnats, shore flies, sometimes root mealybugs. Yellow sticky traps catch adults. For larvae, let the soil dry more aggressively and apply Bacillus thuringiensis israelensis (BTI) as a soil drench. It’s a natural bacteria that kills fly larvae but won’t harm your plant. Root mealybugs require a systemic insecticide or discarding the plant — they’re very hard to eradicate.
Oxalis Varieties and Their Specific Quirks
Not all oxalis are created equal. The care nuances vary by species.
Oxalis Triangularis (Purple Shamrock)
The dramatic purple butterfly leaves make this the most popular variety. It has a strong dormancy cycle — often disappearing completely in summer. It’s also the most rot-prone because those large, thin leaves transpire slowly. Be extra strict with the finger test. Bright indirect light keeps the purple color intense. Too little light makes it green and leggy.
Oxalis Regnellii (Green Shamrock)
The classic green three-leaf clover look. Slightly more tolerant of moisture than triangularis but still hates wet feet. Often sold as “lucky shamrock” around St. Patrick’s Day. These grocery store plants are usually forced in heavy peat soil — repot immediately.
Oxalis Versicolor (Candy Cane Sorrel)
White flowers with red edges like candy canes. Winter bloomer. Goes dormant in summer. Needs a distinct cool, dry rest period to flower well. Water sparingly during summer dormancy.
Oxalis Deppei (Iron Cross)
Green leaves with a dark purple cross center. Bulbous rhizomes. More drought-tolerant than others but still rots easily in heavy soil. Excellent candidate for gritty, mineral-heavy mixes.
Common Myths About Oxalis Care
Bad advice spreads fast. Let’s clear up the biggest misconceptions.
Myth: Oxalis Likes Constant Moisture Because It’s a “Woodland Plant”
Many oxalis species do grow in woodland settings. But they grow in well-drained leaf litter on slopes, not in bogs. Their bulbs rot in standing water just like any other bulb. “Moist but well-drained” is the key phrase — not “constantly wet.”
Myth: Misting Replaces Watering
Misting wets the leaves, not the roots. Oxalis absorbs water through its roots. Misting can actually promote fungal leaf spots if water sits on the foliage. Water the soil, not the leaves.
Myth: Yellow Leaves Always Mean Nitrogen Deficiency
Yellow leaves on oxalis are far more often overwatering than hunger. Fertilizing a rotting plant adds salt stress to root stress. Fix the water first. Then, if new growth is pale, feed lightly.
Myth: You Can’t Kill Oxalis — It’s a Weed
Outdoors in ideal climates, some oxalis species are aggressive spreaders. Indoors in a pot, they’re delicate. The conditions that make them weedy outside (ample rain, drainage, space) don’t exist in a container. Don’t let the “weed” reputation make you careless.
Creating the Ideal Environment for Long-Term Health
Watering is just one piece. The whole environment affects how your oxalis handles moisture.
Light: Bright Indirect Is Best
Oxalis needs good light to photosynthesize and use water efficiently. Low light means slow growth, slow water uptake, and soil that stays wet too long. An east-facing window is perfect. South or west works with a sheer curtain. North may be too dim unless supplemented with a grow light. Rotate the pot weekly for even growth.
Temperature: Cool to Moderate
Oxalis prefers sixty to seventy-five degrees Fahrenheit. Above eighty, many species trigger dormancy. Below fifty, growth stops. Avoid drafts from heaters, AC vents, or cold windows. Sudden temperature swings stress the plant and disrupt its water regulation.
Humidity: Average Is Fine
Unlike calatheas or ferns, oxalis doesn’t demand high humidity. Forty to sixty percent relative humidity is plenty. Higher humidity slows soil drying, which increases overwatering risk. If you run a humidifier for other plants, keep your oxalis a few feet away.
Fertilizer: Light and Seasonal
Feed only during active growth (spring and fall). Use a balanced liquid fertilizer at quarter strength every four weeks. Never fertilize a dormant plant, a newly repotted plant (wait six weeks), or a plant recovering from rot. Fertilizer salts accumulate in wet soil and burn damaged roots.
Conclusion: Patience Wins with Oxalis
Saving an overwatered oxalis tests your patience. The plant looks worse before it looks better. You’ll trim away half the roots, repot, wait days to water, then watch… and wait… and wonder if it worked. Then one morning you’ll see a tiny purple or green shoot pushing through the soil. That moment makes every careful step worth it.
Remember the core lesson: oxalis stores water in its bulbs. It survives drought better than flood. When in doubt, wait a day. The finger test never lies. A pot with drainage holes and fast-draining soil does half the work for you. And if your plant goes dormant, don’t panic — it’s not dead, it’s resting.
Your oxalis wants to live. It evolved to survive harsh conditions by retreating underground and bouncing back. Give it the right conditions — light, air, drainage, and restraint with the watering can — and it will reward you with those magical fluttering leaves for years to come. Trust the process. Trust the plant. And most of all, trust your finger.
Frequently Asked Questions
How do I know if my oxalis is overwatered or underwatered?
Overwatered oxalis has yellow leaves, mushy stems, wet soil, and a foul smell. Underwatered oxalis has crispy brown leaf edges, dry soil pulling away from the pot, and leaves that fold up during the day but perk up after watering.
Can I use hydrogen peroxide to treat oxalis root rot?
Yes. A 3% hydrogen peroxide solution diluted one part peroxide to four parts water can be used as a soil drench after trimming rotted roots. It oxygenates the soil and kills pathogens. Use once, then let the soil dry before watering normally.
What is the best soil mix for oxalis to prevent overwatering?
A mix of two parts potting soil, one part perlite, and one part coarse sand or orchid bark provides excellent drainage. Add horticultural charcoal for extra protection against fungal growth.
How often should I water oxalis in winter?
Water only when the top inch of soil is dry, which may be every two to three weeks in winter. Many oxalis varieties go semi-dormant in winter and need very little water. Always check with your finger first.
Can oxalis recover from crown rot?
Crown rot (rot at the soil line where stems emerge) is difficult to treat. If caught early, remove affected stems, dust with cinnamon or fungicide, repot in fresh dry soil, and reduce watering. Success depends on how far the rot has spread into the rhizomes.
Should I mist my oxalis leaves?
No. Misting doesn’t provide meaningful humidity and can encourage fungal leaf spots. Oxalis absorbs water through its roots. Water the soil directly when the top inch is dry.