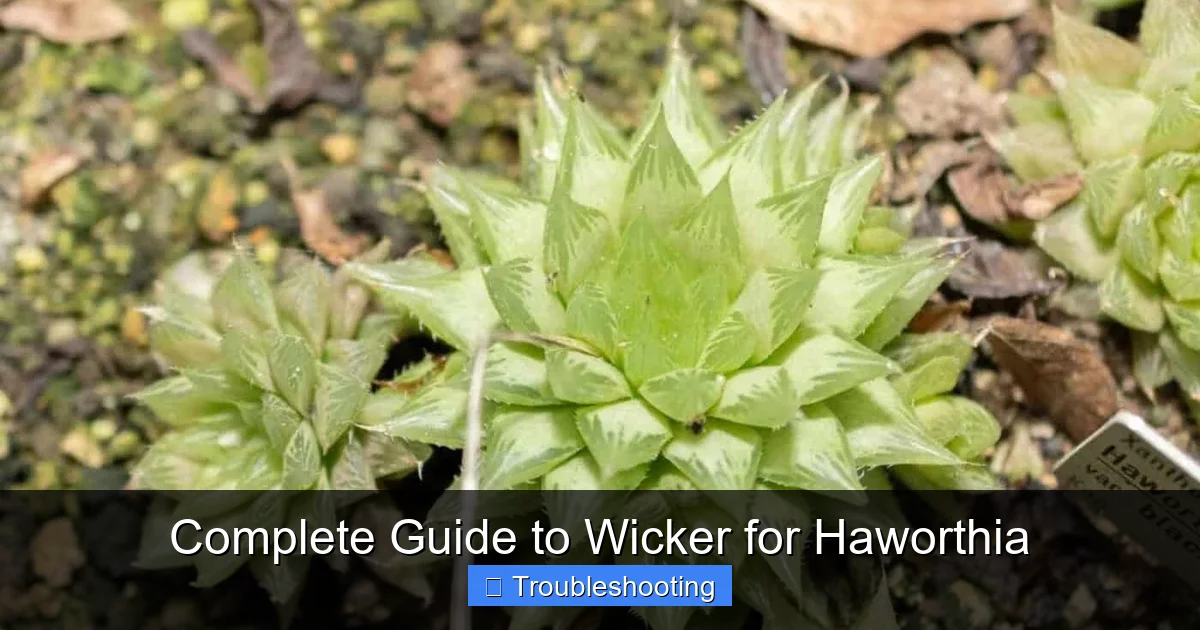
Complete Guide to Wicker for Haworthia
Growing Haworthia in wicker containers combines natural beauty with practical benefits for these charming succulents. This comprehensive guide walks you through selecting the right wicker planter, preparing it for proper drainage, and maintaining healthy plants year-round.
If you love the look of natural textures in your plant displays, you have probably considered wicker for your Haworthia collection. These compact succulents with their architectural rosettes and translucent leaf windows look stunning nestled in woven baskets. But wicker brings unique challenges. It breathes. It wicks moisture. It breaks down. Understanding how to work with these characteristics makes the difference between thriving plants and a disappointing experiment.
This guide covers everything you need to know about pairing Haworthia with wicker containers. We will explore container selection, preparation techniques, ongoing care adjustments, and solutions for common problems. Whether you are repurposing a vintage basket or investing in a purpose-made planter, you will finish this article confident in your ability to create beautiful, healthy displays.
Key Takeaways
- Wicker provides excellent airflow: Natural fibers allow root zones to breathe, reducing rot risk for Haworthia.
- Liners are essential: Always use a plastic or coco coir liner to retain soil while allowing drainage.
- Choose tight-weave wicker: Loose weaves spill soil and dry out too fast for succulent needs.
- Monitor moisture closely: Wicker wicks water away, so check soil more frequently than in ceramic pots.
- Elevate containers: Keep wicker off wet surfaces to prevent mold and premature deterioration.
- Repot every two years: Refresh soil and inspect roots as wicker breaks down over time.
- Indoor displays work best: Protected locations extend wicker life and stabilize growing conditions.
Quick Answers to Common Questions
Can I plant Haworthia directly in wicker without a liner?
No, you should always use a liner. Direct planting causes soil loss through the weave, rapid moisture wicking that stresses roots, and accelerated wicker rot from constant soil contact.
How often should I water Haworthia in wicker containers?
Check soil moisture every 3 to 5 days in summer and every 2 to 3 weeks in winter. Water only when the bottom half of the soil is dry. Wicker wicks moisture faster than solid pots.
What is the best wicker material for Haworthia planters?
Rattan and unpeeled willow are the most durable natural options. They resist decay longer and typically have tighter weaves. Synthetic wicker lasts indefinitely but reduces root aeration benefits.
Why is my wicker basket molding at the bottom?
Mold indicates trapped moisture. Ensure the liner has drainage holes, the basket sits on feet for airflow underneath, and you are not overwatering. Clean with vinegar solution and apply sealant.
Can I leave wicker Haworthia planters outside year-round?
Natural wicker degrades quickly in rain, freeze-thaw cycles, and UV exposure. Bring containers indoors or to a protected porch during winter and heavy rains. Synthetic wicker handles outdoor exposure better.
📑 Table of Contents
Understanding Haworthia and Wicker Compatibility
Haworthia species originate from southern Africa where they grow tucked into rock crevices and under shrub shelter. They prefer bright indirect light, well-draining soil, and infrequent but thorough watering. Their roots are shallow and fibrous, designed to capture brief rainfall quickly. They hate sitting in wet soil. Rot is the number one killer.
Wicker, traditionally made from willow, rattan, reed, or bamboo, is porous and breathable. Air moves through the weave. Moisture evaporates from the sides, not just the top. This mimics the airy conditions Haworthia roots love. However, wicker also pulls water from the soil through capillary action. The soil dries faster than in plastic or glazed ceramic. In hot, dry weather, this can stress plants. In humid conditions, the wicker itself can stay damp, inviting mold.
Why Wicker Works for Haworthia
The primary benefit is root zone aeration. Haworthia roots need oxygen. In dense soils or non-breathable pots, oxygen depletes. Wicker allows constant gas exchange through the container walls. This reduces the risk of anaerobic conditions that lead to root rot. The wicking action also helps prevent waterlogging at the bottom of the pot, provided drainage holes exist in the liner.
Aesthetic harmony is another win. Haworthia foliage ranges from deep green to gray-green, often with white tubercles or translucent tips. Wicker’s warm browns, golds, and grays complement these colors beautifully. The organic texture contrasts nicely with the geometric precision of Haworthia rosettes. A cluster of different Haworthia varieties in a large wicker tray creates a living centerpiece.
Potential Drawbacks to Consider
Wicker degrades. Natural fibers break down with repeated wet-dry cycles, UV exposure, and microbial activity. A wicker basket used outdoors year-round may last only one to two seasons. Indoors, away from direct rain and harsh sun, it can last several years. Plan for eventual replacement.
Soil leakage frustrates many first-timers. Loose weaves let potting mix fall through gaps. Fine particles sift out with every watering. This makes a mess and reduces soil volume for roots. Tight-weave wicker or a quality liner solves this.
Weight can be misleading. A large wicker planter filled with soil and plants becomes heavy. The handles on decorative baskets are often not load-rated. Always lift from the bottom, not the handles, when moving planted containers.
Choosing the Right Wicker Container
Not all wicker is created equal. Material, weave tightness, shape, and construction quality determine how well a container performs for Haworthia. Take time to evaluate options before buying or repurposing.
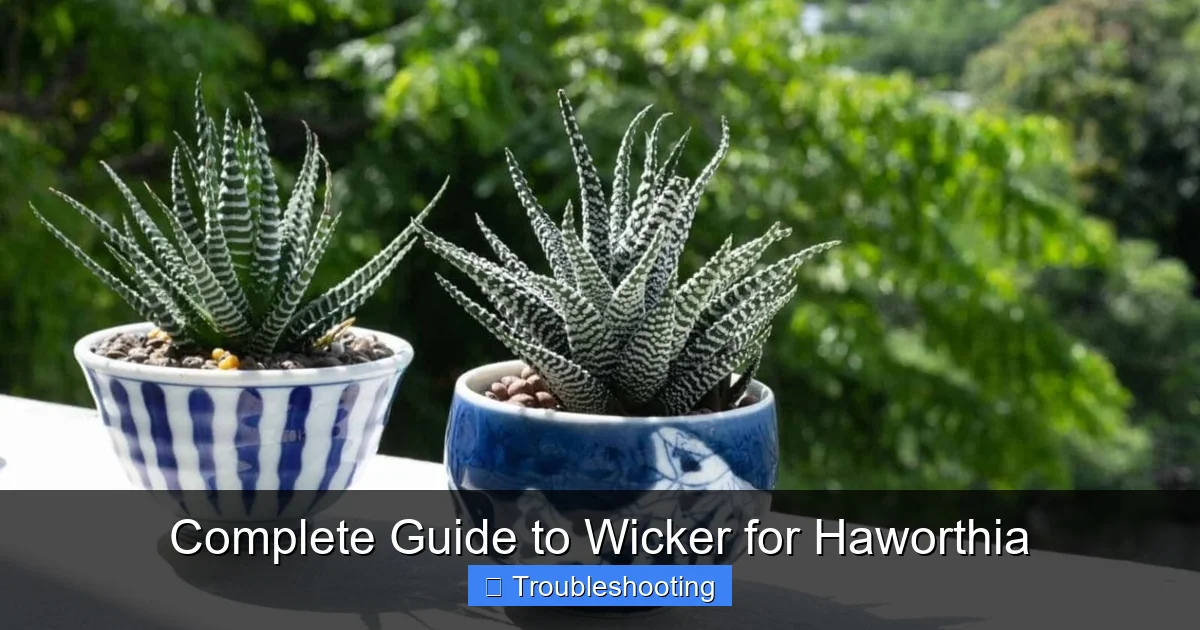
Visual guide about Complete Guide to Wicker for Haworthia
Image source: planetnatural.com
Material Matters
Willow is the most common wicker material. It is flexible, strong, and widely available. Unpeeled willow (with bark) lasts longer than peeled willow because the bark protects fibers. Look for a golden-brown color indicating proper curing.
Rattan comes from climbing palm stems. It is denser and more durable than willow. The solid core resists crushing. Rattan planters often have a tighter weave naturally. They cost more but last longer.
Seagrass and water hyacinth are softer, faster-growing materials. They biodegrade quicker. They work for short-term displays but are poor choices for permanent Haworthia homes.
Synthetic wicker (resin, HDPE) mimics natural fibers but resists rot, UV, and moisture damage. It does not breathe like natural wicker, so the aeration benefit is lost. However, it eliminates mold concerns and lasts indefinitely. Choose synthetic if longevity outweighs root aeration for your situation.
Weave Tightness and Pattern
Hold the basket up to a light source. You should see minimal gaps between strands. A tight, even weave indicates quality construction and reduces soil loss. Common patterns include:
- Rand weave: Single strands pass over and under alternating stakes. Strong and relatively tight.
- Pair weave: Two strands twist around each stake. Very tight, excellent for soil retention.
- Wale weave: Three or more strands create a heavy ridge. Often used at rim and base for structure.
- Open/twilled weaves: Decorative but leak soil. Avoid unless you line thoroughly.
Run your hand along the interior. It should feel smooth. Rough splinters damage liners and roots. Quality wicker is sanded or naturally smooth from use.
Shape and Size Considerations
Haworthia roots are shallow. They prefer wide, shallow containers over deep ones. A deep basket wastes soil and holds moisture too long at the bottom where roots do not reach. Look for containers 3 to 5 inches deep with broad surface area.
Round, oval, and rectangular shapes all work. Rectangular trays allow attractive groupings. Round bowls showcase single specimens. Ensure the base is flat and stable. Wicker baskets with rounded bottoms tip easily.
Check for a raised base or feet. Containers sitting directly on surfaces trap moisture underneath, accelerating rot. Feet or a recessed base promote airflow beneath.
New vs. Vintage vs. Repurposed
New planters from garden centers are often treated with sealants. These reduce breathability but extend life. Rinse well before use to remove dust and residues.
Vintage baskets from thrift stores or family attics add character. Inspect carefully for mold, insect damage, and structural weakness. Old glue joints fail. Soak in a 10% bleach solution for 15 minutes, rinse thoroughly, and dry completely in sun before planting.
Repurposed items like laundry baskets, picnic baskets, or storage totes can work if they meet the criteria above. Remove any plastic liners, hardware, or fabric inserts. Drill drainage holes in solid bottoms.
Preparing Wicker Planters for Haworthia
Preparation determines success. Skipping steps leads to soil messes, water damage, and plant decline. Follow this process every time.
Step 1: Clean and Inspect
Brush out dust and debris with a soft brush. Vacuum crevices. Check for loose strands, broken stakes, or sharp ends. Tuck loose ends back into the weave or trim flush. Sand rough spots. If the wicker smells musty, the bleach soak mentioned earlier is mandatory.
Step 2: Apply a Protective Sealant (Optional)
A clear, water-based sealant extends wicker life significantly. Choose a product labeled safe for plants and food contact once cured. Matte finishes look most natural. Apply two thin coats to the exterior and interior, allowing full drying between coats. Do not seal the bottom if you want maximum breathability there. Note that sealant reduces the wicking effect somewhat. Test on a small area first.
Step 3: Install a Liner
This is non-negotiable. Liners contain soil, protect wicker from constant moisture, and allow removal for repotting. Options include:
- Rigid plastic pots: Drop a nursery pot inside. Simplest method. Choose a pot 1 inch smaller than the basket interior. Hide the rim with moss or decorative stones.
- Flexible plastic liners: Sold as “basket liners” or “planter bags.” Conform to shape. Poke drainage holes in the bottom. Fold excess down inside the rim.
- Coco coir liners: Natural fiber sheets pressed into shape. Breathable, biodegradable, attractive. Replace annually as they break down.
- Heavy-duty landscape fabric: Cut to size, press into basket, secure with clothespins or binder clips at the rim. Double layer for durability. Cheap and effective.
- DIY plastic bag method: Use a sturdy trash bag. Poke holes. Tuck edges down. Not pretty but functional for hidden baskets.
Whichever liner you choose, ensure it has drainage holes. Haworthia cannot tolerate standing water. Elevate the liner slightly with pebbles or pot feet inside the basket so water exits freely.
Step 4: Add a Drainage Layer
Place a half-inch layer of coarse material at the liner bottom. Options: perlite, pumice, LECA (clay pebbles), or coarse gravel. This prevents soil from clogging drainage holes and creates a reservoir for excess water to escape into.
Step 5: Prepare Haworthia Soil Mix
Standard potting soil retains too much water. Haworthia needs a gritty, fast-draining mix. Make your own:
- 2 parts coarse sand or poultry grit
- 1 part pumice or perlite
- 1 part quality cactus/succulent soil (or coconut coir based mix)
- Optional: 1/2 part worm castings for gentle nutrition
Mix thoroughly. Wet slightly so it holds together when squeezed but crumbles easily. Fill the liner to about 1 inch below the rim.
Planting and Care in Wicker Containers
With the container ready, planting is straightforward. Ongoing care requires adjustments for the wicker environment.
Planting Technique
Remove Haworthia from its nursery pot. Gently loosen the root ball. Shake off excess old soil. Inspect roots. Trim any black, mushy, or dead roots with sterilized scissors. Healthy roots are white or light tan and firm.
Create a shallow depression in the new soil. Place the plant so the crown (where leaves meet roots) sits at soil level. Do not bury the lower leaves. Backfill with mix, firming gently. Top with a thin layer of decorative gravel or small stones. This keeps lower leaves off damp soil, reduces evaporation, and looks finished.
Wait 3 to 5 days before watering. This allows any root damage to callous, preventing rot.
Watering Adjustments for Wicker
Wicker wicks moisture from the soil. Check soil moisture more frequently than you would for ceramic or plastic. Insert a wooden skewer or moisture meter to the bottom of the liner. Water only when the bottom half is dry.
When watering, do it thoroughly. Place the entire basket in a sink or tub. Water until it flows freely from the drainage holes. Let it drain completely. Never let the basket sit in a saucer of water. The wicker will wick it back up.
In summer heat, you may water every 5 to 7 days. In winter, every 3 to 4 weeks. Always judge by soil moisture, not calendar.
Bottom watering works well with wicker. Place the basket in a tray of water for 15 minutes. The soil wicks up moisture evenly. The wicker stays drier. Remove and drain thoroughly.
Light Requirements
Haworthia prefers bright indirect light. Direct afternoon sun scorches leaves. Morning sun is gentle and beneficial. East or north windows are ideal. South or west windows need sheer curtains.
Wicker baskets are portable. Rotate the container weekly for even growth. Move outdoors in summer to a shaded patio if desired. Acclimate gradually over 7 to 10 days. Bring in before temperatures drop below 50°F (10°C).
Fertilizing
Haworthia are light feeders. Use a balanced, water-soluble fertilizer diluted to 1/4 strength. Apply once monthly during active growth (spring to early fall). Skip winter. Alternatively, top-dress with worm castings in spring. The frequent watering in wicker leaches nutrients faster, so slight feeding is appropriate.
Seasonal Care Calendar
Spring: Repot if needed. Resume fertilizing. Increase watering as growth accelerates. Check for pests.
Summer: Monitor moisture daily in heat. Provide shade from intense sun. Watch for mealybugs in leaf axils. Ensure good airflow.
Fall: Reduce watering. Stop fertilizing. Bring outdoor plants inside. Inspect thoroughly for hitchhiking pests.
Winter: Water sparingly. Keep cool (55 to 65°F ideal). Maximize light. No fertilizer. Check for rot during dim months.
Common Problems and Troubleshooting
Even with perfect preparation, issues arise. Wicker introduces specific failure modes. Recognize them early.
Wicker Mold and Mildew
Symptoms: White, green, or black fuzzy patches on wicker strands. Musty smell. Often at the base or where wicker contacts soil.
Causes: Persistent dampness, poor airflow, high humidity, no sealant.
Solutions: Move to a drier, airier location. Scrub affected areas with a stiff brush and 1:10 vinegar-water solution. Rinse. Dry in direct sun for several hours. Apply sealant if not already done. Ensure liner drainage works. Elevate basket on feet.
Prevention: Never let wicker stay wet. Empty saucers immediately. Use a fan in humid rooms. Replace liners annually.
Soil Drying Too Fast
Symptoms: Leaves wrinkle, lose plumpness, develop brown tips. Soil pulls away from liner edges. Water runs straight through.
Causes: Hot dry air, windy location, unsealed wicker, too much sun, root-bound plant.
Solutions: Seal wicker exterior. Move to shadier spot. Group plants to increase local humidity. Add a layer of sphagnum moss on soil surface. Bottom water to rehydrate hydrophobic soil. Repot if root-bound.
Soil Staying Too Wet
Symptoms: Lower leaves turn translucent, mushy, yellow. Stem feels soft. Fungus gnats appear. Algae on soil surface.
Causes: Poor drainage, no liner holes, saucer holding water, heavy soil mix, cool low-light conditions.
Solutions: Verify drainage holes are clear. Remove saucer. Repot into grittier mix. Increase light and airflow. Treat with hydrogen peroxide drench (1:4 with water) for early rot. Discard severely affected plants.
Wicker Deterioration
Symptoms: Strands become brittle, snap easily. Color fades to gray. Weave loosens. Basket loses shape.
Causes: UV exposure, repeated wet-dry cycles, age, poor quality material.
Solutions: This is eventually inevitable for natural wicker. Extend life by keeping indoors, sealing, and avoiding overwatering. When deterioration compromises structure, transplant into a new container. Compost the old wicker.
Pests Specific to Wicker Environments
Wicker crevices harbor pests. Mealybugs love the protected junctions. Spider mites thrive in the dry microclimate wicker creates. Scale insects attach to woody strands.
Inspection: Check wicker thoroughly before planting. Use a flashlight. Look in every gap.
Treatment: For mealybugs, dab with isopropyl alcohol on a cotton swab. Spray neem oil weekly for 3 weeks. For spider mites, increase humidity, spray insecticidal soap. For scale, scrape off manually, then treat with horticultural oil.
Prevention: Quarantine new plants 2 weeks. Keep wicker clean. Avoid overcrowding.
Root Issues
Because wicker breathes, roots may grow toward the container walls and into the wicker itself. This makes repotting tricky.
Solution: At repotting time, soak the root ball in water to loosen soil. Gently tease roots free. If roots have penetrated the wicker, cut the wicker strands rather than tearing roots. Sacrifice the basket if necessary. Roots come first.
Creative Display Ideas
Wicker’s versatility shines in creative arrangements. Here are inspiring ways to showcase Haworthia.
Single Specimen Showcases
A striking Haworthia truncata or Haworthia cooperi var. truncata deserves its own stage. Choose a round wicker bowl 6 to 8 inches wide. Plant centrally. Top dress with white quartz gravel. Place on a minimalist stand. The contrast of geometric plant and organic basket draws the eye.
Mixed Haworthia Trays
Rectangular wicker trays (12 by 18 inches or larger) hold collections. Group by texture: window-leaved types (cooperi, cymbiformis) together, hard-leaved types (fasciata, attenuata) together. Vary heights. Add small rocks or driftwood for a miniature landscape. Leave space between plants for airflow.
Vertical Wicker Gardens
Wall-mounted wicker pockets or frames create living art. Line pockets with coco coir. Plant small Haworthia offsets. Water with a squeeze bottle. Ensure the wall can handle moisture. Use a waterproof backing board. Best for bright indoor walls.
Tiered Stands
Multi-tier wicker plant stands display collections at varying heights. Place larger specimens on lower shelves, smaller on top. Rotate shelves seasonally for even light. Ensure each tier has a drip tray to protect the wicker below.
Hanging Wicker Baskets
Shallow wicker baskets with chains hang beautifully. Plant trailing Haworthia varieties like Haworthia viscosa or Haworthia reinwardtii. Hang near east-facing windows. Water by taking down, soaking, draining, rehanging. Check chains regularly for rust.
Seasonal Centerpieces
For special occasions, create a temporary arrangement in a decorative wicker basket. Combine Haworthia with other succulents, air plants, moss, and seasonal elements (pinecones, flowers, ornaments). Keep plants in their nursery pots hidden by moss. Dismantle after the event. Plants return to permanent homes unstressed.
Long-Term Maintenance and Repotting
Wicker containers and Haworthia both benefit from periodic renewal.
When to Repot
Repot Haworthia every 2 to 3 years. Signs it is time: roots circling the liner bottom, soil depleted (crusty, hydrophobic), plant outgrowing space, offset crowding, or wicker deteriorating.
Best time is early spring at the start of active growth. Avoid repotting during summer heat or winter dormancy.
Repotting Process
Remove the entire liner from the wicker basket. If roots have grown into the wicker, cut the liner away. Gently remove the plant. Shake off old soil. Inspect and trim roots. Prepare fresh soil mix. Replant in a clean liner (new or sterilized). Return to the wicker basket if it is still sound. Otherwise, select a new container.
Wicker Maintenance Schedule
Monthly: Dust wicker with a soft brush. Check for mold. Verify drainage.
Quarterly: Inspect structural integrity. Tighten loose strands. Apply touch-up sealant to worn spots.
Annually: Deep clean. Remove liner. Scrub wicker with mild soap and water. Rinse. Dry completely in sun (2 to 3 hours max to avoid UV damage). Reapply sealant. Replace liner.
Every 2 to 3 years: Evaluate replacement. If wicker is brittle, sagging, or extensively molded, retire it. The cost of a new basket is minor compared to losing a prized plant.
Conclusion
Growing Haworthia in wicker containers rewards you with stunning, naturalistic displays that highlight the unique beauty of these succulents. The breathable walls promote healthy roots. The warm textures elevate your decor. But success demands attention to preparation, liners, watering adjustments, and ongoing maintenance.
Start with a quality tight-weave basket. Line it properly. Use gritty soil. Water mindfully. Monitor for mold. Repot periodically. These habits become routine quickly. Soon you will develop an intuition for the moisture rhythm of your wicker planters.
Remember that wicker is a living material in its own way. It ages. It changes. It eventually returns to the earth. Embrace this cycle. When one basket retires, another takes its place. Your Haworthia collection continues to grow, propagate, and delight through generations of containers.
Whether you choose a single heirloom bowl for a prized truncata or a tiered stand for a growing obsession, the combination of Haworthia and wicker brings a slice of African rocky slopes into your home with rustic elegance. Happy planting.
Frequently Asked Questions
Do Haworthia roots grow into the wicker material?
Yes, Haworthia roots can penetrate loose weaves or deteriorated wicker seeking moisture. This makes repotting difficult. Use a quality liner and inspect roots at each repotting. Cut wicker strands rather than tearing roots if they have penetrated.
Should I seal my wicker planter before using it for Haworthia?
Sealing extends wicker life and reduces mold but slightly decreases breathability. Use a plant-safe, water-based sealant. Apply to exterior and interior walls, not the bottom. Two thin coats. Unsealed wicker provides maximum aeration but lasts 1 to 2 years.
What soil mix works best for Haworthia in wicker?
Use a fast-draining mix: 2 parts coarse sand or poultry grit, 1 part pumice or perlite, 1 part cactus soil or coconut coir. Wicker wicks moisture, so the mix must dry quickly but rehydrate easily. Avoid peat-heavy mixes that become hydrophobic.
Can I use a wicker laundry basket as a Haworthia planter?
Yes, if it has a tight weave, flat stable bottom, and you add a sturdy liner with drainage. Remove any fabric lining first. Elevate on bricks or pot feet. Expect 1 to 2 seasons of life. Large baskets allow beautiful specimen groupings.
How do I prevent soil from washing out of wicker gaps when watering?
Use a tight-weave basket, a quality liner (coco coir, landscape fabric, or plastic), and top-dress with gravel. Water gently with a narrow-spout can or bottom-water. Avoid high-pressure streams that displace soil.
What Haworthia varieties look best in wicker containers?
All varieties work, but window-leaved types (H. cooperi, H. cymbiformis, H. truncata) contrast beautifully with wicker texture. Hard-leaved zebra types (H. fasciata, H. attenuata) provide architectural form. Mix textures in large trays for visual interest.