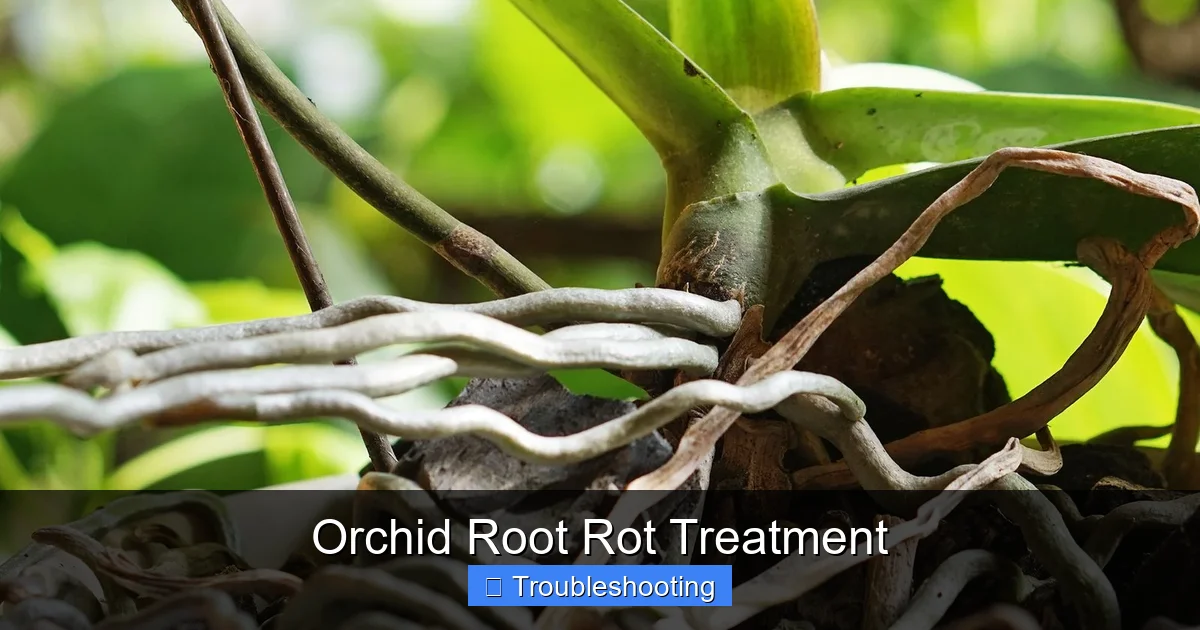
Orchid Root Rot Treatment
Orchid root rot treatment requires quick action: remove the plant, trim all mushy roots, treat with hydrogen peroxide, and repot in fresh medium. Early detection and proper aftercare are critical for recovery.
Orchids are stunning plants, but they can be finicky. One of the most common problems growers face is root rot. If you have ever pulled an orchid from its pot and found brown, mushy roots, you know the sinking feeling. The good news? You can often save the plant. This guide walks you through every step of orchid root rot treatment so you can nurse your orchid back to health.
Root rot happens when roots sit in water too long. Orchid roots need air. They suffocate in soggy media. Fungi and bacteria move in. The roots turn brown or black. They feel soft. They may smell bad. Leaves yellow and drop. The plant looks wilted even when wet. Do not panic. With the right approach, many orchids bounce back. I have saved dozens of plants using the methods below. You can too.
Key Takeaways
- Act fast: Root rot spreads quickly; treat at the first sign of yellowing leaves or mushy roots.
- Sterilize tools: Always use clean scissors to prevent spreading bacteria or fungus.
- Hydrogen peroxide helps: A 3% solution kills pathogens on remaining healthy roots.
- Fresh medium is essential: Never reuse old potting mix; it holds spores and excess moisture.
- Adjust watering habits: Water only when the medium is nearly dry to prevent recurrence.
- Airflow matters: Good ventilation reduces humidity around roots and discourages rot.
- Patience pays off: Recovery takes weeks; new root growth signals success.
Quick Answers to Common Questions
Can an orchid survive root rot?
Yes, if caught early and treated properly. Remove all mushy roots, treat with hydrogen peroxide, and repot in fresh medium. The plant can regrow roots.
How do I know if my orchid has root rot?
Look for yellowing leaves, mushy brown or black roots, a foul smell, and a plant that looks wilted despite wet media. Healthy roots are firm and white or green.
Should I water my orchid after treating root rot?
Wait 3 to 7 days before watering to let cut ends callous. Mist leaves daily for humidity. Then water thoroughly and let drain completely.
Can I reuse the old potting mix after root rot?
No. Old mix harbors fungal spores and bacteria. Always use fresh, sterile orchid potting medium to prevent reinfection.
How often should I check my orchid roots?
Check visible roots every time you water. Do a full root inspection monthly. Repot and examine all roots every 1 to 2 years.
📑 Table of Contents
- Understanding Orchid Root Rot
- Identifying the Signs of Root Rot
- Immediate Orchid Root Rot Treatment Steps
- Repotting After Root Rot
- Preventing Future Root Rot
- Special Considerations for Different Orchid Types
- When to Seek Professional Help
- Monitoring Recovery
- Common Myths About Orchid Root Rot Treatment
- Building a Root Rot Prevention Kit
- Conclusion
Understanding Orchid Root Rot
What Causes Root Rot
Root rot is not a single disease. It is a condition caused by several pathogens. The most common culprits are Pythium, Phytophthora, and Rhizoctonia fungi. Bacteria like Erwinia also play a role. These organisms live in almost every environment. They only become a problem when conditions favor them. Wet, stagnant, low-oxygen environments are perfect for them.
Overwatering is the number one cause. Many beginners water on a schedule rather than checking the medium. Orchids in dense moss or broken-down bark stay wet too long. Poor drainage makes it worse. Pots without holes trap water. Decorative outer pots with no drainage hold runoff. Low light slows evaporation. Cool temperatures reduce the plant’s water uptake. All these factors combine to create a rot storm.
Why Orchid Roots Are Unique
Orchid roots differ from typical houseplant roots. Most orchids are epiphytes. In nature, they grow on tree branches. Their roots cling to bark. They absorb moisture from humid air and rain. They dry quickly between rains. They photosynthesize too. That is why healthy orchid roots are green or silvery. They have a spongy covering called velamen. Velamen absorbs water fast and protects the inner cortex. When velamen stays wet, it breaks down. Pathogens enter the cortex. Rot begins.
The Difference Between Rot and Natural Aging
Not every brown root is rot. Old roots naturally die back. They turn tan or brown and become papery. They are dry and hollow. Rotten roots are mushy. They collapse when squeezed. They may ooze liquid. They smell sour or musty. Healthy roots are firm. They are white or green. They have plump velamen. Learn to tell the difference. You do not want to cut healthy tissue.
Identifying the Signs of Root Rot
Above-Ground Symptoms
The first clues appear on the leaves and pseudobulbs. Leaves turn yellow, starting at the bottom. They may become limp and leathery. New growth may stall. Buds blast (drop before opening). Pseudobulbs shrivel. The plant looks dehydrated even though the pot is wet. This happens because dead roots cannot take up water. The plant is drowning and thirsty at the same time.
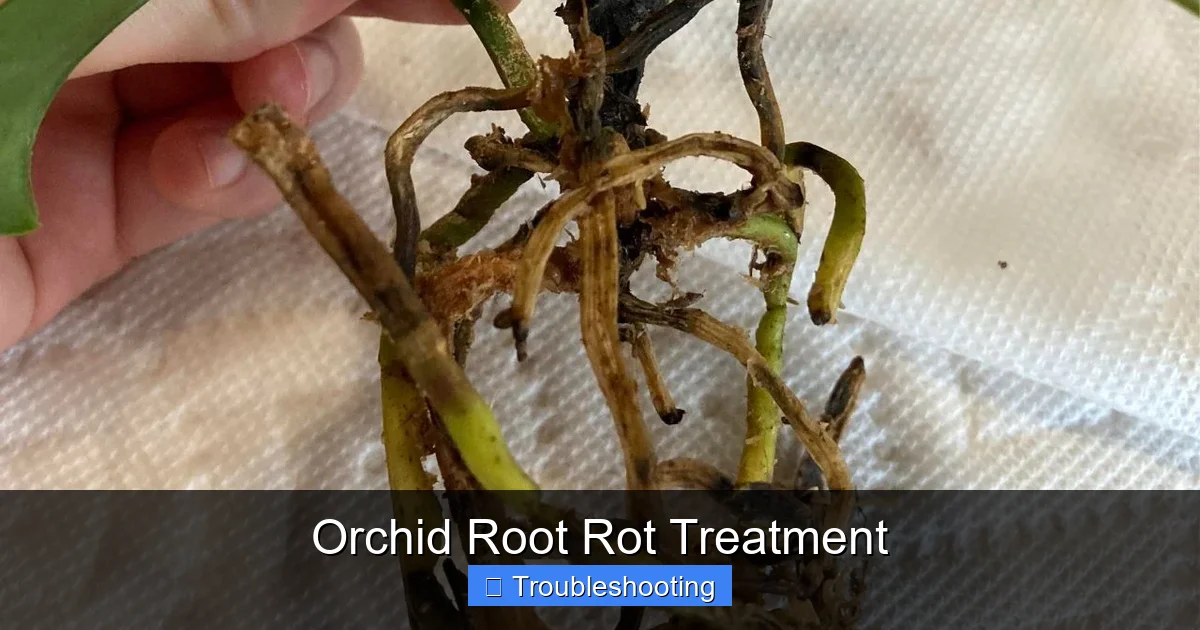
Visual guide about Orchid Root Rot Treatment
Image source: planterhoma.com
Root Zone Symptoms
To confirm, you must look at the roots. Gently remove the orchid from its pot. Shake off loose media. Inspect every root. Healthy roots are firm and white or green. Rotten roots are brown, black, or mushy. The velamen sloughs off, leaving a thin string (the stele). That string may be intact but the root is dead. Smell the root ball. A foul, swampy odor means advanced rot.
Using a Moisture Meter or Skewer
If you are unsure, use a wooden skewer. Push it deep into the medium. Leave it for a minute. Pull it out. If it is dark and wet, the medium is saturated. A moisture meter gives a reading. But nothing beats looking at the roots directly. Make root inspection part of your routine. Check every time you water. Catch problems early.
Immediate Orchid Root Rot Treatment Steps
Gather Your Supplies
Before you start, get everything ready. You need clean scissors or pruning shears. Sterilize them with rubbing alcohol or a flame. Have a bowl of lukewarm water. Prepare 3% hydrogen peroxide in a spray bottle. Get fresh orchid potting mix (bark, sphagnum, or a blend). Have a clean pot with drainage holes. Wear gloves if you prefer. Work on a clean surface. Newspaper or a disposable tablecloth works well.
Remove the Orchid from Its Pot
Tip the pot sideways. Gently ease the plant out. If roots cling to the pot, squeeze a flexible pot or run a knife around the inside. Do not yank. You will tear healthy roots. If the plant is stuck in a clay pot, you may need to break the pot. Sacrifice the pot to save the plant. Once free, shake off as much old media as possible. Rinse roots under lukewarm running water. This removes debris and lets you see clearly.
Trim All Rotted Roots
This is the most critical step. Cut off every mushy, brown, or black root. Cut back to firm, white or green tissue. If a root is partially rotted, cut above the damage. Sterilize your scissors between cuts. Dip in alcohol or wipe with a disinfecting wipe. This prevents spreading pathogens. It feels drastic. You may remove 50% or more of the root system. That is okay. A few healthy roots are better than many dead ones. Dead roots rot further and kill the plant.
Treat Remaining Roots with Hydrogen Peroxide
Spray the trimmed roots thoroughly with 3% hydrogen peroxide. It bubbles on contact. That is oxygen releasing. It kills bacteria and fungi on contact. It also oxygenates the root zone. Let the roots sit for a few minutes. Do not rinse. The peroxide breaks down into water and oxygen. It is safe and effective. Some growers use cinnamon as a natural fungicide. Dust cut ends with ground cinnamon. It seals wounds and has antifungal properties. Either works. I use both.
Clean the Pot or Get a New One
If reusing the pot, scrub it with hot soapy water. Soak in a 10% bleach solution for 10 minutes. Rinse thoroughly. Let it dry. Plastic pots are easier to sterilize than clay. Clay is porous and can harbor spores. When in doubt, use a new pot. Choose a pot just large enough for the remaining roots. Orchids like tight quarters. Too much media stays wet too long. Clear plastic pots let you monitor roots. They also allow light to reach photosynthetic roots.
Repotting After Root Rot
Choose the Right Potting Medium
Medium choice depends on your environment and watering habits. Bark mixes drain fast. They are great for humid climates or heavy waterers. Sphagnum moss holds more water. It suits dry homes or infrequent waterers. A blend of bark, perlite, and charcoal works for many. Avoid garden soil. It compacts and suffocates roots. Never reuse old mix. It holds spores and salts. Fresh medium gives the plant a clean start.
Position the Plant Correctly
Place the orchid in the pot. The base of the lowest leaf should sit just below the rim. Spread roots naturally. Do not force them. Add medium around the roots. Tap the pot gently to settle it. Do not pack tight. Air spaces are vital. The plant should be stable but not buried. If the plant wobbles, use a stake and clips. Stability encourages new root attachment.
Watering After Repotting
Do not water immediately. Wait 3 to 7 days. This lets cut ends callous. It reduces infection risk. Mist leaves daily to maintain humidity. When you do water, water thoroughly. Flush the pot until water runs free. Then let it drain completely. Do not let the pot sit in a saucer of water. Empty the saucer. The first few weeks are critical. Watch for new root tips. They are bright green or reddish. That is your success signal.
Preventing Future Root Rot
Master Your Watering Routine
Watering is a skill. Learn to judge by weight. Lift the pot when dry. Lift it when wet. Feel the difference. Stick a finger or skewer into the medium. Water when the top inch is dry. For bark, that may be every 5 to 7 days. For moss, every 10 to 14 days. Adjust for season. Water less in winter. Water more in active growth. Morning watering lets leaves dry by night. Wet leaves at night invite crown rot.
Improve Air Circulation
Stagnant air breeds fungus. A small fan on low keeps air moving. Do not blow directly on the plant. Just create gentle movement. Space plants apart. Crowding traps humidity. Good airflow also helps leaves dry after watering. It strengthens stems. It mimics the breezy canopy orchids love.
Provide Proper Light
Light drives photosynthesis. Photosynthesis powers root growth. Too little light means slow water uptake. The medium stays wet. Too much light burns leaves. Most orchids want bright, indirect light. East or west windows work well. South windows need sheer curtains. North windows may be too dim. Observe leaf color. Light green means good light. Dark green means too little. Reddish edges mean too much.
Fertilize Wisely
Weakly, weekly is the mantra. Use a balanced orchid fertilizer at 1/4 strength. Fertilize every week during growth. Flush with plain water monthly to prevent salt buildup. Salts damage roots. Damaged roots invite rot. Do not fertilize a sick plant. Wait until you see new roots. Then start slowly.
Repot on Schedule
Orchid media breaks down. Bark becomes spongy. Moss compacts. Both hold too much water. Repot every 1 to 2 years. Spring is ideal. New growth signals the right time. Fresh media resets the clock. It prevents rot before it starts. It also lets you inspect roots regularly.
Special Considerations for Different Orchid Types
Phalaenopsis (Moth Orchids)
Phals are the most common houseplant orchid. They have no pseudobulbs. Leaves store water. They hate drying out completely. But they hate soggy roots more. Use a bark mix with some moss for moisture balance. Clear pots help you see roots. Phals often grow aerial roots. Leave them. They absorb humidity. Do not bury them unless they are long enough to reach the medium naturally.
Cattleya and Sympodial Orchids
Cattleyas, Dendrobiums, and Oncidiums have pseudobulbs. They store water and nutrients. They tolerate drying better. They need a chunky, fast-draining mix. Large bark, charcoal, and perlite work well. Repot when new growth starts. Position the oldest pseudobulb against the pot edge. New growth goes toward the center. This gives room to grow.
Mounted Orchids
Some orchids grow mounted on wood or cork. They dry fast. Rot is rare but possible. If moss around roots stays soggy, rot happens. Remove the plant. Trim rot. Remount with fresh sphagnum. Water by soaking the mount. Let it dry fully between waterings. Mounted orchids need high humidity. A humidifier or daily misting helps.
Terrestrial Orchids
Paphiopedilums (slipper orchids) and Phragmipediums grow in soil-like mixes. They want more moisture. But they still need drainage. Use a fine bark mix with peat and perlite. Keep evenly moist, not wet. They have no pseudobulbs. Do not let them dry out completely. Rot here often starts at the base of the fan. Check the crown regularly.
When to Seek Professional Help
Systemic Infection Signs
Sometimes rot spreads to the stem or crown. Crown rot is often fatal. The center of the plant turns black and mushy. Leaves pull out easily. If the crown is gone, the plant cannot grow new leaves. Stem rot on sympodial orchids shows as black, sunken lesions on pseudobulbs. If most pseudobulbs are affected, recovery is unlikely. You can try cutting away infected tissue and treating with a systemic fungicide. But success rates are low.
Viral Infections
Viruses mimic rot symptoms. Yellow streaks, rings, or mosaic patterns on leaves suggest virus. There is no cure. Infected plants should be isolated or destroyed to protect others. Sterilize tools between every plant. If you suspect virus, send a sample to a lab. Do not guess.
Valuable or Rare Specimens
If the orchid has high sentimental or monetary value, consider a professional. Orchid societies often have experienced growers who can help. Some nurseries offer rescue services. They have access to stronger fungicides and controlled environments. It may be worth the cost.
Monitoring Recovery
What to Expect Week by Week
Week 1: The plant looks rough. Leaves may still be limp. No visible change. That is normal. Week 2-3: Leaf turgor improves. Leaves firm up. You may see tiny root tips appear at the base. They look like green or red dots. Week 4-6: New roots grow longer. They attach to the medium. New leaf growth may start. Week 8+: The plant looks established. Resume normal care.
Signs of Trouble During Recovery
Watch for spreading black areas. New soft spots on the stem. Foul smell returning. Leaves continuing to yellow and drop. These mean rot is still active. You may need to re-inspect roots. Sometimes a missed piece of rot spreads. Act fast. Re-treat if needed.
Adjusting Care as the Plant Recovers
As roots regrow, the plant takes up more water. You may need to water slightly more often. But stay cautious. Overwatering now undoes everything. Increase light gradually. A recovering plant burns easier. Hold off on fertilizer until you see active leaf growth. Then use 1/8 strength. Build up slowly.
Common Myths About Orchid Root Rot Treatment
Myth: Cinnamon Alone Cures Rot
Cinnamon helps. It is a good antifungal for cut surfaces. But it does not fix the underlying problem. If you dust cinnamon and put the plant back in soggy moss, rot returns. Cinnamon is a supplement, not a cure.
Myth: You Must Remove All Roots
Some say cut everything and regrow from the stem. This works for some Phals (stem propagation). But it is extreme. If the plant has any healthy roots, keep them. They support the plant while new roots grow. Total root removal stresses the plant severely.
Myth: Hydrogen Peroxide Damages Roots
3% peroxide is safe. It breaks down fast. It does not harm living tissue at that concentration. Higher concentrations (10%+) can burn. Stick to drugstore 3%. Use it once at treatment. Do not use it every watering.
Myth: Orchids Need Constant Moisture
This myth kills more orchids than anything. Orchids need humidity, not wet feet. Their roots need air. Constant moisture suffocates them. The velamen is designed for quick wet-dry cycles. Mimic nature. Wet, then dry. Wet, then dry.
Building a Root Rot Prevention Kit
Essential Items to Keep on Hand
Prepare a kit so you can act fast. Include: sharp bypass pruners, 70% isopropyl alcohol, 3% hydrogen peroxide spray bottle, ground cinnamon, fresh orchid bark mix, clean pots in various sizes, bamboo stakes and clips, wooden skewers, disposable gloves, and a small fan. Store it near your plants. When you spot trouble, you are ready.
Routine Inspection Schedule
Make it a habit. Every watering: lift the pot, check weight, look at visible roots. Monthly: pull one plant and check root ball. Quarterly: full repot check for each plant. Keep a log. Note dates, observations, actions. Patterns emerge. You learn your plants’ rhythms.
Conclusion
Orchid root rot treatment is not magic. It is a process. Remove the plant. Cut the rot. Treat the cuts. Repot fresh. Change the habits that caused it. The steps are simple. The discipline is hard. But every grower loses plants to rot at some point. It is how you learn. I have composted my share. Each loss taught me something. Now I catch it early. My plants thrive. Yours will too.
Remember: healthy roots mean a healthy plant. Give them air. Give them drainage. Give them time to dry. Watch them. Listen to them. They tell you what they need. With patience and the right orchid root rot treatment approach, you can turn a mushy disaster into a blooming success. Happy growing.
Frequently Asked Questions
What is the best fungicide for orchid root rot?
Hydrogen peroxide (3%) is effective and safe for home use. For severe cases, systemic fungicides like thiophanate-methyl or metalaxyl work but require careful application. Always follow label instructions.
Can I save an orchid with no roots left?
Yes, Phalaenopsis can sometimes regrow roots from the stem base. Place the stem in a humid environment with damp sphagnum moss. Keep warm and bright. New roots may emerge in weeks.
Why does my orchid keep getting root rot?
Recurring rot usually means the growing conditions haven’t changed. Check for overwatering, poor drainage, broken-down media, low light, or poor airflow. Fix the environment, not just the plant.
Is cinnamon a good treatment for orchid root rot?
Cinnamon is a natural antifungal that works well on fresh cut surfaces. Dust it on trimmed roots after cutting. It helps seal wounds and prevent infection but does not replace proper culture.
How long does it take an orchid to recover from root rot?
Recovery takes 4 to 12 weeks. New root tips appear in 2 to 4 weeks. Leaf turgor improves in 2 to 3 weeks. Full establishment with new growth takes 2 to 3 months.
Can I treat root rot without repotting?
Not effectively. Rotten roots and infected media must be removed. Repotting in fresh medium is essential. Skipping this step almost guarantees the rot will return.