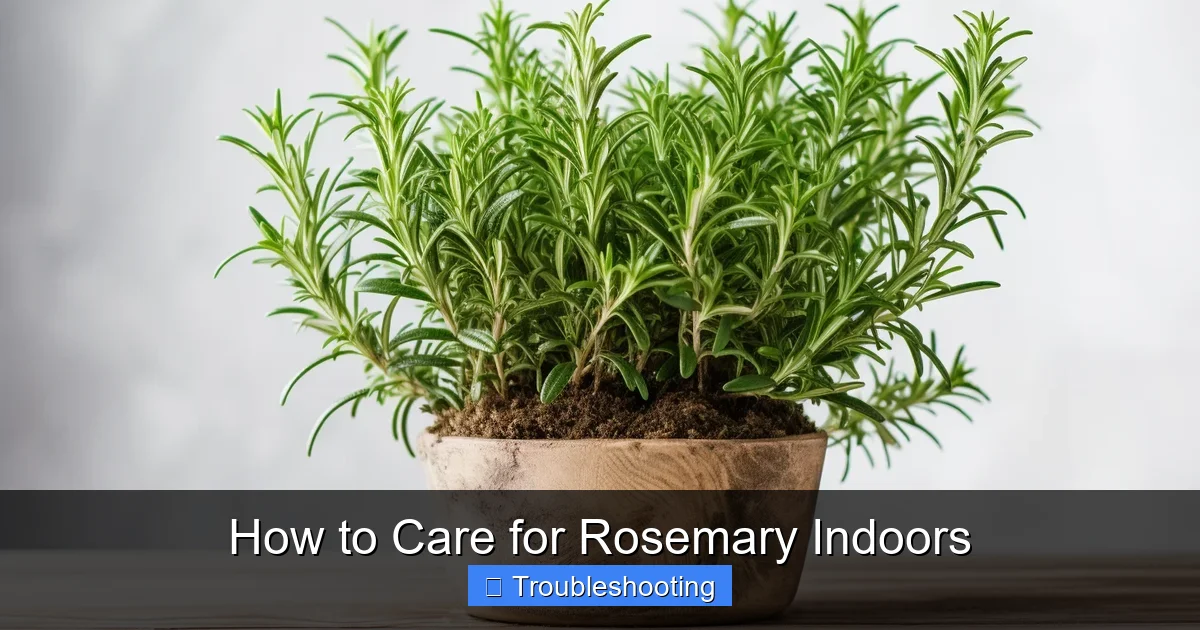
How to Care for Rosemary Indoors
Growing rosemary indoors is rewarding when you meet its specific needs. This guide covers everything from choosing the right pot and soil to mastering light, water, and humidity requirements. Follow these tips to enjoy fresh, aromatic rosemary year-round in your kitchen.
Key Takeaways
- Light is critical: Rosemary needs 6 to 8 hours of direct sunlight daily or a strong grow light alternative.
- Well-draining soil prevents root rot: Use a sandy, gritty mix in a pot with drainage holes.
- Water deeply but infrequently: Let the top inch of soil dry out completely between waterings.
- Good air circulation matters: Space plants apart and avoid stagnant, humid corners.
- Prune regularly for bushy growth: Harvest often and trim woody stems to encourage new shoots.
- Watch for pests early: Spider mites and powdery mildew are common indoor threats.
- Repot annually in spring: Refresh soil and check roots to keep your plant vigorous.
Quick Answers to Common Questions
How much direct sunlight does indoor rosemary need?
Indoor rosemary needs at least 6 hours of direct sunlight daily, preferably 8 hours. A south-facing window is ideal. If natural light is insufficient, use a full-spectrum LED grow light for 12 to 14 hours a day.
Why does my rosemary keep dying in winter?
Winter deaths are usually caused by overwatering combined with low light. Growth slows drastically, so the plant needs very little water. Water only when the soil is dry an inch deep, typically every 3 to 4 weeks. Add a grow light to compensate for short days.
Can I use regular potting soil for rosemary?
Regular potting soil holds too much moisture and causes root rot. You must amend it. Mix 2 parts potting soil with 1 part coarse sand or perlite and 1 part fine grit or pumice for a fast-draining blend.
How do I fix leggy, sparse growth on my rosemary?
Leggy growth means insufficient light. Move the plant to a brighter location or add a grow light. Prune back the long stems by one-third in spring, cutting just above a leaf node to encourage bushier branching.
What is the white powder on my rosemary leaves?
White powder is powdery mildew, a fungal disease caused by high humidity and poor air circulation. Remove affected leaves, increase air flow with a fan, and spray with a mix of 1 tablespoon baking soda, 1 teaspoon horticultural oil, and 1 gallon of water.
📑 Table of Contents
- Why Grow Rosemary Indoors
- Choosing the Right Variety
- Light Requirements: The Non-Negotiable Factor
- The Perfect Pot and Soil Mix
- Watering: The Art of Neglect
- Humidity and Air Flow
- Feeding: Less Is More
- Pruning and Harvesting for Health
- Repotting: The Annual Refresh
- Common Problems and Troubleshooting
- Winter Care Special Considerations
- Propagating New Plants
- Creative Uses Beyond Cooking
- Conclusion
Why Grow Rosemary Indoors
Rosemary is a favorite herb for many home cooks. Its piney aroma and bold flavor elevate roasted vegetables, breads, and meats. Growing it indoors means you have fresh sprigs at your fingertips all year. No more trips to the grocery store for wilted, expensive bunches. An indoor plant also adds a touch of greenery and a wonderful scent to your kitchen or sunny windowsill.
But rosemary has a reputation. Many gardeners call it finicky. It often thrives outdoors in the ground but struggles inside a pot. The good news is that failure usually comes down to a few misunderstood needs. Rosemary is native to the Mediterranean. It loves sun, heat, and rocky, dry soil. Our homes often offer the opposite: low light, high humidity, and soggy potting mix. Once you mimic its natural habitat, the plant becomes surprisingly tough. This guide will walk you through every step to keep your indoor rosemary alive and thriving.
Choosing the Right Variety
Not all rosemary plants are created equal. Some varieties handle indoor life better than others. Upright types like ‘Tuscan Blue’ or ‘Arp’ can get large and woody fast. They need serious pruning to stay manageable in a pot. For windowsills and countertops, look for compact or trailing varieties. ‘Prostratus’ is a classic trailing type that spills beautifully over the edge of a container. ‘Blue Boy’ is a true dwarf that stays under 12 inches tall. ‘Huntington Carpet’ is another low grower with great flavor.
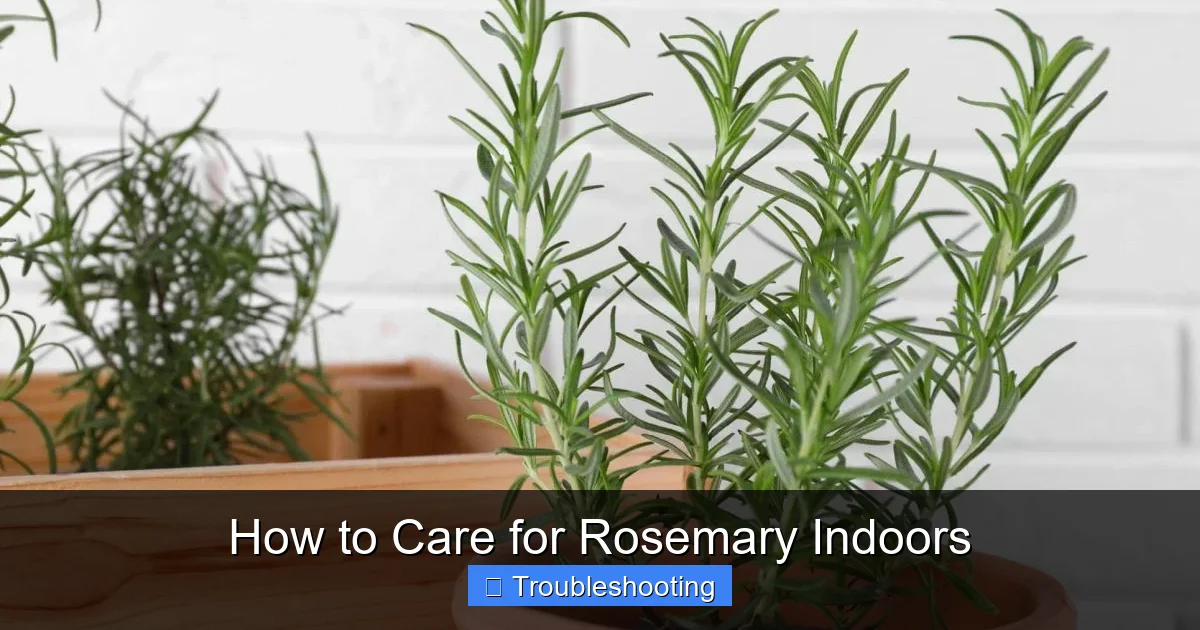
Visual guide about How to Care for Rosemary Indoors
Image source: the-plant-guide.com
Starting from Seed vs. Buying a Plant
You can start rosemary from seed, but it tests your patience. Germination takes two to four weeks. The seedlings grow slowly for months. They are also prone to damping off, a fungal disease that kills baby plants. For most indoor growers, buying a healthy starter plant is the smarter move. You get instant harvest potential and a stronger root system. Look for a plant with bright green needles, no brown tips, and no signs of webbing or white powder on the leaves. Gently tip it out of the nursery pot. The roots should be white and firm, not brown and mushy.
Light Requirements: The Non-Negotiable Factor
If you get one thing right, make it light. Rosemary is a sun worshiper. In its native hills, it bakes in full sun all day. Indoors, it needs a minimum of six hours of direct sunlight. Eight hours is even better. A south-facing window is the gold standard. West-facing works too. East-facing might barely squeak by in summer but will fail in winter. North-facing windows will not work without serious supplemental lighting.
Signs Your Plant Needs More Light
Watch your plant. It will tell you if it is unhappy. Leggy growth is the number one sign. The stems stretch long and thin between leaf nodes. The plant looks sparse and floppy. The needles may turn a pale, yellowish green. New growth might be tiny and weak. If you see this, move the plant immediately. Rotate the pot a quarter turn every week. This prevents the plant from leaning permanently toward the window.
Using Grow Lights Successfully
Most homes lack perfect natural light, especially in winter. A full-spectrum LED grow light solves this. Look for a light rated around 5000K to 6500K. Hang it 6 to 12 inches above the plant. Run it for 12 to 14 hours a day. A simple outlet timer automates this. You do not need an expensive panel. A single gooseneck lamp or a small panel light works for one or two pots. The investment pays off in dense, aromatic growth.
The Perfect Pot and Soil Mix
Root rot is the silent killer of indoor rosemary. It happens when roots sit in water. The solution starts with the pot and soil. Never use a pot without drainage holes. Decorative cachepots are fine if you keep the plant in a nursery pot inside them. But you must dump the excess water after every watering. Terra cotta is the best material. It is porous. It wicks moisture away from the soil. Plastic holds water longer. If you tend to overwater, stick to terra cotta.
Size Matters
Do not pot a small plant into a huge container. “Overpotting” leaves a large volume of wet soil with no roots to drink it. The soil stays soggy. Choose a pot only 1 to 2 inches wider than the root ball. Rosemary actually likes being a little root-bound. It mimics the rocky crevices of its home. A 6 to 8 inch pot is usually perfect for a mature indoor plant.
DIY Soil Recipe for Success
Standard bagged potting soil is too heavy. It holds too much water. You need a fast-draining, gritty mix. Make your own. It is cheaper and better. Mix two parts high-quality potting soil with one part coarse sand or perlite. Add one part fine grit, pumice, or chicken grit (insoluble crushed granite). A handful of horticultural charcoal helps keep the mix sweet. The mix should feel loose and gritty. Water should run through it in seconds.
Watering: The Art of Neglect
Most people kill rosemary with kindness. They water on a schedule. They water because the surface looks dry. Rosemary wants you to ignore it. The rule is simple: water deeply, then wait. Stick your finger an inch into the soil. If it feels cool and damp, do not water. Wait until that top inch is bone dry. Then take the pot to the sink. Water until it pours out the bottom holes. Let it drain fully. Put it back. That is it.
Seasonal Adjustments
Water needs change with the seasons. In spring and summer, the plant grows actively. It drinks more. You might water every 5 to 7 days. In fall and winter, growth slows or stops. Light levels drop. The plant uses very little water. You might water only every 2 to 3 weeks. Always check the soil first. Never water on a calendar date. Overwatering in winter is the most common cause of death.
Water Quality Considerations
Rosemary dislikes softened water. The sodium builds up in the soil and burns roots. If you have a water softener, use rainwater, distilled water, or water from an outside spigot before the softener. Tap water is usually fine if it is not heavily chlorinated. Letting tap water sit overnight helps chlorine dissipate. Room temperature water is best. Cold water shocks the roots.
Humidity and Air Flow
Indoor air is dry, especially in winter with heating running. Rosemary tolerates dry air better than wet air. However, very low humidity can stress it. Spider mites love hot, dry, still air. They are the number one pest of indoor rosemary. The fix is air movement. A small fan on low, running a few hours a day, works wonders. It mimics the coastal breezes of the Mediterranean. It strengthens stems. It dries the leaf surface, preventing fungal spores from germinating.
Avoiding the Humidity Trap
Do not mist rosemary. Misting creates a wet leaf surface. This invites powdery mildew and botrytis (gray mold). Do not use pebble trays. They raise humidity right around the crown. Grouping plants helps humidity, but space them at least 6 inches apart. Air must flow between them. If you see white powder on leaves, that is powdery mildew. Increase air flow immediately. Remove affected leaves. Treat with a homemade spray of 1 tablespoon baking soda, 1 teaspoon horticultural oil, and 1 gallon water.
Feeding: Less Is More
Rosemary grows in poor, rocky soil. It does not need rich fertilizer. Too much nitrogen produces lush, weak growth with low oil content. That means less flavor and aroma. It also attracts aphids. Feed sparingly. Use a balanced liquid fertilizer diluted to half strength. Or use a slow-release organic pellet in spring. Feed once a month during active growth (spring to early fall). Stop completely in winter. Do not fertilize a stressed or newly repotted plant. Wait 4 to 6 weeks for roots to establish.
Signs of Nutrient Issues
Yellowing older needles can mean nitrogen deficiency. But it also means overwatering. Check soil moisture first. Purple stems or needles often indicate phosphorus deficiency, usually from cold soil or wet roots. White new growth with green veins (chlorosis) suggests iron deficiency, often from high soil pH. Rosemary likes slightly acidic to neutral soil (pH 6.0 to 7.0). Most bagged mixes are fine. If you suspect pH issues, a simple soil test kit confirms it.
Pruning and Harvesting for Health
Pruning is not just for shape. It is essential for health. Rosemary gets woody at the base. Woody stems do not produce new leaves. If you never cut it, you end up with a bare, leggy plant. Regular harvesting keeps it bushy. It stimulates branching. The best time to prune is spring, just as new growth starts. But you can snip for cooking anytime.
How to Prune Correctly
Never cut into old, brown, leafless wood. Rosemary rarely sprouts from bare wood. Cut green stems just above a leaf node or a pair of leaves. Take no more than one-third of the plant at a time. For a major renovation, do it in stages over a few weeks. Shape the plant into a loose mound or dome. This lets light reach the center. Remove any dead, crossing, or inward-growing branches. Clean your scissors with alcohol between plants to prevent disease spread.
Harvesting for the Kitchen
Harvest in the morning after dew dries but before the sun gets hot. This is when essential oils peak. Snip 4 to 6 inch sprigs. Strip the needles from the woody stem for cooking. Chop finely; the needles are tough. Woody stems are great for throwing on grill coals or into a fire pit for aroma. You can also dry rosemary. Hang small bunches upside down in a dark, airy spot. Or lay sprigs on a screen. Store dried needles in an airtight jar away from light.
Repotting: The Annual Refresh
Plan to repot every spring. Even if the plant does not need a bigger pot, the soil breaks down. It compacts. It loses drainage. Salts from fertilizer build up. Repotting refreshes the root zone. It lets you inspect roots for rot or pests. It is the single best thing you can do for long-term success.
Step-by-Step Repotting Guide
Water the plant lightly a day before. This holds the root ball together. Prepare the new pot with a coffee filter or mesh over the hole. Add an inch of fresh gritty mix. Gently remove the plant. Loosen the root ball with your fingers. Tease out circling roots. Trim any brown, mushy roots with clean scissors. Place the plant in the new pot. The soil line should be the same as before. Do not bury the stem. Fill around with mix. Tap the pot to settle. Do not pack it down. Water thoroughly. Keep in bright shade for a few days, then move back to sun.
Common Problems and Troubleshooting
Even with perfect care, issues arise. Catching them early saves the plant. Here is a troubleshooting guide for the most frequent indoor rosemary problems.
Brown, Crispy Needles
This usually means underwatering or low humidity. Check the soil. If it is dust-dry deep down, water deeply. If the soil is moist but needles are crisp, the air is too dry or hot. Move away from heating vents. Add a fan for circulation. Brown tips can also mean fertilizer burn. Flush the pot with lots of water to leach salts.
Yellowing Needles
Yellowing from the bottom up often means overwatering. Check roots. If they are brown and mushy, you have root rot. Unpot immediately. Cut all rot. Repot in fresh, dry, gritty mix. Do not water for a week. Yellowing all over can mean nitrogen deficiency or root binding. If roots are circling the pot, repot. If soil is old, feed lightly.
Spider Mites
Look for fine webbing at leaf joints. Leaves look stippled or dusty. Mites are tiny, barely visible. They thrive in hot, dry, still air. Blast the plant with a strong spray of water in the sink. Hit the undersides of leaves. Repeat every 3 days for 2 weeks. Apply insecticidal soap or neem oil. Increase humidity slightly and add a fan. Quarantine the plant from others.
Powdery Mildew
White powder on leaves. It spreads fast in humid, stagnant air with poor light. Remove badly affected leaves. Improve air flow. Spray with the baking soda mix mentioned earlier. Or use a sulfur-based fungicide labeled for herbs. Do not compost diseased leaves. Throw them in the trash.
Aphids and Whiteflies
Sticky residue (honeydew) on leaves. Tiny green, black, or white bugs on new growth. Blast with water. Spray with insecticidal soap. Yellow sticky traps catch flying adults. Check nearby plants. They spread fast.
Root Rot
The plant wilts but soil is wet. Smell the soil. Sour, swampy smell means rot. This is an emergency. Unpot. Wash all soil off roots. Cut every brown, mushy root. Dip healthy roots in 3% hydrogen peroxide for 5 minutes. Repot in fresh, dry, gritty mix in a clean pot. Do not water for 7 to 10 days. Pray. Survival is not guaranteed.
Winter Care Special Considerations
Winter is the danger zone. Short days. Dry heat. Cold drafts. Growth stops. The plant is basically dormant. Your job is to keep it alive until spring.
Light Strategy
Move the plant to the absolute brightest window. Clean the glass. Dust the leaves. Supplement with a grow light 14 hours a day. This prevents the leggy, weak growth that makes the plant vulnerable to pests.
Temperature Management
Rosemary prefers 60 to 70°F (15 to 21°C) days and cooler nights. It can handle down to 40°F (4°C) but not freezing. Keep it away from cold window panes at night. Keep it away from heating vents. Sudden temperature swings cause needle drop.
Water Discipline
This is critical. Water maybe once every 3 to 4 weeks. The soil must be dry deep down. A moisture meter helps if you are unsure. Do not fertilize. Do not prune heavily. Just maintain.
Propagating New Plants
Rosemary roots easily from cuttings. This is how you replace an old, woody plant. Or share with friends. Take 4 to 6 inch cuttings in spring or early summer. Choose semi-hardwood stems (firm but not woody). Strip the bottom 2 inches of needles. Dip in rooting hormone (optional but helpful). Stick in moist perlite or sand. Cover with a plastic bag or dome. Keep in bright, indirect light. Roots form in 3 to 6 weeks. Pot up into gritty mix.
Layering Method
If you have a trailing variety, pin a low stem to the soil in a neighboring pot. Bury a node. Keep moist. It will root while still attached to the mother. Cut it free once roots form. This has a near 100% success rate.
Creative Uses Beyond Cooking
Your indoor rosemary earns its keep in many ways. The scent is invigorating. Place a pot near your desk for focus. Add sprigs to a simmer pot with citrus peels and cinnamon for a natural air freshener. Make rosemary-infused olive oil. Steep sprigs in warm oil, strain, bottle. Great for bread dipping. Make a hair rinse. Steep rosemary in apple cider vinegar. Dilute and rinse after shampoo for shine. Add to bath salts for sore muscles. The antimicrobial properties make it a great addition to homemade cleaning sprays.
Conclusion
Growing rosemary indoors is a relationship. You learn its language. Crispy needles mean thirst. Leggy stems mean darkness. Yellow leaves mean wet feet. Webbing means mites. Once you speak its language, the guesswork vanishes. You give it sun, grit, air, and restraint. It gives you flavor, fragrance, and a living link to the Mediterranean hills. Do not be discouraged by past failures. Every dead plant taught you something. Now you have the knowledge. Get a terra cotta pot. Mix that gritty soil. Find your sunniest window. Plant your rosemary. Watch it thrive. Your roasted potatoes will thank you.
Frequently Asked Questions
How often should I water my indoor rosemary plant?
Water deeply only when the top inch of soil feels completely dry. In summer this may be every 5 to 7 days; in winter, only every 3 to 4 weeks. Always check the soil with your finger before watering rather than following a fixed schedule.
What type of pot is best for growing rosemary indoors?
An unglazed terra cotta pot with a drainage hole is best. The porous clay wicks excess moisture away from the roots, preventing rot. Choose a pot only 1 to 2 inches larger than the root ball, as rosemary prefers to be slightly root-bound.
Can I grow rosemary indoors without a sunny window?
Yes, but you must use a full-spectrum LED grow light. Run the light for 12 to 14 hours daily, positioned 6 to 12 inches above the plant. Without strong supplemental light, rosemary will become leggy, weak, and prone to pests.
Why are the tips of my rosemary needles turning brown?
Brown tips usually indicate underwatering, very low humidity, or fertilizer salt buildup. Check soil moisture first. If the soil is dry, water deeply. If the soil is moist, flush the pot with water to remove salts and increase air circulation around the plant.
When and how should I prune my indoor rosemary?
Prune in early spring as new growth begins. Cut green stems just above a leaf node, removing no more than one-third of the plant at a time. Never cut into old, brown, woody stems, as rosemary rarely regrows from bare wood.
How do I get rid of spider mites on my rosemary?
Spider mites thrive in hot, dry, still air. Blast the plant with a strong stream of water, targeting leaf undersides. Repeat every 3 days for 2 weeks. Apply insecticidal soap or neem oil. Run a fan daily to improve air circulation and deter future infestations.