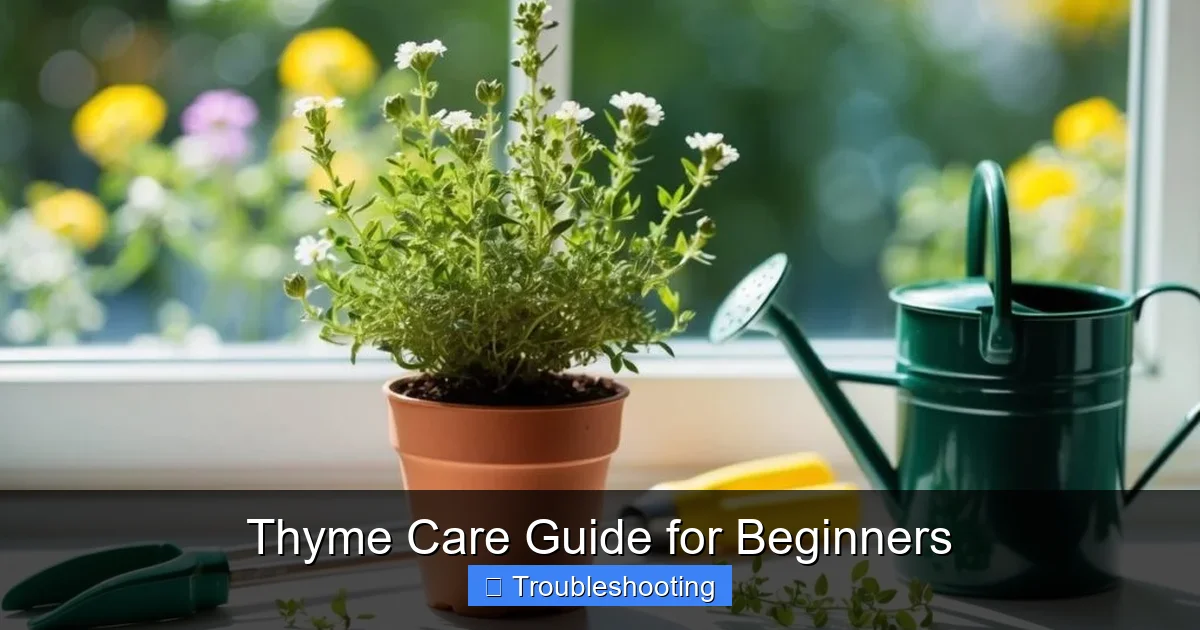
Thyme Care Guide for Beginners
Thyme is a hardy, low-maintenance herb perfect for new gardeners. This thyme care guide for beginners covers everything from choosing the right variety and planting location to watering, pruning, and troubleshooting common issues like root rot and pests. Follow these simple steps and you’ll enjoy fresh thyme year-round.
Key Takeaways
- Choose the right variety: English thyme and French thyme are best for cooking; creeping thyme works well as ground cover.
- Plant in full sun: Thyme needs at least six hours of direct sunlight daily for strong growth and flavor.
- Use well-draining soil: Sandy or gritty soil prevents root rot, the most common thyme problem.
- Water sparingly: Let soil dry completely between waterings; thyme hates wet feet.
- Prune regularly: Trim after flowering to keep plants bushy and prevent woody stems.
- Harvest correctly: Snip stems just before flowers open for the best flavor.
- Watch for pests: Spider mites and aphids can appear in dry conditions; treat early with neem oil.
Quick Answers to Common Questions
How often should I water thyme?
Water thyme only when the top 2 inches of soil are completely dry. This usually means every 7-10 days in summer and every 2-3 weeks in cooler months. Always check soil moisture before watering.
Can thyme grow in shade?
Thyme needs at least 6 hours of direct sun daily. It will survive in partial shade but becomes leggy, produces fewer oils, and loses flavor. Full sun is essential for healthy, flavorful plants.
Why is my thyme turning brown and woody?
Woody growth is natural as thyme ages. However, excessive woodiness with dieback usually means insufficient pruning, too much shade, overwatering, or the plant is 3-5 years old and needs replacement.
When is the best time to harvest thyme for drying?
Harvest thyme just before flowers open, in mid-morning after dew dries but before the day heats up. This is when essential oil concentration peaks, giving you the most flavorful dried herb.
Can I grow thyme indoors year-round?
Yes, but it is challenging. Thyme needs 6+ hours of direct sun or 12-14 hours under grow lights, cool temperatures (60-65°F), good air circulation, and very careful watering. Expect a shorter lifespan than outdoor plants.
📑 Table of Contents
- Why Thyme Is Perfect for Beginner Gardeners
- Choosing the Right Thyme Variety
- Planting Thyme for Success
- Watering, Feeding, and Daily Care
- Harvesting and Preserving Thyme
- Troubleshooting Common Thyme Problems
- Growing Thyme in Containers
- Seasonal Care Calendar
- Propagating Thyme for Free Plants
- Companion Planting with Thyme
- Creative Uses Beyond the Kitchen
- Conclusion
Why Thyme Is Perfect for Beginner Gardeners
If you are new to growing herbs, thyme should be at the top of your list. This tough little plant thrives on neglect. It does not need rich soil. It does not need frequent watering. It does not need constant attention. What it does need is sunlight and good drainage. Give it those two things, and it will reward you with fragrant leaves for years.
This thyme care guide for beginners walks you through every step. You will learn how to pick the best variety for your kitchen. You will learn how to plant it in beds or containers. You will learn the watering schedule that keeps roots healthy. You will also learn how to spot trouble early and fix it fast. By the end, you will feel confident growing thyme like a pro.
Choosing the Right Thyme Variety
Not all thyme is the same. There are over 300 species. Some are grown for cooking. Some are grown for looks. Some spread like a carpet. Knowing the difference saves you time and disappointment.
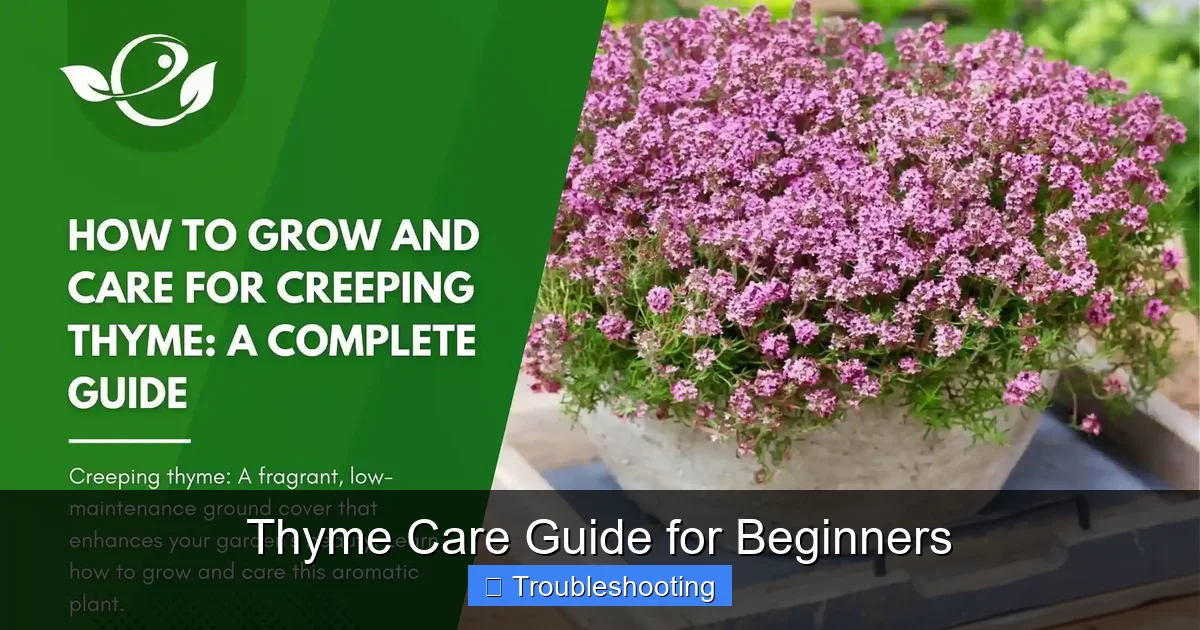
Visual guide about Thyme Care Guide for Beginners
Image source: envirevoagritech.com
Culinary Thyme Varieties
English thyme (Thymus vulgaris) is the classic kitchen herb. It has a strong, earthy flavor. It grows upright to about 12 inches tall. It is hardy in zones 5 through 9. This is the thyme most recipes call for.
French thyme is a close cousin. It has a slightly sweeter, more delicate taste. The leaves are narrower and grayer. It is less cold-hardy, best in zones 6 through 9. Chefs love it for fines herbes blends.
Lemon thyme (Thymus citriodorus) adds a bright citrus note. It smells amazing when brushed against. Use it in fish dishes, teas, and desserts. It comes in variegated forms with gold-edged leaves that look pretty in pots.
Caraway thyme has a unique caraway scent. It is low-growing and spreads slowly. Great for breads and roasted vegetables.
Ornamental and Ground Cover Thymes
Creeping thyme (Thymus serpyllum) forms a dense mat. It handles foot traffic well. Plant it between stepping stones. It blooms with pink or purple flowers that bees love. It is not the best for cooking but excels as a living mulch.
Woolly thyme has fuzzy, silvery leaves. It hugs the ground tightly. It rarely flowers. Use it in rock gardens or troughs. It dislikes humidity more than other thymes.
Elfin thyme is the tiniest. It grows only an inch high. Perfect for fairy gardens or tiny crevices. It is slow to establish but very cute.
Quick Selection Guide
- For cooking: English thyme or French thyme
- For containers: Lemon thyme or compact English thyme
- For paths and pavers: Creeping thyme
- For rock gardens: Woolly thyme or elfin thyme
- For pollinators: Any flowering variety
Planting Thyme for Success
Good planting sets the stage for everything else. Thyme hates wet roots. That is rule number one. Rule number two is full sun. Follow these steps and your plants will start strong.
When to Plant
Spring is ideal. Plant after your last frost date. The soil has warmed but summer heat has not arrived. This gives roots time to establish. Fall planting works in zones 7 and warmer. Plant at least six weeks before the first frost. Avoid planting in the heat of summer. Transplant shock plus heat stress often kills young plants.
Selecting the Site
Thyme needs six to eight hours of direct sun. More sun equals more oils equals better flavor. A south-facing spot is perfect. West-facing works too. Morning sun with afternoon shade is acceptable but not ideal. The plants will get leggy and weak.
Drainage is non-negotiable. Thyme grows wild on rocky Mediterranean hillsides. Recreate that. If your soil is heavy clay, do not plant thyme directly in the ground. Build a raised bed. Use a container. Or amend heavily with sand and grit.
Soil Preparation
Thyme prefers poor soil. Rich soil makes lush growth but weak flavor. It also encourages rot. Aim for a pH between 6.0 and 8.0. Slightly alkaline is fine. Test your soil if unsure.
For in-ground planting, mix the native soil with coarse sand or fine gravel. A 50-50 mix works well. Add a handful of compost per planting hole. No manure. No heavy fertilizer. Thyme does not need it.
For containers, use a cactus or succulent mix. Or make your own: two parts potting soil, one part coarse sand, one part perlite or pumice. Make sure the pot has drainage holes. Terra cotta is best. It wicks moisture away from roots.
Spacing and Planting Depth
Space upright varieties 12 to 18 inches apart. Space creeping varieties 6 to 12 inches apart. They will fill in. Dig a hole the same depth as the root ball. Do not bury the stem. The crown should sit at soil level. Backfill with your amended soil. Firm gently. Water once to settle. Then leave it alone.
Growing Thyme from Seed vs. Transplants
Seeds are cheap but slow. Thyme seeds take 14 to 28 days to germinate. They need light to sprout. Press them into moist seed-starting mix. Do not cover. Keep at 70°F. Transplant seedlings when they have four true leaves. Harden off for a week before planting out.
Transplants are faster and easier. Buy healthy starts from a nursery. Look for bushy plants with no yellow leaves. Avoid root-bound pots. This thyme care guide for beginners recommends transplants for first-timers. You get a harvest sooner.
Watering, Feeding, and Daily Care
This is where most beginners go wrong. They love their plants to death. Thyme wants tough love. Less water. Less fertilizer. Less fuss.
The Golden Rule of Watering
Water deeply. Then wait. Let the soil dry completely. Stick your finger two inches down. If it feels dry, water. If it feels cool or damp, wait. In summer, this might mean watering every 7 to 10 days. In spring and fall, every 2 to 3 weeks. In winter, barely at all.
Container thyme dries faster. Check pots every few days in heat. But still, let them dry between drinks. Overwatering causes root rot faster than anything else. Yellow leaves that feel soft? Too much water. Crispy brown tips? Too little. Aim for the middle.
How to Water Properly
Water at the base. Keep leaves dry. Wet foliage invites fungal disease. Use a watering can with a narrow spout. Or a drip line. Water in the morning. This lets any splashed moisture evaporate. Avoid evening watering.
Deep watering encourages deep roots. Shallow sprinkling creates shallow roots. Shallow roots dry out fast. They also anchor poorly. Water until moisture reaches the bottom of the root zone. For established plants, that is 6 to 12 inches down.
Fertilizing: Less Is More
Thyme does not need fertilizer. Really. In rich soil, it grows fast but tastes bland. It also gets floppy. If you must feed, use a light hand. Apply a balanced organic fertilizer once in early spring. Half the recommended rate. Or top-dress with a thin layer of compost. That is it for the year.
Container plants need a bit more. Nutrients leach out. Feed once in spring and once in midsummer. Use a diluted liquid fertilizer. Fish emulsion works well. Stop feeding by late summer. You want tough growth going into winter.
Mulching for Moisture Control
Mulch helps but choose wisely. Organic mulches like straw or wood chips hold moisture. That can be bad for thyme. Use gravel, pea stone, or crushed oyster shells instead. These reflect heat. They improve drainage. They look nice too. Apply a one-inch layer. Keep it away from the crown.
Pruning and Pinching
Regular pruning keeps thyme productive. Pinch back tips during the growing season. This encourages branching. More branches mean more leaves to harvest. Do not cut into woody stems. They rarely resprout. Focus on green growth.
After flowering, shear the plant back by one-third. This prevents the center from opening up. It also stimulates a fresh flush of growth. In late summer, stop heavy pruning. Let the plant harden off for winter.
Harvesting and Preserving Thyme
The best part of growing thyme is using it. Proper harvesting keeps the plant healthy and gives you the best flavor.
When to Harvest
Harvest anytime the plant is actively growing. The flavor peaks just before flowers open. This is when essential oils are highest. Morning is best. After dew dries but before the sun gets hot. The oils have not evaporated yet.
You can start harvesting when the plant is 6 inches tall. Take only what you need. Never remove more than one-third of the plant at once. This leaves enough foliage for photosynthesis.
How to Harvest
Use clean scissors or snips. Cut stems 2 to 3 inches above the base. Cut just above a leaf node. This is where new growth will emerge. Avoid tearing. Torn stems invite disease.
For a big harvest, shear the whole plant back by half. Do this in mid-morning on a dry day. The plant will recover in a few weeks. You get a large batch for drying.
Fresh Storage
Fresh thyme keeps well. Wrap stems in a damp paper towel. Place in a plastic bag. Refrigerate. It lasts 10 to 14 days. Or stand stems in a jar with an inch of water. Cover loosely with a bag. Change water every few days.
Drying Thyme
Dried thyme holds flavor better than most herbs. Hang small bunches upside down in a dark, airy spot. A closet or pantry works. Takes 1 to 2 weeks. Leaves should crumble easily. Strip leaves from stems. Store in airtight jars away from light. Use within a year.
You can also dry on screens. Spread stems in a single layer. Keep in a warm, dry place with good airflow. A food dehydrator at 95°F works fast. Check after 2 hours.
Freezing Thyme
Freezing preserves the fresh taste best. Strip leaves from stems. Pack into ice cube trays. Cover with water or olive oil. Freeze solid. Pop cubes into freezer bags. Drop a cube into soups, stews, or sauces. Lasts 6 months.
Or freeze whole sprigs on a tray. Once frozen, transfer to bags. Use within 4 months for best quality.
Making Thyme-Infused Oil and Vinegar
Fill a clean jar with fresh thyme sprigs. Cover with good olive oil or white wine vinegar. Seal. Let sit 2 weeks in a cool, dark place. Strain. The oil is great for roasting vegetables. The vinegar shines in dressings. Refrigerate and use within a month.
Troubleshooting Common Thyme Problems
Even with great care, issues pop up. This section of the thyme care guide for beginners covers the most frequent troubles and how to fix them. Early action saves plants.
Root Rot: The Number One Killer
Symptoms: Yellowing leaves starting at the bottom. Stems turn brown or black at soil line. Plant wilts even when soil is wet. Roots are brown, mushy, and smell bad.
Cause: Too much water. Poor drainage. Heavy soil. Humid conditions.
Fix: Stop watering immediately. If in a pot, remove plant. Trim all rotten roots with clean scissors. Repot in fresh, dry, gritty mix. Do not water for a week. If in ground, improve drainage around the plant. Add gravel. Mound soil slightly. Pray. Root rot is often fatal. Prevention is everything.
Prevention: Plant in well-draining soil. Water only when dry. Use gravel mulch. Space plants for airflow.
Woody, Leggy Growth
Symptoms: Stems become thick and bare at the base. Few leaves on lower half. Plant looks straggly. Flops open in the center.
Cause: Age. Lack of pruning. Too much shade. Too much fertilizer.
Fix: In spring, cut back hard to 2 inches above the woody base. Only if you see green buds low on the stems. If no green buds, the plant is too far gone. Replace it. Thyme lives 3 to 5 years typically. Plan to replace regularly.
Prevention: Prune lightly all season. Shear after flowering. Full sun. Lean soil.
Spider Mites
Symptoms: Tiny yellow stipples on leaves. Fine webbing on stem tips. Leaves turn bronze and drop. Plant looks dusty.
Cause: Hot, dry, dusty conditions. Stressed plants.
Fix: Blast with strong water spray every 3 days for 2 weeks. Hit undersides of leaves. Apply neem oil or insecticidal soap weekly for 3 weeks. Increase humidity slightly. Mulch with gravel to reduce dust.
Prevention: Avoid drought stress. Hose down plants occasionally. Encourage predatory mites by avoiding broad pesticides.
Aphids
Symptoms: Clusters of tiny green, black, or gray insects on new growth. Sticky honeydew residue. Sooty mold on leaves. Curled or distorted leaves.
Cause: Tender new growth. High nitrogen. Ants farming them.
Fix: Squish by hand. Spray off with water. Apply insecticidal soap. Repeat in 5 days. Control ants with sticky barriers.
Prevention: Do not over-fertilize. Encourage ladybugs and lacewings.
Fungal Diseases: Powdery Mildew and Botrytis
Symptoms: White powdery coating on leaves (powdery mildew). Gray fuzzy mold on stems and leaves (botrytis). Usually in humid, crowded conditions.
Cause: Poor airflow. Wet foliage. High humidity. Shade.
Fix: Remove affected parts. Thin plants for airflow. Apply copper fungicide or potassium bicarbonate spray. Water at base only.
Prevention: Space properly. Full sun. Morning water only. Gravel mulch.
Winter Damage
Symptoms: Brown, dead foliage in spring. Split stems. Heaved crowns.
Cause: Freeze-thaw cycles. Wet soil in winter. No snow cover. Marginal hardiness.
Fix: Wait until spring. Scratch bark. Green underneath means alive. Prune dead parts. Water if dry. Fertilize lightly.
Prevention: Stop watering in fall. Apply gravel mulch after ground freezes. In zones 5 and below, cover with evergreen boughs. Do not use leaves. They mat and hold moisture. Container plants: move to unheated garage. Or sink pot in ground.
Growing Thyme in Containers
Containers give you total control. They are perfect for patios, balconies, and poor soil. This thyme care guide for beginners highly recommends starting with pots.
Choosing the Right Pot
Terra cotta is king. It breathes. It wicks excess moisture. Roots stay healthier. Choose a pot at least 12 inches wide and 10 inches deep. Thyme has a taproot. It needs depth. Ensure multiple drainage holes. One hole clogs easily.
Shallow wide pots work for creeping thyme. Deep pots for upright varieties. Avoid glazed ceramic without extra holes. Avoid plastic unless you drill more holes. Self-watering pots are a death trap for thyme.
Container Soil Mix
Do not use garden soil. It compacts. Use a gritty mix. Recipe: 2 parts quality potting soil, 1 part coarse sand (builder’s sand, not play sand), 1 part perlite or pumice. Add a tablespoon of garden lime per gallon of mix. Thyme likes alkaline conditions.
Top dress with half an inch of pea gravel. This keeps the crown dry. It looks clean. It reflects light up into the plant.
Container Watering Schedule
Pots dry faster. Check daily in summer. Lift the pot. Light means dry. Heavy means wet. Water until it runs out the bottom. Empty the saucer. Never let thyme sit in water.
In winter, water once a month if kept cool and dormant. Water slightly more if growing indoors under lights.
Feeding Container Thyme
Nutrients wash out. Feed monthly April through August. Use liquid kelp or fish emulsion at quarter strength. Or slow-release organic pellets in spring only. Stop by September.
Repotting and Root Pruning
Every 2 to 3 years, repot in spring. Slide plant out. Loosen roots. Trim circling roots. Shake off old soil. Repot in fresh mix. Same pot or one size up. Water lightly. Shade for a week.
Indoor Thyme Growing
Thyme can grow indoors but it is tricky. It needs 6+ hours of direct sun. A south window works. Better: LED grow lights 12 to 14 hours daily. Keep cool, 60 to 65°F. Air circulation is critical. Run a small fan. Water sparingly. Harvest often to keep it bushy. Expect a shorter lifespan than outdoor plants.
Seasonal Care Calendar
Thyme care changes with the seasons. Follow this calendar for a healthy, productive plant year after year.
Spring (March to May)
- Remove winter protection
- Prune dead stems
- Apply light compost top-dressing
- Plant new starts after last frost
- Begin regular watering as growth resumes
- Pinch tips to encourage bushiness
- Watch for aphids on new growth
Summer (June to August)
- Harvest regularly
- Water deeply but infrequently
- Shear back after main bloom
- Mulch with gravel to keep roots cool
- Scout for spider mites in heat
- Take cuttings for propagation
- Stop fertilizing by late August
Fall (September to November)
- Reduce watering as temperatures drop
- Final light harvest before hard frost
- Do not prune after September
- Apply winter mulch after ground freezes
- Move containers to protected spot
- Clean up fallen debris
Winter (December to February)
- Water only during dry thaws
- Brush heavy snow off gently
- Check containers monthly
- Plan next year’s varieties
- Order seeds or mark catalog favorites
Propagating Thyme for Free Plants
Thyme is easy to multiply. Three methods work well. Save money. Share with friends. Replace aging plants.
Division
Best in spring. Dig up a mature plant. Pull or cut the root ball into sections. Each section needs roots and green growth. Replant immediately. Water well. Keep shaded for a week. This rejuvenates old plants too.
Stem Cuttings
Take 3-inch cuttings in early summer. Choose non-flowering stems. Strip lower leaves. Dip in rooting hormone (optional). Stick in moist sand-perlite mix. Cover with a plastic bag. Place in bright indirect light. Roots in 3 to 4 weeks. Pot up. Harden off. Plant out.
Layering
Creeping thyme does this naturally. Pin a low stem to the soil with a U-pin. Cover the contact point with soil. Keep moist. Roots form in 4 to 6 weeks. Cut from mother plant. Transplant.
Seed Saving
Let a few flowers go to seed. Collect when seed heads turn brown. Dry in a paper bag. Shake to release tiny seeds. Store cool and dry. Viability drops after 1 year. Sow fresh for best results.
Companion Planting with Thyme
Thyme plays well with others. Its strong scent confuses pests. Its flowers attract beneficial insects. It makes a great neighbor.
Best Vegetable Companions
- Cabbage family: Repels cabbage worms and loopers
- Tomatoes: Deters tomato hornworms and whiteflies
- Eggplant: Reduces flea beetle damage
- Potatoes: Repels Colorado potato beetles
- Strawberries: Deters slugs and improves flavor
- Onions and garlic: Mutual pest protection
Herb Companions
- Rosemary: Same needs, looks great together
- Sage: Similar water and sun requirements
- Lavender: Mediterranean trio, all love grit and sun
- Oregano: Spreading habit complements upright thyme
Flower Companions
- Roses: Thyme at the base hides bare canes, deters aphids
- Yarrow: Attracts same beneficials
- Echinacea: Shared pollinator appeal
- Sedum: Same tough conditions
What to Avoid
Do not plant thyme near basil, cilantro, or mint. These want rich, moist soil. Thyme will rot. Keep it away from heavy feeders like corn. They have opposite needs.
Creative Uses Beyond the Kitchen
Thyme earns its keep in many ways. Explore these bonus uses.
Medicinal Uses
Thyme tea soothes coughs and sore throats. Steep 1 teaspoon dried leaves in hot water 10 minutes. Add honey. Thymol, the main oil, is antiseptic and antifungal. Diluted thyme oil treats athlete’s foot and acne. Always test a patch first. Consult a doctor for serious conditions.
Household Uses
Simmer thyme sprigs with lemon and cinnamon for a natural air freshener. Add dried thyme to sachets for drawers. Moths hate it. Make a cleaning spray: steep thyme in vinegar 2 weeks. Strain. Dilute with water. Antibacterial counter spray.
Garden Uses
Creeping thyme as a lawn alternative. Handles light traffic. Stays green in drought. No mowing needed. Flowers feed bees. Living mulch under fruit trees. Suppresses weeds. Looks beautiful.
Craft Uses
Press thyme sprigs for botanical art. Weave into herb wreaths. Add to homemade candles. Infuse into soap. The scent holds well.
Conclusion
You now have a complete thyme care guide for beginners. You know how to choose, plant, water, feed, prune, harvest, and troubleshoot. You know the seasonal rhythm. You know how to propagate and companion plant. Thyme asks for so little and gives so much. Sun. Drainage. A little neglect. In return, you get flavor, fragrance, beauty, and medicine.
Start with one plant. A pot of English thyme by the kitchen door. Watch it. Learn its signals. Expand from there. Before long, you will be the friend who brings fresh thyme to every gathering. The one with the thriving herb garden. The one who knows that the best thyme care guide for beginners is simply this: plant it high, keep it dry, and let the sun do the work.
Happy growing. Your thyme journey starts now.
Frequently Asked Questions
What type of soil is best for thyme?
Thyme thrives in poor, well-draining soil with a pH between 6.0 and 8.0. Sandy or gritty soil mixed with coarse sand or fine gravel prevents root rot. Avoid rich, heavy, or clay soils that retain moisture.
How do I prevent root rot in thyme?
Plant in well-draining soil or containers with drainage holes. Water only when soil is completely dry. Use gravel mulch instead of organic mulch. Ensure good air circulation around plants. Never let thyme sit in standing water.
Should I fertilize my thyme plants?
Thyme rarely needs fertilizer. Rich soil produces lush but flavorless growth. If desired, apply a light top-dressing of compost in early spring or use half-strength balanced organic fertilizer once per year. Container plants may need light feeding twice per season.
How do I prune thyme to keep it from getting woody?
Pinch back growing tips regularly during the season. After flowering, shear the plant back by one-third. Never cut into old woody stems as they rarely resprout. Replace plants every 3-5 years when they become too woody.
What pests commonly affect thyme?
Spider mites and aphids are the most common pests. Spider mites appear in hot, dry conditions causing stippled leaves and webbing. Aphids cluster on new growth. Both can be controlled with strong water sprays, neem oil, or insecticidal soap.
Can thyme survive winter outdoors?
Most thyme varieties are hardy in zones 5-9. In colder zones, apply gravel mulch after the ground freezes and cover with evergreen boughs. Container plants should be moved to an unheated garage or sunk into the ground for root protection.