Affordable Scandinavian for Areca Palm
Create a stunning Scandinavian look for your areca palm without breaking the bank. This guide covers budget-friendly planters, DIY pot hacks, proper drainage techniques, and Nordic-inspired styling tips to keep your palm thriving in minimalist elegance.
Key Takeaways
- Choose the right pot size: Areca palms need room for root growth but hate sitting in water, so pick a container 2 inches wider than the root ball with drainage holes.
- Scandinavian style on a budget: White ceramic, matte terracotta, and woven baskets create the Nordic look for under $30 at stores like IKEA, Target, and local thrift shops.
- Drainage is non-negotiable: Add a layer of pebbles, use a cachepot system, or drill holes in decorative pots to prevent root rot in your areca palm.
- Light placement matters: Position your palm near east or north-facing windows for bright, indirect light that mimics its natural habitat.
- DIY cachepot hack: Place a plastic nursery pot inside a decorative woven basket or ceramic cover pot for easy watering and maximum style.
- Group for impact: Cluster your areca palm with snake plants or pothos in matching neutral pots to create a cohesive Scandinavian plant corner.
- Seasonal care adjustments: Reduce watering in winter, increase humidity with pebble trays, and rotate the pot monthly for even growth.
Quick Answers to Common Questions
What is the best affordable Scandinavian planter for an areca palm?
A 12-inch white matte ceramic pot with drainage holes from IKEA or Target ($15-25) offers the clean Nordic look, proper drainage, and ideal sizing for most mature areca palms.
Can I use a woven basket without drainage holes for my areca palm?
Yes, use it as a cachepot. Keep the palm in its plastic nursery pot with drainage holes, place that inside the basket, and remove the inner pot for watering. This protects the basket and ensures proper drainage.
How often should I water my areca palm in a Scandinavian-style pot?
Water when the top 2 inches of soil feel dry. Typically every 7-10 days in spring/summer, every 14-21 days in fall/winter. Always water thoroughly until it drains, then empty the saucer.
Why are my areca palm tips turning brown in my new ceramic pot?
Brown tips usually indicate low humidity, fluoride in tap water, or fertilizer salt buildup. Increase humidity with a pebble tray, use filtered water, and flush the soil quarterly to prevent salt accumulation.
Do I need to repot my areca palm immediately after buying a new Scandinavian planter?
Only repot if the plant is root-bound (roots circling the bottom, emerging from holes, or soil drying in 2-3 days). Otherwise, use the new pot as a cachepot or wait until spring for a less stressful transition.
📑 Table of Contents
- Why Your Areca Palm Deserves a Scandinavian Upgrade
- Understanding What Your Areca Palm Actually Needs
- Choosing Affordable Scandinavian Planters That Work
- Drainage Solutions: The Non-Negotiable Foundation
- Styling Your Areca Palm: Scandinavian Plant Composition
- Care Routine: Keeping Your Palm Thriving in Its New Home
- Troubleshooting Common Areca Palm Problems
- Budget Breakdown: The Complete Scandinavian Areca Palm Setup
- Seasonal Care Calendar: Year-Round Success
- Conclusion: Your Palm, Your Sanctuary
Why Your Areca Palm Deserves a Scandinavian Upgrade
Let me tell you something. I used to think areca palms were just… plants. Green things that sat in corners and collected dust. Then I moved into my first apartment with those big north-facing windows, and everything changed. The light hit different. The space felt different. And suddenly, my sad little palm in a cracked plastic pot looked like exactly what it was: an afterthought.
Here is the thing about Scandinavian design. It is not about spending thousands on designer planters. It is about intention. Clean lines. Natural materials. Breathing room. And honestly? Your areca palm craves that energy. These tropical beauties come from Madagascar, where they grow under dappled canopy light in well-draining soil. A Scandinavian approach — minimal pot, maximum drainage, strategic placement — actually mimics their native environment better than any fancy self-watering gadget.
So let us walk through this together. I am going to show you how to give your areca palm the Nordic spa treatment it deserves, without draining your savings account. We will cover pot selection, drainage hacks, styling tricks, and the care routine that keeps those fronds feathery and green year-round.
Understanding What Your Areca Palm Actually Needs
The Root of the Matter
Before we talk aesthetics, we need to talk roots. Areca palms (Dypsis lutescens) have a fibrous root system that spreads wide rather than deep. They are not taproot plants. This means wide, shallow pots work better than deep narrow ones. The roots need oxygen as much as they need water. Soggy soil suffocates them. Root rot sets in fast.
I learned this the hard way with my first palm. Beautiful ceramic pot. No drainage holes. “It has a saucer!” I told myself. Three months later, yellow fronds, mushy stems, and a very expensive lesson. Do not be me.
Light Requirements: The Scandinavian Connection
Here is where the Nordic design philosophy aligns perfectly with plant biology. Scandinavian interiors maximize natural light. Pale walls. Sheer curtains. Uncluttered windowsills. Your areca palm wants bright, indirect light — exactly what a north or east-facing window provides. Direct afternoon sun scorches the fronds. Too little light creates leggy, sparse growth.
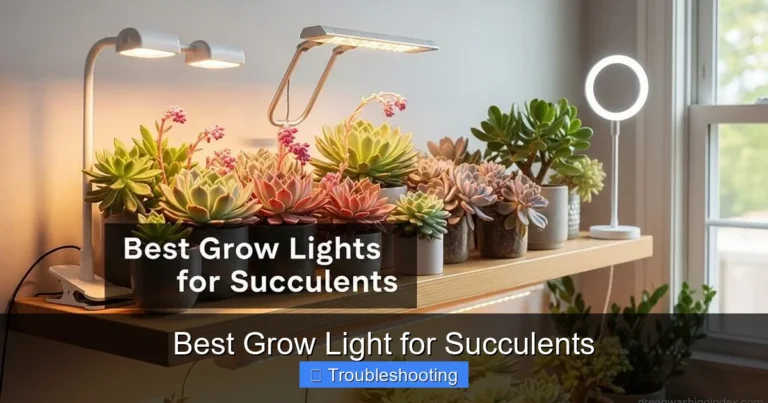
If your space is darker, do not panic. Areca palms tolerate medium light. They just grow slower. Supplement with a grow light if needed. A simple clip-on LED on a timer costs $20 and makes a massive difference through winter months.
Humidity and Temperature Sweet Spots
These palms prefer 50-60% humidity and temperatures between 65-75°F. Most homes sit around 30-40% humidity, especially in winter with forced air heating. The Scandinavian solution? Simple. Group plants together. Add a pebble tray. Maybe a small humidifier. No spa-level misting rituals required.
Choosing Affordable Scandinavian Planters That Work
The Holy Trinity: Ceramic, Terracotta, Woven
Scandinavian design relies on a tight material palette. White matte ceramic. Warm terracotta. Natural woven fibers. That is it. That is the whole look. And guess what? All three are widely available at budget prices.
White Matte Ceramic
IKEA’s BITTERGURKA series. Target’s Threshold line. Wayfair’s basics. You can find 10-12 inch white matte ceramic pots for $15-25. Look for ones with drainage holes and matching saucers. If they do not have holes, we will fix that in the next section. The matte finish hides water marks and fingerprints better than glossy. The neutral white makes the green fronds pop.
Matte Terracotta
Classic. Breathable. Inexpensive. Standard terracotta pots from Home Depot or Lowe’s cost $8-15 for the 10-12 inch size. The porous clay wicks moisture away from roots, reducing rot risk. For a more “Scandi” look, skip the orange clay and seek out muted terracotta — grey-brown, sand, warm white. Some brands sell “scandi terracotta” specifically. Or buy plain and give them a quick limewash treatment (diluted white paint, wiped off while wet) for that aged Nordic patina.
Woven Baskets as Cachepots
This is my favorite hack. Seagrass, water hyacinth, rattan baskets from IKEA (KNIXHULT, $12), Target (Project 62, $15-20), or even TJ Maxx/HomeGoods (constantly rotating, $10-30). These are cachepots — decorative covers. Your palm stays in its plastic nursery pot. The basket hides the ugly. When watering, lift the nursery pot out, water in the sink, let drain, pop back in. Zero mess. Maximum texture.
Sizing Your Pot Correctly
Current root ball diameter + 2 inches = your target pot diameter. No bigger. Areca palms like being slightly root-bound. Oversized pots hold excess soil that stays wet too long. If your palm is in a 10-inch nursery pot, move to a 12-inch decorative pot. Not 14. Not 16. Twelve.
Depth matters too. Aim for a pot height roughly equal to its width. Those tall narrow “floor planters” look cute but encourage water to pool at the bottom where roots cannot reach. Wide and shallow wins.
Where to Shop Smart
- IKEA: BITTERGURKA ceramic, KNIXHULT woven, SOCKERART terracotta. All under $25.
- Target: Threshold ceramic, Project 62 woven, Opalhouse terracotta. Watch for sales.
- Home Depot / Lowe’s: Basic terracotta, plastic nursery pots (for cachepot inserts), saucers.
- Local thrift stores / Facebook Marketplace: Vintage ceramic, mid-century planters, woven baskets. Clean with vinegar solution before use.
- Dollar Tree / Dollar General: Saucer trays, small terracotta, plastic liner pots. Surprisingly useful.
Drainage Solutions: The Non-Negotiable Foundation
Why Drainage Holes Are Non-Optional
I cannot stress this enough. Decorative pots without drainage holes are plant coffins. Water pools at the bottom. Roots rot. Fungus gnats move in. The plant declines slowly while you wonder what you did wrong. You did not do anything wrong. The pot did.
If your beautiful Scandinavian pot lacks holes, you have three options. Drill them. Use it as a cachepot. Or create a false bottom.
Option 1: Drill Your Own Holes
Ceramic and terracotta drill easily with a masonry bit. $10 at any hardware store. Place the pot on a towel. Mark 3-4 spots on the bottom. Drill slowly with steady pressure. Keep the bit wet (spray bottle) to reduce dust and heat. Wear safety glasses. Rinse the pot. Done. This takes 10 minutes and saves your plant’s life.
Option 2: The Cachepot System (My Top Recommendation)
Keep the plant in its plastic nursery pot. Place that inside the decorative pot. The nursery pot has excellent drainage. The decorative pot catches overflow. When watering, remove the inner pot. Water thoroughly in sink or tub. Let drain completely. Return to cachepot. This works with any decorative container — woven baskets, sealed ceramic, metal tins, vintage finds. Zero modification needed.
Option 3: False Bottom with Pebbles
If you absolutely must plant directly in a hole-less pot, create a drainage layer. Add 2-3 inches of pea gravel, LECA (clay pebbles), or broken terracotta shards at the bottom. Cover with landscape fabric or a coffee filter. Add soil. Plant. This creates a reservoir for excess water. However. You must water very carefully. No way to flush salts. Risk of overwatering remains high. I only recommend this for cachepots you cannot drill and will not use as cachepots.
The Saucer Situation
Every pot needs a saucer. Even cachepots benefit from a saucer under the nursery pot to catch drips. Clear plastic saucers disappear visually. Terracotta saucers match terracotta pots. Ceramic saucers match ceramic pots. Cork trivets work under woven baskets to protect floors from moisture. Spend the $2-3. Your floors will thank you.
Styling Your Areca Palm: Scandinavian Plant Composition
The Rule of Three (Or Five, Or Seven)
Odd numbers look more natural. Group your areca palm with two other plants of varying heights and textures. A tall snake plant (Sansevieria). A trailing pothos or philodendron. A compact ZZ plant. All in matching white ceramic. Or all in terracotta. Or all in woven baskets. The material consistency ties it together. The plant variety keeps it interesting.
Height Variation Through Stands
Scandinavian interiors use vertical space. Plant stands elevate smaller pots. IKEA’s SATSUMAS stand ($15). Target’s metal stands ($20). DIY version: three wooden legs + a round wood slice = custom stand for $8. Stagger heights. Floor plant. Mid-height on stand. Trailing on shelf. The eye moves. The composition breathes.
Negative Space Is Your Friend
Do not crowd. Scandinavian design values negative space as much as objects. Leave room around your palm grouping. Let the fronds cast shadows on the wall. Let the woven texture catch the light. A single statement palm in a beautiful pot, with nothing else within three feet, makes a stronger impact than a cluttered jungle corner.
Seasonal Styling Shifts
Winter: Add a chunky knit throw over a nearby chair. Place a candle in a ceramic holder near (not on) the plant. Spring: Swap the cachepot for a lighter woven basket. Summer: Move the palm outdoors to a shaded patio in its nursery pot. Fall: Bring in a ceramic pumpkin or two. The plant stays. The accessories rotate. The pot stays neutral.
Care Routine: Keeping Your Palm Thriving in Its New Home
Watering: The Finger Test
Forget schedules. Stick your finger 2 inches into the soil. Dry? Water. Damp? Wait. Areca palms like evenly moist — not wet, not bone dry. In a well-draining pot with good soil, this usually means watering every 7-10 days in growing season, every 14-21 days in winter. Water until it flows from drainage holes. Empty the saucer after 30 minutes.
Soil Mix for Success
Standard potting soil holds too much water. Make your own mix: 2 parts quality potting soil, 1 part perlite, 1 part orchid bark or coarse sand. This drains fast, holds some moisture, lets roots breathe. Repot every 2-3 years in spring. Only go up one pot size. Fresh mix. Gentle root loosening. Water well after.
Fertilizing: Less Is More
Balanced liquid fertilizer (10-10-10 or 20-20-20) at half strength. Monthly April through September. Zero fertilizer October through March. Salt buildup burns leaf tips. Flush the soil quarterly — water heavily until it runs clear from drainage holes for several minutes.
Pruning and Grooming
Remove completely brown or yellow fronds at the base. Use clean, sharp scissors. Do not pull — you damage the trunk. Trim brown tips at an angle following the leaf shape. This is cosmetic. The plant does not care. But it looks better. Wipe fronds monthly with a damp microfiber cloth. Removes dust. Prevents spider mites. Lets the plant photosynthesize efficiently.
Pest Prevention
Spider mites love dry air. Mealybugs hide in leaf axils. Scale looks like brown bumps on stems. Check weekly. Quarantine new plants for two weeks. Treat infestations with insecticidal soap or neem oil, applied in evening, repeated weekly for three weeks. A healthy, well-humidified palm in good light rarely gets pests.
Troubleshooting Common Areca Palm Problems
Yellow Fronds: The Diagnostic Checklist
Yellow leaves happen. Do not panic. Run through this list:
- Bottom fronds only, gradual: Normal aging. Remove them.
- Many fronds, rapid: Overwatering. Check roots. Repot if mushy.
- Tips yellow, then brown: Underwatering, low humidity, or fertilizer burn.
- Pale yellow, new growth: Nutrient deficiency. Fertilize.
- Yellow with green veins: Iron deficiency. Use chelated iron supplement.
Brown Tips: The Chronic Complaint
Almost every areca palm gets brown tips. It is usually one of three things. Low humidity (fix: pebble tray, humidifier, grouping). Fluoride in tap water (fix: use (fix: filtered, rain, or distilled water). Fertilizer salt buildup (fix: flush soil). Trim the brown. Address the cause. New growth comes clean.
Drooping Fronds: Water or Light?
Droop + dry soil = underwatered. Water thoroughly. Perks up in hours. Droop + wet soil = overwatered/root rot. Check roots immediately. Droop + moist soil + low light = not enough light. Move closer to window or add grow light.
Pale, Leggy Growth
Stretched stems. Wide gaps between leaf nodes. Small fronds. Classic low light response. Move to brighter spot. Rotate weekly for even exposure. Consider supplemental lighting. The plant will not “fix” existing leggy growth, but new growth will be compact.
Root Bound: When to Repot
Roots circling the pot bottom. Roots emerging from drainage holes. Soil dries in 2-3 days. Water runs straight through without absorbing. Spring is repot season. Go up 2 inches in diameter. Fresh mix. Do not break the root ball apart — just loosen the outer edges.
Budget Breakdown: The Complete Scandinavian Areca Palm Setup
Under $50: The Thrifty Starter
- 12-inch terracotta pot: $10
- Matching saucer: $3
- Potting mix, perlite, bark: $15
- Liquid fertilizer: $8
- Pebble tray (dollar store tray + driveway gravel): $5
- Moisture meter: $7
- Total: ~$48
Under $100: The Polished Look
- 12-inch white matte ceramic pot with drainage: $25
- Matching saucer: $8
- Woven seagrass cachepot (for seasonal swap): $15
- Quality potting mix + amendments: $20
- Fertilizer: $8
- Humidifier (small, 1L): $20
- Total: ~$96
Under $200: The Full Nordic Corner
- Three matching 12-inch ceramic pots: $75
- Three saucers: $18
- Metal plant stand (tall): $25
- Metal plant stand (short): $20
- Snake plant + pothos + ZZ plant: $45
- Soil, amendments, fertilizer: $30
- Total: ~$213 (watch for sales to hit $200)
Seasonal Care Calendar: Year-Round Success
Spring (March-May): Wake Up Season
Resume fertilizing. Check for repot needs. Increase watering frequency as light increases. Clean windows for maximum light transmission. Rotate weekly. Watch for spider mites as air warms.
Summer (June-August): Growth Season
Peak watering needs. Fertilize monthly. Move outdoors to shaded spot if desired (acclimate slowly over 2 weeks). Monitor for pests daily. Mist foliage in morning. Enjoy the lush growth.
Fall (September-November): Transition Season
Reduce fertilizing by half in September. Stop by October. Bring outdoor plants in before nights hit 55°F. Inspect thoroughly for pests. Reduce watering as light decreases. Add humidifier as heating starts.
Winter (December-February): Rest Season
Water every 2-3 weeks. No fertilizer. Maximize light — move closer to windows, add grow lights. Run humidifier daily. Keep away from heat vents and cold drafts. Rotate monthly. Expect zero new growth. This is normal.
Conclusion: Your Palm, Your Sanctuary
Here is what I want you to take away. Scandinavian design for your areca palm is not about perfection. It is not about the most expensive pot or the most Instagram-worthy corner. It is about creating conditions where your plant thrives — and where you feel calm looking at it.
The white ceramic pot with drainage holes. The simple watering routine. The strategic window placement. The seasonal rhythm. These things cost almost nothing. They require attention, not money. And they transform a surviving plant into a thriving centerpiece.
Start where you are. Drill holes in that thrifted pot. Repot with the right mix. Set a calendar reminder to check soil moisture. Move the palm to the better window. One step at a time. Your areca palm has been waiting for this. So has your space.
In six months, you will walk past that corner and catch the light hitting the fronds just right. The shadow patterns on the wall. The clean lines of the pot. The quiet green presence. And you will think: Yes. This is it.
Your palm deserves it. You deserve it. Let the Scandinavian simplicity begin.
Frequently Asked Questions
What size Scandinavian planter do I need for my areca palm?
Choose a pot 2 inches wider in diameter than the current root ball. For most mature areca palms in 10-inch nursery pots, a 12-inch decorative pot is ideal. Avoid oversized pots which retain excess moisture and cause root rot.
Can I drill drainage holes in a ceramic Scandinavian planter myself?
Yes, use a masonry drill bit ($10 at hardware stores) to drill 3-4 holes in the bottom. Drill slowly on a towel with the bit kept wet. Wear safety glasses. This takes 10 minutes and makes any decorative pot plant-safe.
What soil mix works best for areca palms in Scandinavian pots?
Mix 2 parts quality potting soil, 1 part perlite, and 1 part orchid bark or coarse sand. This fast-draining blend prevents waterlogging while retaining enough moisture for healthy root growth in ceramic or terracotta containers.
How do I style multiple plants with my areca palm for a Scandinavian look?
Group 3-5 plants of varying heights in matching pots (all white ceramic, all terracotta, or all woven baskets). Use plant stands for height variation. Leave negative space around the grouping. Keep pots neutral; let the plants provide the visual interest.
Why is my areca palm drooping after repotting into a new Scandinavian planter?
Transplant shock causes temporary drooping. Keep soil evenly moist (not wet), provide bright indirect light, increase humidity, and avoid fertilizing for 4-6 weeks. The plant should recover within 2-3 weeks as roots establish.
Can I keep my areca palm in a low-light corner with a grow light?
Yes. A full-spectrum LED grow light (20-30 watts) placed 12-18 inches above the canopy for 12-14 hours daily provides adequate light. Choose a clip-on or floor model with a timer for consistency. This works well in north-facing rooms or winter months.