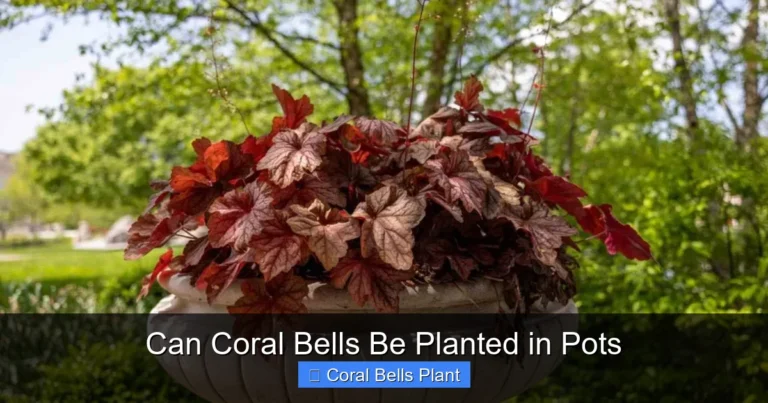
How Deep to Plant Coral Bells
Plant coral bells with the crown at soil level — never bury the crown or you risk rot and plant death. Dig a hole twice as wide as the root ball but only as deep, backfill gently, and water thoroughly to settle the soil around the roots.
If you have ever walked through a shade garden in late spring and spotted those ruffled, jewel-toned leaves catching the light, you already know the magic of coral bells. Heuchera, as the botanists call them, are the unsung heroes of the shade border — tough, colorful, and endlessly versatile. But here is the thing: for all their easygoing reputation, there is one non-negotiable rule that separates thriving clumps from sad, rotting crowns. It comes down to how deep to plant coral bells. Get this right, and you set the stage for years of low-maintenance beauty. Get it wrong, and you will be replacing plants before the season ends.
I learned this lesson the hard way years ago when I tucked a dozen ‘Palace Purple’ into a new bed, patting the soil firmly around each one like I was tucking in children. Two weeks later, the centers turned mushy and black. Crown rot. The culprit? I had buried the crowns just a half-inch too deep. That tiny mistake cost me an entire planting. Since then, I have made it my mission to understand exactly what these plants need at planting time — and to share that knowledge so you don’t have to learn the hard way.
Key Takeaways
- Crown at soil level: The most critical rule — keep the crown (where stems meet roots) exactly at ground level to prevent rot and ensure healthy growth.
- Hole width matters more than depth: Dig the planting hole twice as wide as the root ball but only as deep as the container to encourage lateral root spread.
- Amend heavy soils: Coral bells need excellent drainage; mix compost or grit into clay soils before planting to prevent waterlogged roots.
- Water deeply after planting: A thorough soak settles soil around roots and eliminates air pockets that can dry out the root ball.
- Mulch carefully: Apply 1-2 inches of mulch but keep it pulled back from the crown to avoid moisture buildup and fungal issues.
- Container planting follows the same rule: Whether in ground or pots, the crown must sit at soil surface — never deeper.
- Check depth after watering: Soil can settle after the first few waterings; verify the crown hasn’t sunk below grade and adjust if needed.
Quick Answers to Common Questions
What is the correct planting depth for coral bells?
Plant coral bells with the crown (where stems meet roots) exactly at soil level — never buried, never exposed.
How wide should the planting hole be for coral bells?
Dig the hole twice as wide as the root ball but only as deep as the container to encourage lateral root growth.
Can I plant coral bells deeper for winter protection?
No, planting deeper causes crown rot. Instead, apply loose mulch after the ground freezes, keeping it away from the crown.
What happens if I plant coral bells too deep?
The crown will rot from trapped moisture, leading to yellowing leaves, stunted growth, and often plant death within weeks.
Should I fertilize coral bells when planting?
No, wait until new growth appears (2-3 weeks), then apply a balanced slow-release fertilizer at half strength.
📑 Table of Contents
- Understanding the Coral Bell Crown
- The Golden Rule: Crown at Soil Level
- Step-by-Step Planting Process
- Special Situations: Containers, Slopes, and Bare Root
- Common Planting Mistakes and How to Avoid Them
- Aftercare: The First Critical Weeks
- Seasonal Considerations for Planting Depth
- Variety-Specific Nuances
- Troubleshooting: Is My Planting Depth Wrong?
- Companion Planting and Design Tips
- Long-Term Crown Management
- Frequently Asked Questions About Planting Depth
- Conclusion
Understanding the Coral Bell Crown
Before we talk numbers and measurements, you need to know what you are looking for. The crown of a coral bell is the junction where the leaf stems emerge from the root system. It looks like a tight cluster of buds at the base of the foliage. This crown is the plant’s command center — it produces new leaves, flower stalks, and stores energy for winter survival. It is also the most vulnerable part of the plant.
Unlike trees or shrubs that can tolerate (or even benefit from) deep planting, Heuchera crowns are prone to rot when buried. The crown tissue needs air circulation. When soil covers it, moisture gets trapped against the tender tissue, creating the perfect environment for fungal pathogens. Within days, the crown can turn to mush. The plant cannot recover because the growing points are destroyed.
What the Crown Looks Like
When you slip a coral bell out of its nursery pot, brush away the loose potting mix at the base. You will see a dense mass of fibrous roots and, rising from the center, a woody or semi-woody base with multiple growth points. Those growth points — often reddish or pale green — are the crown. In mature plants, the crown may sit atop a short, thick stem (sometimes called a caudex) that lifts it slightly above the root mass. This is normal and should remain exposed.
Why Nursery Pots Can Mislead You
Here is a trap many gardeners fall into: the soil level in the nursery pot is not always the correct planting depth. Growers sometimes pot plants a little deep for stability during shipping. Or the soil may have settled. Never assume the pot’s soil line equals the right depth. Always locate the crown visually and use that as your guide.
The Golden Rule: Crown at Soil Level
If you remember only one thing from this article, make it this: plant coral bells with the crown at soil level. Not below. Not above. Right at the surface. This single rule applies whether you are planting in the ground, in a raised bed, or in a container. It applies to every variety, from the ruffled ‘Caramel’ to the dramatic ‘Black Pearl’ to the native Heuchera americana.
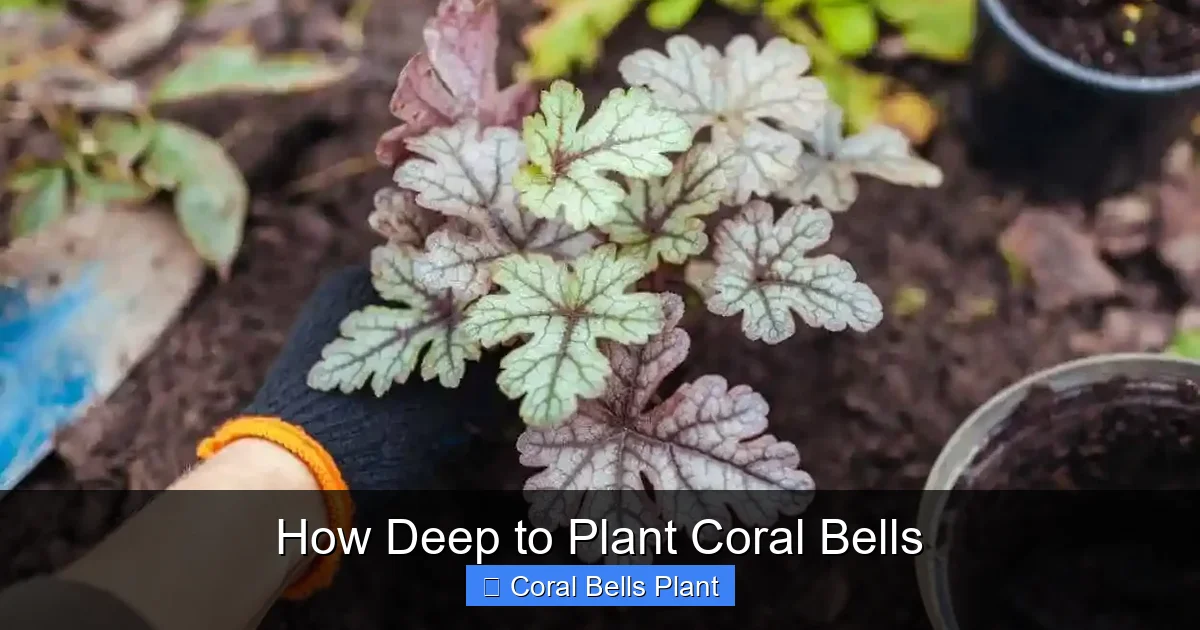
Visual guide about How Deep to Plant Coral Bells
Image source: i0.wp.com
What “At Soil Level” Actually Looks Like
Picture the finished planting. The soil should come up to the base of the crown — right where the lowest leaf stems emerge. You should still be able to see the crown itself. If you gently pull back the mulch later, the crown sits there, exposed to air, with roots spreading downward and outward into the soil. No soil on top of the crown. No crown sticking up in the air with exposed roots.
The Half-Inch Danger Zone
You might think a half-inch deeper won’t hurt. It will. Coral bells have zero tolerance for buried crowns. Even a quarter-inch of soil over the crown can trap enough moisture to initiate rot in humid conditions. I have seen plants decline from what seemed like perfectly acceptable planting depth, only to discover the crown was barely covered. Err on the side of slightly high — you can always add a thin layer of mulch later. You cannot easily fix a buried crown without disturbing the roots.
Step-by-Step Planting Process
Now that the golden rule is clear, let’s walk through the entire planting process from start to finish. Each step supports that critical crown placement.
1. Choose the Right Spot
Coral bells prefer morning sun and afternoon shade, or dappled light all day. In cooler climates (zones 4-6), they can handle more sun — even full sun with adequate moisture. In hot climates (zones 7-9), afternoon shade is essential to prevent leaf scorch. The soil must drain well. If water puddles in the spot after rain, choose another location or amend heavily.
2. Prepare the Soil
This step is where many gardeners cut corners, and it shows later. Coral bells want rich, humusy, well-draining soil with a slightly acidic to neutral pH (6.0-7.0). If your soil is heavy clay, mix in compost, leaf mold, or fine pine bark at a 1:1 ratio with the native soil. For sandy soil, add compost to improve moisture retention. Work amendments into the top 10-12 inches of the planting area — not just the hole. This encourages roots to explore beyond the planting pocket.
3. Dig the Hole: Wide, Not Deep
Dig a hole twice as wide as the root ball but only as deep as the container. This is counterintuitive if you are used to planting trees, where the hole depth matches the root ball. For coral bells, width matters more. The wide hole gives the fibrous roots loose soil to expand into horizontally, which is how they naturally grow. The shallow depth ensures you won’t accidentally plant too deep.
If you are planting multiple coral bells, space them 12-18 inches apart for most varieties, 18-24 inches for larger cultivars like ‘Big Top’ or ‘Mega Caramel’. They will fill in within a couple of seasons.
4. Remove the Plant from Its Pot
Gently squeeze the sides of the nursery pot to loosen the root ball. Tip the pot on its side and slide the plant out. If it resists, tap the bottom of the pot or run a knife around the inside edge. Never yank the plant by its foliage — the crown can separate from the roots.
5. Inspect and Loosen Roots
Examine the root ball. If roots are circling the bottom or sides (pot-bound), gently tease them apart with your fingers. For severely pot-bound plants, make three or four vertical cuts 1/4-inch deep around the root ball with a clean knife. This sounds harsh, but it stimulates new outward growth. Shake off any loose potting mix that falls away easily — you want the roots to make direct contact with your native soil blend.
6. Position the Plant — The Critical Moment
Place the plant in the hole. Stand back and check: is the crown at ground level? Lay a straight edge (a tool handle, a board, your hand) across the hole. The crown should touch that imaginary line. If the crown sits below, add soil to the bottom of the hole and tamp it firmly so it won’t settle later. If the crown sits above, remove some soil from the bottom. Take your time here. This is the moment that determines success or failure.
7. Backfill and Firm Gently
Fill the hole halfway with your amended soil. Water lightly to settle the soil around the roots. Finish backfilling to ground level. Use your hands — not your foot — to firm the soil around the plant. You want good soil-to-root contact without compacting the soil so much that water and air cannot penetrate. The crown should still be visible at the surface.
8. Water Thoroughly
Give the plant a long, slow soak. This does two things: it eliminates air pockets around the roots, and it settles the soil to its final level. After watering, check the crown again. If soil has washed over it, gently brush it away. If the crown has sunk slightly, lift the plant very carefully and add a bit of soil underneath.
9. Mulch — But Keep It Off the Crown
Apply 1-2 inches of shredded bark, leaf mold, or pine straw around the plant. Pull the mulch back 1-2 inches from the crown. A mulch volcano around the base traps moisture exactly where you don’t want it. The mulch ring should look like a donut, not a mound. This also discourages voles and slugs from nesting against the crown.
Special Situations: Containers, Slopes, and Bare Root
The crown-at-soil-level rule never changes, but the execution shifts slightly in certain scenarios.
Planting Coral Bells in Containers
Containers are a fantastic way to grow coral bells, especially if your garden soil is poorly drained. Choose a pot at least 12 inches wide and deep with drainage holes. Use a high-quality potting mix blended with 20-30% perlite or coarse sand for extra drainage. Position the plant so the crown sits at the soil surface, about 1 inch below the pot rim to allow for watering. Water until it drains freely from the bottom. Container plants need more frequent watering and fertilizing than in-ground plants, but the crown rule remains identical.
Planting on a Slope
On a slope, the “soil level” is ambiguous. Create a small, level planting terrace by cutting into the slope above the plant and using that soil to build a berm below. Plant into this level surface with the crown at the terrace grade. The berm holds water and prevents erosion. Mulch heavily on the downhill side. Check after heavy rains to ensure soil hasn’t washed over the crown or exposed roots.
Planting Bare-Root Coral Bells
Bare-root plants (often sold by mail-order in early spring) arrive dormant with no soil on the roots. Soak the roots in lukewarm water for 1-2 hours before planting. Form a small mound of soil in the center of the planting hole. Drape the roots over the mound so they radiate downward. The crown should sit at ground level. Backfill carefully, working soil between the roots. Water gently but thoroughly. Bare-root plants are more forgiving of slight depth errors because you can see the crown clearly, but they are also more vulnerable to drying out — keep the soil consistently moist for the first month.
Common Planting Mistakes and How to Avoid Them
Even experienced gardeners stumble with coral bells. Here are the most frequent errors and how to sidestep them.
Mistake 1: Planting Too Deep “For Stability”
It feels instinctive to bury a plant deeper so it won’t blow over or heave in winter. With coral bells, this backfires. The crown rots, and the plant dies — no stability needed. If a newly planted coral bell feels loose, firm the soil around the root ball more thoroughly, or use a small stake temporarily. Never bury the crown.
Mistake 2: Mulch Volcanoes
Piling mulch against the crown is effectively the same as planting too deep. The mulch holds moisture against the crown tissue. Always maintain a mulch-free ring around the base. Re-check after heavy rain or wind, which can shift mulch.
Mistake 3: Ignoring Soil Settlement
Soil settles after planting — sometimes a lot. The first few waterings can drop the soil level by half an inch or more. If the crown was barely at soil level initially, it ends up buried. Check the crown after the first watering, after the first rain, and after a week. Adjust if needed by gently lifting the plant and adding soil underneath.
Mistake 4: Planting in Poorly Drained Soil
Even perfect planting depth won’t save a coral bell in soggy soil. The roots need oxygen. In heavy clay, plant in a raised bed or mound the soil 6-8 inches above grade to improve drainage. Alternatively, choose container culture.
Mistake 5: Confusing the Crown with the Root Ball Top
In some nursery pots, the potting mix covers the crown. When you plant at the “pot level,” you bury the crown. Always locate the crown visually before positioning the plant.
Aftercare: The First Critical Weeks
You have planted at the perfect depth. Now what? The first 4-6 weeks determine whether the plant establishes or struggles.
Watering
Keep the soil consistently moist but not soggy. Check daily by sticking your finger 1 inch into the soil near the root ball. If it feels dry at that depth, water deeply. Avoid frequent light sprinklings — they encourage shallow roots. After the first month, reduce frequency but maintain deep watering during dry spells.
Fertilizing
Do not fertilize at planting time. The amended soil provides enough nutrients. Wait until new growth appears (usually 2-3 weeks), then apply a balanced, slow-release fertilizer (like 10-10-10 or 14-14-14) at half the recommended rate. Too much nitrogen produces lush foliage at the expense of root development.
Monitoring for Problems
Watch for signs of trouble: yellowing lower leaves (could be overwatering or planting too deep), wilting despite moist soil (crown rot starting), or blackened crown tissue (advanced rot). If you catch crown rot early — the crown feels firm but looks dark — carefully dig the plant, wash the roots, cut away any mushy tissue with a sterile knife, dust with sulfur powder, and replant slightly higher in fresh, well-draining soil. It is a long shot, but sometimes works.
Seasonal Considerations for Planting Depth
The time of year you plant affects how you manage depth and aftercare.
Spring Planting (Best in Cold Climates)
Spring is ideal in zones 4-6. The soil is warming, rainfall is usually reliable, and the plant has a full season to establish before winter. Plant as soon as the soil can be worked — usually 2-4 weeks before the last frost date. The crown-at-soil-level rule applies. Mulch well after planting to moderate soil temperature fluctuations.
Fall Planting (Best in Hot Climates)
In zones 7-9, fall planting (September-October) gives roots time to establish in cool, moist conditions before summer heat returns. Plant at least 6 weeks before the ground freezes. The crown rule is the same, but pay extra attention to mulch — a slightly thicker layer (2-3 inches) helps prevent frost heave, which can push the crown above ground. Check in late winter and gently press any heaved plants back down.
Summer Planting (Avoid If Possible)
Summer planting stresses coral bells. If you must plant in summer, choose a cloudy day or plant in the evening. Provide temporary shade with a shade cloth or lattice for 1-2 weeks. Water daily for the first week, then every 2-3 days. The crown must be at soil level — no exceptions — because heat stress combined with depth stress is often fatal.
Variety-Specific Nuances
While the crown rule is universal, some coral bell types have quirks worth knowing.
Large-Leaved Hybrids (Villosa Types)
Varieties like ‘Caramel’, ‘Citronelle’, ‘Mocha’, and ‘Brownies’ (Heuchera villosa hybrids) have larger, thicker leaves and more vigorous crowns. They are more tolerant of heat and humidity but equally intolerant of buried crowns. Their crowns are often more elevated on a woody caudex. Plant with the caudex visible.
Small Species Types
Heuchera sanguinea, H. cylindrica, and other species types have smaller, tighter crowns. They are easier to plant too deep by accident because the crown is less obvious. Take extra time to locate it.
Heucherella (Foamy Bells)
These intergeneric crosses (Heuchera x Tiarella) follow the exact same planting depth rule. Their crowns tend to be more spreading, but the principle is identical: crown at soil level.
Troubleshooting: Is My Planting Depth Wrong?
Sometimes you inherit a planting or realize months later that something is off. Here is how to diagnose and fix depth issues.
Signs of Planting Too Deep
- Slow or no new growth in spring
- Yellowing or browning of lower/central leaves
- Crown feels soft or mushy when gently probed
- Fungal growth (white or gray fuzz) at base
- Plant pulls out easily with no root resistance (roots rotted)
Signs of Planting Too Shallow
- Exposed roots visible at surface
- Plant rocks or wobbles in the ground
- Crown and upper roots dry out quickly
- Winter damage (heaving, freeze injury) more severe
- Stunted growth despite adequate water
How to Correct Depth on an Established Plant
If the plant is dormant (late fall to early spring), you can dig and replant at the correct depth. Dig widely to preserve the root ball. Replant following the steps above. If the plant is actively growing, correction is riskier. For slightly deep plants, carefully remove soil from around the crown with a small trowel or your fingers, creating a shallow depression so the crown sits at the new soil level. Do not mound soil up around the crown — that just buries it again. For slightly shallow plants, add a thin layer of compost or soil around the base, tapering away from the crown, to cover exposed roots.
Companion Planting and Design Tips
Once you have mastered planting depth, the fun begins — designing with coral bells. Their mounding habit and incredible foliage range (lime, caramel, purple, silver, near-black, peach) make them perfect for:
- Shade borders: Pair with hostas, ferns, astilbes, and brunnera for texture contrast.
- Woodland edges: Mass 5-7 of the same variety for a drift of color.
- Container combinations: Use as the “filler” in thriller-filler-spiller pots with carex, ivy, and flowering annuals.
- Rock gardens: Species types like H. sanguinea thrive in gritty, well-drained soil.
- Under trees: Plant in the dappled shade of deciduous trees where they get spring sun before leaf-out.
When planting in groups, maintain consistent depth across all plants. Use a board across the planting holes as a level guide. This ensures even establishment and a uniform look.
Long-Term Crown Management
Coral bells are not forever-plants in the same spot without intervention. Over 3-5 years, the crown tends to rise above the soil line as organic matter decomposes and the woody caudex elongates. This natural “heaving” exposes roots and makes the plant vulnerable to winter injury and drought.
The Crown Lift Solution
Every 2-3 years in early spring or fall, lift the plant, divide if desired, and replant at the correct depth. This rejuvenates the plant, gives you free divisions, and resets the crown position. It is also the perfect time to amend the soil with fresh compost.
Top-Dressing Alternative
If you don’t want to dig, you can top-dress around the crown with 1/2 inch of compost or fine mulch in spring. This covers exposed roots without burying the crown. Do not exceed 1/2 inch per year.
Frequently Asked Questions About Planting Depth
Let me address the questions I hear most often from fellow gardeners.
Can I plant coral bells deeper if I mulch heavily?
No. Mulch on top of a buried crown makes it worse. The crown needs air. Mulch must stay off the crown regardless of planting depth.
What if the nursery pot has the crown buried?
Plant at the crown, not the pot soil line. Gently remove excess potting mix to find the crown, then plant at that level.
Do I need to plant deeper in winter for protection?
Never. Deep planting causes rot. For winter protection, apply a loose mulch (pine straw, shredded leaves) after the ground freezes, keeping it off the crown.
Can I plant coral bells on a mound for drainage?
Yes! In heavy soil, plant on a 6-8 inch mound. The crown sits at the mound’s soil level. This is an excellent strategy for clay gardens.
How do I know if my established plant is too deep?
Check for slow growth, yellowing center leaves, or a soft crown. Gently brush away soil at the base — if the crown is buried, carefully remove soil to expose it.
Does planting depth affect flowering?
Indirectly, yes. A buried crown stresses the plant, reducing energy for flower production. A correctly planted coral bell blooms more reliably.
Conclusion
There you have it — everything you need to know about how deep to plant coral bells. The rule is beautifully simple: crown at soil level. Not deeper. Not shallower. Just right. But simple does not mean easy. It takes attention at planting time, vigilance during the first few weeks, and occasional maintenance as the years pass.
I have planted hundreds of coral bells over the years — in my own garden, in client gardens, in containers on patios. Every single one that thrived was planted with the crown visible at the soil surface. Every single one that failed had a buried crown. The correlation is perfect.
So the next time you bring home a gorgeous ‘Electric Lime’ or ‘Forever Purple’, take an extra minute. Brush away the soil. Find the crown. Dig a wide, shallow hole. Position the plant with surgical precision. Water it in. Pull back the mulch. And then step back and know you have given that plant the single best start possible.
Your reward? Clumps of ruffled, glowing foliage that catch the light and make the shade garden sing — for years to come. Happy planting.
Frequently Asked Questions
How deep to plant coral bells in containers?
In containers, plant coral bells with the crown at the soil surface, about 1 inch below the pot rim. Use well-draining potting mix with added perlite. The same crown-at-soil-level rule applies whether in ground or pots.
Can coral bells be planted too shallow?
Yes, planting too shallow exposes roots and the crown base to drying out and winter injury. The crown should sit at soil level with roots fully covered. If roots are visible, add a thin layer of soil or compost around the base.
What is the crown of a coral bell plant?
The crown is the junction where leaf stems emerge from the root system. It appears as a tight cluster of growth points at the base of the foliage. This is the plant’s growing center and must remain at soil level to prevent rot.
How do I fix a coral bell planted too deep?
If dormant (late fall to early spring), dig and replant at correct depth. If actively growing, carefully remove soil from around the crown with fingers or a small trowel to expose it, creating a slight depression so the crown sits at the new soil level.
Do different coral bell varieties need different planting depths?
No, all coral bells (Heuchera), foamy bells (Heucherella), and foamflowers (Tiarella) follow the same rule: crown at soil level. Large villosa hybrids may have a more visible woody caudex, but the crown itself must still sit at the surface.
When is the best time to plant coral bells?
Spring (2-4 weeks before last frost) is best in cold climates (zones 4-6). Fall (6+ weeks before ground freeze) is ideal in hot climates (zones 7-9). Avoid summer planting unless necessary, and provide extra shade and water if you must plant then.