Can Coral Bells Be Planted in Pots
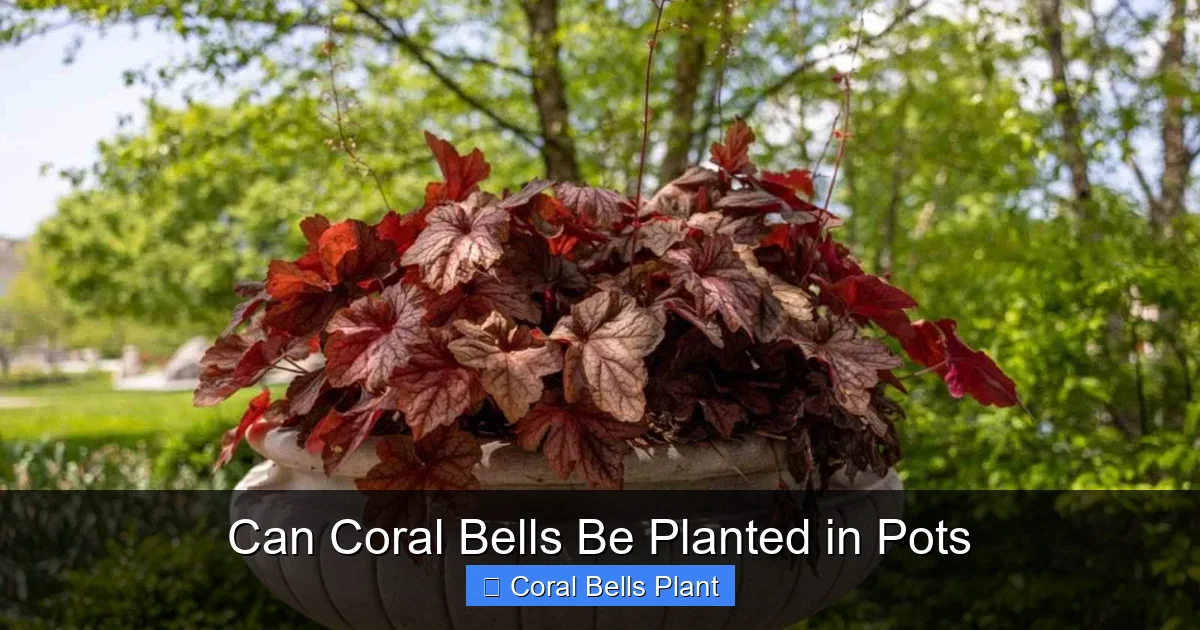
Coral bells (Heuchera) grow beautifully in pots and make excellent container plants for shade gardens, patios, and balconies. With proper drainage, quality potting mix, and consistent moisture, these colorful perennials will thrive in containers for years.
If you have ever admired the ruffled, colorful foliage of coral bells in a garden bed, you might wonder if you can bring that same beauty to your patio, deck, or balcony. The short answer is yes. Coral bells, also known by their botanical name Heuchera, are one of the most versatile perennials for container gardening. Their compact size, stunning leaf colors, and tolerance for shade make them a top pick for gardeners who want low-maintenance elegance in pots.
Growing coral bells in containers opens up a world of design possibilities. You can move them to follow the light, group them with other shade-loving plants, or feature them as solo specimens in decorative pots. Whether you have a sprawling backyard or a modest apartment balcony, potted coral bells deliver season-long interest with minimal fuss. In this guide, we will walk through everything you need to know to grow healthy, vibrant coral bells in pots.
Key Takeaways
- Coral bells adapt well to container life: Their compact root systems and mounding habit make them ideal for pots of all sizes.
- Choose the right container: Select pots at least 12 inches wide with drainage holes to prevent root rot.
- Use well-draining potting mix: A blend of peat moss, perlite, and compost provides the moisture retention and aeration Heuchera needs.
- Water consistently but avoid soggy soil: Check the top inch of soil daily during hot weather and water when dry.
- Provide appropriate light: Most varieties prefer morning sun with afternoon shade, though some tolerate more sun.
- Fertilize lightly: Apply slow-release fertilizer in spring and supplement with liquid feed monthly during growing season.
- Overwinter with care: In cold climates, move pots to a protected location or insulate containers to protect roots.
Quick Answers to Common Questions
Can coral bells survive winter in pots?
Yes, with proper protection. In zones 7 and up, they often stay evergreen. In zones 5-6, insulate pots with straw or bubble wrap. In zone 4 and colder, move pots to an unheated garage or transplant into the ground for winter.
What size pot do coral bells need?
Choose a container at least 12 inches wide and 12 inches deep. Larger pots (18-24 inches) are better for mixed plantings and hold moisture longer, reducing watering frequency.
How often should I water potted coral bells?
Check soil daily by sticking your finger one inch deep. Water when dry at that depth. In summer heat, this may mean daily watering. Water deeply until it drains from the bottom holes.
Do coral bells need full sun in containers?
No. Most varieties prefer morning sun with afternoon shade. In hot climates, they need more shade. Only a few sun-tolerant cultivars handle full sun, and even then, only with consistent moisture.
When should I fertilize coral bells in pots?
Mix slow-release fertilizer into the potting mix at planting. Supplement with half-strength liquid fertilizer every 2-4 weeks during active growth. Stop fertilizing by mid-August to allow hardening off before winter.
📑 Table of Contents
- Why Coral Bells Thrive in Containers
- Choosing the Right Pot for Coral Bells
- The Perfect Potting Mix for Potted Coral Bells
- Planting Coral Bells in Pots Step by Step
- Light Requirements for Potted Coral Bells
- Watering Potted Coral Bells Correctly
- Fertilizing Coral Bells in Containers
- Designing Beautiful Container Combinations
- Overwintering Potted Coral Bells
- Common Problems and Solutions
- Best Coral Bells Varieties for Containers
- Repotting and Dividing Mature Plants
- Creative Container Ideas for Coral Bells
- Coral Bells in Pots Through the Seasons
- Troubleshooting Quick Reference
- Frequently Asked Questions About Potted Coral Bells
- Conclusion
Why Coral Bells Thrive in Containers
Coral bells possess several traits that make them naturals for pot culture. Their root systems are relatively shallow and fibrous, meaning they do not need deep soil to flourish. A container that is twelve to fourteen inches deep provides plenty of room. The plants form neat mounds that rarely exceed eighteen inches in height and width, so they stay in scale with most decorative pots.
Another advantage is their foliage-first appeal. While coral bells do send up delicate flower spikes in late spring to early summer, their main show is the leaves. Colors range from lime green and chartreuse to deep purple, caramel, silver, and near-black. Many varieties feature dramatic veining or ruffled edges. This foliage stays attractive from spring through fall, and in mild climates, it remains evergreen through winter. In a pot, that long season of color is right at eye level where you can enjoy it daily.
Shade Tolerance Makes Them Versatile
One of the biggest challenges in container gardening is finding plants that perform well in shade. Many flowering annuals demand full sun. Coral bells, on the other hand, prefer part shade to full shade. Morning sun with afternoon protection is ideal for most varieties. This makes them perfect for covered porches, north-facing balconies, and spots under trees where other container plants struggle.
Low Maintenance Requirements
Busy gardeners appreciate that coral bells ask for little beyond regular watering and occasional feeding. They have few pest problems. Deer and rabbits usually leave them alone. They do not need deadheading to keep blooming, though removing spent flower stems keeps plants looking tidy. Once established in a good potting mix, they are surprisingly drought-tolerant for a shade plant.
Choosing the Right Pot for Coral Bells
The container you select sets the stage for success. While coral bells are adaptable, the wrong pot can lead to root rot, stunted growth, or winter damage. Here is what to look for.
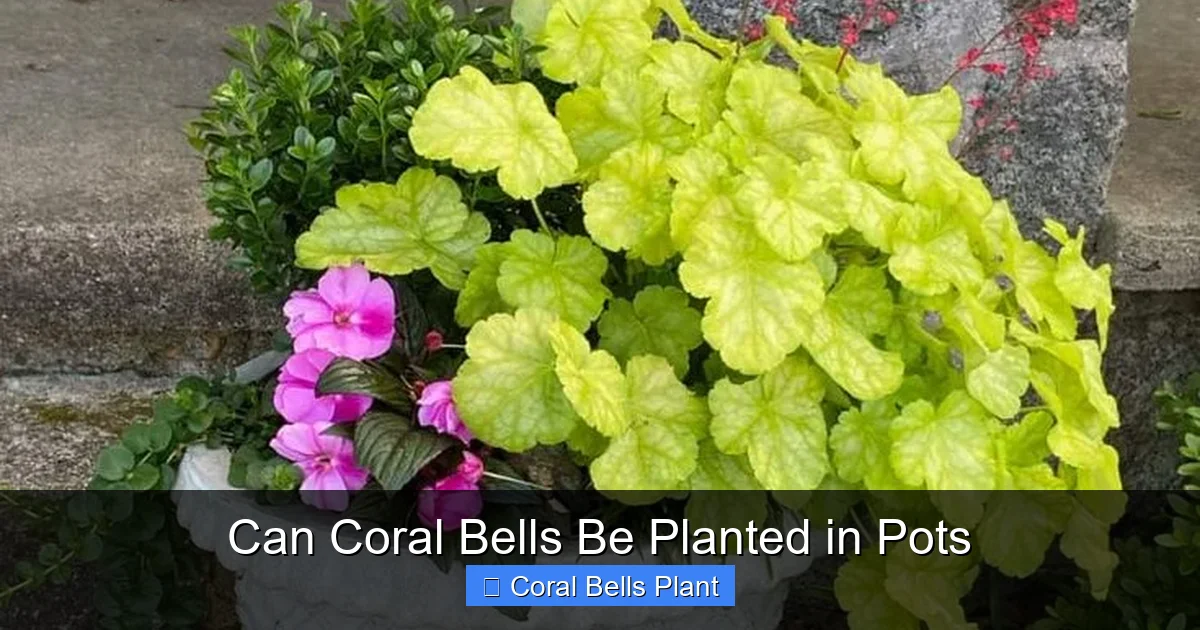
Visual guide about Can Coral Bells Be Planted in Pots
Image source: i.pinimg.com
Size Matters
Start with a pot that is at least twelve inches in diameter and twelve inches deep. This gives the roots room to spread and holds enough soil to buffer moisture and temperature swings. If you want to create a mixed container with companion plants, go larger. Eighteen to twenty-four inch wide pots work well for combinations. Remember that a larger soil volume means less frequent watering.
Drainage Is Non-Negotiable
Every pot must have drainage holes. Coral bells hate wet feet. Standing water leads to crown rot and fungal diseases. If you fall in love with a decorative pot that lacks holes, drill them yourself or use it as a cachepot. Place the planted nursery pot inside the decorative one, and empty any water that collects after watering.
Material Considerations
Terracotta, ceramic, plastic, fiberglass, and wood all work. Each has pros and cons. Terracotta is porous, which helps soil dry evenly but means more frequent watering. Glazed ceramic retains moisture better but is heavy. Plastic and fiberglass are lightweight and hold moisture well, making them great for balconies or rooftops where weight matters. Wooden planters insulate roots against temperature extremes but eventually rot. Choose based on your climate, aesthetic, and ability to move the pot.
Elevate for Better Drainage
Set pots on pot feet, bricks, or plant caddies. This prevents the drainage holes from sitting flush against a saucer or deck surface, which can block water exit. Elevation also improves air circulation around the container, reducing the risk of fungal issues.
The Perfect Potting Mix for Potted Coral Bells
Garden soil is too heavy for containers. It compacts over time, suffocating roots. You need a high-quality potting mix designed for container use. The ideal blend balances moisture retention with excellent drainage.
DIY Potting Mix Recipe
If you prefer to mix your own, combine the following:
- Two parts peat moss or coconut coir
- One part perlite or coarse sand
- One part compost or well-rotted leaf mold
This mix holds water without becoming soggy. The compost adds nutrients and beneficial microbes. Avoid mixes with added water-retaining crystals unless you live in an extremely hot, dry climate. Those crystals can keep the root zone too wet for coral bells.
Commercial Mixes That Work
Look for potting mixes labeled for containers or outdoor planters. Brands like FoxFarm Ocean Forest, Pro-Mix BX, or Espoma Organic Potting Mix are reliable. Avoid “garden soil” or “raised bed soil” bags. Those are formulated for in-ground use and will not drain well enough in pots.
Adding Slow-Release Fertilizer
Mix in a balanced slow-release fertilizer at planting time. A 14-14-14 or 10-10-10 formula works well. Follow the package rate for container plants. This gives your coral bells a steady nutrient supply for the first three to four months.
Planting Coral Bells in Pots Step by Step
Planting is straightforward, but a few details make a big difference in long-term health.
Timing Your Planting
Spring is the ideal time to pot up coral bells. The soil is warming, and plants have the full growing season to establish before winter. In mild climates (zones 7 and up), early fall planting also works. Avoid planting during the hottest weeks of summer unless you can provide consistent shade and water.
Preparing the Container
Cover the drainage holes with a piece of landscape fabric, a coffee filter, or a shard of broken pottery. This keeps potting mix from washing out while letting water drain. Fill the pot about two-thirds full with your moistened potting mix. Press it down lightly to eliminate large air pockets.
Removing the Plant from Its Nursery Pot
Water the coral bells thoroughly an hour before transplanting. This reduces shock and helps the root ball hold together. Gently squeeze the nursery pot sides to loosen the root ball. Tip the pot upside down while supporting the plant base, and slide it out. If roots are circling the bottom, tease them apart with your fingers. This encourages outward growth into the new soil.
Setting the Plant at the Right Depth
This is critical. Coral bells have a crown where the leaves emerge. This crown must sit at or slightly above the soil line. Burying the crown leads to rot. Position the plant so the top of the root ball is about an inch below the pot rim. This leaves room for watering without overflow. Backfill with potting mix, firming gently around the roots. Water thoroughly until water runs out the drainage holes.
Mulching the Surface
Apply a thin layer of shredded bark, pine straw, or cocoa hulls. Keep mulch away from the crown. Mulch conserves moisture, moderates soil temperature, and prevents soil from splashing on leaves during watering.
Light Requirements for Potted Coral Bells
Light needs vary slightly by variety, but general guidelines apply to most.
Morning Sun, Afternoon Shade Is Ideal
Four to six hours of morning sun followed by dappled or full afternoon shade produces the best foliage color and compact growth. In cooler climates (zones 4 to 6), coral bells can tolerate more sun, even full sun if moisture is consistent. In hot climates (zones 8 and up), they need more shade. Afternoon sun in July will scorch leaves and stress the plant.
Signs of Too Much Sun
Watch for bleached or faded leaf color, brown crispy edges, and wilting that does not recover by morning. If you see these, move the pot to a shadier spot immediately.
Signs of Too Little Light
Leggy growth, fewer leaves, dull color, and lack of flowering indicate insufficient light. Try a spot with brighter morning light.
Using Pots to Follow the Light
One of the joys of container gardening is mobility. If you have a plant caddy or lightweight pot, you can shift your coral bells seasonally. In spring, they might enjoy a sunnier spot. As summer heat intensifies, move them deeper into shade. This flexibility is a major advantage over in-ground planting.
Watering Potted Coral Bells Correctly
Watering is the single most important care task. Containers dry out faster than garden beds, especially in wind and heat.
The Finger Test
Forget calendar schedules. Stick your finger into the potting mix up to the first knuckle. If it feels dry at that depth, water. If it feels moist, wait. During peak summer, you may water daily. In spring and fall, every two to three days might suffice.
Water Deeply
When you water, apply enough that it flows freely from the drainage holes. This ensures the entire root zone is moistened and flushes accumulated salts from fertilizer. Light sprinklings encourage shallow roots that are vulnerable to drying out.
Morning Watering Is Best
Water early in the day so foliage has time to dry before evening. Wet leaves overnight invite fungal diseases like powdery mildew. If you must water in late afternoon, aim the spout at the soil, not the leaves.
Self-Watering Pots and Drip Irrigation
If you travel often or have many containers, consider self-watering planters or a drip irrigation system with a timer. These deliver consistent moisture and reduce the risk of drought stress. Just ensure the reservoir does not keep the soil constantly saturated.
Fertilizing Coral Bells in Containers
Nutrients leach out of potting mix with every watering. Regular feeding keeps plants vigorous and colorful.
Slow-Release at Planting
As mentioned, incorporate slow-release fertilizer when you pot up. This covers the first growing phase.
Liquid Feeding During Active Growth
Once the initial fertilizer is spent (usually after three to four months), supplement with a water-soluble fertilizer every two to four weeks. A balanced formula like 20-20-20 or one slightly higher in nitrogen (like 24-8-16) promotes lush foliage. Dilute to half the label strength. Coral bells are not heavy feeders. Over-fertilizing causes soft growth that is prone to disease and winter injury.
Stop Feeding in Late Summer
Cease fertilizing by mid-August in most climates. This allows the plant to harden off before winter. Late-season nitrogen encourages tender new growth that will not survive frost.
Designing Beautiful Container Combinations
Coral bells play well with others. Their mounding habit and colorful foliage make them excellent “fillers” in the classic thriller-filler-spiller container design formula.
Shade-Loving Companions
Pair coral bells with plants that share their light and moisture preferences. Great choices include:
- Ferns (Japanese painted fern, autumn fern, maidenhair fern)
- Hostas (small varieties like ‘Blue Mouse Ears’ or ‘Pandora’s Box’)
- Heucherella (foamy bells, a Heuchera x Tiarella hybrid)
- Tiarella (foamflower)
- Brunnera (Siberian bugloss, especially ‘Jack Frost’)
- Hellebores (Lenten rose)
- Carex (sedges like ‘Ice Dance’ or ‘Everillo’)
- Impatiens or begonias for seasonal color
Color Echoes and Contrasts
Use coral bells foliage to echo or contrast with companion plants. A purple-leaved Heuchera like ‘Palace Purple’ looks stunning next to chartreuse carex or golden creeping Jenny. A silver-leaved variety like ‘Silver Scrolls’ pairs beautifully with blue hostas or purple-flowered hellebores. Caramel-colored varieties warm up a composition with green ferns and white brunnera.
Seasonal Swaps
Because coral bells are perennial, you can change the annual companions each season. Plant pansies or violas in early spring. Switch to impatiens or torenia for summer. Add ornamental kale or mums in fall. The coral bells provide the constant backbone.
Single Specimen Impact
Do not overlook the power of a single coral bells in a beautiful pot. A large, mature specimen of a dramatic variety like ‘Black Pearl,’ ‘Fire Alarm,’ or ‘Lime Rickey’ makes a bold architectural statement. Choose a pot that complements the leaf color. A charcoal glazed pot with a lime green Heuchera is modern and striking. A rust-colored terracotta pot with a caramel variety feels warm and earthy.
Overwintering Potted Coral Bells
In containers, roots are exposed to colder temperatures than in the ground. The soil in a pot can freeze solid, killing roots that would survive in the insulated earth. Overwintering strategy depends on your hardiness zone.
Zones 7 and Warmer
In these mild climates, coral bells often stay evergreen in pots. Move containers to a sheltered spot against a house wall, under an eave, or in an unheated garage during hard freezes. Water occasionally if the soil dries out. No other special care is needed.
Zones 5 and 6
Provide extra insulation. Group pots together in a protected corner. Surround them with straw bales, bags of leaves, or bubble wrap. You can also sink the pot into the ground or a compost pile up to its rim for the winter. Mulch heavily over the crown with shredded leaves or pine straw. Water during winter thaws if the soil is dry.
Zones 4 and Colder
In these zones, potted coral bells need significant protection. The best option is to move them into an unheated garage, shed, or cold frame once they go dormant. Keep the soil barely moist. Do not let it freeze dry. Alternatively, transplant them into the garden in early fall, then pot them up again in spring. Some gardeners treat them as annuals in very cold climates, replacing them each year.
Spring Wake-Up
As temperatures moderate, gradually remove winter protection. Check for new growth at the crown. Trim away any tattered or dead leaves. Resume regular watering and feeding. Repot into fresh mix every two to three years to refresh the soil and divide if the plant has outgrown its container.
Common Problems and Solutions
Even with good care, issues can arise. Here is how to handle the most frequent ones.
Crown Rot
This is the number one killer of coral bells in pots. It happens when the crown stays wet. Symptoms include wilting that does not improve with watering, mushy crown tissue, and a foul smell. Prevention is key: plant high, water at the soil line, ensure drainage, and avoid heavy mulch on the crown. If caught early, you can sometimes save the plant by removing rotted tissue, dusting with sulfur powder, and improving drainage.
Powdery Mildew
This fungal disease appears as a white powdery coating on leaves. It thrives in humid conditions with poor air circulation. Space pots adequately. Water in the morning. Remove affected leaves. Spray with a homemade solution of one tablespoon baking soda, one teaspoon horticultural oil, and one gallon water, or use a labeled fungicide.
Root Weevils
Adult weevils notch leaf edges at night. Larvae feed on roots, causing wilting and decline. Beneficial nematodes applied to the soil in spring and fall control larvae. Sticky traps catch adults. Keep the area clean of debris where they hide.
Sun Scorch
Brown, crispy patches on leaves exposed to hot afternoon sun. Move the pot to a shadier location. Water deeply. The plant will produce fresh leaves once conditions improve.
Fading Leaf Color
If a variety known for vivid color turns dull green, it may be getting too much shade or too much fertilizer. Adjust light exposure and cut back on nitrogen.
Best Coral Bells Varieties for Containers
With hundreds of cultivars available, choosing can be overwhelming. These proven performers excel in pots.
For Bold Color
- ‘Palace Purple’: Classic deep purple, metallic sheen, very vigorous.
- ‘Obsidian’: Near-black, shiny leaves, compact habit.
- ‘Fire Alarm’: Bright red spring foliage matures to deep burgundy.
- ‘Lime Rickey’: Electric chartreuse, ruffled leaves, holds color all season.
- ‘Caramel’: Warm amber-apricot leaves, heat and humidity tolerant.
For Pattern and Texture
- ‘Silver Scrolls’: Silver leaves with dark veins, purple undersides.
- ‘Berry Smoothie’: Rose-pink leaves with silver overlay, large ruffled foliage.
- ‘Delta Dawn’: Gold leaves with red centers, striking contrast.
- ‘Midnight Rose’: Black leaves splashed with hot pink spots.
For Sun Tolerance
- ‘Southern Comfort’: Cinnamon-peach leaves, handles more sun than most.
- ‘Georgia Peach’: Peachy-orange with silver veil, bred for heat and humidity.
- ‘Citronelle’: Bright yellow-green, more sun tolerant than other chartreuse types.
Miniature Varieties for Small Pots
- ‘Petite Pearl Fairy’: Tiny silver-pink leaves, six inches tall.
- ‘Little Cutie’ series: ‘Blondie,’ ‘Coco,’ ‘Frost,’ ‘Peppermint’ – all under eight inches.
Repotting and Dividing Mature Plants
After two to three years, your potted coral bells may become root-bound or the center may turn woody and less productive. Spring is the time to repot or divide.
Repotting Up
If the plant still looks vigorous but has filled the pot, move it to a container two inches larger. Use fresh potting mix. Loosen the root ball. Water well.
Dividing to Rejuvenate
If the center is woody, division is better. Remove the plant from its pot. Shake or wash off old soil. Using a sharp knife or spade, cut the crown into sections, each with healthy roots and several growth buds. Discard the woody center. Replant divisions in fresh mix. Water well and keep shaded for a week. You will get multiple new plants from one old one.
Creative Container Ideas for Coral Bells
Think beyond the standard round pot. Coral bells adapt to many container styles.
Window Boxes and Troughs
Long, narrow containers on a shady windowsill or balcony railing showcase a row of coral bells beautifully. Mix three or four varieties for a tapestry effect. Ensure the box is at least ten inches deep.
Hanging Baskets
Trailing varieties are rare, but compact mounding types work in hanging baskets viewed from below. The ruffled leaf edges catch the light. Pair with trailing ivy, creeping Jenny, or fuchsia.
Repurposed Containers
Old wheelbarrows, galvanized tubs, wooden crates, and even retired kitchen colanders make charming homes for coral bells. Just add drainage holes and use the same planting principles.
Tiered Plant Stands
Display a collection at varying heights on a plant stand or shelving unit. This creates a lush vertical garden in a small footprint. Group by color theme for maximum impact.
Coral Bells in Pots Through the Seasons
One of the joys of growing coral bells in containers is watching them change through the year.
Spring Awakening
New leaves emerge in the freshest, most intense colors of the year. Flower spikes begin to rise. This is the showiest time for many varieties. Keep soil evenly moist as growth accelerates.
Summer Steadiness
Foliage color may deepen or shift. Some varieties develop a silver veil as protection from heat. Flowers bloom, attracting hummingbirds and bees. Deadhead spent stems to redirect energy to leaves. Watch watering closely in heat waves.
Fall Transformation
Cooler temperatures often bring out richer tones. Reds deepen. Purples intensify. Chartreuse turns golden. The plant prepares for dormancy. Reduce watering as growth slows. Stop fertilizing.
Winter Structure
In mild zones, the foliage persists, providing rare winter color. In cold zones, leaves may die back to the crown. The pot itself, perhaps with evergreen boughs or branches added, becomes a seasonal decoration.
Troubleshooting Quick Reference
Here is a handy checklist for diagnosing common container coral bells issues.
- Wilting despite moist soil: Check for crown rot or root weevil larvae.
- Brown leaf edges: Usually underwatering, low humidity, or fertilizer burn.
- Pale, stretched growth: Too little light.
- White powder on leaves: Powdery mildew.
- Holes in leaves: Slugs, snails, or root weevil adults.
- Plant heaving out of pot: Frost heave in winter; replant deeper in spring.
- No flowers: Too much shade, too much nitrogen, or plant too young.
Frequently Asked Questions About Potted Coral Bells
We covered the basics, but some specific questions come up often.
Can I grow coral bells indoors as houseplants?
They can survive indoors for a season with bright indirect light, cool temperatures, and high humidity, but they are not ideal long-term houseplants. They need a winter dormancy period. Enjoy them on a shaded porch or balcony instead.
Do coral bells in pots come back every year?
Yes, they are perennials. With proper overwintering care for your zone, they return each spring. In zones 4 and colder, they may need to be planted in the ground for winter or replaced annually.
How often should I repot coral bells?
Every two to three years, or when roots fill the container. Spring is the best time.
Can I plant coral bells with succulents?
Not recommended. Succulents need full sun and very dry soil. Coral bells need shade and consistent moisture. Their needs conflict.
Why are my coral bells leaves turning green?
Many colorful varieties revert to green in too much shade or with excess nitrogen fertilizer. Increase light slightly and reduce feeding.
Are coral bells toxic to pets?
Heuchera is generally considered non-toxic to dogs and cats, but ingestion of any plant material can cause mild stomach upset. Discourage chewing.
Conclusion
Growing coral bells in pots is one of the most rewarding container gardening projects you can undertake. These adaptable perennials bring sophisticated foliage color to shaded spaces where flowers often fail. With the right pot, a well-draining mix, consistent moisture, and a little seasonal attention, your potted Heuchera will thrive for years.
The versatility is unmatched. Use them as solo stars in architectural containers. Weave them into mixed shade combinations that change with the seasons. Move them to follow the light or to refresh your outdoor living space. Divide them to multiply your collection. Few plants offer so much beauty for so little effort.
Whether you are a seasoned gardener looking to expand your container repertoire or a beginner with a shady balcony, coral bells deserve a spot in your pot lineup. Pick a variety that speaks to your color palette, plant it up this spring, and enjoy the show from April through November. Your shade garden just got a major upgrade.
Frequently Asked Questions
Can coral bells be planted in pots with other plants?
Absolutely. Coral bells make excellent companion plants in mixed containers. Pair them with shade-loving plants like ferns, hostas, heucherella, tiarella, brunnera, hellebores, and carex. They work well as the “filler” in thriller-filler-spiller designs.
What is the best potting soil for coral bells in containers?
Use a high-quality, well-draining potting mix. A blend of two parts peat moss or coconut coir, one part perlite, and one part compost works perfectly. Avoid garden soil, which compacts in pots and causes root rot.
Why are my potted coral bells dying?
The most common causes are crown rot from planting too deep or overwatering, root weevil larvae eating roots, powdery mildew from poor air circulation, or sun scorch from too much afternoon sun. Check drainage, planting depth, and light exposure.
Do coral bells bloom in pots?
Yes, coral bells produce delicate flower spikes in late spring to early summer even in containers. The flowers attract hummingbirds and pollinators. Deadheading spent stems keeps the plant looking tidy and encourages more foliage growth.
Can I grow coral bells in a hanging basket?
Compact mounding varieties work well in hanging baskets, especially when viewed from below. Pair them with trailing plants like ivy, creeping Jenny, or fuchsia. Ensure the basket is at least 10 inches deep and has excellent drainage.
How do I overwinter coral bells in pots in zone 5?
Group pots together in a sheltered corner against a house wall. Surround them with straw bales or bags of leaves for insulation. Mulch heavily over the crowns with shredded leaves. Water during winter thaws if soil is dry. Alternatively, sink pots into the ground up to their rims.