Fern Pruning Guide
Pruning ferns is essential for maintaining their health, shape, and vigor. This comprehensive fern pruning guide covers everything from the best timing and tools to step-by-step techniques for different fern varieties, helping you avoid common mistakes and keep your ferns thriving year-round.
Key Takeaways
- Timing matters: Prune most ferns in early spring before new growth emerges for the best results.
- Use clean tools: Always sterilize pruning shears to prevent spreading diseases between plants.
- Remove dead fronds first: Start by cutting away brown, yellow, or damaged fronds at the base.
- Know your variety: Different fern types like Boston, maidenhair, and tree ferns have unique pruning needs.
- Don’t over-prune: Never remove more than one-third of healthy fronds at once to avoid shocking the plant.
- Aftercare is crucial: Water well and provide proper humidity after pruning to support recovery.
- Regular maintenance: Light grooming throughout the growing season keeps ferns looking their best.
Quick Answers to Common Questions
When is the best time to prune ferns?
Early spring, just before new growth emerges, is the ideal time for major pruning. Light removal of dead fronds can be done anytime.
How much of a fern can I safely prune at once?
Never remove more than one-third of healthy fronds in a single session. Removing too much shocks the plant and slows recovery.
Should I cut dead fern fronds at the base or partway up?
Always cut at the base near the crown. Leaving stubs creates entry points for rot and looks unsightly as they die back.
Can I prune ferns in the fall?
Fall pruning is not recommended for outdoor ferns because fronds provide winter crown protection. Only remove clearly dead material in autumn.
Do all fern varieties need the same pruning approach?
No, varieties differ significantly. Boston ferns tolerate hard pruning while maidenhair and bird’s nest ferns need only gentle removal of dead fronds.
📑 Table of Contents
- Introduction
- Why Pruning Matters for Ferns
- When to Prune Your Ferns
- Tools You Need for Fern Pruning
- Step-by-Step Fern Pruning Guide
- Pruning Different Fern Varieties
- Common Fern Pruning Mistakes to Avoid
- Aftercare: Helping Your Ferns Thrive Post-Pruning
- Seasonal Fern Pruning Calendar
- Troubleshooting Common Post-Pruning Issues
- Advanced Pruning Techniques
- Indoor vs. Outdoor Fern Pruning Differences
- Conclusion
Introduction
Ferns bring a touch of ancient elegance to any space. Their delicate fronds unfurl with a grace that few other plants can match. But like all living things, ferns need a little help to stay at their best. That is where pruning comes in. Many plant parents feel nervous about cutting their ferns. They worry they might harm the plant or ruin its natural shape. The truth is, proper pruning makes ferns stronger, fuller, and more beautiful.
This fern pruning guide walks you through everything you need to know. We will cover when to prune, what tools to use, and exactly how to make each cut. You will learn the differences between fern varieties. You will discover common mistakes to avoid. By the end, you will feel confident giving your ferns the trim they deserve. Let us dive in and help your ferns flourish.
Why Pruning Matters for Ferns
Pruning does more than just make your fern look tidy. It serves several vital functions that directly impact plant health. Understanding these benefits will motivate you to make pruning a regular part of your fern care routine.
Visual guide about Fern Pruning Guide
Image source: wikihow.com
Removes Dead and Diseased Growth
Dead fronds are not just unsightly. They can harbor pests and fungal diseases. These problems can spread to healthy parts of the plant. Removing dead material promptly stops issues before they start. It also improves air circulation around the crown. Good airflow reduces the risk of mold and mildew. This is especially important for ferns grown indoors where air movement is limited.
Encourages New Growth
When you remove old fronds, the plant redirects energy. Instead of maintaining dying leaves, it produces fresh, vibrant growth. This renewal process keeps the fern looking lush and full. Spring pruning is particularly effective for stimulating new fiddleheads. These curled young fronds are a sign of a happy, healthy plant.
Maintains Shape and Size
Ferns can become leggy or sparse over time. Some varieties spread aggressively. Regular pruning keeps them within bounds. It prevents them from overwhelming neighboring plants. For container ferns, pruning maintains a pleasing proportion between plant and pot. A well-shaped fern is a joy to behold.
Improves Light Penetration
Dense, overgrown ferns shade their own centers. Inner fronds receive insufficient light. They yellow and die off. Thinning the canopy allows light to reach all parts of the plant. This promotes even growth throughout. Every frond gets its share of photosynthesis power.
When to Prune Your Ferns
Timing is everything in gardening. Ferns are no exception. Pruning at the right time minimizes stress. It maximizes the plant’s ability to recover and thrive. Let us break down the optimal timing for different situations.
Early Spring: The Prime Window
Early spring is the gold standard for major fern pruning. This is just before new growth begins. The plant is still dormant or just waking up. Cutting now removes winter damage cleanly. It makes room for fresh fiddleheads to emerge unimpeded. You can clearly see the plant structure without dense foliage in the way. Most fern varieties respond beautifully to spring pruning.
Late Winter in Mild Climates
If you live in a frost-free area, you can prune in late winter. The timing window is wider. Just ensure you finish before new growth starts. Watch for the first signs of fiddleheads. Once they appear, you have missed the ideal window for heavy pruning. Light grooming is still fine.
Throughout the Growing Season: Light Maintenance
You can remove dead or damaged fronds anytime. Do not wait for spring if you see brown fronds in July. Removing them promptly prevents disease spread. This light grooming does not stress the plant. It keeps your fern looking fresh all season long.
Fall Pruning: Proceed with Caution
Fall pruning is generally not recommended for outdoor ferns. The fronds provide winter protection for the crown. They insulate the roots from freezing temperatures. Removing them leaves the plant vulnerable. If you must tidy up in fall, only remove clearly dead material. Leave green fronds in place until spring.
After Repotting or Transplanting
Wait a few weeks after repotting before pruning. The plant needs time to recover from root disturbance. Pruning too soon adds stress. Once you see new growth, you know the roots have settled. Then you can safely shape the plant if needed.
Tools You Need for Fern Pruning
Good tools make the job easy and safe for your plants. You do not need a vast arsenal. A few quality items will serve you well for years. Invest in the best you can afford. Clean, sharp tools are non-negotiable.
Bypass Pruning Shears
Bypass shears are the gold standard for fern work. They work like scissors with two curved blades. One blade passes by the other. This creates a clean, precise cut. Anvil shears crush stems. Crushing damages delicate fern tissue. Choose shears with a comfortable grip. Spring-loaded handles reduce hand fatigue during long sessions.
Small Snips or Scissors
For fine work, keep a pair of sharp scissors handy. Floral snips work beautifully. They allow precise cuts on tiny fronds. They are perfect for maidenhair and other delicate varieties. Kitchen shears can work in a pinch. Just ensure they are clean and sharp.
Sterilizing Solution
This is not optional. It is essential. Rubbing alcohol (70% isopropyl) works perfectly. Hydrogen peroxide is another good option. Commercial plant disinfectants are also available. Wipe blades before you start. Wipe between plants. Wipe after cutting diseased material. This simple habit prevents heartbreak.
Protective Gloves
Some ferns have irritating spores or rough stems. Gloves protect your hands. They also keep plant oils off your skin. Nitrile gloves offer good dexterity. Leather gloves work for tougher jobs like tree ferns. Choose what feels comfortable.
Clean Cloth or Paper Towels
Keep these nearby for wiping blades. Also useful for cleaning sap from your hands. A damp cloth helps remove dust from remaining fronds after pruning. This lets the plant breathe better.
Container for Debris
Have a bucket or bag ready. Collect all cut material immediately. Do not leave it on the soil surface. Decaying fronds invite fungus gnats and disease. Dispose of healthy material in compost. Bag and trash diseased material.
Step-by-Step Fern Pruning Guide
Now for the main event. This step-by-step process works for most common ferns. Adjust based on your specific variety. We will cover variety-specific tips in the next section.
Step 1: Assess the Plant
Take a moment to really look at your fern. Walk around it if possible. Note the overall shape. Identify dead, yellow, or damaged fronds. Look for signs of pests or disease. Check the crown for new fiddleheads emerging. This assessment guides your pruning plan.
Step 2: Sterilize Your Tools
Before a single cut, wipe your shears with alcohol. Let them air dry for thirty seconds. This kills bacteria and fungal spores. Do this every time you prune. No exceptions.
Step 3: Remove Dead and Damaged Fronds First
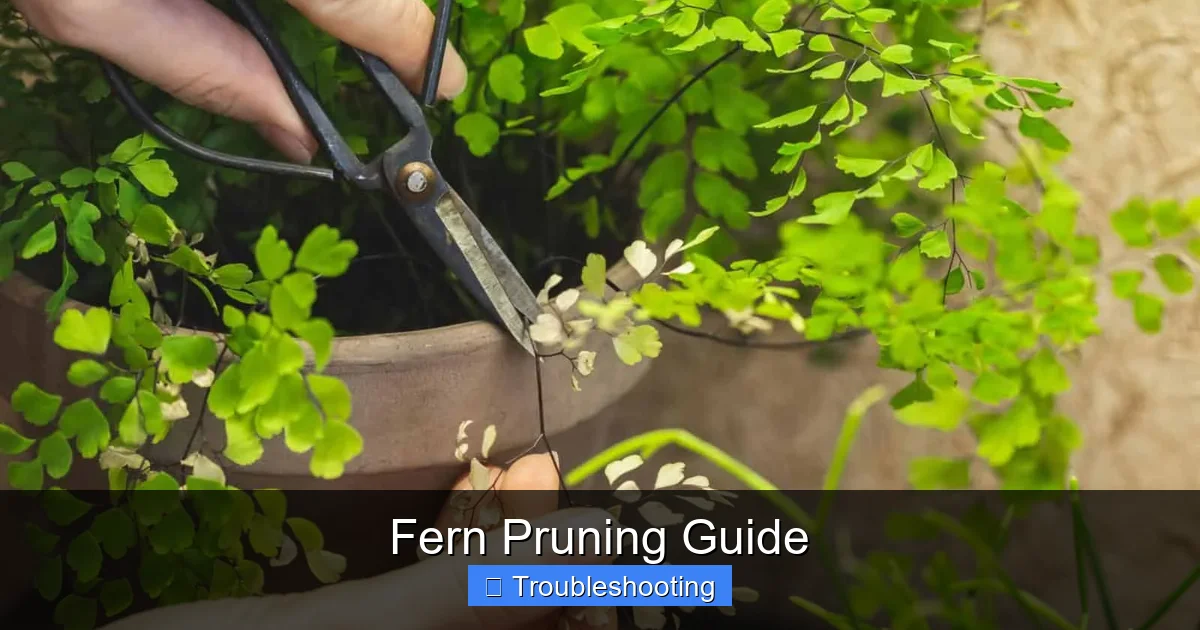
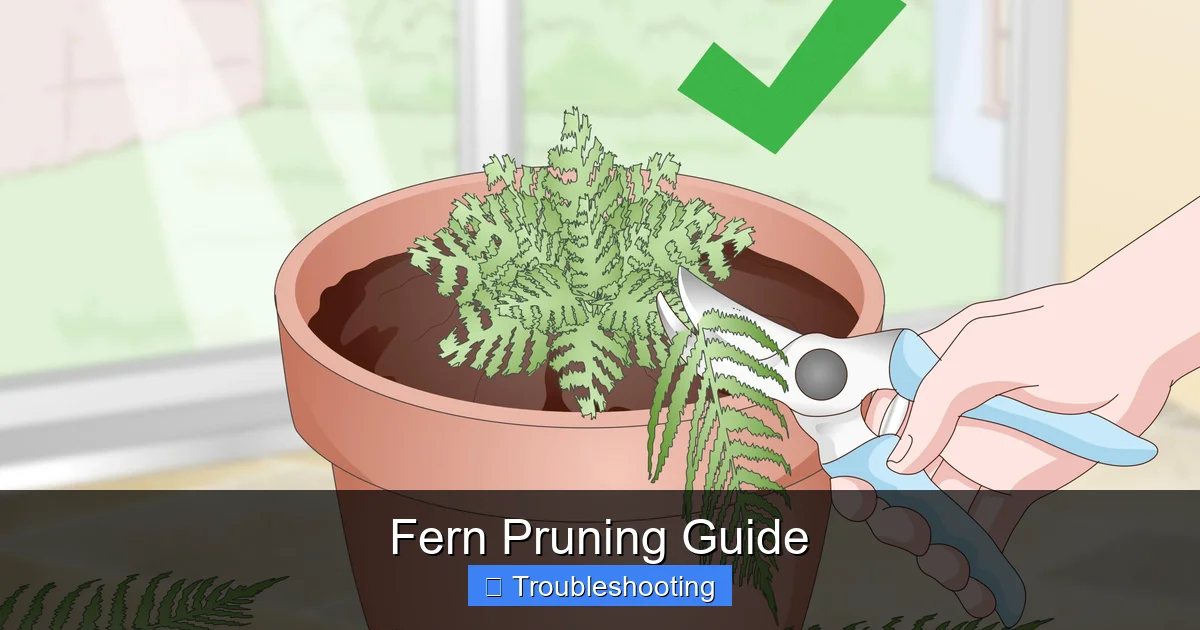
Start with the obvious cuts. Brown, crispy fronds go first. Yellowing fronds that are clearly declining go next. Cut each at the base, near the crown. Do not leave stubs. Stubs die back and invite rot. Make clean, decisive cuts. Pull the removed frond away gently.
Step 4: Thin Overcrowded Areas
Look for sections where fronds are tightly packed. Remove some of the oldest, largest fronds from these areas. Choose fronds that cross or rub against others. This opens the center to light and air. Aim to remove no more than one-third of total fronds. Less is more if you are unsure.
Step 5: Shape the Plant
Step back and evaluate the silhouette. Trim any fronds that spoil the natural form. For vase-shaped ferns, maintain the graceful arch. For mounding types, keep a rounded profile. Make cuts at varying heights for a natural look. Avoid creating a flat top or harsh lines.
Step 6: Clean Up
Remove all debris from the pot or bed. Wipe dust from remaining fronds with a damp cloth. Check the crown for trapped material. Water the plant well. This settles the soil and reduces stress.
Step 7: Monitor Recovery
Watch your fern over the next few weeks. New fiddleheads should appear. The plant should look perky, not wilted. If you see signs of stress, increase humidity. Hold off on fertilizer for two weeks. Let the plant recover at its own pace.
Pruning Different Fern Varieties
Not all ferns are created equal. Each type has its own growth habit and pruning preferences. Knowing your fern helps you prune with confidence. Here are guidelines for popular varieties.
Boston Fern (Nephrolepis exaltata)
Boston ferns are vigorous growers. They benefit from annual hard pruning in spring. Cut the entire plant back to two to four inches above the soil. This sounds drastic. But it rejuvenates the plant completely. Fresh, uniform growth emerges within weeks. For maintenance, trim scraggly fringe fronds anytime. Remove runners if you want to contain spread.
Maidenhair Fern (Adiantum)
Maidenhair ferns are delicate. They dislike heavy pruning. Remove only dead or damaged fronds. Cut individual stems at the base. Never shear the plant. The wiry black stems are part of its charm. If the whole plant looks poor, cut to the ground in spring. It will often regrow from the rhizomes.
Bird’s Nest Fern (Asplenium nidus)
Bird’s nest ferns grow from a central rosette. Do not cut into the crown. Remove only outer fronds that are damaged. Cut at the base where they meet the crown. New growth emerges from the center. The plant maintains its nest shape naturally. Avoid pruning the newest center fronds.
Staghorn Fern (Platycerium)
Staghorn ferns have two frond types. Shield fronds are flat and brown at the base. They protect the roots. Never remove green shield fronds. Brown shields can be removed if loose. Fertile fronds are the antler-like ones. Trim only damaged tips. Cut back to healthy tissue. These ferns rarely need major pruning.
Japanese Painted Fern (Athyrium niponicum)
This deciduous fern dies back in winter. Spring cleanup is simple. Remove all dead fronds at ground level. New growth emerges from the crown. During the season, trim any scorched or damaged fronds. The colorful foliage is the star. Prune to show it off.
Tree Ferns (Dicksonia, Cyathea)
Tree ferns need special care. Only remove dead fronds. Cut close to the trunk but do not damage it. The trunk is actually a root mass. Green fronds feed the trunk. Removing them weakens the plant. In cold climates, leave dead fronds for winter protection. Remove in spring.
Rabbit’s Foot Fern (Davallia)
These ferns have fuzzy rhizomes that creep over the pot edge. Do not bury or cut these rhizomes. Remove only dead fronds at the base. The rhizomes are the plant’s lifeline. They store water and nutrients. Prune gently around them.
Holly Fern (Cyrtomium falcatum)
Holly ferns are tough and evergreen. They tolerate heavier pruning. Remove old fronds in early spring. You can cut the whole plant back hard if needed. It rebounds quickly. Trim damaged tips anytime. The leathery fronds last a long time.
Common Fern Pruning Mistakes to Avoid
Even experienced gardeners make mistakes. Learning from others saves your ferns. Here are the most frequent errors and how to avoid them.
Over-Pruning
This is the number one mistake. Enthusiasm leads to removing too much. Remember the one-third rule. Never remove more than one-third of healthy fronds at once. The plant needs leaves for photosynthesis. Drastic cuts shock the system. Recovery takes months. Patience yields better results.
Pruning at the Wrong Time
Fall pruning of outdoor ferns removes winter protection. Summer heavy pruning stresses the plant in heat. Winter pruning exposes the crown to freeze damage. Stick to early spring for major work. Light cleanup is fine anytime.
Using Dirty Tools
Skipping sterilization spreads disease. One infected cut can doom a collection. Make it a ritual. Clean blades before, during, and after. It takes thirty seconds. It saves years of heartache.
Leaving Stubs
Cutting halfway up a frond leaves an ugly stub. The stub dies back anyway. It becomes an it creates an entry point for rot. Always cut at the base. Find where the frond meets the crown or rhizome. Cut cleanly there.
Shearing Instead of Selective Pruning
Hedge-trimmer style cuts ruin fern aesthetics. Ferns have graceful, arching forms. Shearing creates a flat, unnatural top. It also stimulates dense growth only at the tips. The interior becomes bare. Selective cuts preserve the natural beauty.
Ignoring Variety Needs
Treating a maidenhair like a Boston fern causes damage. Each variety has different tolerance. Research your specific fern. When in doubt, prune less. You can always cut more later. You cannot un-cut.
Pruning Stressed Plants
A fern suffering from drought, pests, or recent repotting cannot handle pruning. Wait until it recovers. Healthy plants bounce back. Stressed plants decline further. Address the underlying issue first.
Not Cleaning Up Debris
Leaving cut fronds on the soil breeds problems. Fungus gnats love decaying matter. Fungal spores splash onto healthy fronds. Pests hide in the debris. Clean up completely every time.
Aftercare: Helping Your Ferns Thrive Post-Pruning
The job is not done when you put the shears away. Proper aftercare ensures your pruning efforts pay off. The plant needs support to push new growth. Here is how to nurture your ferns after their trim.
Water Thoroughly
Give the plant a deep drink after pruning. This reduces shock. It hydrates tissues for new growth. Ensure water reaches the entire root zone. For pots, water until it drains freely. For garden ferns, soak the root area well.
Increase Humidity
Pruning reduces the plant’s transpiration surface temporarily. But new growth needs high humidity to unfurl properly. Mist the plant daily for two weeks. Use a humidity tray. Group plants together. Run a humidifier. This is especially critical for indoor ferns.
Hold Off on Fertilizer
Do not fertilize immediately after pruning. The plant is not ready to use nutrients. Wait two to three weeks. Then apply a diluted, balanced fertilizer. Half strength is plenty. Ferns are light feeders. Too much fertilizer burns tender new roots.
Provide Appropriate Light
Most ferns prefer bright, indirect light. After pruning, this is even more important. Direct sun can scorch exposed crowns. Too little light produces weak, leggy growth. Find the sweet spot for your variety.
Watch for Pests
Fresh cuts can attract pests. Inspect daily for the first week. Look for aphids, scale, or spider mites. Early detection makes control easy. A strong spray of water often dislodges early infestations.
Monitor New Growth
Fiddleheads should appear within two to three weeks in spring. They unfurl slowly. Do not touch or help them. They know what to do. If no new growth appears after a month, reassess care. Check roots, light, and water.
Resume Normal Care Gradually
After two weeks, return to your regular routine. Water when the top inch of soil feels dry. Fertilize monthly at half strength during growing season. Maintain humidity. Your fern will reward you with lush, fresh foliage.
Seasonal Fern Pruning Calendar
A quick reference calendar helps you stay on track. Adjust for your climate zone. This assumes a temperate four-season climate.
Late Winter (February-March)
- Inspect evergreen ferns for winter damage
- Plan spring pruning strategy
- Sharpen and sterilize tools
Early Spring (March-April)
- Main pruning season for most ferns
- Remove all dead fronds from deciduous types
- Hard prune Boston, holly, and similar vigorous ferns
- Light prune delicate varieties
- Clean up debris thoroughly
Late Spring (May-June)
- Monitor new growth
- Remove any frost-damaged new fronds
- Light shaping if needed
- Begin regular fertilizing schedule
Summer (July-August)
- Remove dead or damaged fronds only
- Trim fronds damaged by sun or heat
- Maintain high humidity
- Water consistently
Fall (September-October)
- Stop fertilizing
- Reduce watering as growth slows
- Remove only clearly dead material
- Prepare winter protection for tender ferns
- Leave green fronds on outdoor ferns
Winter (November-January)
- Minimal intervention
- Check for pest issues
- Maintain humidity for indoor ferns
- Protect outdoor crowns with mulch or fronds
- Plan next year’s pruning
Troubleshooting Common Post-Pruning Issues
Sometimes things do not go as planned. Here are common problems after pruning and how to fix them.
Fern Looks Wilted After Pruning
This is usually transplant shock. The plant lost foliage that supported its root system. Water thoroughly. Increase humidity dramatically. Mist multiple times daily. Place a clear plastic bag over small plants to create a humidity tent. Remove for an hour daily for air exchange. Recovery usually takes one to two weeks.
No New Growth After a Month
Check the crown. Is it firm and alive? Gently scratch the surface. Green tissue means life. Brown and mushy means rot. If alive, check roots. Are they white and firm? Black and mushy indicates root rot. Improve drainage. Reduce watering. If roots are healthy, the plant may just be slow. Some ferns take six weeks to show new fiddleheads.
New Fronds Are Small or Deformed
This suggests nutrient deficiency or pest damage. Check for aphids on emerging fiddleheads. They distort growth. Spray with insecticidal soap if found. If no pests, apply a very dilute fertilizer. Ensure adequate light. Weak light produces weak growth.
Brown Tips on Remaining Fronds
Low humidity or inconsistent watering causes this. Increase humidity. Water more consistently. Trim brown tips at an angle for appearance. Do not cut into green tissue. The angled cut looks more natural.
Plant Looks Sparse After Pruning
You may have removed too much. Or the plant was already sparse. Be patient. Ferns fill in slowly. Ensure optimal care. Consider dividing and repotting if the plant is old and woody. Fresh soil and space stimulate growth.
Advanced Pruning Techniques
For the confident fern gardener, these techniques take your skills further.
Division During Pruning
Spring pruning is the perfect time to divide overgrown ferns. After cutting back foliage, lift the plant. Use a sharp knife or spade to separate the root ball. Each division needs roots and crown tissue. Replant immediately. Water well. This rejuvenates old plants and gives you free ferns.
Rejuvenation Pruning for Neglected Ferns
If a fern has not been pruned in years, it may need drastic measures. In early spring, cut everything to two inches above soil. This works for Boston, holly, sword, and similar tough ferns. Do not do this to delicate types. Water and wait. The fresh start often produces the best growth in years.
Creating a Fern Standard
Tree ferns and large Boston ferns can be trained as standards. Remove lower fronds gradually over seasons. Leave a clear trunk. Shape the top into a canopy. This creates a dramatic specimen plant. Stake for support if needed.
Pruning for Propagation
Some ferns produce bulbils on fronds. These are tiny plantlets. When pruning, save fronds with bulbils. Pin them onto moist potting mix. They will root and grow. This is an easy propagation method during routine maintenance.
Indoor vs. Outdoor Fern Pruning Differences
Environment changes the approach. Indoor and outdoor ferns face different challenges.
Indoor Fern Considerations
Indoor ferns lack natural air movement. Disease spreads faster. Sterilization is even more critical. Dust accumulates on fronds. Wipe leaves after pruning. Heating systems dry the air. Humidity management is paramount. Light is often limited. Prune to maximize light capture. Rotate plants for even growth.
Outdoor Fern Considerations
Outdoor ferns face weather extremes. Winter protection is a pruning consideration. Leave fronds on marginally hardy types. Wildlife may browse new growth. Protect emerging fiddleheads. Soil conditions vary. Adjust watering after pruning based on rainfall. Natural predators control pests. Less intervention needed.
Container vs. Ground Planted
Container ferns dry out faster. Water more attentively after pruning. Nutrients leach out. Fertilize more regularly. Root bound plants need division. Ground planted ferns have more buffer. They recover faster from heavy pruning. They access deeper moisture.
Conclusion
Pruning ferns is not a chore to dread. It is a conversation with your plants. You observe. You respond. They grow. This fern pruning guide has given you the knowledge to prune with purpose and confidence. Remember the key principles. Prune in early spring. Use clean, sharp tools. Remove dead material first. Respect the one-third rule. Know your variety. Provide loving aftercare.
Your ferns will reward you. They will grow fuller, healthier, and more beautiful each season. The crispy brown fronds of yesterday become the lush green arches of tomorrow. Every snip of the shears is an investment in that future. So grab your pruners. Step up to your ferns. Give them the care they deserve. The ancient lineage of ferns has survived millions of years. With your help, your specimens will thrive for many more. Happy pruning.
Frequently Asked Questions
How often should I prune my ferns?
Major pruning should happen once a year in early spring. Light maintenance to remove dead or damaged fronds can be done anytime throughout the growing season as needed.
What tools do I need for pruning ferns?
You need bypass pruning shears for clean cuts, small scissors for delicate work, rubbing alcohol for sterilizing, gloves for protection, and a container for debris collection.
Why are my fern fronds turning brown after pruning?
Brown tips after pruning usually indicate low humidity or inconsistent watering. Increase humidity with misting or a humidifier and maintain even soil moisture for recovery.
Can I divide my fern when I prune it?
Yes, early spring pruning is the perfect time to divide overgrown ferns. After cutting back foliage, separate the root ball into sections with roots and crown tissue, then replant immediately.
Should I fertilize my fern right after pruning?
No, wait two to three weeks after pruning before fertilizing. The plant needs time to recover and cannot use nutrients immediately. Apply half-strength fertilizer once new growth appears.
How do I know if I pruned my fern too much?
Signs of over-pruning include wilting that persists beyond two weeks, no new growth after a month, and a generally sparse, weak appearance. The plant may need extra humidity and patience to recover.