Coral Bells Plant Propagation
Coral bells plant propagation is simple when you know the three main methods: division, seed, and cuttings. Division gives instant plants, seed offers variety, and cuttings work well for rare cultivars. Follow the step‑by‑step guides below to grow healthy Heuchera in any garden.
Welcome to the complete guide on coral bells plant propagation. If you love the bright foliage of Heuchera, you will enjoy multiplying your collection. This article walks you through every method, from quick division to patient seed sowing.
We keep the language simple and the steps clear. You do not need a greenhouse or fancy tools. A sharp spade, a clean pot, and a little patience are enough. Let us dive in and turn one plant into many.
By the end you will know when to divide, how to sow seeds, and how to root cuttings. You will also learn how to avoid common problems like rot and slow growth. Ready? Let’s get started with coral bells plant propagation.
Key Takeaways
- Division is fastest: you get mature clumps in one season.
- Seed adds diversity: new colors and forms appear each generation.
- Stem cuttings root quickly: use a humid dome for best results.
- Leaf cuttings work for hybrids: they preserve unique foliage patterns.
- Timing matters: early spring or fall gives the highest success rates.
- Aftercare is key: keep soil moist, provide shade, and fertilize lightly.
Quick Answers to Common Questions
What is the fastest way to propagate coral bells?
Division is the fastest coral bells plant propagation method because each piece already has roots.
Can I grow coral bells from seed collected in my garden?
Yes, you can collect mature seed pods, dry them, and sow the tiny seeds on a moist surface for germination.
Do stem cuttings need rooting hormone?
Rooting hormone improves success rates but is not strictly required for coral bells plant propagation by stem cuttings.
When should I divide my coral bells?
Early spring before new growth or early fall after flowering are the best times for division.
How do I prevent rot in cuttings?
Use a well‑draining medium, keep humidity high but ventilate daily, and water only when the top layer feels dry.
📑 Table of Contents
Understanding Coral Bells
What Are Coral Bells?
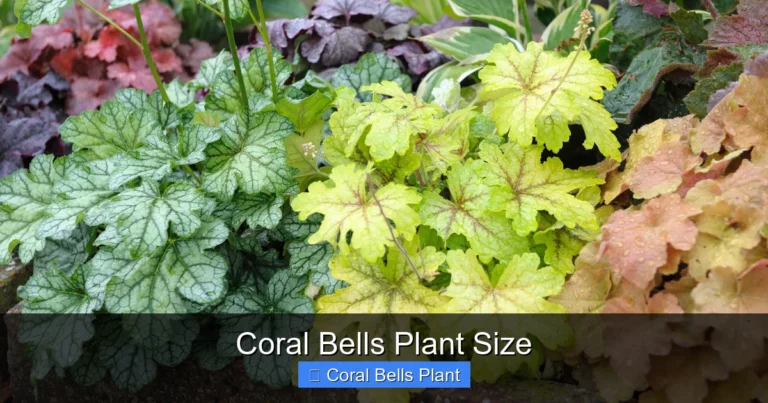
Coral bells, also called Heuchera, are perennial herbs prized for their colorful leaves. They thrive in partial shade and well‑drained soil. The plants form low mounds that add texture to borders and containers. Their flowers are small but attract pollinators in late spring.
Knowing the plant helps you choose the best coral bells plant propagation method for your garden. Leaf color ranges from lime green to deep burgundy. Some cultivars have ruffled edges while others are smooth. This diversity makes propagation exciting.
Why Propagate Coral Bells?
Propagating coral bells lets you expand your garden without buying new plants. It also preserves a favorite cultivar that may be hard to find. Sharing divisions with friends builds community. And seed propagation can create brand new color combos.
Each coral bells plant propagation technique offers a different benefit. Division gives instant mature clumps. Seed adds genetic surprise. Cuttings clone exact foliage patterns. Choose the method that matches your goals.
Pro Tips for Understanding Coral Bells
When you study coral bells plant propagation, note the leaf texture and color of each cultivar. Match the propagation method to the plant’s growth habit. Keep a garden journal to track which method works best for each variety.
Methods of Coral Bells Plant Propagation
Division
Division is the most popular coral bells plant propagation technique. You split an established clump into smaller pieces, each with roots and shoots. The new pieces establish quickly because they already have a root system. This method works best in early spring or early fall.
To succeed with division, water the parent plant a day before you dig. Use a clean spade to avoid disease. Replant each division at the same depth it grew before. Mulch lightly to retain moisture.
Seed Starting
Seed starting is a slower coral bells plant propagation route but rewards you with genetic variation. Heuchera seeds are tiny and need light to germinate. Sow them on the surface of a moist seed‑starting mix and keep them warm. Expect seedlings in two to three weeks.
Collect seeds from mature pods in late summer. Store them in a paper envelope in a cool drawer. When you sow, press seeds gently onto the mix; do not cover them. Light is essential for germination.
Stem Cuttings
Stem cuttings offer a middle ground between division and seed. Take a 4‑inch piece of healthy stem just below a node. Remove lower leaves, dip the cut end in rooting hormone, and place it in a sterile medium. Cover with a clear dome to keep humidity high.
Use a sharp, sterilized knife for a clean cut. A node is where roots will emerge. Keep the cutting out of direct sun. Mist daily to maintain moisture without waterlogging.
Leaf Cuttings
Leaf cuttings are useful for hybrids that do not come true from seed. Cut a mature leaf with a short petiole, lay it on moist perlite, and keep it humid. New plantlets form at the leaf base after several weeks.
Choose a fully expanded leaf without damage. Place the leaf upside down so the petiole contacts the medium. A humidity dome or plastic bag works well. Patience is key; roots may take a month.
Pro Tips for Choosing a Method
In coral bells plant propagation, match the method to your timeline and space. Division is fastest for immediate impact. Seed is best for breeding new colors. Cuttings excel when you need exact clones of a prized cultivar.
Step‑by‑Step Division Guide
When to Divide
The ideal time for coral bells plant propagation by division is early spring before new growth starts. A second window opens in early fall after flowering ends. Avoid dividing in hot summer or frozen winter.
Check the weather forecast for a cool, cloudy day. Cool temperatures reduce transplant shock. If you must divide in summer, provide shade and extra water.
Tools You Need
Gather a sharp spade or garden fork, a clean knife, gloves, and a bucket of water. Sterilize tools with rubbing alcohol to prevent disease spread. Have fresh potting mix ready for the new divisions.
A hand trowel helps with small clumps. A garden hose with a gentle spray works for watering. Label each division with a waterproof marker.
Division Process
First, water the parent plant thoroughly. Then dig around the clump, keeping a generous root ball. Lift the clump and shake off excess soil. Use the knife to cut the crown into sections, each with at least three shoots and a healthy root mass. Replant each division at the same depth it grew before.
Work quickly to keep roots moist. If roots dry out, soak divisions in water for ten minutes before planting. Firm the soil gently around each new plant.
Aftercare
Water the new divisions well and mulch with shredded bark. Keep the soil evenly moist for the first four weeks. Provide light shade if the sun is intense. Feed with a balanced liquid fertilizer at half strength after new growth appears.
Monitor for wilting or yellowing leaves. Adjust watering if the soil stays soggy. Remove any dead foliage to improve air flow.
Pro Tips for Division Success
When practicing coral bells plant propagation by division, divide on a cloudy day to limit stress. Use a sharp knife to make clean cuts that heal fast. Replant divisions immediately and water deeply to settle soil around roots.
Growing Coral Bells from Seed
Collecting Seeds
Allow seed pods to dry on the plant until they turn brown. Snip the pods and place them in a paper bag. Shake gently to release the tiny seeds. Store seeds in a cool, dry envelope until you are ready to sow.
Label the envelope with the cultivar name and date. Seeds remain viable for two to three years if kept dry. Fresh seed gives the highest germination rates.
Sowing Indoors
Fill a tray with a fine seed‑starting mix. Moisten the mix and press the seeds onto the surface; do not cover them. Place the tray under a grow light at 70°F. Keep the surface misted daily. Germination usually occurs in 14 to 21 days.
Use a clear plastic lid to hold humidity. Vent the lid once a day to prevent mold. Thin seedlings to one per cell when they have two true leaves.
Transplanting Outdoors
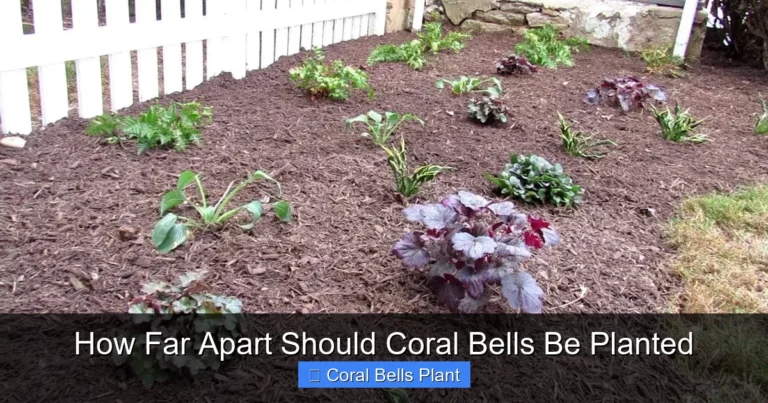
When seedlings have two true leaves, harden them off by exposing them to outdoor conditions for a few hours each day. After a week, plant them in a prepared bed with compost‑rich soil. Space plants 12 inches apart to allow mature spread.
Water thoroughly after planting. Mulch with straw to keep roots cool. Continue light feeding every four weeks during the first season.
Pro Tips for Seed Germination
For coral bells plant propagation from seed, keep the seed tray at a steady 70°F and provide 12‑14 hours of light. Use a fine mist sprayer to avoid disturbing the tiny seeds. Patience pays off; seedlings emerge in two to three weeks.
Using Stem and Leaf Cuttings
Preparing Cuttings
Select a healthy, non‑flowering stem about four inches long. Cut just below a node with a sterile blade. Remove the lower two leaves to expose the node. For leaf cuttings, choose a fully expanded leaf with a short petiole.
Make the cut at a 45‑degree angle to increase surface area. Dip the cut end in rooting hormone for faster results. Keep cuttings in a plastic bag with a damp paper towel until you pot them.
Rooting Medium
A mix of equal parts perlite and peat moss works well for coral bells plant propagation by cuttings. Fill small pots or a propagation tray. Make a hole with a pencil and insert the cutting so the node is just below the surface.
Press the medium gently around the stem. Water lightly to settle the mix. Avoid compacting the medium, which can restrict air flow.
Humidity and Light
Cover the tray with a clear plastic dome or a zip‑lock bag. Place it in bright, indirect light. Vent the cover daily to prevent mold. Keep the medium moist but not soggy.
A small fan on low can improve air circulation. Check moisture by touching the surface; it should feel damp, not wet.
Transplanting Rooted Cuttings
After three to four weeks, gently tug the cutting; resistance means roots have formed. Transplant each rooted cutting into its own pot with regular potting soil. Water well and grow on until the plant is ready for the garden.
Harden off the new plants by placing them outside for a few hours each day. Increase exposure gradually over a week. Plant in the garden when night temperatures stay above 50°F.
Pro Tips for Cutting Rooting
In coral bells plant propagation using cuttings, maintain a constant temperature of 70°F and high humidity. Use a rooting hormone with a concentration of 0.1% IBA for best results. Label each cutting to track cultivar performance.
Common Problems and Solutions
Rot and Damping Off
Overwatering is the main cause of rot in coral bells plant propagation. Use a well‑draining medium and water only when the top inch feels dry. Apply a fungicide drench if you see blackened stems.
Remove any affected cuttings immediately. Sterilize tools before the next session. Good airflow reduces fungal pressure.
Slow Root Development
Cool temperatures slow rooting. Keep the propagation area at 68‑72°F. A heat mat under the tray can speed up the process. Also ensure the cuttings receive enough light.
If roots still lag, try a stronger rooting hormone concentration. Check that the medium is not too compacted.
Pest Issues
Aphids and spider mites may attack tender new growth. Spray with insecticidal soap or neem oil at the first sign. Keep the area clean and remove any infested leaves promptly.
Inspect plants daily during the first month. Early detection makes control easy. Encourage beneficial insects like lady beetles.
Pro Tips for Preventing Issues
When managing coral bells plant propagation, sanitize all tools and containers before each use. Rotate propagation trays each season to avoid pathogen buildup. Keep a log of watering, temperature, and any treatments applied.
Conclusion
You now have a full toolbox for coral bells plant propagation. Division gives you instant plants, seed adds excitement, and cuttings let you clone special varieties. Choose the method that fits your schedule and space. Remember to water wisely, provide shade, and feed lightly. With a little care, your Heuchera collection will multiply season after season. Happy gardening!
Frequently Asked Questions
What soil type is best for coral bells plant propagation?
A light, well‑drained mix rich in organic matter works best for all propagation methods.
How long does it take for seed‑grown coral bells to flower?
Seedlings typically need two to three years before they produce their first flower spikes.
Can I propagate coral bells in containers?
Yes, divisions, cuttings, and seedlings all thrive in pots as long as drainage is adequate.
Is it necessary to sterilize tools before dividing?
Sterilizing tools with alcohol reduces the risk of spreading fungal diseases during coral bells plant propagation.
What light conditions do cuttings need?
Bright, indirect light is ideal; direct sun can scorch tender cuttings.
How often should I fertilize newly propagated coral bells?
Apply a half‑strength balanced fertilizer once new growth appears, then monthly during the growing season.