Complete Guide to Vintage for String of Turtles
This comprehensive guide covers everything you need to know about caring for vintage String of Turtles plants. Learn to identify and fix common issues in mature specimens including yellowing leaves, leggy growth, root rot, and pest infestations. Discover proven techniques to revive struggling plants and keep your vintage Peperomia prostrata thriving for years to come.
If you have been growing String of Turtles for a few years, you already know this plant has personality. Those tiny turtle-shell leaves trailing over the pot edge bring so much joy. But as your plant matures into what collectors call a vintage specimen, the care routine shifts. What worked for a fresh cutting might harm a three-year-old plant. I learned this the hard way when my oldest String of Turtles started yellowing despite my usual care routine.
This guide walks through every challenge vintage String of Turtles face. We will cover yellowing leaves, leggy stems, root rot, pest invasions, and the mysterious slow decline that puzzles even experienced growers. You will learn to read your plant signals like a pro. By the end, you will confidently troubleshoot any issue and keep your mature Peperomia prostrata thriving for many more seasons.
Key Takeaways
- Vintage plants need different care: Mature String of Turtles have established root systems and require less frequent watering than younger plants.
- Yellowing leaves signal specific problems: Overwatering, underwatering, nutrient deficiency, or natural aging each cause distinct yellowing patterns.
- Leggy growth indicates insufficient light: Vintage plants stretch toward light sources; provide bright indirect light to maintain compact growth.
- Root rot is the number one killer: Well-draining soil and proper watering technique prevent this fatal condition in mature specimens.
- Propagation rejuvenates vintage plants: Taking cuttings from healthy stems creates new plants while encouraging bushier growth on the mother plant.
- Pest prevention beats treatment: Regular inspection and neem oil applications keep mealybugs, spider mites, and fungus gnats at bay.
- Seasonal adjustments are crucial: Reduce watering and stop fertilizing during winter dormancy to prevent stress on vintage plants.
Quick Answers to Common Questions
How often should I water a vintage String of Turtles?
Water when the top two inches of soil feel dry and the pot feels light. This typically means every 7-10 days in summer and every 2-3 weeks in winter, but always check soil moisture rather than following a strict schedule.
Why are my vintage String of Turtles leaves turning yellow and mushy?
Yellow mushy leaves indicate overwatering and potential root rot. Let the soil dry completely, remove affected leaves, check roots for rot, and repot in fresh chunky well-draining mix if necessary.
Can I propagate woody stems from a vintage plant?
Yes, woody stems root well through layering or stem cuttings. Allow cut ends to callous for 24 hours, then root in water or moist perlite. Layering by pinning a node to soil while still attached to the mother plant has the highest success rate.
What light level does a mature String of Turtles need?
Vintage plants need bright indirect light (200-400 foot-candles). East or west windows are ideal. South windows need sheer curtains. North windows usually provide insufficient light for mature specimens, leading to leggy growth.
How do I know if my vintage plant is root bound?
Signs include water running straight through the pot, soil drying in 1-2 days, roots visible at drainage holes, and the pot feeling solid when squeezed. Repot into fresh chunky mix in a slightly larger container every 2 years in spring.
📑 Table of Contents
- Understanding What Makes a String of Turtles Vintage
- Diagnosing Yellowing Leaves on Mature Plants
- Fixing Leggy Growth and Sparse Foliage
- Root Rot: The Silent Killer of Vintage Plants
- Pest Management for Established Specimens
- Seasonal Care Adjustments for Longevity
- Propagation: Renewing Your Vintage Collection
- Troubleshooting Mysterious Decline
- Advanced Tips from Long-Time Growers
- Conclusion
Understanding What Makes a String of Turtles Vintage
Age and Growth Milestones
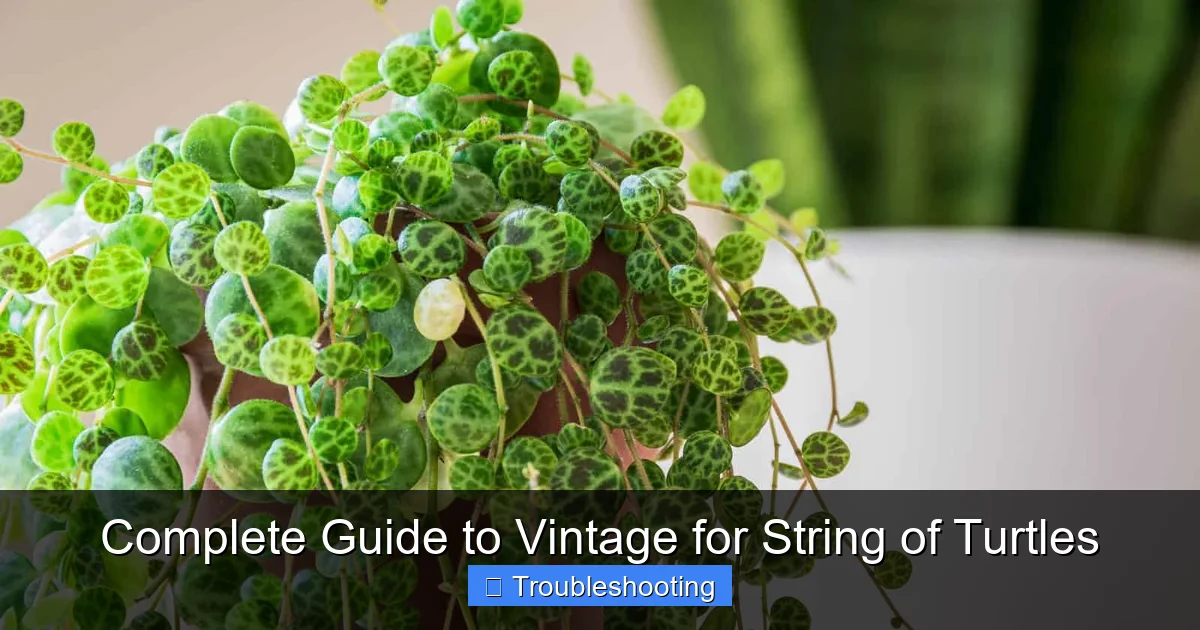
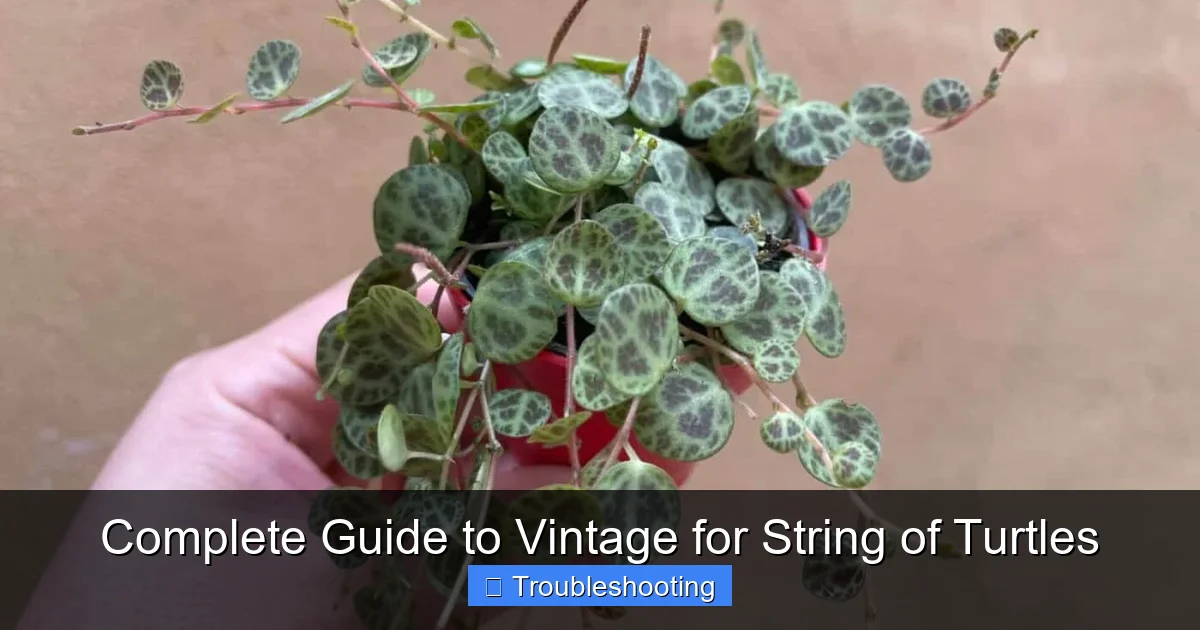
Most growers consider a String of Turtles vintage once it passes the two-year mark. At this stage, the plant develops a woody base stem. The root system fills the pot completely. Leaves grow larger and show more pronounced turtle-shell patterning. You might notice the plant produces small flower spikes more regularly. These spikes look like thin rat tails and signal a happy mature plant.
A vintage specimen often stretches three feet or more in trailing length. The stems become semi-woody near the soil line. This natural aging process is beautiful but changes how the plant handles water and nutrients. The thickened stems store more moisture. The dense root mass drinks faster but also suffocates easier in soggy soil.
How Vintage Differs from Juvenile Care
Young String of Turtles cuttings need consistent moisture to establish roots. They tolerate lower light while building energy reserves. Vintage plants flip this script. Their established roots rot quickly in wet soil. They demand brighter light to sustain their larger leaf mass. Fertilizer needs increase but concentration must decrease to avoid salt buildup in the crowded root zone.
Think of it like raising a child versus caring for a teenager. The teenager eats more but has stricter bedtime rules. Your vintage plant drinks more water between sessions but punishes you harder for overwatering. The margin for error shrinks as the plant ages.
Diagnosing Yellowing Leaves on Mature Plants
Overwatering Yellow Pattern
Overwatering shows up first on the oldest leaves near the base. These leaves turn soft yellow, almost translucent. They feel mushy when gently squeezed. The yellowing spreads upward along the stem. You might see black spots developing at the leaf attachment points. The soil stays damp for more than five days after watering. A sour smell sometimes rises from the pot.
Visual guide about Complete Guide to Vintage for String of Turtles
Image source: planetnatural.com
Fix this by letting the soil dry completely. Remove all yellow leaves with clean scissors. Check roots for rot if the problem persists. Repot into fresh chunky mix if roots look brown and mushy. Going forward, water only when the top two inches feel dry and the pot feels light.
Underwatering Yellow Pattern
Underwatering creates crispy yellow edges that move inward. The leaves feel paper-thin and curl slightly. Stems may shrivel near the tips. This often happens in vintage plants because their dense roots drink water fast. The soil pulls away from pot edges. You might see the plant perk up dramatically within hours of watering.
Increase watering frequency but not volume. Bottom watering works well for vintage plants. Place the pot in a tray of water for fifteen minutes. The dense root mass wicks up exactly what it needs. Top water lightly afterward to settle the soil surface.
Nutrient Deficiency Yellow Patterns
Nitrogen deficiency turns older leaves pale yellow while veins stay green. The plant grows slowly and new leaves emerge small. Magnesium deficiency creates yellow patches between leaf veins on older growth. Iron deficiency hits new growth first with yellow leaves and green veins.
Vintage plants deplete soil nutrients faster. Apply half-strength balanced fertilizer monthly during growing season. Use a formula with micronutrients. Flush the soil every three months by running water through for several minutes. This prevents salt buildup that blocks nutrient uptake.
Natural Aging Yellow
Sometimes yellow leaves are just retirement. Vintage String of Turtles naturally shed oldest leaves as they focus energy on new growth. These leaves turn clean yellow, dry crisp, and fall off easily. No mushy texture. No spreading pattern. Usually just one or two leaves at a time near the base.
This is healthy. Pluck them off and move on. If you lose more than a leaf per week, investigate other causes.
Fixing Leggy Growth and Sparse Foliage
Why Vintage Plants Stretch
Leggy growth means long gaps between leaf nodes. Stems look thin and weak. Leaves grow smaller and lose their turtle pattern definition. The plant puts all energy into reaching light instead of making leaves. This happens fast in vintage plants because they have the root power to fuel rapid stem extension.
Visual guide about Complete Guide to Vintage for String of Turtles
Image source: investinaznow.com
Common triggers include seasonal light changes, moving the plant to a shadier spot, or nearby plants growing taller and casting shade. Even a sheer curtain can reduce light enough to trigger stretching in a mature specimen.
Light Requirements for Mature Specimens
Vintage String of Turtles need bright indirect light. East or west windows work beautifully. South windows need a sheer curtain. North windows rarely provide enough intensity for mature plants. Aim for 200 to 400 foot-candles at the plant level. A simple phone app can measure this.
If natural light falls short, add a grow light. LED bars or bulbs in the 4000K to 6500K range work well. Run them twelve to fourteen hours daily. Position twelve to eighteen inches above the plant. Rotate the pot weekly for even growth.
Pruning to Encourage Bushiness
Pruning vintage plants feels scary but pays off. Cut leggy stems back to just above a leaf node. New growth branches from that node. The plant becomes fuller. Do this in spring or early summer when growth hormones run high. Never remove more than one-third of the plant at once.
Save the cuttings. They root easily and make great gifts or backup plants. More on propagation later.
Training and Support Options
Vintage stems get heavy. They cascade beautifully but can pull the plant sideways. Use a small trellis or macrame hanger to distribute weight. Some growers train stems in a spiral around the pot for a fuller look. Gentle ties with soft twine work. Avoid wire that cuts into woody stems.
Root Rot: The Silent Killer of Vintage Plants
Why Mature Plants Succumb Faster
Root rot kills more vintage String of Turtles than anything else. The dense root mass creates a moisture trap. Water sits between roots instead of draining. Fungal pathogens love this environment. Once rot starts, it spreads fast through the connected root network. A plant that took years to grow can collapse in two weeks.
Vintage plants also mask early symptoms. Their stored stem moisture keeps leaves looking fine while roots die underneath. By the time leaves yellow, the root system is often seventy percent gone.
Early Warning Signs
Watch for soil staying wet more than a week. Fungus gnats appearing suddenly. A faint musty smell when you water. Leaves losing their glossy sheen. Stems feeling slightly soft near the soil line. The plant stops putting out new growth despite good light and season.
Gently lift the plant from its pot every few months. Healthy roots are white or light tan and firm. Rotting roots are brown, black, or mushy. They pull away from the root ball easily.
Emergency Root Rot Treatment
If you catch rot early, act fast. Remove the plant from its pot. Shake off all old soil. Rinse roots under lukewarm water. Trim every brown or mushy root with sterilized scissors. Dip remaining roots in hydrogen peroxide solution (one part 3% peroxide to four parts water) for five minutes.
Repot in fresh chunky mix. Use a clean pot with drainage holes. Do not water for three days. Then water lightly. Place in bright indirect light with good airflow. Hold fertilizer for a month. The plant may drop leaves but should recover if enough healthy roots remain.
Preventive Soil Mix for Vintage Plants
The right mix prevents ninety percent of rot cases. My go-to recipe: two parts small orchid bark, one part perlite, one part coconut coir, half part worm castings. This drains instantly but holds enough moisture for the dense root mass. Repot vintage plants every two years in spring. Fresh mix restores aeration and removes salt buildup.
Choose pots wisely. Terracotta wicks moisture and helps prevent rot. Ensure multiple drainage holes. Avoid pots more than two inches wider than the root ball. Excess soil stays wet too long.
Pest Management for Established Specimens
Mealybugs: The Cottony Invaders
Mealybugs love vintage String of Turtles. They hide in leaf axils where stems meet leaves. The woody base stems provide perfect shelter. Look for white cottony clusters. Leaves yellow and drop. Sticky honeydew coats leaves below. Ants often farm mealybugs for this honeydew.
Treatment: Dab visible bugs with alcohol on a cotton swab. Spray entire plant with neem oil weekly for three weeks. Isolate the plant. Check neighbors. Systemic granules in soil work for severe cases but use as last resort.
Spider Mites: The Invisible Web Spinners
Spider mites thrive in dry indoor air. They are tiny but their damage shows. Leaves develop stippled yellow dots. Fine webbing appears between leaves and stems. The plant looks dusty. Vintage plants with dense foliage hide mites well.
Treatment: Shower the plant thoroughly with lukewarm water. Increase humidity to sixty percent. Apply insecticidal soap every five days for three treatments. Neem oil alternates well. Predatory mites work for large collections.
Fungus Gnats: More Annoying Than Deadly
Fungus gnats signal overly wet soil. Their larvae nibble root hairs. Adults fly around your face. Vintage plants in dense mixes attract them. Yellow sticky traps catch adults. Let soil dry more between waterings. Top dress with half inch of sand or diatomaceous earth. Mosquito bits in water kill larvae.
Scale Insects: The Armored Bumps
Scale looks like small brown bumps on stems. They don’t move. They suck sap and weaken the plant. Woody vintage stems host them well. Scrape off with fingernail or soft brush. Follow with neem oil spray. Check weekly for months. They hide incredibly well.
Preventive Pest Routine
Inspect vintage plants weekly. Wipe leaves monthly with damp cloth. Spray neem oil preventively every six weeks. Quarantine new plants for three weeks. Keep growing area clean. Remove fallen leaves promptly. Healthy vintage plants resist pests better.
Seasonal Care Adjustments for Longevity
Spring Awakening
Spring triggers explosive growth. Increase watering frequency as days lengthen. Start fertilizing at half strength. Repot if roots circle the pot. Prune leggy winter growth. Take cuttings for propagation. Check for pests emerging from dormancy. This is the best time for any major interventions.
Summer Maintenance
Summer brings peak growth. Water when top inch dries. Fertilize monthly. Provide shade from harsh afternoon sun. Increase humidity with pebble tray or humidifier. Watch for spider mites in air conditioning drafts. Rotate for even light exposure. Enjoy the lush trailing growth.
Fall Transition
Fall signals slowing down. Reduce fertilizing by October. Water less frequently as growth slows. Move plant back from cold windows. Check for drafts. Clean leaves to maximize winter light absorption. Stop pruning. Let the plant harden off for winter.
Winter Dormancy Care
Winter is dangerous for vintage plants. Low light and dry air stress them. Water only when soil is dry halfway down. No fertilizer. Keep above sixty degrees Fahrenheit. Provide supplemental light if possible. Accept some leaf loss. Do not panic over slow growth. The plant rests.
Propagation: Renewing Your Vintage Collection
Why Propagate Vintage Plants
Propagation serves multiple purposes. It creates backup plants in case the mother declines. It rejuvenates the mother plant by stimulating new growth. It lets you share this wonderful plant with friends. Vintage stems root slower than juvenile cuttings but produce stronger plants.
Stem Cutting Method
Select healthy stems with at least four leaf nodes. Cut just below a node with clean scissors. Remove bottom two leaves. Let the cut end callous for twenty-four hours. Place in water or moist perlite. Roots appear in three to six weeks. Pot up when roots reach one inch.
Water vs Soil Propagation
Water propagation lets you watch roots develop. Change water weekly. Transition to soil gently. Soil propagation skips transition shock. Use the same chunky mix as mother plant. Keep evenly moist. Cover with humidity dome or plastic bag. Vent daily.
Layering for Woody Stems
Vintage woody stems root well via layering. Pin a stem node to moist soil in adjacent pot. Use a hairpin or bent wire. Keep soil staple. Roots form while still attached to mother. Sever after six weeks. This method has highest success rate for mature stems.
Common Propagation Mistakes
Using stems with no nodes. Skipping callous time. Keeping cuttings too wet. Expecting fast results. Vintage cuttings take patience. Give them eight weeks before giving up. Label with date and mother plant name.
Troubleshooting Mysterious Decline
When Everything Looks Right But Plant Fades
Sometimes vintage String of Turtles decline despite perfect care. Leaves get smaller. Stems thin. No new growth. No pests. No rot. This frustrates experienced growers. The cause is often root bound exhaustion or salt buildup invisible from the top.
Root Bound Exhaustion
Vintage plants eventually fill every soil pore with roots. No soil left to hold water or nutrients. The plant survives on stored stem moisture until reserves deplete. Signs: water runs straight through pot. Plant dries in two days. Roots visible at drainage holes. Pot feels solid with roots.
Solution: Repot immediately. Loosen root ball gently. Trim circling roots. Fresh chunky mix. Slightly larger pot. Water well. Shade for a week. Resume normal care.
Salt Buildup Toxicity
Fertilizer salts accumulate over years. They burn root tips. Block nutrient uptake. Create drought stress in wet soil. White crust on soil surface or pot rim signals this. Flush monthly during growing season. Run water through for five minutes. Let drain completely. Repot every two years regardless.
Genetic Senescence
Some vintage plants simply reach end of natural lifespan. Peperomia prostrata can live ten plus years but individual stems age out. The plant becomes a collection of old woody stems with sparse foliage. Propagation resets the clock. New plants from cuttings are genetically identical but physiologically young.
Advanced Tips from Long-Time Growers
Bottom Watering Mastery
Bottom watering transforms vintage plant care. Fill a basin with two inches of water. Set pot in for fifteen minutes. Remove and let drain. The dense root mass drinks evenly. No wet crown. No fungus gnats. Salt buildup reduces. Do this every other watering. Top water monthly to flush salts.
Humidity Hacks for Dry Homes
Group vintage plants together. They create a humidity bubble. Place on pebble trays with water below pebble tops. Run a small humidifier nearby. Mist in morning only so leaves dry by night. Avoid misting in low light or cool temps. Wet leaves invite fungal issues.
Fertilizer Rotation Strategy
Rotate fertilizers to provide complete nutrition. Month one: balanced 10-10-10 at quarter strength. Month two: high nitrogen 3-1-2 for foliage. Month three: bloom booster 1-3-2 for root health. Month four: plain water flush. Repeat. This prevents nutrient imbalances common in long-term container plants.
Light Measurement Made Simple
Use your hand test. At noon, hold hand twelve inches above plant. Sharp distinct shadow means bright light. Fuzzy shadow means medium. Barely visible shadow means low. Vintage String of Turtles need sharp shadow for at least four hours daily. Adjust position seasonally.
Creating a Care Calendar
Track your vintage plant yearly. Note repotting dates. Fertilizer types and dates. Pest treatments. Watering frequency changes. Growth milestones. Photos help. Patterns emerge. You learn your specific plant rhythms. This prevents reactive care and enables proactive adjustments.
Conclusion
Caring for vintage String of Turtles rewards patience with stunning trailing beauty. These plants teach you to observe closely and respond thoughtfully. The challenges we covered – yellowing leaves, leggy growth, root rot, pests, seasonal shifts, mysterious decline – all have solutions rooted in understanding how mature plants differ from juveniles.
Your vintage plant carries history. Each woody stem tells a season survived. Each turtle leaf displays your care consistency. When issues arise, you now have a diagnostic framework. Check water first. Then light. Then roots. Then pests. Then nutrients. This order catches ninety percent of problems early.
Remember that propagation is your insurance policy. Take cuttings annually. Share them. Start fresh pots. The mother plant may eventually retire but her clones carry on. That is the true joy of vintage plant parenthood – you become part of the plant lineage.
Keep observing. Keep adjusting. Keep enjoying those tiny turtle shells cascading over your pot edges. Your vintage String of Turtles has many beautiful years ahead with you as its steward.
Frequently Asked Questions
What is considered a vintage String of Turtles plant?
A String of Turtles is considered vintage once it reaches 2-3 years of age. At this stage, it develops woody base stems, a dense root system that fills the pot, larger leaves with pronounced turtle-shell patterning, and trailing stems often exceeding three feet in length.
Why is my vintage String of Turtles dropping leaves suddenly?
Sudden leaf drop in vintage plants usually signals root rot from overwatering, severe underwatering, temperature shock from cold drafts, or pest infestation. Check soil moisture first, then inspect roots and leaves for pests or disease symptoms.
Should I fertilize my vintage String of Turtles differently than a young plant?
Yes, vintage plants need more frequent but weaker fertilization. Apply half-strength balanced fertilizer monthly during growing season (spring through early fall), and flush soil every three months to prevent salt buildup in the dense root mass.
Can vintage String of Turtles recover from severe root rot?
Recovery is possible if caught early and at least 30% of roots remain healthy. Remove all rotted roots, treat with hydrogen peroxide solution, repot in fresh chunky mix, withhold water for three days, and provide bright indirect light with good airflow.
How do I make my vintage String of Turtles fuller and less leggy?
Provide brighter light, prune leggy stems back to leaf nodes in spring, and rotate the pot weekly for even growth. The pruned cuttings can be propagated and planted back into the mother pot to increase fullness.
Is it normal for vintage String of Turtles to lose lower leaves?
Yes, vintage plants naturally shed their oldest leaves near the base as they focus energy on new growth. This appears as clean yellowing and drying of individual leaves without spreading patterns or mushy texture. Losing 1-2 leaves per month is normal.