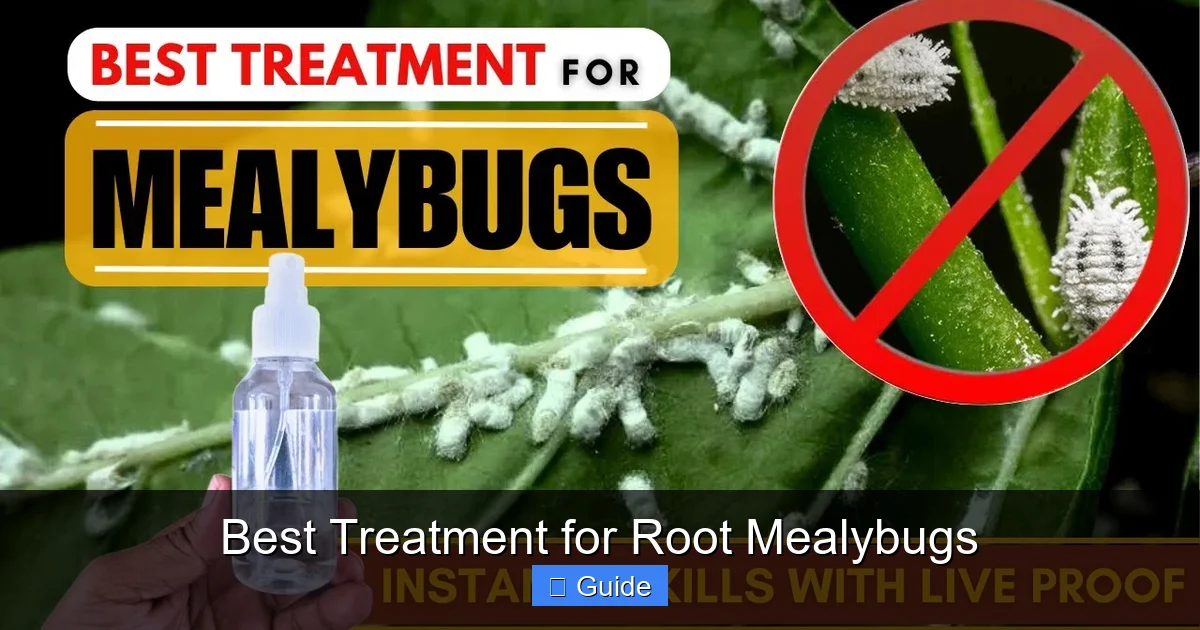
Best Treatment for Root Mealybugs
Root mealybugs are destructive pests that feed on plant roots underground, often going unnoticed until severe damage occurs. This comprehensive guide covers everything you need to know about identifying, treating, and preventing these hidden invaders using both natural and chemical methods.
Key Takeaways
- Early detection is critical: Root mealybugs live underground and show subtle above-ground symptoms like yellowing leaves and stunted growth before plants collapse.
- Isolate infected plants immediately: Prevent spread to healthy plants by quarantining any specimen showing signs of infestation.
- Systemic insecticides offer the most reliable control: Products containing imidacloprid or dinotefuran translocate through the plant to reach pests on roots.
- Beneficial nematodes provide effective biological control: Steinernema feltiae and Heterorhabditis bacteriophora actively hunt and kill root mealybugs in soil.
- Hot water treatment works for potted plants: Submerging root balls in 120°F water for 10-15 minutes kills pests without chemicals.
- Prevention beats cure every time: Inspect new plants, use sterile potting mix, and avoid overwatering to create unfavorable conditions.
- Multiple treatments are usually necessary: Root mealybugs have overlapping generations, so repeat applications every 2-3 weeks for complete eradication.
Quick Answers to Common Questions
How do I know if my plant has root mealybugs?
Look for unexplained wilting, yellowing leaves, stunted growth, and ants on the soil surface. Confirm by removing the plant from its pot and checking roots for white, cottony masses and tiny oval insects covered in waxy powder.
What is the fastest way to kill root mealybugs?
Hot water treatment (120°F for 10-15 minutes) kills all life stages instantly for potted plants. For chemical control, dinotefuran soil drenches translocate to roots within days, faster than imidacloprid.
Can I use neem oil for root mealybugs?
Yes, neem oil or azadirachtin products applied as a soil drench every 7-14 days can suppress populations, but they work slowly and are best combined with other methods like beneficial nematodes.
Are root mealybugs the same as fungus gnats?
No. Root mealybugs are white, waxy, oval insects that suck sap. Fungus gnat larvae are tiny, translucent worms with black heads that feed on fungi and root hairs. They require different treatments.
How long does it take to get rid of root mealybugs completely?
Expect 6-8 weeks of consistent treatment. Their overlapping generations mean eggs hatch continuously. Repeat applications every 2-3 weeks until no signs remain for a full month.
📑 Table of Contents
- Understanding Root Mealybugs: The Hidden Threat
- How to Identify Root Mealybug Infestations
- Best Treatment Options for Root Mealybugs
- Natural and Organic Control Methods
- Chemical Treatments: When and How to Use Them
- Prevention: Keeping Root Mealybugs Away for Good
- Special Situations: Orchids, Succulents, and Large Specimens
- Conclusion: Winning the War Against Root Mealybugs
Understanding Root Mealybugs: The Hidden Threat
If you’ve ever pulled a struggling plant from its pot and found white, cottony masses clinging to the roots, you’ve met one of gardening’s most frustrating foes. Root mealybugs are tiny, sap-sucking insects that spend their entire lives underground, hidden from view and often from mind. Unlike their above-ground cousins that cluster on stems and leaves, these subterranean pests operate in secrecy, draining the life from your plants before you even realize they’re there.
The best treatment for root mealybugs starts with understanding what you’re up against. These insects belong to the family Pseudococcidae, closely related to scale insects and aphids. Several species target roots, but the most common culprits in home and greenhouse settings are the ground mealybug (Rhizoecus falcifer) and the Pritchard’s mealybug (Rhizoecus pritchardi). They’re small, usually 1-3 millimeters long, oval-shaped, and covered in a white, waxy powder that gives them a mealy appearance, hence the name.
What makes root mealybugs particularly insidious is their reproductive strategy. Females can lay hundreds of eggs in cottony ovisacs attached to roots. These eggs hatch into tiny crawlers that disperse through the soil, seeking new feeding sites. In warm conditions, a generation can complete in just 3-4 weeks, meaning populations can explode rapidly. They feed by inserting needle-like mouthparts into root tissue and sucking out sap, weakening the plant and creating entry points for fungal and bacterial pathogens. The damage they cause often mimics nutrient deficiencies or root rot, leading to misdiagnosis and delayed treatment.
Why Root Mealybugs Are Different From Foliar Mealybugs
Many gardeners are familiar with foliar mealybugs, those white fuzzy bugs that cluster on stems and leaf undersides. Root mealybugs share the same family but lead completely different lives. Foliar mealybugs are exposed to predators, weather, and sprays. Root mealybugs enjoy the constant temperature, moisture, and protection of the soil environment. This means treatments that work on leaves often fail against root populations. Contact sprays can’t reach them. Systemic products must translocate down to roots in sufficient concentration. Cultural controls like washing plants off with water are useless. The best treatment for root mealybugs requires a completely different approach than what you’d use for the aboveground variety.
Plants Most Vulnerable to Root Mealybug Attack
While root mealybugs can infest almost any potted plant, they show distinct preferences. Succulents and cacti are prime targets, especially those in gritty, well-draining mixes that mimic their natural habitat. African violets, orchids, ferns, and many tropical foliage plants frequently fall victim. In greenhouse and nursery settings, they’re notorious pests of cyclamen, poinsettias, and many bedding plants. Outdoor plants aren’t immune either. Root mealybugs can establish in garden beds, particularly in sandy, well-drained soils. They’ve been documented on grasses, ornamental shrubs, and even some vegetable crops. Container plants are at highest risk because the confined root zone allows populations to build quickly with nowhere for crawlers to disperse.
How to Identify Root Mealybug Infestations
Catching an infestation early is half the battle. Since root mealybugs live out of sight, you need to know the subtle signs they leave above ground. The symptoms often develop slowly and look like other common problems, which is why so many infestations go unnoticed until it’s too late.
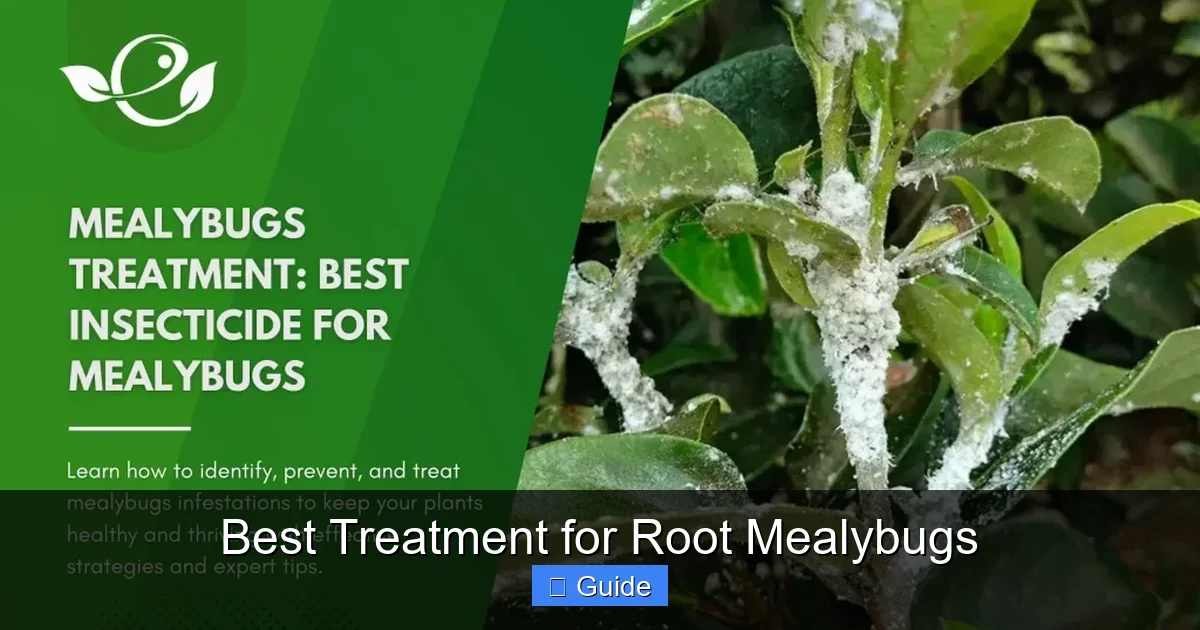
Visual guide about Best Treatment for Root Mealybugs
Image source: envirevoagritech.com
Above-Ground Warning Signs
The first clue is usually a general decline in plant vigor. Growth slows or stops completely. New leaves may be smaller than normal, pale, or yellowed. The plant might wilt during the heat of the day even when soil is moist, because damaged roots can’t take up water fast enough. You might notice nutrient deficiency symptoms, particularly nitrogen and potassium deficiencies, since the pests are intercepting the plant’s nutrient stream. Flowering plants may produce fewer buds or drop them prematurely. In severe cases, the entire plant collapses and dies, often leading the gardener to blame root rot or underwatering.
One telltale sign is the presence of ants. Ants farm mealybugs for their honeydew, a sweet, sticky excretion. If you see ants crawling on the soil surface or climbing the pot, investigate immediately. They’re often the first indicator of a subterranean infestation. You might also spot the white, waxy filaments of the mealybugs themselves on the soil surface, around drainage holes, or on the outside of the pot near the bottom.
Confirming the Diagnosis: The Root Inspection
There’s only one way to know for sure: you have to look at the roots. Gently remove the plant from its pot. For plastic pots, squeeze the sides to loosen the root ball. For rigid containers, run a knife around the inside edge. Tip the plant upside down, supporting the stem between your fingers, and tap the pot rim against a solid surface. The root ball should slide out intact.
Examine the roots carefully. Look for white, cottony masses in the root crevices, along the sides of the root ball, and especially near the bottom where drainage holes provide access. The pests themselves are tiny, but their waxy coating and egg sacs are visible to the naked eye. You might also see a white, powdery residue on the roots and surrounding soil. This is the mealybugs’ protective wax. In heavy infestations, the entire root system can appear white and fuzzy. Use a magnifying glass or hand lens for a closer look. The insects are oval, segmented, and move slowly when disturbed.
Distinguishing Root Mealybugs From Other Problems
Several other issues can mimic root mealybug damage. Root rot causes wilting and yellowing too, but the roots will be brown, mushy, and foul-smelling. Healthy roots are firm and white or tan. Fungus gnat larvae feed on roots but are tiny, translucent worms with black heads, not white and waxy. Root aphids are similar in size and habit but lack the heavy wax coating and tend to be greenish, brown, or black. Beneficial mycorrhizal fungi form white threads on roots, but these are fine, hair-like hyphae, not cottony masses with visible insects. When in doubt, collect a sample in a zip-top bag and take it to your local cooperative extension office for positive identification.
Best Treatment Options for Root Mealybugs
Once you’ve confirmed the diagnosis, it’s time to act. The best treatment for root mealybugs depends on several factors: the severity of infestation, the type of plant, whether it’s edible, your tolerance for chemicals, and whether the plant is in a pot or in the ground. In most cases, a combination approach yields the best results.
Immediate Isolation and Sanitation
Before treating, isolate the infected plant. Root mealybug crawlers move surprisingly fast through soil and can travel between pots via drainage water, shared trays, or even on your tools. Move the plant to a quarantine area away from your other plants. Wash your hands and tools thoroughly after handling it. Dispose of the old potting mix in a sealed bag, don’t compost it. The eggs and crawlers can survive in compost and reinfest your garden. Scrub the pot with hot, soapy water and a 10% bleach solution, then rinse well. If the plant is in the ground, you’ll need to treat in place, but you can still create a barrier by removing mulch and debris from around the base.
Systemic Insecticides: The Heavy Artillery
For many growers, systemic insecticides represent the most reliable best treatment for root mealybugs. These products are absorbed by the roots and translocated throughout the plant via the xylem. When mealybugs feed, they ingest the toxin. The two most effective active ingredients for root mealybugs are imidacloprid and dinotefuran, both neonicotinoids.
Imidacloprid is widely available in granular, liquid concentrate, and ready-to-use formulations. Products like Bonide Systemic Houseplant Insect Control or BioAdvanced 3-in-1 Insect, Disease & Mite Control contain imidacloprid. Apply as a soil drench according to label directions. The granules are worked into the top inch of soil and watered in. It takes 1-2 weeks for the chemical to move through the plant and reach effective concentrations in the roots. Protection lasts 8-12 weeks.
Dinotefuran (found in products like Safari or Zylam) moves faster and is more water-soluble, making it especially effective for soil applications. It can reach roots in days rather than weeks. However, it’s more expensive and often sold in professional sizes. Both chemicals are toxic to bees and other pollinators. Do not use on flowering plants that attract bees, and never apply to edible crops. Follow all label precautions regarding runoff and water contamination.
Contact Insecticides for Soil Drenching
If you prefer non-systemic options, several contact insecticides can be applied as soil drenches. Pyrethrin-based products (like PyGanic) are botanical insecticides derived from chrysanthemums. They break down quickly in sunlight but persist longer in soil. Apply as a thorough drench, saturating the entire root zone. Repeat every 7-10 days for at least three applications to catch newly hatched crawlers.
Insecticidal soaps and horticultural oils can also be used as soil drenches, though they’re less effective against the waxy-coated adults. They work best on the crawler stage. Mix at the highest label rate for soil application and drench thoroughly. These products have minimal residual activity, so frequent repetition is essential. They’re safer for beneficial insects and can be used on edibles with appropriate pre-harvest intervals.
Hot Water Treatment: A Chemical-Free Option for Potted Plants
One of the most effective non-chemical treatments is hot water immersion. This method works because mealybugs and their eggs die at temperatures above 115°F (46°C), while most plants can tolerate brief exposure to 120°F (49°C). It’s the best treatment for root mealybugs on valuable specimen plants where you want to avoid chemicals entirely.
Here’s the protocol: Remove the plant from its pot and gently shake off as much soil as possible. Trim away any dead or heavily infested roots. Heat a large container of water to exactly 120°F. Use a thermometer, precision matters. Submerge the entire root ball for 10-15 minutes. Maintain the temperature throughout. After treatment, plunge the roots into cool water to stop the heating process. Repot in fresh, sterile mix in a clean pot.
This method kills all life stages instantly. However, it’s not suitable for all plants. Cold-sensitive tropicals, plants with fleshy roots, and recently stressed specimens may not survive. Test on a less valuable plant first. Also, it provides no residual protection, so reinfestation is possible if any crawlers remain in the environment.
Natural and Organic Control Methods
For organic gardeners, those with pets and children, or anyone preferring to avoid synthetic chemicals, several effective natural options exist. These methods often require more persistence and combination approaches but can achieve excellent control.
Beneficial Nematodes: Microscopic Allies
Beneficial nematodes are perhaps the most effective biological control for root mealybugs. These microscopic roundworms actively hunt soil-dwelling pests. Two species are particularly effective: Steinernema feltiae and Heterorhabditis bacteriophora. They enter the mealybug’s body through natural openings and release symbiotic bacteria that kill the host within 24-48 hours. The nematodes then reproduce inside the cadaver, releasing thousands of new infective juveniles to continue the hunt.
Application is straightforward. Purchase fresh nematodes from a reputable supplier (they’re living organisms with a limited shelf life). Store in the refrigerator until use. Mix with water according to package directions and apply as a soil drench in the evening or on a cloudy day, as UV light kills them. Water the soil well before and after application to help them move through the pore spaces. Keep the soil moist for at least two weeks. Results appear within 1-2 weeks. Nematodes are safe for plants, pets, people, and beneficial insects. They work best when soil temperatures are between 60-85°F.
Diatomaceous Earth: Mechanical Control
Food-grade diatomaceous earth (DE) is a powder made from fossilized diatoms. Its microscopic sharp edges abrade the waxy coating of insects, causing them to dehydrate and die. For root mealybugs, work DE into the top 2-3 inches of soil at a rate of about 1 cup per gallon of potting mix. You can also apply it as a slurry drench: mix 1/2 cup DE per gallon of water, agitate constantly while applying to keep it suspended.
DE only works when dry, so it’s most effective in well-draining mixes that dry out between waterings. In constantly moist soil, it loses effectiveness. Reapply after each watering or rain event. Wear a dust mask when applying dry DE, as the fine particles can irritate lungs. DE is non-toxic and safe for edibles, but it also harms beneficial soil insects, so use judiciously.
Neem Oil and Azadirachtin Products
Neem oil, derived from the neem tree (Azadirachta indica), contains multiple active compounds. Azadirachtin is the most potent, disrupting insect growth, feeding, and reproduction. As a soil drench, neem products can suppress root mealybug populations over time. They’re most effective on the crawler stage and as an anti-feedant. Mix according to label directions for soil application and drench thoroughly every 7-14 days.
Neem has the advantage of being relatively safe for beneficial insects, especially when applied to soil rather than foliage. It breaks down quickly in sunlight and soil microbes. However, it can cause phytotoxicity on some sensitive plants, particularly in hot weather. Test on a small area first. Avoid using on plants in the Solanaceae family (tomatoes, peppers, eggplants) during flowering, as it may affect pollination.
Predatory Insects and Mites
Several beneficial insects prey on root mealybugs. The mealybug destroyer (Cryptolaemus montrouzieri) is a lady beetle relative whose larvae resemble large mealybugs. They’re voracious predators but prefer foliar populations. For root mealybugs, the rove beetle (Dalotia coriaria) and the predatory mite (Stratiolaelaps scimitus, formerly Hypoaspis miles) are more effective. These soil-dwelling predators hunt in the top few inches of soil, consuming eggs, crawlers, and adults.
Release predators according to supplier instructions, usually at a rate of 10-50 per square foot. They establish best in moist, organic-rich soils with temperatures above 60°F. Once established, they can provide ongoing control. However, they’re incompatible with most insecticides, including neem and pyrethrins. Use them as a standalone strategy or after chemical residues have dissipated.
Homemade Remedies: What Works and What Doesn’t
You’ll find countless home remedies online: garlic spray, cinnamon, hydrogen peroxide, dish soap solutions, alcohol drenches. Most have limited effectiveness against root mealybugs. Alcohol drenches (1 part isopropyl alcohol to 4 parts water) can kill on contact but provide no residual control and can damage roots. Hydrogen peroxide (1 tablespoon 3% per cup water) oxygenates soil and may kill some pests but won’t eliminate an established population. Cinnamon has antifungal properties but minimal insecticidal effect.
The most effective homemade approach combines physical removal with a soap drench. Wash as much soil off the roots as possible, then dip the root ball in a solution of 2 tablespoons pure castile soap per gallon of water for 15 minutes. Rinse thoroughly and repot in sterile mix. This removes the bulk of the population mechanically and the soap kills stragglers. Follow with nematodes or DE for residual control.
Chemical Treatments: When and How to Use Them
Sometimes natural methods aren’t enough. Heavy infestations, valuable plant collections, or commercial operations may require chemical intervention. Understanding the options, timing, and safety considerations ensures effective control with minimal risk.
Choosing the Right Product
The market offers dozens of insecticides labeled for mealybugs, but few specifically mention root mealybugs. Look for products with soil application instructions. The active ingredients with proven efficacy against root mealybugs include:
- Imidacloprid: Systemic, long-lasting, widely available for homeowners.
- Dinotefuran: Systemic, faster uptake, more water-soluble.
- Thiamethoxam: Systemic, similar to imidacloprid, often in professional products.
- Acetamiprid: Translaminar (moves into leaf tissue), some systemic activity, safer for bees.
- Flupyradifurone: Newer systemic, different mode of action, lower bee toxicity.
- Spirotetramat: True systemic (moves both up and down in plant), excellent for root pests.
- Chlorpyrifos: Organophosphate, contact/oral, restricted use in many areas.
- Bifenthrin: Pyrethroid, contact, long soil residual, not systemic.
For most home gardeners, imidacloprid or dinotefuran products offer the best balance of efficacy, availability, and ease of use. Professionals may prefer spirotetramat (Kontos) for its unique bidirectional movement.
Application Timing and Technique
Timing matters enormously. Root mealybugs have overlapping generations, so you’ll always have eggs, crawlers, and adults present. Systemics need time to translocate. Apply early in the growing season if possible, when plants are actively taking up water and nutrients. Water the plant well the day before treatment to ensure good soil moisture and active root function.
For soil drenches, mix the exact label rate. More is not better and can damage roots. Apply slowly and evenly over the entire soil surface until liquid drains from the bottom. This ensures the chemical reaches the entire root zone. For granules, distribute evenly over the soil surface and water in thoroughly. Avoid getting product on foliage unless the label permits foliar application.
Repeat applications are almost always necessary. The label will specify minimum retreatment intervals, usually 7-14 days for contact products, 4-8 weeks for systemics. Plan for at least 2-3 applications to break the life cycle. Mark your calendar and don’t skip treatments.
Resistance Management
Mealybugs are notorious for developing insecticide resistance. Their high reproductive rate, protective wax coating, and sheltered habitat accelerate resistance selection. To preserve the effectiveness of your tools, rotate modes of action. The Insecticide Resistance Action Committee (IRAC) classifies insecticides by mode of action group. Neonicotinoids (imidacloprid, dinotefuran, thiamethoxam) are Group 4A. Spirotetramat is Group 23. Flupyradifurone is Group 4D. Pyrethroids (bifenthrin) are Group 3A. Organophosphates (chlorpyrifos) are Group 1B.
Never use the same group consecutively. If you treat with imidacloprid (Group 4A), follow with spirotetramat (Group 23) or a non-chemical method. Keep records of what you used and when. This discipline extends the useful life of every product.
Safety and Environmental Considerations
Chemical treatments carry risks. Neonicotinoids are highly toxic to bees and other pollinators. They can persist in soil for months and move into pollen and nectar. Never apply to flowering plants that attract bees. Avoid use near water features, as they’re toxic to aquatic invertebrates. Follow all label restrictions on buffer zones and runoff prevention.
Wear chemical-resistant gloves, long sleeves, and eye protection when mixing and applying. Keep children and pets out of the treatment area until the product has dried completely (for sprays/drenches) or been watered in (for granules). Store products in original containers, locked away from children and pets. Dispose of empty containers according to label directions and local regulations.
Consider spot-treating only infected plants rather than broadcasting chemicals preventively. This reduces total chemical load and preserves beneficial insects in untreated areas. In integrated pest management (IPM), chemicals are the last resort, used only when monitoring indicates populations exceed action thresholds.
Prevention: Keeping Root Mealybugs Away for Good
The old adage holds true: an ounce of prevention is worth a pound of cure. Once you’ve eliminated an infestation, implementing preventive practices will save you from repeating the battle. The best treatment for root mealybugs is never needing one at all.
Quarantine and Inspection Protocols
Every new plant entering your collection is a potential Trojan horse. Nurseries and garden centers are high-risk environments for root mealybugs. Plants sit close together, share irrigation water, and may come from multiple suppliers. Establish a mandatory quarantine period of 4-6 weeks for all new acquisitions. Keep them physically separated from your established plants, ideally in a different room or at least 10 feet away outdoors.
During quarantine, inspect weekly. Check the soil surface, drainage holes, and pot exterior. Gently lift the plant from its pot every 2 weeks to examine roots. Use a flashlight and magnifier. If you find anything suspicious, treat immediately before the plant joins your collection. This single practice prevents 90% of infestations.
Sterile Growing Media and Clean Pots
Root mealybugs can hitchhike in potting mix. Always use fresh, sterile media for repotting. Never reuse old potting soil, even from healthy-looking plants. Eggs and crawlers can persist undetected. If you make your own mix, pasteurize components by heating to 180°F for 30 minutes. Commercial bagged mixes labeled “sterile” or “pasteurized” are generally safe.
Clean and disinfect pots before reuse. Scrub with hot, soapy water, then soak in 10% bleach solution for 10 minutes. Rinse thoroughly. For porous terra cotta, consider replacing rather than risking survival in pore spaces. Use new pots for valuable or sensitive plants.
Cultural Practices That Discourage Infestations
Root mealybugs thrive in certain conditions. Understanding their preferences lets you create an inhospitable environment. They prefer warm, moist, stable conditions with plenty of organic matter. They dislike extreme dryness, temperature fluctuations, and certain soil amendments.
Allow the top inch of soil to dry between waterings. Constant moisture favors mealybug survival and reproduction. Use well-draining mixes with coarse components like perlite, pumice, or bark. Avoid peat-heavy mixes that stay soggy. Top-dress with inorganic mulch like gravel, sand, or crushed granite rather than organic mulches. This creates a dry, abrasive surface layer that deters crawlers.
Incorporate diatomaceous earth or beneficial nematodes into your potting mix at planting time as a preventive inoculation. Some growers add a systemic insecticide granule at half the label rate as insurance for high-value plants. Rotate this practice annually to avoid resistance.
Sanitation and Monitoring
Good hygiene breaks the life cycle. Remove dead leaves and debris from soil surfaces promptly. These harbor pests and pathogens. Clean up spilled potting mix immediately. Disinfect tools between plants, especially when repotting or dividing. A spray bottle with 70% isopropyl alcohol works well for quick tool sanitation.
Implement a regular monitoring schedule. Check root zones of a few plants each month during the growing season. Use yellow sticky traps on the soil surface to catch crawlers and monitor population trends. Keep a garden journal noting inspections, treatments, and observations. Patterns emerge over time that help you anticipate and prevent problems.
Managing Ants: The Mealybug Farmers
Ants and mealybugs have a mutualistic relationship. Ants protect mealybugs from predators and parasites, move them to better feeding sites, and even carry them to new plants. In return, they harvest the honeydew. Controlling ants is a crucial but often overlooked component of mealybug management.
Apply ant baits around the base of pots and along trails. Borax-based baits (like Terro) are effective and relatively low-toxicity. Diatomaceous earth barriers around pot rims and legs deter ant access. Tanglefoot or similar sticky barriers on pot rims or bench legs create impassable obstacles. Eliminate ant colonies in the vicinity using appropriate baits. Without their ant bodyguards, mealybugs become much more vulnerable to natural enemies and environmental stresses.
Special Situations: Orchids, Succulents, and Large Specimens
Certain plants present unique challenges for root mealybug treatment. Their growth habits, root structures, or value require tailored approaches.
Orchids: Delicate Roots, Special Care
Orchids are notoriously susceptible to root mealybugs, and their fleshy, photosynthetic roots are easily damaged by harsh treatments. The velamen (the spongy outer root layer) absorbs chemicals readily, increasing phytotoxicity risk. For orchids, the best treatment for root mealybugs is often a combination of physical removal and gentle chemical or biological control.
Unpot the orchid and remove all media. Soak roots in lukewarm water to soften old mix, then gently tease it away. Inspect every root. Trim away dead, hollow, or heavily infested roots with sterile scissors. Dip the root system in a solution of 1 tablespoon mild liquid soap per gallon of water for 10 minutes. Rinse thoroughly. Repot in fresh, sterile orchid mix.
For chemical control, use the lowest effective rate of systemic. Imidacloprid at 1/4 to 1/2 label rate applied as a drench after repotting works well. Alternatively, apply beneficial nematodes (Steinernema feltiae) as a drench. They’re safe for orchid roots and highly effective in the coarse, airy mixes orchids prefer. Avoid oils, soaps at high concentrations, and hot water treatment, all of which can damage velamen.
Succulents and Cacti: Gritty Mixes and Dry Conditions
Succulents are root mealybug magnets. Their gritty, fast-draining mixes and infrequent watering create ideal conditions. The pests hide in the crevices of fibrous roots and at the base of the caudex or stem. Treatment is complicated by the plants’ sensitivity to overwatering and chemical burns.
Hot water treatment works exceptionally well for succulents. Their roots tolerate the heat better than tropical plants. The 120°F for 10-15 minutes protocol is safe for most succulents and cacti. After treatment, let roots dry for 2-3 days before repotting in fresh, dry mix. This drying period helps heal any minor heat stress.
Systemic granules worked into the new mix provide long-term protection. Use imidacloprid or dinotefuran at full label rate. The dry conditions slow chemical breakdown, extending residual activity. Beneficial nematodes are less effective in the very dry, coarse mixes succulents prefer, as they need moisture to move and survive.
For valuable specimen plants, consider a preventive systemic application at repotting time, usually every 2-3 years. This avoids the stress of treating an active infestation on a prized plant.
Large Specimen Plants and In-Ground Plantings
Treating a 6-foot ficus tree in a 30-gallon pot or a landscape planting requires different tactics. You can’t unpot or immerse these. Soil drenches are the primary option. Calculate the soil volume and apply the appropriate amount of systemic insecticide as a drench. For large containers, you may need several gallons of mixed solution. Apply slowly over several hours to ensure even distribution without runoff.
For in-ground plants, the treatment zone extends to the drip line. Apply systemic as a band around the base, then water in deeply. Consider hiring a licensed applicator for large landscape jobs. They have access to professional products (like spirotetramat or chlorantraniliprole) and equipment for deep root injection, which places the chemical directly in the root zone.
Beneficial nematodes can be applied at scale using a hose-end sprayer or irrigation injection. This works well for landscape beds. Release predatory mites (Stratiolaelaps) in spring for season-long suppression. Combine with ant control for best results.
Conclusion: Winning the War Against Root Mealybugs
Root mealybugs are formidable opponents. They hide in the dark, reproduce prolifically, and resist many conventional treatments. But they’re not invincible. Armed with knowledge, vigilance, and the right tools, you can eliminate them and protect your plants.
The best treatment for root mealybugs isn’t a single product or technique. It’s a strategy. Start with prevention: quarantine new plants, use sterile media, practice good sanitation. Monitor regularly so you catch infestations early, when they’re easiest to control. When treatment is needed, match the method to the situation. Hot water for potted succulents. Systemic drenches for large specimens. Beneficial nematodes for organic gardens. Predatory mites for ongoing biological control. Combine methods for synergistic effect.
Remember that persistence pays. Root mealybugs didn’t appear overnight, and they won’t disappear after one treatment. Commit to the full course of treatment, usually 6-8 weeks minimum. Follow up with monitoring to ensure they’re truly gone. And maintain preventive practices indefinitely. Your plants will reward you with vigorous growth, beautiful blooms, and the satisfaction of a job well done.
Gardening is full of challenges, but each one teaches us something. Dealing with root mealybugs makes you a more observant, knowledgeable grower. You learn to read the subtle language of plants, to understand the hidden world beneath the soil, and to appreciate the delicate balance of the garden ecosystem. That’s a harvest worth more than any single crop.
Frequently Asked Questions
Can root mealybugs spread to other plants?
Yes, root mealybugs spread easily. Crawlers move through drainage holes, shared water trays, and on tools or hands. Ants also transport them between plants. Always isolate infected plants immediately.
Are root mealybugs harmful to humans or pets?
Root mealybugs do not bite, sting, or transmit diseases to humans or pets. They only feed on plant sap. However, some chemical treatments used to control them can be toxic, so follow label safety instructions carefully.
Will repotting alone get rid of root mealybugs?
Repotting with thorough root washing removes many pests, but eggs and crawlers often remain on roots or in crevices. Always combine repotting with a treatment like hot water, soap drench, or systemic insecticide for complete control.
Do beneficial nematodes work on root mealybugs in all soil types?
Beneficial nematodes work best in moist, well-aerated soils with temperatures between 60-85°F. They struggle in very sandy, waterlogged, or extremely dry soils. Keep soil consistently moist for 2 weeks after application.
Can I use hydrogen peroxide to kill root mealybugs?
Hydrogen peroxide (1 tablespoon 3% per cup water) may kill some pests on contact and oxygenates soil, but it does not provide reliable control of established root mealybug populations. Use as a supplement, not a primary treatment.
When is the best time of year to treat for root mealybugs?
Treat whenever you discover an infestation. However, systemic insecticides work best when plants are actively growing (spring through fall) and transpiring rapidly. Biological controls like nematodes are most effective when soil temperatures exceed 60°F.