Best Terracotta for Plant Propagation
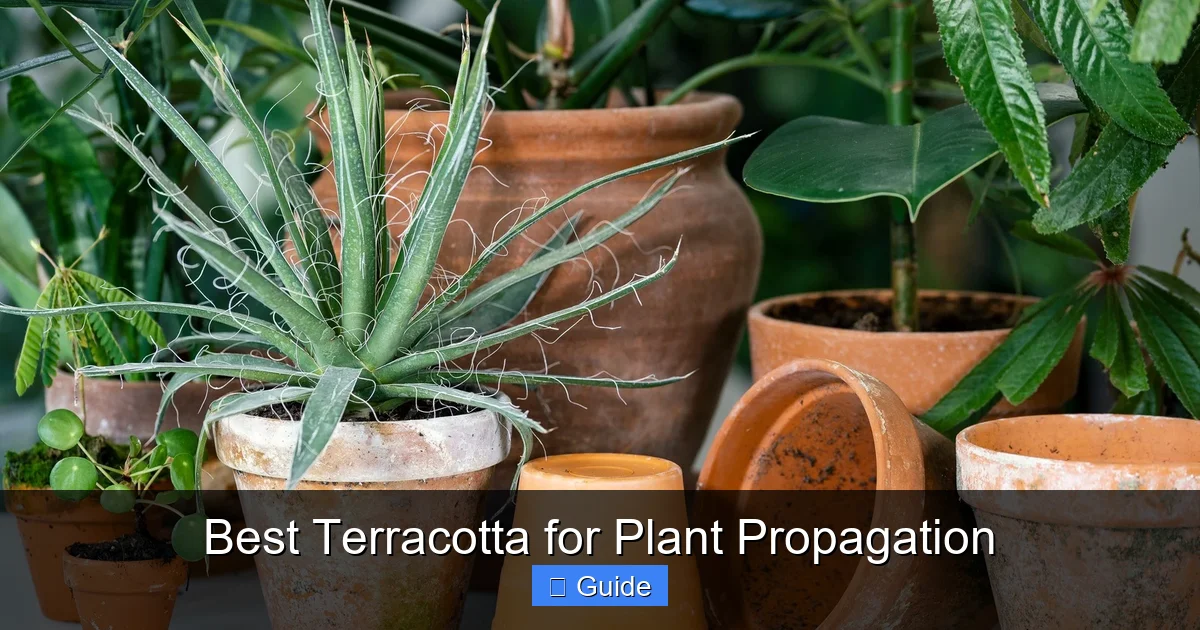
Terracotta pots are the gold standard for plant propagation because their porous walls allow air and moisture exchange, creating the perfect environment for root development. This guide covers everything you need to know about choosing, preparing, and using terracotta for successful cuttings.
Key Takeaways
- Porosity matters most: Terracotta’s breathable walls prevent waterlogging and promote oxygen flow to developing roots.
- Size matches the cutting: Small pots (2-3 inches) work best for single cuttings; larger pots suit multiple stems or bigger specimens.
- Pre-soak new pots: Soaking terracotta for 30 minutes before use stops the clay from wicking moisture away from fresh cuttings.
- Drainage holes are non-negotiable: Every propagation pot needs at least one hole to let excess water escape.
- Quality varies by brand: High-fired terracotta lasts longer and resists salt buildup better than cheap, low-fired alternatives.
- Clean between uses: Scrub pots with diluted bleach or vinegar to kill pathogens before starting new cuttings.
- Pair with the right medium: Terracotta works best with chunky, well-draining mixes like perlite, vermiculite, or coarse sand blends.
Quick Answers to Common Questions
Do I need to soak terracotta pots before every use?
Yes, soak new pots for 30 minutes before first use. For reused pots, soak if they have been stored dry. Pots kept damp from recent use do not need re-soaking.
Can I use terracotta pots without drainage holes for propagation?
No. Drainage holes are essential. Without them, water pools at the bottom and causes root rot. Drill a hole or use the pot as a decorative cache for a plastic nursery pot.
What size terracotta pot is best for monstera cuttings?
A 2.5 to 3 inch standard terracotta pot is ideal for single monstera node cuttings. It provides enough space for initial root development without holding excess moisture.
How often should I water cuttings in terracotta pots?
Check daily by lifting the pot or feeling the mix. Water when the top inch is dry and the pot feels light. This is typically every 2-3 days for tropicals, 4-5 days for succulents.
Why are my terracotta pots developing white crust?
The white crust is mineral salt buildup from fertilizer and tap water. Remove it by soaking in vinegar solution and scrubbing. Prevent it by flushing with distilled water monthly.
📑 Table of Contents
- Why Terracotta Wins for Plant Propagation
- Understanding Terracotta Materials and Quality
- Choosing the Right Size and Shape
- Preparing Terracotta Pots for Propagation
- Best Propagation Mixes for Terracotta
- Propagation Techniques Optimized for Terracotta
- Environmental Control with Terracotta Pots
- Common Mistakes and How to Avoid Them
- Caring for Cuttings in Terracotta
- Budget-Friendly Terracotta Options
- Advanced Terracotta Propagation Tips
- Conclusion
Why Terracotta Wins for Plant Propagation
If you have ever tried rooting cuttings in plastic cups or glass jars, you know the struggle. The stems look fine for a few days, then suddenly turn mushy at the base. That is rot, and it happens because stagnant water traps bacteria and fungi against the tender new roots. Terracotta solves this problem naturally. The fired clay is full of microscopic pores. Those tiny holes let water vapor escape and fresh air enter. Roots need oxygen just as much as they need moisture. When you use terracotta for plant propagation, you give your cuttings the best of both worlds.
I learned this lesson the hard way with a batch of monstera cuttings. I placed them in clear plastic containers with sphagnum moss. They looked great for a week. Then the stems blackened at the soil line. I switched to small terracotta pots with a perlite mix. The difference was night and day. Roots appeared in half the time, and not a single cutting failed. That experience turned me into a terracotta advocate for life.
This guide walks you through everything you need to pick the best terracotta for plant propagation. We will cover pot types, sizes, preparation steps, soil mixes, and common mistakes. Whether you are a beginner rooting your first pothos or a collector propagating rare aroids, the right terracotta pot makes all the difference.
Understanding Terracotta Materials and Quality
What Is Terracotta Exactly
Terracotta means “baked earth” in Italian. It is a type of earthenware made from clay that contains iron oxide. That iron gives the pots their signature warm orange-red color. The clay is shaped, dried, then fired in a kiln at temperatures between 1,000 and 1,150 degrees Celsius. This relatively low firing temperature leaves the clay porous. That porosity is the key feature for plant propagation.
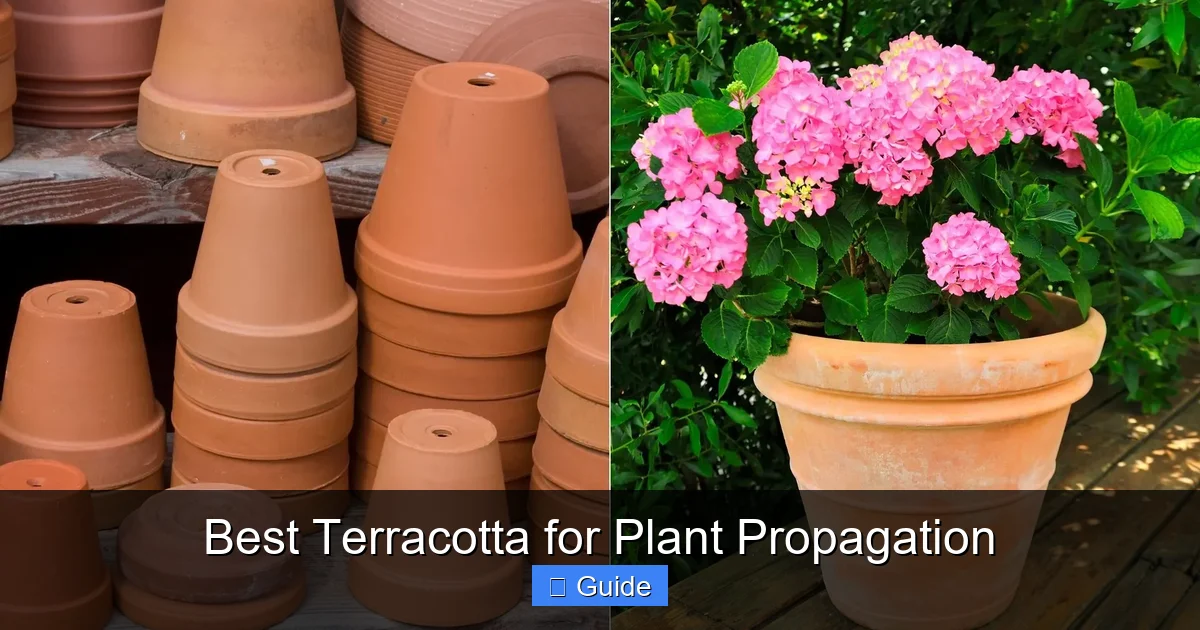
Visual guide about Best Terracotta for Plant Propagation
Image source: positivebloom.com
High-Fired vs Low-Fired Terracotta
Not all terracotta is created equal. Low-fired pots are baked at the lower end of the temperature range. They are very porous, which sounds good, but they also break easily and degrade fast. High-fired terracotta spends more time at higher heat. The result is a denser, stronger pot that still breathes but resists cracking and salt buildup. For propagation, high-fired is worth the extra cost. You will reuse these pots dozens of times.
Machine-Made vs Hand-Thrown
Machine-made pots are uniform, affordable, and widely available. They work perfectly fine for most home propagators. Hand-thrown pots have thicker walls and subtle variations. They look beautiful and often last longer, but they cost three to five times as much. If you are running a nursery or propagating hundreds of cuttings, machine-made standard pots are the practical choice. Save the artisan pots for display specimens.
Glazed vs Unglazed
This is a critical distinction. Glazed terracotta has a glass-like coating that seals the pores. It looks pretty, but it defeats the purpose of using terracotta for propagation. You want unglazed pots. The raw clay surface must be exposed to air. Some pots have a glazed rim or a decorative band near the top. That is fine as long as the majority of the wall and the bottom remain unglazed.
Recognizing Quality at the Store
Tap the pot gently with your knuckle. A high-fired pot rings like a bell. A low-fired pot sounds dull. Check the bottom for a smooth, even finish. Rough, gritty bottoms scratch surfaces and indicate poor quality. Look for a single, clean drainage hole. Multiple small holes clog easily. The rim should be smooth, not chipped or sharp. A good terracotta pot feels heavy for its size. That weight means dense clay that will hold up over time.
Choosing the Right Size and Shape
Small Pots for Single Cuttings
Two to three inch pots are the sweet spot for most leaf and stem cuttings. A small volume of soil dries evenly, reducing rot risk. It also encourages the plant to fill the pot with roots before you transplant. This builds a strong root ball that handles the move better. Standard sizes include 2-inch, 2.5-inch, and 3-inch diameters. Depth matters too. A 3-inch deep pot gives roots room to grow downward, which is what they naturally want to do.
Larger Pots for Multiple Cuttings
Four to six inch pots work well when you want to root several cuttings together. This is common for herbs, succulents, or creating a full pot of tradescantia. Space cuttings about an inch apart. Use a chopstick to make planting holes so you do not damage the stems. A wider, shallow shape like a bulb pan or azalea pot is ideal here. The broader surface area improves air flow around each cutting.
Deep Pots for Taproots
Some plants develop a strong central taproot early on. Trees, shrubs, and many natives fall into this group. For these, choose a deep pot, often called a tree pot or rose pot. These can be 6 to 10 inches deep but only 3 to 4 inches wide. The depth accommodates the taproot without circling. Circling roots lead to girdling and long-term health issues. If you propagate woody plants, keep a few deep pots on hand.
Shallow Pans for Surface Rooting
Succulents, cacti, and some tropicals root along the stem where it touches soil. Shallow terracotta pans or seed trays work best for these. The soil depth only needs to be 1.5 to 2 inches. The wide surface lets you lay stems flat and pin them down. This method, called layering, produces multiple plants from one stem. Terracotta pans dry fast, which succulents love.
Matching Pot to Plant Type
Here is a quick reference. Pothos, philodendron, monstera: 2.5 to 3 inch standard pots. Succulents and cacti: 2 to 3 inch shallow pans. Herbs like basil and mint: 4 inch azalea pots with 3-5 cuttings. Woody cuttings like hydrangea or fig: 4 inch deep tree pots. Seedlings and tiny starts: 2 inch square pots that fit neatly in trays. When in doubt, go smaller. You can always pot up later.
Preparing Terracotta Pots for Propagation
The Critical Pre-Soak Step
New terracotta is thirsty. The dry clay will pull water out of your propagation mix before the cuttings can use it. This stresses or kills delicate roots. The fix is simple. Submerge new pots in a bucket of water for 30 minutes. You will see bubbles rise as air escapes the pores. When the bubbles stop, the clay is saturated. Remove the pots and let them drain for 10 minutes. They should feel cool and damp, not dripping. Do this every time you use a new pot.
Cleaning Used Pots
Reusing pots saves money and reduces waste. But old pots carry pathogens, salt crusts, and pest eggs. Scrub each pot with a stiff brush and hot, soapy water. Rinse well. Then soak in a solution of one part bleach to nine parts water for 10 minutes. Alternatively, use one part white vinegar to three parts water for a non-toxic option. Rinse thoroughly until no smell remains. Let dry completely in the sun. UV light adds extra sanitation.
Dealing with Salt Buildup
White crust on the outside of terracotta is mineral salts from fertilizer and tap water. It is unsightly and can burn roots that touch the pot walls. Remove heavy buildup by soaking in vinegar solution overnight. Scrub with a wire brush. For stubborn deposits, make a paste of baking soda and water. Apply, wait 15 minutes, then scrub. Rinse well. Prevent future buildup by flushing pots with distilled water monthly during active use.
Checking Drainage Holes
Before every use, verify the drainage hole is clear. Push a pencil or chopstick through from the bottom. If the hole is clogged with old soil or roots, clean it out. A blocked hole turns a terracotta pot into a water trap. That defeats the whole purpose. Some propagators place a small square of landscape fabric or a coffee filter over the hole. This keeps soil in while letting water out. It is optional but helpful for very fine mixes.
Labeling Your Pots
Terracotta is perfect for writing on. Use a permanent marker or a grease pencil to note the plant name, date, and cutting source right on the pot. The writing survives watering and handling. When the pot is clean and dry again, the mark wipes off with rubbing alcohol. This simple habit saves enormous confusion when you have 20 pots of similar-looking cuttings.
Best Propagation Mixes for Terracotta
Why Mix Matters More in Terracotta
Terracotta dries faster than plastic. Your mix must hold enough moisture to keep cuttings hydrated between waterings, but drain fast enough to prevent rot. This balance is trickier in clay. A mix that works in plastic may be too dry in terracotta. Conversely, a moisture-retentive mix that rots in plastic might be perfect in terracotta. Adjust your recipe to the pot material.
The Classic Perlite-Peat Mix
Equal parts perlite and peat moss or coco coir is the industry standard for a reason. Perlite provides aeration and drainage. Peat holds water evenly. In terracotta, bump the peat to 60 percent. This compensates for the pot’s wicking action. Add a handful of worm castings per gallon for gentle nutrition. This mix works for 90 percent of tropical cuttings.
Chunky Aroid Mix for Terracotta
If you propagate monsteras, philodendrons, or anthuriums, they prefer airy conditions. Try 40 percent orchid bark, 30 percent perlite, 20 percent coco coir, and 10 percent charcoal. The bark creates large air pockets. Charcoal keeps the mix fresh. In terracotta, this mix dries in 2-3 days, which is ideal. Water when the top inch feels dry.
Succulent and Cactus Propagation Mix
These plants need extreme drainage. Use 50 percent coarse sand or poultry grit, 30 percent perlite, and 20 percent coco coir. Avoid fine sand. It compacts and seals out air. In shallow terracotta pans, this mix dries in a day or two. That is perfect. Succulent cuttings should callus over before planting. Let them sit in open air for 3-7 days until the cut end is dry and sealed.
Water Propagation Transition Mix
Many people start cuttings in water, then move them to soil. The transition shocks water roots. Ease the shift with a mix of 70 percent perlite and 30 percent peat. Keep it very moist for the first week. Terracotta helps here because you can bottom water. Place the pot in a tray of water. The clay wicks moisture up gently. This mimics the water environment while introducing soil contact.
DIY vs Bagged Mixes
Bagged seed starting mix is convenient but often too fine for terracotta. It compacts and stays wet too long. Amend it with extra perlite at a 1:1 ratio. Making your own mix gives control and saves money if you propagate in volume. Buy ingredients in bulk. Store dry components in sealed bins. Mix only what you need for each session. Wet mix grows mold fast.
Propagation Techniques Optimized for Terracotta
Stem Cuttings in Terracotta
This is the most common method. Take a 4-6 inch cutting just below a node. Remove lower leaves. Dip the cut end in rooting hormone if desired. Make a hole in the moist mix with a pencil. Insert the cutting so at least one node is buried. Firm the mix gently. Water from the top until it drains out the bottom. Place in bright, indirect light. The terracotta will darken when wet and lighten as it dries. This visual cue helps you learn the watering rhythm.
Leaf Cuttings for Succulents
Gently twist a healthy leaf from the stem. Get the whole base. Let it callus 3-5 days. Lay the leaf flat on moist succulent mix in a shallow terracotta pan. Do not bury it. Mist lightly every 2-3 days. Tiny roots and a baby plant will emerge from the base. Terracotta’s fast drying prevents the leaf from rotting before it roots. Once the baby is established, you can pot it up.
Node Cuttings for Rare Aroids
For expensive plants like variegated monsteras, node cuttings maximize stock. Cut the stem into sections, each with one node and one leaf. The leafless nodes can root too. Plant horizontally, half-buried, in the chunky aroid mix. Use a 3 inch terracotta pot per node. High humidity helps. Cover with a clear plastic bag or dome. Vent daily. Terracotta prevents the soggy bottom that kills these pricey cuttings.
Rooting in Water Then Transferring
Some propagators prefer water roots first. That is fine. When roots are 1-2 inches long, transfer to terracotta. Use the transition mix described earlier. Plant the cutting, water well, and keep the mix very moist for 7-10 days. Then gradually reduce watering. The terracotta’s breathability helps water roots convert to soil roots without suffocating.
Air Layering with Terracotta
Air layering produces a rooted branch while still attached to the mother plant. Wrap moist sphagnum moss around a wounded node. Cover with plastic. Once roots show through the moss, cut below the roots. Pot the new plant in terracotta with a supportive stake. The established roots handle the transition easily. Terracotta stabilizes the top-heavy new plant better than lightweight plastic.
Environmental Control with Terracotta Pots
Humidity Management
Terracotta lowers ambient humidity around the pot because moisture evaporates through the walls. This is great for preventing fungal diseases. But some cuttings need high humidity. The solution is a humidity dome or clear plastic bag over the pot. Prop the bag up with stakes so it does not touch the leaves. Vent daily. The terracotta base keeps the root zone aerated while the dome keeps the leaves humid. Best of both worlds.
Temperature Regulation
Clay has thermal mass. It buffers temperature swings. In a sunny window, plastic pots heat up fast and cook roots. Terracotta warms slowly and cools slowly. This protects cuttings from heat stress. In a cold room, terracotta holds a bit of warmth. For bottom heat, place terracotta pots on a seedling heat mat. The clay distributes heat evenly across the bottom. No hot spots.
Light Considerations
Terracotta pots are opaque. Light does not penetrate the sides. This prevents algae growth on the inner walls, a common issue in clear plastic. It also means roots grow in darkness, as nature intended. Place pots in bright, indirect light. Direct sun on the pot heats the clay and can dry the mix too fast. A sheer curtain or east-facing window works well.
Air Flow Benefits
Good air circulation prevents damping off and strengthens stems. Terracotta’s porous walls allow micro-air-exchange at the root zone. This subtle flow mimics natural soil conditions. A small fan on low, oscillating nearby, amplifies the effect. Just ensure the mix does not dry out in hours. Adjust watering frequency to match.
Bottom Watering Technique
Bottom watering is a game changer for terracotta propagation. Place pots in a tray. Add water to half the pot height. Wait 10-20 minutes. The clay wicks water up evenly. The surface stays drier, reducing fungus gnats and algae. Roots grow downward following the moisture. Remove pots and let drain. This method gives consistent moisture without overwatering. It is especially useful for delicate cuttings that hate wet crowns.
Common Mistakes and How to Avoid Them
Skipping the Pre-Soak
This is the number one error. Dry terracotta steals water from cuttings. The stems wilt, roots desiccate, and the cutting fails. Always soak new pots. Always soak pots that have been stored dry. It takes 30 minutes. Set a timer. Do not skip it.
Using Pots Without Drainage
Some decorative terracotta lacks holes. Do not use these for propagation. Drill a hole if you have a masonry bit. Or use them as cache pots. Place a plastic nursery pot with drainage inside the decorative terracotta. Empty the cache pot after watering. Standing water in the outer pot defeats the drainage.
Overwatering Because the Pot Looks Dry
Terracotta darkens when wet, lightens when dry. The outside can look bone dry while the center is still moist. Do not water on appearance alone. Stick your finger an inch into the mix. Or lift the pot. Weight tells the truth. A light pot needs water. A heavy pot does not. Learn the weight of your pots at field capacity.
Choosing Too Large a Pot
“Give it room to grow” backfires in propagation. Large soil volumes stay wet too long. Roots rot before they fill the space. Start small. Pot up when roots circle the bottom. A cutting in a 2-inch pot that is root-bound is healthier than one drowning in a 6-inch pot.
Ignoring Salt Crust
That white powder is not harmless. It pulls water from roots via osmosis. It indicates fertilizer buildup. Flush pots monthly. Repot annually into fresh mix. Clean crusty pots before reuse. Your cuttings will thank you.
Using Garden Soil or Heavy Potting Soil
Garden soil compacts in pots. It carries weeds, pests, and diseases. Heavy potting soil holds too much water. Both suffocate new roots. Use a propagation-specific mix. Light, airy, sterile. It costs a little more. It saves a lot of heartbreak.
Caring for Cuttings in Terracotta
Watering Schedule
There is no fixed schedule. Check daily. Water when the top inch of mix is dry. In terracotta, this might be every 2-3 days for tropicals, every 4-5 days for succulents. Humidity, temperature, and light all affect timing. Morning watering is best. It lets foliage dry before night. Wet leaves overnight invite fungus.
Fertilizing Young Cuttings
Do not fertilize until roots are established. The cutting lives on stored energy. Once you see new leaf growth, roots are working. Start with quarter-strength balanced fertilizer. Apply monthly. Terracotta leaches nutrients faster than plastic. You may need slightly more frequent feeding, but always dilute heavily. Burned roots on a baby plant are fatal.
Hardening Off
When cuttings have strong roots and new growth, prepare them for the real world. Reduce humidity gradually. Remove the dome for an hour, then two, then all day. Move to slightly brighter light. Let the mix dry a bit more between waterings. This toughens the plant. Terracotta helps because it naturally cycles wet and dry.
Potting Up
When roots fill the pot, move to the next size up. Usually 2-inch to 3-inch, or 3-inch to 4-inch. Do not jump sizes. Use the same mix recipe. Terracotta to terracotta is ideal. If you must switch to plastic, adjust watering. Plastic holds water longer. The plant will need less frequent drinks.
Pest Monitoring
Fungus gnats love damp organic mix. Terracotta’s drier surface discourages them. Still, check weekly. Yellow sticky traps catch adults. Mosquito bits in the water kill larvae. Mealybugs and scale hide in leaf axils. Inspect during watering. Catch problems early. Isolate affected pots immediately.
Budget-Friendly Terracotta Options
Bulk Buying Strategies
If you propagate regularly, buy by the case. Garden centers and online wholesalers sell flats of 50 or 100 standard pots. The per-pot cost drops dramatically. Split a case with plant friends. Store extras in a dry box. They last indefinitely dry. Avoid buying single pots at boutique prices unless you need a specific size immediately.
Thrift Store and Yard Sale Finds
Old terracotta is often better than new. Decades of use have seasoned the clay. It is stable and less prone to cracking. Clean them well with the bleach soak. Check for cracks. Hairline fractures are fine. Structural cracks leak soil. Negotiate prices. Sellers often give deals on dusty boxes of pots.
DIY Terracotta Alternatives
You can make propagation containers from terracotta chimney flues, drainage pipes, or roof tiles. Cut to size with an angle grinder. Wear a mask. Silica dust is dangerous. These homemade pots are very cheap and fully customizable. Great for deep root trainers or long troughs for hedge cuttings.
Recycling Nursery Pots
Many nurseries throw away used terracotta. Ask politely. Offer to take them off their hands. Bring your own boxes. Clean thoroughly. This keeps pots out of landfills and costs zero. Some nurseries have “pot return” days. Watch for announcements.
When to Splurge on Quality
Spend more on pots for valuable cuttings. Rare variegated plants, difficult species, or sentimental cuttings deserve the best. High-fired, hand-thrown pots have thicker walls. They buffer moisture and temperature better. They last a lifetime. For everyday pothos and spider plants, cheap machine-made pots work fine.
Advanced Terracotta Propagation Tips
Double Potting for Stability
Top-heavy cuttings tip over light terracotta pots. Slip the propagation pot into a heavier ceramic or stone cache pot. The outer pot adds ballast. The inner terracotta still breathes. Ensure the cache pot is wider so air circulates. Do not let water pool in the bottom.
Using Terracotta Shards as Mulch
Broken pot pieces make excellent mulch. Lay shards on the mix surface. They reduce evaporation, deter fungus gnats, and look neat. As they break down, they add trace minerals. It is a free use for pots that cracked beyond repair.
Terracotta Wicking Beds
For vacation watering, create a wicking bed. Fill a waterproof tray with 2 inches of wet sand. Bury terracotta pots halfway in the sand. The clay wicks water from the sand as needed. Cuttings stay hydrated for weeks. Test before you leave. Adjust sand moisture so pots do not stay soggy.
Labeling Systems That Last
Permanent marker fades in sun. Paint pens last longer. Embossed metal tags on wire stakes are permanent. Or use a label maker with outdoor-rated tape. Stick labels on the pot rim, not the side. Side labels wash off. Rim labels stay readable for years.
Seasonal Adjustments
Winter propagation in terracotta needs less water. Light is lower. Growth is slower. Check every 4-5 days instead of 2-3. Summer may need daily checks. Move pots out of harsh afternoon sun. The clay heats up and can damage roots. A shade cloth or sheer curtain solves this.
Conclusion
Terracotta for plant propagation is not just a trend. It is a time-tested method that works with plant biology, not against it. The porous clay creates a root environment that balances moisture and air perfectly. Your cuttings root faster, stronger, and with fewer losses. Start with a few basic sizes. Pre-soak every time. Use the right mix for your plants. Water by weight, not schedule. Clean between batches. These simple habits turn propagation from a gamble into a reliable skill.
I have propagated hundreds of plants in terracotta. The only failures came when I got lazy. Skipped the soak. Used old mix. Forgot to check for a week. The pots did their job. I did not. When you respect the material and the process, terracotta rewards you with tray after tray of healthy, rooted cuttings ready to grow into beautiful plants.
Grab a pack of 2.5 inch pots this weekend. Soak them tonight. Take some cuttings tomorrow. In a few weeks, you will have new plants to share, swap, or keep. That is the joy of propagation. Terracotta just makes it easier.
Frequently Asked Questions
Can I propagate succulents in terracotta pots?
Yes, terracotta is excellent for succulent propagation. The porous clay wicks away excess moisture, preventing rot. Use shallow pans with a gritty, fast-draining mix and let cuttings callus before planting.
Do terracotta pots help prevent fungus gnats?
Terracotta helps reduce fungus gnats because the soil surface dries faster. Fungus gnats need consistently moist soil to breed. The drier top layer in terracotta disrupts their life cycle.
How do I clean used terracotta pots for reuse?
Scrub with hot soapy water, then soak in 1 part bleach to 9 parts water for 10 minutes. Rinse thoroughly and dry in sunlight. For a non-toxic option, use 1 part vinegar to 3 parts water instead.
Should I use rooting hormone with terracotta propagation?
Rooting hormone is optional but helpful for woody or difficult cuttings. Terracotta’s aeration enhances hormone effectiveness by preventing the anaerobic conditions that cause hormone degradation.
Can I bottom water all my terracotta propagation pots?
Yes, bottom watering works well for terracotta. Place pots in a tray of water for 10-20 minutes until the top of the mix darkens. This encourages downward root growth and keeps foliage dry.
What is the difference between terracotta and ceramic pots for propagation?
Terracotta is unglazed and porous, allowing air and moisture exchange. Ceramic pots are glazed and non-porous, holding water like plastic. For propagation, terracotta’s breathability gives superior root health.