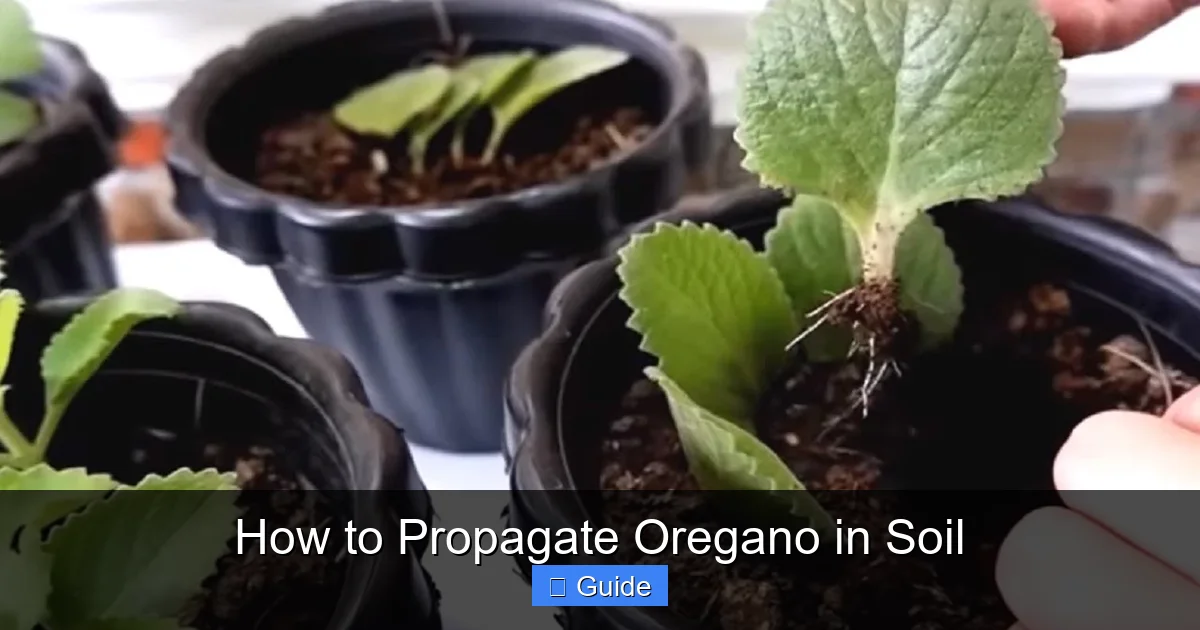
How to Propagate Oregano in Soil
Propagating oregano in soil is a simple way to grow new plants from cuttings. This guide covers timing, tools, step-by-step instructions, and care tips for success.
Growing your own herbs is one of the most rewarding parts of gardening. Oregano stands out as a kitchen staple that thrives with minimal fuss. If you already have a healthy plant, you can make dozens more for free. Learning how to propagate oregano in soil gives you an endless supply of this aromatic herb. It saves money. It ensures you always have fresh leaves for pizza, pasta, and marinades. This guide walks you through every step with clear details.
Soil propagation is often easier than water propagation for woody herbs like oregano. The roots grow stronger. They adapt better to garden life later. You avoid transplant shock. Whether you are a beginner or a seasoned grower, this method works reliably. Let us dive into the process together.
Key Takeaways
- Best time: Spring and early summer offer ideal conditions for root development.
- Cutting selection: Choose healthy stems 4 to 6 inches long with several leaf nodes.
- Soil mix: Use well-draining potting mix with perlite or sand for aeration.
- Rooting hormone: Optional but helpful for faster and stronger root growth.
- Humidity: Keep cuttings moist with a humidity dome or plastic bag.
- Light needs: Place in bright indirect light, not direct sun, while rooting.
- Transplant timing: Move to larger pots once roots are 1 to 2 inches long.
Quick Answers to Common Questions
How long does oregano take to root in soil?
Oregano cuttings typically root in 2 to 4 weeks in soil. Warmer temperatures and bottom heat can speed up the process to 10 to 14 days.
Can I propagate oregano without rooting hormone?
Yes, oregano roots readily without hormone. Rooting hormone simply speeds up the process and increases success rates, especially for woody stems.
What is the best soil mix for oregano cuttings?
A mix of one part potting soil to one part perlite or coarse sand provides ideal drainage and aeration for oregano cuttings.
Should I cover oregano cuttings with plastic?
Yes, covering with a clear plastic bag or humidity dome maintains high humidity, preventing the cuttings from drying out before roots form.
When can I transplant rooted oregano to the garden?
Transplant after the last frost when soil reaches 60°F, plants are 4 to 6 inches tall, and roots are 1 to 2 inches long.
📑 Table of Contents
- Why Propagate Oregano in Soil?
- When Is the Best Time to Propagate Oregano?
- Preparing Your Materials and Workspace
- Step-by-Step Guide to Propagate Oregano in Soil
- Caring for Your New Oregano Plants
- Troubleshooting Common Problems
- Transplanting to the Garden
- Harvesting and Using Your Propagated Oregano
- Propagating Different Oregano Varieties
- Advanced Tips for Higher Success Rates
- Conclusion
Why Propagate Oregano in Soil?
You might wonder why bother with cuttings when seeds are cheap. Seeds take longer. They vary in flavor and vigor. Cuttings clone the parent plant exactly. You keep the same great taste. You skip the slow germination phase. Soil propagation offers distinct advantages over water rooting.
Stronger Root Systems
Roots grown in soil develop fine root hairs. These tiny structures absorb water and nutrients efficiently. Water roots are brittle. They often break during transplant. Soil roots transition smoothly to garden beds or larger pots. Your new plants establish faster. They show less wilting after moving.
Lower Risk of Rot
Water propagation can lead to stem rot if leaves sit in liquid. Soil drains excess moisture. It provides oxygen to the root zone. Oregano hates wet feet. A well-draining mix mimics its native Mediterranean habitat. You get healthier starts with fewer losses.
No Hardening Off Needed
Water-rooted cuttings need gradual exposure to soil conditions. This hardening off takes a week or more. Soil-rooted plants already live in their final medium. You simply pot them up or plant them out. It saves time and reduces stress on young plants.
Cost Effective and Sustainable
One mature oregano plant yields dozens of cuttings each season. You fill your garden beds. You share with friends. You never buy nursery starts again. It fits a zero-waste lifestyle. You use what you already have.
When Is the Best Time to Propagate Oregano?
Timing matters. Oregano roots best during active growth. The plant puts energy into new shoots. Roots form faster. Success rates climb.
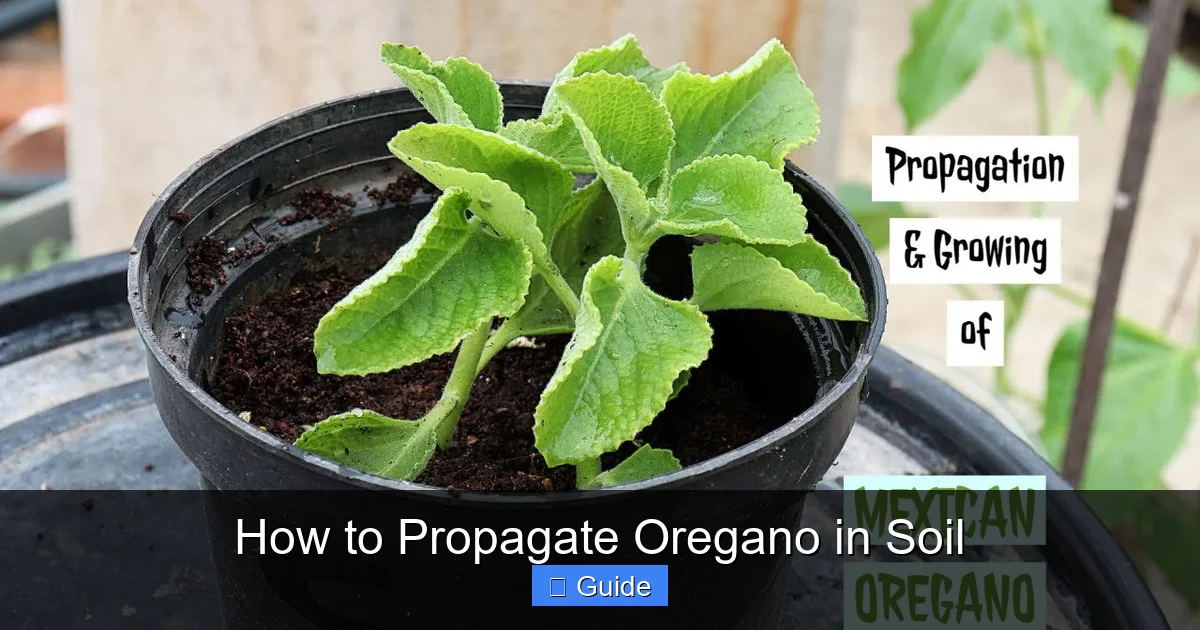
Visual guide about How to Propagate Oregano in Soil
Image source: i.ytimg.com
Spring: The Prime Window
Late spring is ideal. Soil warms up. Days lengthen. The mother plant pushes fresh growth. Take cuttings from new green stems. Avoid old woody bases. They root slowly or not at all. Aim for May to June in most zones.
Early Summer Works Too
If you miss spring, early summer still works. Choose a cool morning. Hydrate the mother plant the day before. Heat stress reduces rooting success. Keep cuttings shaded during the hottest part of the day.
Avoid Fall and Winter
Dormant plants lack vigor. Cuttings may sit for months without roots. Fungal issues increase in cool damp conditions. If you must propagate off-season, use a heat mat and grow lights. Expect lower success rates.
Signs Your Plant Is Ready
Look for stems that snap cleanly when bent. Green flexible tips indicate active growth. The plant should be at least 6 inches tall. It should show no signs of disease or pests. A healthy donor gives healthy clones.
Preparing Your Materials and Workspace
Gather everything before you start. Clean tools prevent disease spread. Organized supplies make the process smooth. You will feel more confident.
Essential Tools List
- Sharp clean pruning shears or scissors
- Small pots or cell trays (2 to 3 inches)
- Well-draining potting mix
- Perlite or coarse sand
- Rooting hormone powder or gel (optional)
- Spray bottle with water
- Clear plastic bags or humidity dome
- Labels and waterproof marker
- Rubbing alcohol for sterilizing
Creating the Perfect Soil Mix
Oregano needs excellent drainage. Standard potting soil holds too much water. Mix one part potting soil with one part perlite. Add a handful of coarse sand per gallon if available. This blend drains fast but retains enough moisture. It mimics rocky Mediterranean soils.
Moisten the mix before filling pots. It should feel like a wrung-out sponge. No soggy clumps. No dry dust. Pre-wetting prevents the mix from pulling water from the cutting stem.
Sterilize Everything
Wipe blades with rubbing alcohol. Wash pots in hot soapy water. Rinse well. Dip in 10% bleach solution for 10 minutes if reusing old containers. Rinse again. Clean surfaces reduce damping off fungus. This step saves heartache later.
Set Up Your Workspace
Choose a shaded table or bench. Good light helps you see nodes. Avoid direct sun on cuttings. Lay out newspaper or a tray for easy cleanup. Keep a trash bowl for trimmed leaves. Have labels ready to mark varieties and dates.
Step-by-Step Guide to Propagate Oregano in Soil
Follow these steps in order. Do not rush. Each phase builds on the last. Consistency yields the best results.
Step 1: Select and Cut Stems
Walk to your oregano plant in the morning. Stems are turgid then. Choose 4 to 6 inch tips. Look for semi-hardwood. Not soft new growth. Not thick woody bases. The stem should bend without snapping. Cut just below a leaf node. That bump holds rooting cells. Make a clean 45-degree cut. It increases surface area for roots.
Take 5 to 10 cuttings per variety. More stems mean more success. Some will fail. That is normal. Label each bundle if doing multiple types.
Step 2: Prepare the Cuttings
Strip leaves from the bottom two inches. Leave 2 to 3 sets of leaves at the top. Large leaves can be cut in half. This reduces water loss. The stem focuses energy on roots. If using rooting hormone, dip the cut end now. Tap off excess. Powder works fine. Gel clings better. Both boost success.
Step 3: Plant in Soil
Poke a hole in the moist mix with a pencil or dibber. Insert the cutting 1.5 to 2 inches deep. At least two nodes should sit below soil. Firm the mix gently around the stem. Good contact matters. Air pockets dry out the base. Space cuttings 1.5 inches apart in trays. One per small pot.
Step 4: Create Humidity
Oregano cuttings lack roots to drink. They lose water through leaves. High humidity stops wilting. Cover pots with a clear plastic bag. Use sticks to keep plastic off leaves. Or use a humidity dome. Vent daily for 10 minutes. Prevents mold. Check moisture daily. Mist if surface feels dry.
Step 5: Provide Proper Light and Warmth
Place in bright indirect light. A north window works. Or under grow lights 12 inches above. No direct sun. It cooks cuttings in the bag. Ideal temperature is 65 to 75 degrees Fahrenheit. A seedling heat mat speeds rooting. Keep soil at 70 degrees. Roots appear in 2 to 4 weeks.
Step 6: Monitor and Wait
Check daily. Lift the cover. Feel the soil. Mist lightly if needed. Remove any yellow or fallen leaves. They invite fungus. Tug gently after two weeks. Resistance means roots. Do not pull hard. You will break delicate new roots. Patience pays off.
Step 7: Harden Off and Pot Up
Once roots reach 1 to 2 inches, remove humidity cover. Do it gradually. Hour one day. Two hours next. Full exposure in a week. Then transplant to 4 inch pots with regular herb soil. Water well. Keep in partial shade another week. Then move to final location.
Caring for Your New Oregano Plants
Young plants need attention. They are not drought-tolerant yet. Treat them like seedlings for the first month.
Watering Schedule
Keep soil evenly moist but not wet. Water when top half-inch feels dry. Use a narrow spout. Avoid wetting leaves. Wet foliage invites powdery mildew. Morning watering lets leaves dry fast. Reduce frequency as plants establish.
Fertilizing Young Plants
Wait three weeks after potting up. Then feed with half-strength liquid fertilizer. Fish emulsion works well. Or balanced 10-10-10 diluted. Apply every two weeks. Stop in late summer. Harden growth before winter.
Pinching for Bushiness
When plants reach 6 inches, pinch the tips. Cut just above a leaf node. This forces branching. More stems mean more harvest. Repeat every few weeks. You get a compact productive plant. Leggy plants fall over and produce less.
Pest Watch
Aphids and spider mites love tender new growth. Check undersides weekly. Blast with water if found. Insecticidal soap for heavy infestations. Neem oil prevents recurrence. Healthy plants resist pests better. Good airflow helps.
Troubleshooting Common Problems
Even careful gardeners face issues. Know the signs. Act fast. Most problems are fixable.
Cuttings Wilt and Die
Usually low humidity or too much heat. Check your cover. Seal edges better. Move to cooler spot. Mist more often. Remove dead material promptly. Some loss is normal. Aim for 70% success.
Black Stem at Soil Line
Damping off fungus. Caused by wet soil and poor airflow. Discard affected cuttings. Sterilize pots. Use fresh mix. Increase ventilation. Water less. Add cinnamon to soil surface. It is a natural antifungal.
No Roots After 4 Weeks
Stems may be too woody. Or too soft. Or too cold. Check soil temperature. Use a heat mat. Try softer tips next time. Some varieties root slower. Greek oregano roots fast. Ornamental types may stall.
Yellow Leaves
Could be nitrogen deficiency. Or overwatering. Or root rot. Check roots if possible. White firm roots are healthy. Brown mushy roots mean rot. Repot in fresh dry mix if caught early. Feed lightly if pale green.
Mold on Soil Surface
Too wet. Too little air. Scrape off mold. Add a layer of dry sand or perlite. Increase venting. Water from bottom only. Let surface dry between waterings.
Transplanting to the Garden
Your propagated oregano is ready for the big move. Timing and technique ensure survival.
When to Transplant
Wait until after last frost. Soil should be 60 degrees or warmer. Plants should be 4 to 6 inches tall. Well-rooted in 4 inch pots. Hardened off for a full week. Cloudy day is best. Evening works too.
Site Selection
Full sun. At least 6 hours. Well-drained soil. Raised beds are perfect. Rocky slopes work. Avoid low spots where water collects. Oregano hates clay. Amend heavy soil with grit and compost. pH 6.5 to 7.0 ideal.
Spacing and Planting
Space plants 12 to 18 inches apart. They spread. Dig holes twice the pot width. Loosen root ball gently. Plant at same depth. Backfill. Firm lightly. Water thoroughly. Mulch with gravel or straw. Not wood chips. They hold moisture.
First Month Care
Water every 2 to 3 days if no rain. Check soil first. Do not fertilize yet. Let roots explore. Pinch flowers if they appear. You want leaf growth. Remove weeds promptly. They compete for nutrients.
Harvesting and Using Your Propagated Oregano
The reward comes in the kitchen. Harvest correctly for continuous yield.
When to Start Harvesting
Wait until plants are 8 inches tall. Cut stems back to 2 inches above soil. Leave several leaf sets. Plant regrows fast. Morning harvest has best oil content. Dew dried. Before noon heat.
Drying for Storage
Bundle stems. Hang upside down in dark airy spot. Or use a dehydrator at 95 degrees. Leaves crumble when dry. Store in glass jars. Away from light. Flavor lasts 6 months. Freeze in oil for longer keeping.
Fresh Uses
Chop leaves for marinades. Sprinkle on pizza. Stir into tomato sauce. Infuse olive oil. Make herb butter. Flowers are edible too. Pretty garnish. Mild flavor. Bees love them.
Propagating Different Oregano Varieties
Not all oregano is the same. Some root easier. Some need special care.
Greek Oregano (Origanum vulgare hirtum)
The gold standard for cooking. Strong flavor. White flowers. Roots very easily. High success rate. Great for beginners. Spreads moderately.
Italian Oregano (Origanum x majoricum)
Milder. Sweeter. Marjoram hybrid. Roots well. Less aggressive spread. Good for containers. Tender perennial in cold zones.
Golden Oregano (Origanum vulgare ‘Aureum’)
Chartreuse leaves. Ornamental and edible. Roots slower. Needs more light to keep color. Partial shade burns golden foliage. Beautiful in mixed pots.
Hot and Spicy Oregano
High carvacrol content. Very pungent. Roots like Greek. Handles heat well. Great for Mexican dishes. Compact habit.
Syrian Oregano (Origanum syriacum)
Key za’atar ingredient. Fuzzy leaves. Tall upright. Roots moderately. Needs excellent drainage. Winter wet kills it. Grow in pots in wet climates.
Advanced Tips for Higher Success Rates
These pro tricks boost your numbers. Small changes. Big results.
Use Willow Water
Soak willow branches in water 24 hours. Natural rooting hormones. Dip cuttings before planting. Free and effective. Make fresh each time.
Bottom Heat Mat
Soil at 70 to 75 degrees. Roots form in half the time. Thermostat controlled mat best. Check daily. Soil dries faster with heat.
Take Heel Cuttings
Pull side shoot with a sliver of main stem. That heel has more rooting cells. Works on older woody plants. Trim heel flat before planting.
Mist with Seaweed Solution
Kelp extract reduces transplant shock. Stimulates root growth. Spray weekly. Dilute to quarter strength. Smells oceanic but plants love it.
Label Everything
Date. Variety. Source. Hormone used. Notes. You learn what works. You repeat success. You avoid past mistakes. Simple tags save confusion.
Conclusion
Learning how to propagate oregano in soil opens a world of free plants. You turn one purchase into a lifetime supply. The process is simple. The rewards are huge. Fresh flavor steps from your garden. Gifts for fellow cooks. A resilient herb patch that grows stronger each year.
Start this spring. Take a few cuttings. Follow the steps. Watch roots appear. Feel the satisfaction. Your kitchen will thank you. Your garden will thrive. Happy propagating.
Frequently Asked Questions
Can I propagate oregano from grocery store herbs?
Yes, you can propagate oregano from fresh store-bought sprigs if they are very fresh. Choose stems with nodes, trim the bottom, and plant immediately in moist soil mix. Success rates are lower than with garden-fresh cuttings.
Why are my oregano cuttings turning black at the base?
Black stems indicate damping off fungus caused by excess moisture and poor airflow. Remove affected cuttings, improve ventilation, reduce watering, and ensure your soil mix drains well.
Do I need grow lights to propagate oregano indoors?
Grow lights help but are not essential. A bright north-facing window or indirect light from an east window works fine. Provide 12 to 14 hours of light daily for best results.
Can I propagate oregano in winter?
Winter propagation is possible with a heat mat (70°F soil temp) and grow lights. However, success rates are lower because the plant is semi-dormant. Spring is strongly preferred.
How often should I water oregano cuttings?
Check daily. Mist the soil surface when the top half-inch feels dry. Keep evenly moist but never soggy. The humidity cover reduces watering frequency significantly.
What is the difference between soil and water propagation for oregano?
Soil propagation produces stronger roots with less transplant shock. Water propagation lets you see roots but creates fragile water roots that often break when moved to soil.