How to Propagate Bird of Paradise from Cutting
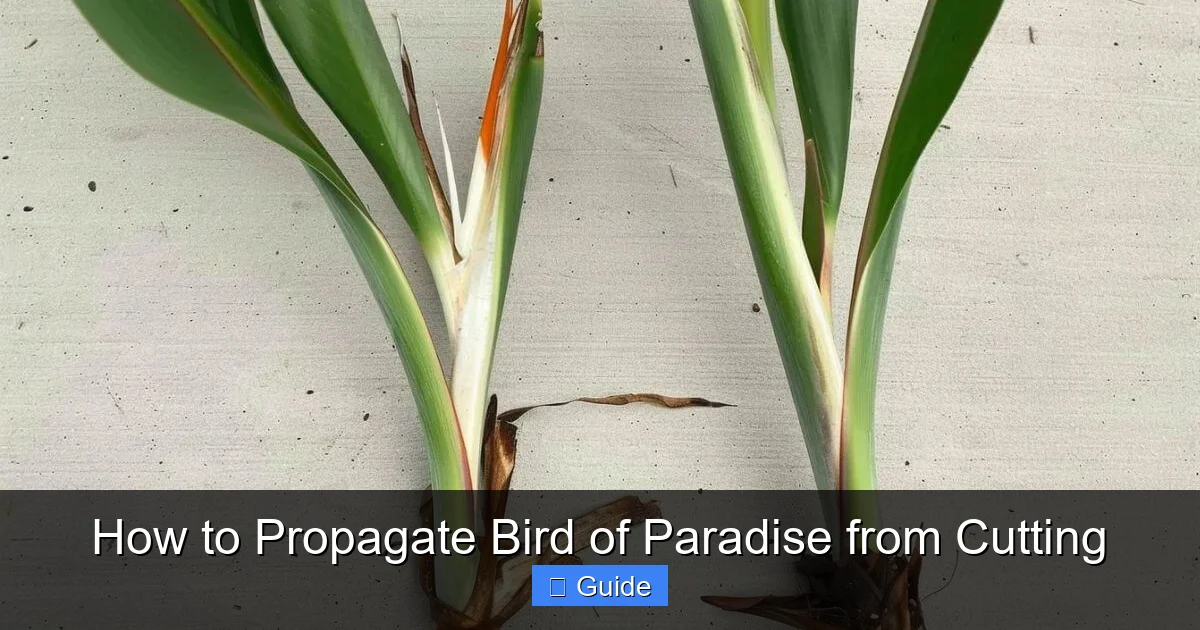
Bird of paradise cannot be propagated from stem cuttings alone. These tropical plants require division of the rhizome root system to create new plants successfully. Our guide explains the proper technique for multiplying your bird of paradise.
If you have ever admired the striking orange and blue blooms of a bird of paradise plant, you have probably wondered about making more of them. These tropical beauties make a bold statement in any garden or bright indoor space. Their paddle shaped leaves and exotic flowers bring instant drama. Many plant lovers ask about how to propagate bird of paradise from cutting. The answer might surprise you. Unlike many houseplants that root easily from stem snippets, bird of paradise follows different rules. This guide walks you through what actually works and what does not.
We will explore the biology behind why traditional cuttings fail. We will show you the division method that professional growers use. You will learn exactly when to divide, how to separate the rhizomes, and how to care for your new plants. Whether you have a massive outdoor clump or a potted specimen indoors, the principles remain the same. Let us dig into the details so you can multiply your bird of paradise with confidence.
Key Takeaways
- Stem cuttings don’t work: Bird of paradise lacks the ability to grow roots from stem sections alone.
- Division is the only reliable method: You must separate the rhizome root system with attached shoots.
- Timing matters most: Spring and early summer give divisions the best chance to establish.
- Each division needs roots and leaves: A viable section requires healthy rhizome, roots, and at least one fan of leaves.
- Patience is essential: New divisions take two to three years to reach flowering maturity.
- Proper aftercare prevents shock: Consistent moisture, humidity, and indirect light help divisions recover.
- Mature plants divide best: Plants at least three years old with multiple shoots yield the strongest divisions.
Quick Answers to Common Questions
Can you root a bird of paradise leaf in water?
No, bird of paradise leaves cannot develop roots in water or soil. The leaf petioles lack the meristematic tissue needed for root formation. Only the underground rhizome can produce new roots and shoots.
What is the best time of year to divide bird of paradise?
Spring is the optimal time for division. The plant enters active growth, allowing divisions to establish roots quickly. Early summer also works well in most climates.
How many leaves should each division have?
Each division should have at least one healthy fan of leaves, but two to three fans are ideal. More leaves mean more stored energy for faster recovery and establishment.
How long until a divided bird of paradise flowers?
Divisions typically take two to three years to reach flowering maturity. Seed grown plants take five to seven years, making division the faster propagation method.
Why is my bird of paradise division not growing?
Slow growth often indicates transplant shock or insufficient roots. Check for firm white roots, maintain consistent moisture and humidity, provide bright indirect light, and wait up to eight weeks for new growth to emerge.
📑 Table of Contents
- Understanding Bird of Paradise Plants
- Can You Really Propagate Bird of Paradise from Cuttings?
- The Best Method: Division Instead of Cuttings
- Step-by-Step Guide to Dividing Your Bird of Paradise
- Caring for Your New Divisions
- Common Problems and Solutions
- Long Term Growth and Flowering
- Alternative Propagation Methods
- Tips for Success from Experienced Growers
- Conclusion
Understanding Bird of Paradise Plants
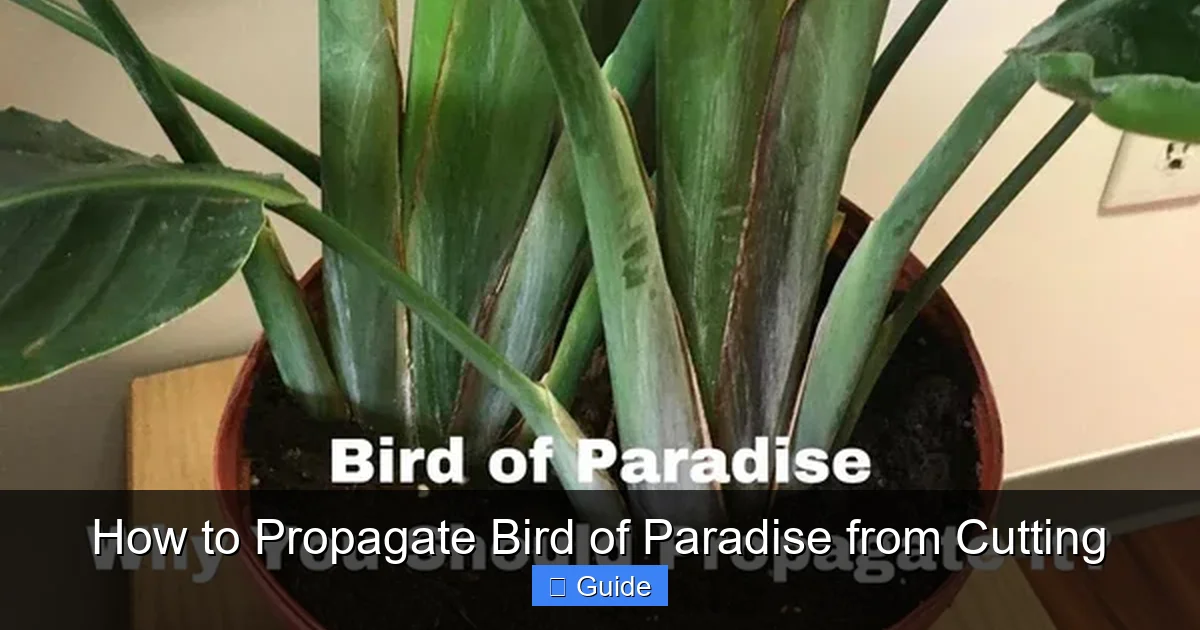
Before we discuss propagation, it helps to know what you are working with. Bird of paradise belongs to the genus Strelitzia. The most common species is Strelitzia reginae. It features the classic orange and blue flowers. Another popular species is Strelitzia nicolai, the giant white bird of paradise. Both grow from thick underground stems called rhizomes. These rhizomes store water and nutrients. They also produce new shoots that emerge as fans of leaves.
Growth Habit and Structure
Bird of paradise does not grow from a single central trunk. Instead, it forms a clump. Each fan of leaves connects to the rhizome below soil. The rhizome creeps horizontally. New fans pop up along its length. Over time, the clump expands outward. A mature plant can span several feet across. The root system is fleshy and substantial. Thick roots anchor the plant and store reserves. This growth habit is the key to understanding propagation.
Why This Matters for Propagation
Many plants root from stem cuttings because their stems contain meristematic tissue. This tissue can differentiate into roots. Bird of paradise stems are actually leaf petioles. They lack the necessary tissue to generate roots. The only part that can produce new growth is the rhizome. The rhizome contains the meristems for both shoots and roots. This is why division works and stem cuttings do not. When you hear someone ask about how to propagate bird of paradise from cutting, they usually mean division. True stem cuttings will simply rot.
Can You Really Propagate Bird of Paradise from Cuttings?
Let us address the question directly. The short answer is no. You cannot propagate bird of paradise from a leaf stem cutting. You cannot root a piece of the flower stalk. You cannot take a section of leaf and expect it to grow roots. Many gardeners learn this the hard way. They snip a beautiful leaf, place it in water or soil, and wait. Weeks pass. The leaf stays green for a while. Then it yellows and dies. No roots ever appear.
Visual guide about How to Propagate Bird of Paradise from Cutting
Image source: cdn.shopify.com
The Science Behind the Failure
Plant propagation relies on totipotency. This is the ability of a cell to regenerate a whole plant. In many plants, stem cells retain this ability. In bird of paradise, the leaf petioles and blades are fully differentiated. They have lost the ability to become root cells. The rhizome is different. It remains a source of undifferentiated cells. Only the rhizome can initiate new roots and shoots. This is a genetic trait of the Strelitzia genus. No amount of rooting hormone will change it.
What About Root Cuttings?
Some plants propagate from root cuttings. You might wonder if a thick bird of paradise root can grow a new plant. The answer is still no. The roots are storage organs. They lack shoot buds. They cannot produce leaves. Only the rhizome has both root and shoot buds. If you cut a root, you get a cut root. It will not sprout. This distinction saves you wasted effort. Focus your energy on division instead.
Exceptions and Rare Cases
There is one laboratory method called tissue culture. Technicians take tiny pieces of meristem tissue. They grow them in sterile media with precise hormones. This produces clones. It is not feasible for home gardeners. It requires a lab. For practical purposes, division is the only way. Seed propagation is possible but slow. Seedlings take five to seven years to flower. Division yields flowering plants in two to three years.
The Best Method: Division Instead of Cuttings
Since we have established that cuttings do not work, let us focus on division. Division means separating a clump into smaller sections. Each section must have rhizome, roots, and leaves. This is how commercial nurseries produce new plants. It is how botanical gardens manage their collections. It is the method you should use at home. When people search for how to propagate bird of paradise from cutting, they really need division instructions.
When to Divide Your Plant
Timing is critical. The best time is spring. The plant is entering active growth. Roots will establish quickly. Early summer works too. Avoid dividing in fall or winter. The plant is dormant or slowing down. Cold wet soil invites rot. Divisions made in fall often die before spring. If you live in a tropical climate with no winter, you have more flexibility. Still, the start of the rainy season is ideal. The plant has natural momentum.
Signs Your Plant Is Ready
Not every plant should be divided. Young plants need time to build energy. Wait until your plant is at least three years old. It should have multiple fans of leaves. Four to six fans is a good minimum. The clump should look crowded. Roots may circle the pot or push above soil. Growth might slow despite good care. These signs indicate the plant has energy to spare. Dividing a weak plant risks losing both pieces.
Tools You Will Need
Gather your supplies before you start. You need a sharp clean knife or pruning saw. A serrated knife works well for tough rhizomes. Have rubbing alcohol for sterilizing. Prepare fresh potting mix. A blend of peat, perlite, and compost works well. You need pots with drainage holes. Choose pots slightly larger than the root ball of each division. Have gloves ready. The sap can irritate sensitive skin. A tarp or newspaper keeps the area clean.
Step-by-Step Guide to Dividing Your Bird of Paradise
Now we get to the practical part. Follow these steps carefully. Take your time. Rushing damages the rhizomes. A clean separation gives each division the best start. This process works for both potted and in ground plants. The principles are identical.
Step One: Prepare the Plant
Water the plant thoroughly one day before dividing. Moist soil holds the root ball together. Dry soil crumbles and breaks roots. Wet soil makes a mess. Aim for evenly moist. If the plant is in a pot, lay it on its side. Gently tap the pot to loosen the root ball. Slide the plant out. If it is stuck, run a knife around the inside edge. For in ground plants, dig a wide circle around the clump. Go deep enough to get under the rhizomes. Lift the whole clump carefully.
Step Two: Examine the Rhizome Structure
Shake off excess soil. Rinse gently with a hose if needed. You need to see the rhizomes clearly. Look for natural separation points. The rhizome will have distinct segments. Each segment connects to a fan of leaves. Roots emerge from the bottom of each segment. Identify where you can cut between fans. Each division needs at least one fan. Two or three fans are better. More fans mean more stored energy. Ensure each piece has healthy white roots.
Step Three: Make Clean Cuts
Sterilize your knife with alcohol. Cut between the fans. Slice through the rhizome cleanly. Do not saw back and forth. A single firm cut reduces damage. If the rhizome is very thick, use a pruning saw. Cut straight across. Avoid angled cuts. They expose more surface to rot. Dust the cut surfaces with cinnamon or sulfur powder. These act as natural fungicides. Let the cuts air dry for an hour. This callusing step helps prevent infection.
Step Four: Pot the Divisions
Fill your pots with moist potting mix. Create a mound in the center. Place the division on the mound. Spread the roots downward. The rhizome should sit just below the soil surface. The leaf fan should be upright. Backfill with mix. Firm gently to remove air pockets. Do not bury the crown. The base of the leaves must stay above soil. Water thoroughly until water drains out the bottom. This settles the soil around roots.
Step Five: Provide Optimal Recovery Conditions
Place the new pots in bright indirect light. Direct sun stresses the divisions. They have reduced root capacity. They cannot take up water fast enough. Keep the soil consistently moist but not soggy. High humidity helps. Mist the leaves daily. Or place a humidity tray nearby. A clear plastic bag over the pot creates a mini greenhouse. Vent it daily to prevent mold. Maintain temperatures above sixty five degrees Fahrenheit. Avoid drafts and heating vents.
Caring for Your New Divisions
The first few months are critical. Your divisions are rebuilding their root systems. They need consistent care. Think of them as convalescing patients. They have the potential to thrive. But they are vulnerable right now. Proper aftercare makes the difference between success and failure.
Watering Strategy
Water when the top inch of soil feels dry. Use your finger to check. Do not let the pot dry out completely. The roots are not yet extensive. They cannot reach deep moisture. But do not keep the soil sopping wet. Soggy soil suffocates roots. It encourages fungal rot. The rhizome is especially prone to rot. Ensure excellent drainage. Empty saucers after watering. Never let pots sit in standing water.
Light Requirements
Bright indirect light is best for the first month. An east facing window works well. Or a few feet back from a south window. After four weeks, gradually increase light. Move the plant closer to the window each week. Mature bird of paradise loves full sun. But divisions need time to adjust. Watch for leaf scorch. Brown patches mean too much light too fast. Slow down the transition if you see damage.
Fertilizing Timeline
Do not fertilize for the first three months. The fresh potting mix has nutrients. The damaged roots cannot absorb fertilizer well. Excess salts burn tender new roots. After three months, start with half strength balanced fertilizer. Apply monthly during the growing season. Stop in fall. Resume in spring. Mature plants are heavy feeders. But young divisions need a gentle approach.
Monitoring for Problems
Check your divisions weekly. Look for new leaf emergence. This is the best sign of success. A new leaf means roots are working. Watch for yellowing older leaves. Some yellowing is normal. The plant sacrifices old leaves to feed new growth. But widespread yellowing signals overwatering or rot. Check for pests. Spider mites love stressed plants. Wipe leaves with a damp cloth monthly. This prevents infestations and keeps leaves clean.
Common Problems and Solutions
Even with perfect technique, issues can arise. Knowing what to watch for helps you act fast. Most problems are fixable if caught early. Here are the most common challenges with bird of paradise divisions.
Rhizome Rot
This is the number one killer. The cut surface gets infected. Fungi or bacteria enter the wound. The rhizome turns mushy and dark. You may smell a foul odor. Leaves wilt despite wet soil. If you catch it early, you can save the division. Unpot the plant. Cut away all rotted tissue. Cut back to firm white rhizome. Dust with sulfur. Repot in fresh dry mix. Do not water for a week. Then water sparingly. Prevention is better. Always sterilize tools. Always let cuts callus. Never overwater.
Transplant Shock
Divisions often drop a few leaves. The tips may brown. Growth pauses for weeks. This is normal transplant shock. The plant is redirecting energy to roots. Do not panic. Do not overwater to compensate. Keep conditions stable. Maintain humidity. Provide gentle light. New growth will appear when roots are ready. This can take six to eight weeks. Patience is your best tool.
No New Growth
If three months pass with no new leaf, something is wrong. Check the roots. Gently unpot and inspect. Are they white and firm? Or brown and mushy? Healthy roots mean the plant is just slow. Some divisions take longer. Ensure warmth and light. Consider a root stimulant with seaweed extract. If roots are dead, the division failed. Learn from it. Next time, take a larger section with more roots.
Pest Infestations
Stressed plants attract pests. Spider mites are the most common. They cause stippled leaves and fine webbing. Mealybugs hide in leaf axils. Scale insects attach to stems. Inspect weekly. Treat immediately with insecticidal soap or neem oil. Repeat weekly for three weeks. Isolate affected weeks. Healthy plants resist pests better. Good care is the best prevention.
Long Term Growth and Flowering
You have successfully divided your bird of paradise. Now what? Understanding the timeline helps set expectations. These are not fast plants. But they are rewarding ones.
Year One: Establishment
The first year is about roots. You may see one or two new leaves. The plant focuses underground. Keep up consistent care. Water and fertilize regularly. Repot if roots fill the container. Move to slightly larger pots each spring. Do not overpot. Bird of paradise likes being somewhat root bound. It encourages flowering.
Year Two: Bulking Up
Growth accelerates. The plant produces more leaves. The rhizome thickens. The clump expands. You might see a flower spike late in year two. But do not count on it. Most plants need three years. Continue good culture. Full sun outdoors in summer boosts energy. Bring indoors before frost if you are in a cold climate.
Year Three and Beyond: Flowering
This is the payoff. Mature divisions flower reliably. The iconic blooms appear in late winter to spring. Each flower lasts weeks. A happy plant produces multiple spikes. Continue dividing every four to five years. This rejuvenates the plant. It prevents overcrowding. It gives you more plants to share. The cycle continues.
Indoor vs Outdoor Considerations
Outdoor plants in zones ten and up grow fastest. They get full sun and seasonal rain. They reach flowering size sooner. Indoor plants need maximum light. A south window is minimum. Supplemental grow lights help. Indoor plants may take an extra year to flower. But they make stunning foliage plants regardless. The giant white bird of paradise makes a dramatic indoor tree.
Alternative Propagation Methods
While division is the standard, other methods exist. They have different timelines and success rates. Knowing your options helps you choose the right approach.
Seed Propagation
Bird of paradise produces seed pods after flowering. The seeds are black with orange tufts. They germinate readily if fresh. Soak seeds for twenty four hours. Nick the hard coat with a file. Sow in warm moist mix. Germination takes one to three months. Seedlings grow slowly. They take five to seven years to flower. But you get genetic variation. This is how new cultivars arise. It is a fun project for patient gardeners.
Tissue Culture
As mentioned, this is a laboratory technique. It produces thousands of identical clones. It is used for commercial production. It is not practical for home growers. But it explains why nursery plants look so uniform. They are all clones of a superior parent. If you buy a named cultivar, it likely came from tissue culture.
Why Not Air Layering?
Air layering works for woody plants. You wound a branch, wrap it in moss, and wait for roots. Bird of paradise has no woody branches. The leaf stems are herbaceous. They cannot layer. The rhizome is underground. You cannot air layer it. So this method is not an option.
Tips for Success from Experienced Growers
Over the years, growers have learned tricks. These tips can improve your results. They come from trial and error. Adopt them to avoid common pitfalls.
Take Larger Divisions
Beginners often cut divisions too small. They want more plants. But tiny divisions struggle. A division with three fans outperforms three divisions with one fan each. The larger piece has more stored energy. It recovers faster. It flowers sooner. Be generous with your cuts. You can always divide again in a few years.
Use the Right Pot Size
Do not put a small division in a huge pot. The excess soil stays wet. This causes rot. Choose a pot just two inches wider than the root ball. The plant will fill it quickly. Then move up one size. This cycle of slight underpotting promotes healthy roots. It also encourages flowering.
Label Your Divisions
If you have multiple varieties, label them. Use waterproof markers on plastic tags. Bury the tag in the pot. Or write on the pot with paint pen. Bird of paradise varieties look similar when not in flower. You will forget which is which. Labels save confusion later.
Share the Wealth
Division often yields more plants than you need. Share with friends. Trade with other plant lovers. Donate to community gardens. Bird of paradise makes a memorable gift. Include care instructions. Your gardening karma will thank you.
Conclusion
We have covered a lot of ground. The main takeaway is clear. You cannot propagate bird of paradise from stem cuttings. The biology simply does not allow it. But division is reliable, straightforward, and rewarding. With a mature plant, sharp tools, and a little patience, you can create multiple new plants. Each division carries the exact genetics of the parent. You know exactly what you are getting.
Remember the key points. Divide in spring. Use clean tools. Let cuts callus. Pot in well draining mix. Provide humidity and indirect light during recovery. Wait three months before fertilizing. Expect flowers in two to three years. The wait is worth it. Few plants deliver such dramatic tropical flair.
Whether you are expanding your own collection or sharing with fellow plant lovers, division is the skill that keeps giving. Your original plant benefits too. Thinning the clump improves air flow. It reduces disease risk. It stimulates fresh growth. Everyone wins.
Now you have the knowledge. The next step is action. Look at your bird of paradise. Is it crowded? Does it have multiple fans? Is it spring? Then you are ready. Gather your tools. Follow the steps. Join the generations of gardeners who have multiplied this magnificent plant. Your future self will thank you when those first orange and blue blooms appear on your very own divisions.
Frequently Asked Questions
Can bird of paradise be propagated from stem cuttings?
No, bird of paradise cannot be propagated from stem cuttings. The leaf stems lack the cellular ability to generate roots. Only division of the rhizome root system produces viable new plants.
What is the difference between bird of paradise rhizomes and roots?
Rhizomes are thick underground stems that store energy and produce both shoots and roots. Roots are thinner structures that absorb water and nutrients but cannot produce new growth on their own.
Do I need rooting hormone for bird of paradise division?
Rooting hormone is not necessary for division. The rhizome already contains active growth buds. Dusting cut surfaces with cinnamon or sulfur powder helps prevent fungal infection instead.
Can I divide a bird of paradise that is growing in the ground?
Yes, in ground plants can be divided by digging up the entire clump. Use a sharp spade to separate sections, ensuring each has rhizome, roots, and leaves. Replant immediately at the same depth.
How often should I divide my bird of paradise plant?
Divide bird of paradise every four to five years when the clump becomes crowded. Regular division rejuvenates the plant, improves flowering, and prevents the center from dying out.
What size pot should I use for a new bird of paradise division?
Choose a pot only two inches wider than the division’s root ball. Bird of paradise prefers being slightly root bound, which encourages flowering. Overpotting leads to waterlogged soil and rhizome rot.