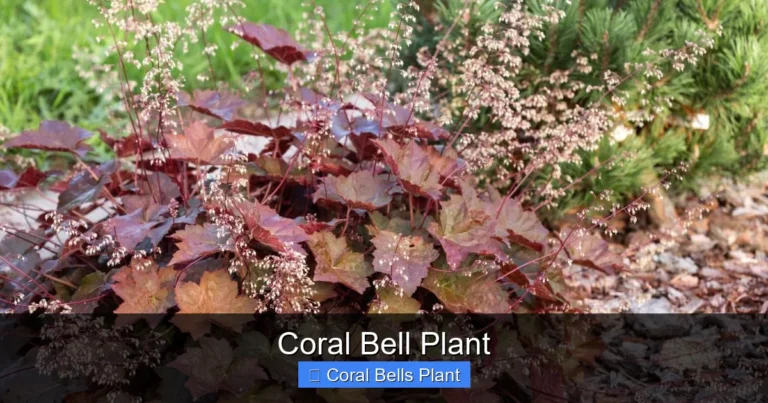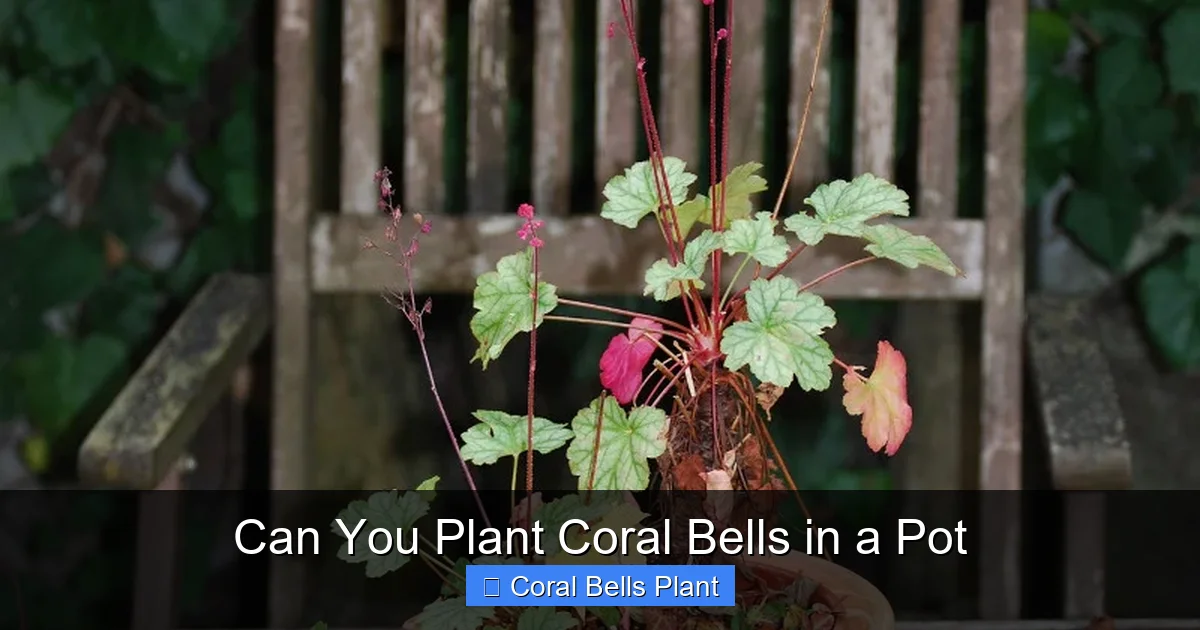
Can You Plant Coral Bells in a Pot
Yes, coral bells thrive beautifully in containers with proper drainage, quality potting mix, and consistent moisture. Container growing offers advantages like better soil control, easier pest management, and the flexibility to move plants for optimal light exposure throughout the seasons.
If you have ever admired the ruffled, colorful foliage of coral bells at a garden center and wondered whether those stunning plants would work on your patio or balcony, you are in the right place. The short answer is a resounding yes. Coral bells, botanically known as Heuchera, are among the most versatile perennials for container gardening. Their compact growth habit, shallow root systems, and incredible range of leaf colors make them perfect candidates for life in a pot.
Growing coral bells in containers actually offers several advantages over planting them in the ground. You gain complete control over soil quality, drainage, and moisture levels. You can move the pots to follow the sun or escape harsh afternoon heat. You can even bring them closer to your kitchen window or front porch to enjoy their foliage up close. Whether you have a sprawling backyard or a modest apartment balcony, container-grown coral bells can add months of colorful interest with relatively little fuss.
Key Takeaways
- Choose the right pot: Select a container at least 12 inches wide and deep with multiple drainage holes to prevent root rot.
- Use well-draining soil: A high-quality potting mix amended with perlite or coarse sand ensures proper aeration and moisture retention.
- Mind the crown: Plant coral bells with the crown slightly above soil level to prevent crown rot, a common issue in containers.
- Water consistently: Check soil moisture daily in summer; water when the top inch feels dry but never let the pot sit in standing water.
- Fertilize lightly: Apply a balanced, slow-release fertilizer in spring and again in midsummer for steady growth without burning roots.
- Provide proper light: Most varieties prefer morning sun with afternoon shade, though some newer cultivars tolerate more sun exposure.
- Overwinter with care: In cold climates, move pots to a protected location or insulate containers to protect roots from freeze-thaw cycles.
Quick Answers to Common Questions
Can you plant coral bells in a pot?
Yes, coral bells thrive in containers with proper drainage, quality potting mix, and consistent moisture. Their compact size and shallow roots make them ideal for pot culture.
What size pot do coral bells need?
Choose a container at least 12 inches wide and deep. Larger pots (16-18 inches) are better for mixed plantings and reduce watering frequency in hot weather.
How often should I water potted coral bells?
Check soil daily in summer. Water deeply when the top inch feels dry. In spring and fall, water every 2-3 days. In winter, water sparingly during thaws only.
Do coral bells come back every year in pots?
Yes, they are perennials that return each spring. In cold climates (zone 6 and below), protect pots by moving to an unheated garage or sinking into the ground with mulch.
What is the best soil for coral bells in containers?
Use a premium potting mix amended with 1 part perlite or coarse grit to 3 parts mix. The blend should be light, fluffy, and fast-draining while retaining some moisture.
📑 Table of Contents
- Why Coral Bells Excel in Containers
- Choosing the Right Container
- Creating the Perfect Potting Mix
- Planting Your Coral Bells Correctly
- Ongoing Care for Potted Coral Bells
- Overwintering Strategies
- Best Coral Bells Varieties for Containers
- Designing Stunning Container Combinations
- Troubleshooting Common Problems
- Frequently Asked Questions About Potted Coral Bells
- Conclusion
Why Coral Bells Excel in Containers
Compact Growth Habit Fits Pots Perfectly
Most coral bells varieties form neat mounds that range from eight to eighteen inches tall and wide. This naturally compact size means they do not outgrow their containers quickly. Unlike sprawling perennials that demand frequent division or massive pots, heuchera stays well-behaved in a standard twelve to fourteen inch container for several years. Their shallow, fibrous root systems are perfectly suited to the limited soil volume of a pot, and they do not develop the deep taproots that make some perennials resent container life.
Foliage Color That Lasts All Season
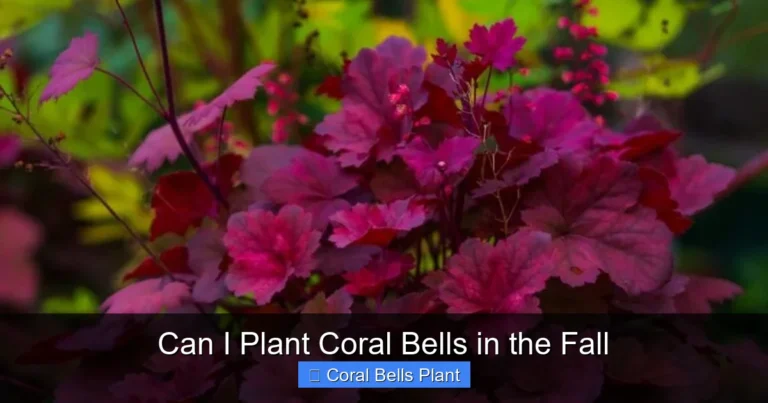
While many flowering perennials offer a brief show of blooms followed by months of green foliage, coral bells are grown primarily for their leaves. Modern breeding has produced an astonishing palette. You can find varieties in shades of lime green, caramel, amber, peach, purple, near-black, silver, and even bright red. Many cultivars hold their color from spring through fall, and some even persist into winter in mild climates. A single pot of ‘Palace Purple’ or ‘Caramel’ can anchor a container combination for the entire growing season.
Versatility in Design
Coral bells play well with others. Their mounded form and textured leaves make them excellent “filler” plants in the classic thriller-filler-spiller container design formula. Pair a dark-leaved variety like ‘Obsidian’ with chartreuse creeping jenny and a tall ornamental grass for drama. Or combine a silver-veined cultivar like ‘Silver Scrolls’ with white flowering annuals for a moon garden effect. Because they tolerate shade better than many sun-loving container plants, they open up design possibilities for covered porches and north-facing balconies.
Choosing the Right Container
Size Matters More Than You Think
When selecting a pot for coral bells, bigger is generally better. A container that is at least twelve inches in diameter and twelve inches deep provides enough soil volume to buffer moisture fluctuations and insulate roots from temperature extremes. Smaller pots dry out alarmingly fast in summer heat, forcing you to water daily or even twice daily. If you want to create a mixed container with multiple plants, step up to a sixteen to eighteen inch pot. Remember that coral bells spread slowly via short rhizomes, so they appreciate a little elbow room.
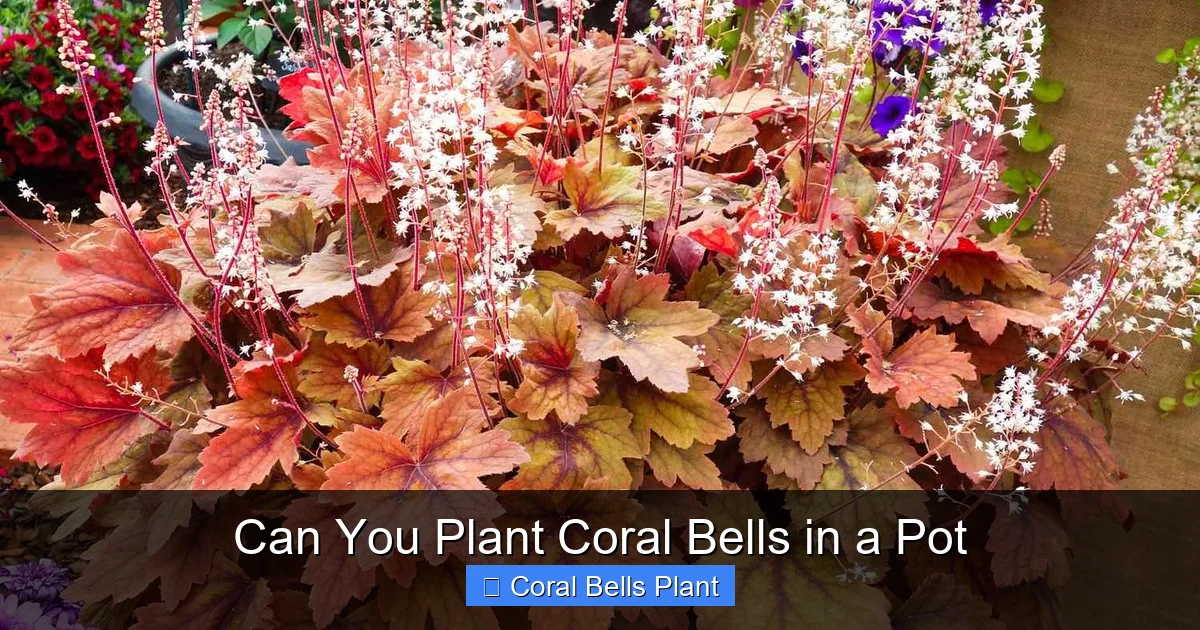
Visual guide about Can You Plant Coral Bells in a Pot
Image source: marthastewart.com
Material Choices and Their Trade-offs
Terra cotta pots are classic and porous, which promotes air exchange around the roots. However, they dry out quickly and can crack in freezing temperatures. Glazed ceramic pots retain moisture better and come in endless colors, but they are heavy and also susceptible to freeze damage. Lightweight resin or fiberglass containers are easy to move and often frost-proof, making them ideal for gardeners who rearrange their displays seasonally. Plastic nursery pots slipped into decorative cachepots offer maximum flexibility. You can lift the inner pot to check drainage or swap plants without disturbing the outer container.
Drainage Is Non-Negotiable
This is the single most critical factor. Coral bells hate wet feet. Crown rot and root rot set in quickly when soil stays soggy. Your pot must have multiple drainage holes at the bottom. If you fall in love with a beautiful container that lacks holes, drill them yourself using a masonry bit for ceramic or a standard bit for plastic and resin. Cover the holes with a piece of landscape fabric or a coffee filter to keep soil from washing out while allowing water to escape freely. Never use gravel or pot shards at the bottom. This outdated practice actually creates a perched water table that keeps roots wetter, not drier.
Creating the Perfect Potting Mix
Start with Quality Bagged Mix
Never use garden soil in containers. It compacts into a dense, airless mass that suffocates roots and harbors weeds and pathogens. Instead, choose a premium potting mix labeled for containers or outdoor use. Look for blends that contain peat moss or coconut coir for moisture retention, compost or aged bark for nutrients, and perlite or vermiculite for aeration. Avoid mixes with added water-holding crystals or synthetic fertilizers. You want a clean, consistent base that you can customize.
Amend for Superior Drainage
Even the best bagged mixes benefit from extra drainage material for coral bells. Mix in coarse perlite, pumice, or horticultural grit at a ratio of one part amendment to three parts potting mix. This creates air pockets that prevent compaction over time and ensures oxygen reaches the roots. If you garden in a humid climate or tend to overwater, increase the amendment to a fifty-fifty ratio. The mix should feel light and fluffy in your hand, not heavy and dense.
Add Organic Matter Sparingly
A handful of well-rotted compost or worm castings mixed into the lower third of the pot provides a slow-release nutrient source without risking fertilizer burn. Avoid fresh manure, green grass clippings, or unfinished compost. These materials continue to decompose in the pot, generating heat and consuming nitrogen that your plants need. If you make your own compost, screen it through half-inch hardware cloth to remove large chunks that could create air pockets or impede drainage.
Planting Your Coral Bells Correctly
Timing Your Planting
Spring is the ideal time to plant coral bells in containers. The soil is warming, nurseries have the best selection, and plants have a full growing season to establish before winter. Early fall works well too, especially in zones seven and warmer, giving roots six to eight weeks to settle before frost. Avoid planting in the heat of midsummer unless you can provide consistent shade and diligent watering during establishment. Winter planting is only feasible in frost-free climates.
The Crown Placement Rule
This is where many gardeners go wrong. The crown of a coral bells plant, the point where stems meet roots, must sit slightly above the soil line. Not at the soil line. Not below it. Slightly above. In a pot, this means filling the container with your prepared mix to about two inches below the rim, creating a shallow mound in the center, setting the plant on top, and backfilling around the sides. The crown should be visible, with the very top of the root ball exposed to air. Burying the crown traps moisture against the stems, inviting fungal diseases that can kill the plant within weeks.
Spacing in Mixed Containers
When combining coral bells with other plants, space them eight to twelve inches apart, center to center. This allows air circulation between plants and prevents the humid, stagnant conditions that favor powdery mildew. If you are planting a single specimen in a twelve inch pot, center it. For a fuller look in a larger container, plant three coral bells in a triangle pattern, each a different variety for a tapestry of color. Just remember that they will expand over time, so do not overcrowd initially.
Watering In and Settling
After planting, water thoroughly until water runs freely from the drainage holes. This settles the soil around the roots and eliminates large air pockets. You may notice the soil level drops after this first watering. Top it off with a bit more mix, keeping the crown exposed. Apply a thin layer of fine bark mulch or gravel around the plant, but pull it back from the crown by at least half an inch. Mulch helps retain moisture and prevents soil from splashing onto leaves during watering, which can spread disease.
Ongoing Care for Potted Coral Bells
Watering: The Goldilocks Balance
Container-grown coral bells need consistent moisture but never soggy soil. Check the pot daily during hot weather by inserting your finger two inches into the mix. If it feels dry at your fingertip, water deeply until it drains from the bottom. If it feels moist, wait. In spring and fall, you may water every two to three days. In summer heat, daily watering is often necessary. In winter, reduce to once every two weeks or whenever the top inch is dry during thaws. Morning watering is best so foliage dries before evening.
Fertilizing for Steady Growth
Because frequent watering leaches nutrients from potting mix, container plants need regular feeding. The easiest approach is to incorporate a balanced, slow-release granular fertilizer (such as 14-14-14 or 10-10-10) into the top inch of soil in early spring. This feeds steadily for three to four months. Supplement with a half-strength liquid fertilizer every three to four weeks during active growth if leaves look pale or growth seems slow. Stop fertilizing by late July so new growth hardens off before frost. Never fertilize dry soil. Water first, then apply fertilizer to moist mix.
Light Requirements by Variety
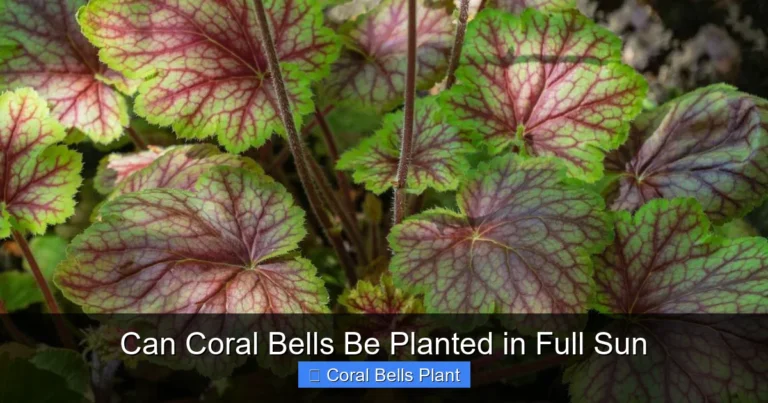
Most coral bells prefer part shade, defined as four to six hours of morning sun or dappled light all day. Dark-leaved varieties like ‘Palace Purple’ and ‘Obsidian’ tolerate more sun than light-colored ones. Chartreuse and yellow cultivars such as ‘Lime Rickey’ and ‘Citronelle’ scorch easily in afternoon sun and need protection. Silver and white-veined types like ‘Silver Scrolls’ develop their best color in bright shade. If your only spot is full sun, choose sun-tolerant series like the Dolce or Primo collections bred for heat and light tolerance. Rotate pots quarterly so all sides receive equal light, preventing lopsided growth.
Grooming and Deadheading
Coral bells are low-maintenance, but a little grooming keeps them looking their best. Remove any yellowed, damaged, or diseased leaves at the base as they appear. This improves air flow and prevents fungal issues. In late spring, tall, airy flower spikes emerge. You can leave them for pollinators and subtle charm, or snip them off at the base to direct energy into foliage production. After the first hard frost in fall, cut back all foliage to about two inches above the crown. This tidies the plant and removes overwintering sites for pests and diseases.
Repotting and Dividing
Every three to four years, your coral bells will need fresh soil and possibly a larger pot. Signs include reduced vigor, smaller leaves, water running straight through the pot without absorbing, or roots circling the drainage holes. Early spring is the best time to repot. Gently remove the plant, shake off old mix, and inspect roots. Trim any that are black, mushy, or tightly circling. If the clump has multiple crowns, you can divide it by pulling or cutting apart the rhizomes, ensuring each division has roots and at least one growing point. Replant divisions in fresh mix following the same crown-above-soil rule.
Overwintering Strategies
Understanding Hardiness in Pots
Coral bells are generally hardy in USDA zones four through nine when planted in the ground. However, roots in containers are exposed to colder temperatures than roots in the earth. The soil in a pot can freeze solid, killing roots that would survive insulated by the ground. As a rule of thumb, subtract one to two hardiness zones for container plants. A variety rated to zone five in the ground may only be reliable to zone six or seven in a pot. Know your zone and your plant’s rating.
Protection Methods for Cold Climates
If you garden in zone six or colder, you have several options. The simplest is to move pots into an unheated garage, shed, or cold frame once the plants go dormant in late fall. They need no light while dormant, but the temperature should stay between twenty and forty degrees Fahrenheit. Water sparingly, just enough to keep roots from desiccating. Alternatively, sink the pot into a vegetable garden bed or compost pile up to its rim, then mulch heavily with straw or shredded leaves. This mimics in-ground insulation. For zone seven and eight, grouping pots against a protected south-facing wall and wrapping them with bubble wrap or burlap often suffices.
Indoor Overwintering
Some gardeners bring coral bells indoors as houseplants for winter. This works if you have a cool, bright location like an unheated sunroom or a basement with grow lights. Keep temperatures around fifty to sixty degrees. Water very lightly, only when the top two inches are dry. Do not fertilize. Watch for spider mites and aphids, which thrive in dry indoor air. In spring, harden off gradually by placing pots outside for increasing periods over two weeks before leaving them out permanently.
Best Coral Bells Varieties for Containers
Top Picks for Foliage Color
‘Caramel’ offers large, glowing apricot leaves that shift to peach and gold through the season. It handles more sun and heat than many varieties. ‘Obsidian’ delivers the deepest, glossiest near-black foliage available, holding color even in full sun. ‘Lime Rickey’ brings electric chartreuse ruffled leaves that light up shady corners. ‘Berry Smoothie’ emerges rose-pink in spring, maturing to burgundy with a metallic sheen. ‘Forever Purple’ lives up to its name with intensely saturated purple leaves that do not fade. ‘Delta Dawn’ features gold leaves with striking red centers that follow the veins.
Best for Heat and Humidity
Gardeners in the Southeast and Midwest should look for varieties bred from Heuchera villosa hybrids. These have larger, hairier leaves that resist fungal diseases in humid conditions. ‘Citronelle’ is a villosa hybrid with luminous yellow-green foliage that takes heat in stride. ‘Mocha’ offers rich coffee-brown leaves with a silvery overlay. ‘Brownies’ has huge, glossy chocolate leaves with pink undersides. The Primo series from Proven Winners includes ‘Black Pearl,’ ‘Mahogany,’ and ‘Wild Rose,’ all selected for vigor and disease resistance in tough climates.
Compact Varieties for Small Pots
If you are working with eight to ten inch containers, choose naturally dwarf cultivars. ‘Little Cutie’ series plants like ‘Blondie,’ ‘Frost,’ and ‘Sugar Plum’ stay under eight inches tall and wide. ‘Petite Pearl Fairy’ forms a tiny mound of silver-veined purple leaves. ‘Fairy Dust’ offers pink-frosted green foliage on a compact frame. These miniatures are perfect for fairy gardens, trough plantings, or windowsill collections.
Designing Stunning Container Combinations
Thriller, Filler, Spiller Formula
Coral bells shine as the filler element. For a shade combination, use a Japanese painted fern as the thriller, ‘Silver Scrolls’ heuchera as the filler, and variegated creeping jenny as the spiller. For part sun, try a dwarf ornamental grass like ‘Little Bunny’ fountain grass as thriller, ‘Caramel’ heuchera as filler, and ‘Snowstorm’ bacopa as spiller. The key is contrasting textures. The ruffled, matte leaves of coral bells look fabulous next to glossy, strappy, or feathery foliage.
Monochromatic Color Schemes
Create sophisticated pots by sticking to one color family. A purple-themed container could feature ‘Palace Purple’ heuchera, ‘Blackie’ sweet potato vine, purple trailing petunias, and a deep purple fountain grass. A silver and white moon garden might combine ‘Silver Scrolls’ heuchera, ‘Silver Falls’ dichondra, white calibrachoa, and dusty miller. A warm sunset pot could blend ‘Georgia Peach’ heuchera, ‘Sweet Caroline Bronze’ sweet potato vine, orange million bells, and copper carex grass.
Seasonal Transitions
Because coral bells are perennial, you can change the annual companions around them through the seasons. In spring, underplant with pansies, violas, and early bulbs like species tulips. Summer brings impatiens, begonias, or coleus for shade, or petunias, verbena, and calibrachoa for sun. Fall transitions to ornamental kale, mums, and pansies again. Winter in mild climates allows cyclamen, hellebores, and evergreen boughs. The heuchera remains the constant anchor, providing structure and color while the supporting cast rotates.
Troubleshooting Common Problems
Crown Rot and Root Rot
These fungal diseases are the number one killer of potted coral bells. Symptoms include wilting despite moist soil, blackened stems at the soil line, and a foul smell from the pot. Prevention is everything. Ensure excellent drainage, keep the crown above soil, water at the base not over the foliage, and never let pots sit in saucers of water. If caught very early, you can sometimes save a plant by unpotting, washing roots, cutting away all rotted tissue, dusting with sulfur fungicide, and repotting in fresh, sterile mix. But success rates are low. It is usually better to discard the plant and soil, sterilize the pot with a ten percent bleach solution, and start fresh.
Powdery Mildew
This appears as a white, powdery coating on leaves, usually in late summer when days are warm and nights are cool with high humidity. It is unsightly but rarely fatal. Improve air circulation by spacing plants adequately and thinning crowded growth. Water at soil level, not overhead. Remove severely affected leaves. Spray with a homemade solution of one tablespoon baking soda plus one teaspoon horticultural oil per gallon of water, applied weekly. Neem oil and potassium bicarbonate products also work. Choose mildew-resistant varieties like those with H. villosa parentage if this is a recurring issue.
Leaf Scorch and Sunburn
Brown, crispy leaf edges or bleached patches indicate too much sun, especially combined with dry soil. Move the pot to a shadier location immediately. Water deeply to rehydrate. Trim off severely damaged leaves; they will not recover. New growth will adapt to the light conditions. If you must keep the plant in a sunny spot, increase watering frequency, add a thicker mulch layer, and consider a shade cloth during the hottest afternoon hours.
Pests: Vine Weevils, Aphids, and Slugs
Vine weevil adults notch leaf edges at night, but their larvae are the real threat, eating roots underground. If a plant suddenly wilts and pulls out of the pot with few roots, suspect vine weevils. Apply beneficial nematodes (Steinernema kraussei) to the soil in spring and fall. Aphids cluster on new growth and flower stems. Blast them off with a strong jet of water or spray insecticidal soap. Slugs and snails love the tender leaves, especially in damp shade. Use iron phosphate bait, copper tape around the pot rim, or hand-pick at night with a flashlight.
Nutrient Deficiencies
Yellowing leaves with green veins (interveinal chlorosis) usually indicate iron deficiency, common in alkaline potting mixes or when watering with hard water. Apply chelated iron as a foliar spray or soil drench. General yellowing of older leaves suggests nitrogen shortage. Apply a balanced liquid fertilizer. Purple or reddish discoloration on older leaves can signal phosphorus deficiency, often caused by cold, wet soil. Warm the roots and feed with a bloom booster formula higher in phosphorus.
Frequently Asked Questions About Potted Coral Bells
Can I grow coral bells indoors year-round?
Coral bells are not ideal permanent houseplants. They need a winter dormancy period triggered by cool temperatures and short days to thrive long-term. Without dormancy, they become leggy, lose color, and decline after a year or two. If you must grow them indoors, provide the brightest possible light, cool temperatures (fifty to sixty degrees), and a distinct rest period in winter with minimal water and no fertilizer.
How often should I repot my coral bells?
Plan to repot every three to four years in early spring. Signs it is time include roots circling the drainage holes, water running through instantly without absorbing, reduced leaf size, or the plant pushing itself up out of the pot as rhizomes accumulate. When repotting, you can move up one pot size or divide the clump and keep the same size container.
Do coral bells bloom in containers?
Yes, most varieties send up delicate flower spikes in late spring to early summer. The flowers are small, bell-shaped, and range from white to pink to red. They attract hummingbirds and pollinators. However, the blooms are not the main show. Many gardeners remove the flower stems to keep the plant’s energy focused on foliage production. If you leave them, deadhead after blooming to prevent self-seeding, as seedlings rarely come true to the parent variety.
Can I plant coral bells with other perennials in a large pot?
Absolutely. Large containers (eighteen inches or wider) can host a mini perennial garden. Good companions include hostas, ferns, foamflower (Tiarella), lungwort (Pulmonaria), Japanese forest grass (Hakonechloa), and sedges (Carex). Choose plants with similar light and moisture needs. Avoid aggressive spreaders like mint or lamium that will overwhelm the coral bells. Remember that all perennials in a pot will need dividing and fresh soil every few years.
Why are my coral bells leaves turning brown and crispy?
This is usually a watering issue. Either the soil dried out completely (underwatering) or the roots are rotting from too much water and cannot take up moisture (overwatering). Check the soil. If it is bone dry, water thoroughly and increase frequency. If it is soggy, improve drainage, reduce watering, and consider repotting into fresh mix. Sun scorch and fertilizer burn can also cause crispy edges.
Are coral bells deer and rabbit resistant in pots?
Generally yes. The fuzzy, somewhat bitter leaves are unpalatable to most deer and rabbits. However, hungry animals in late winter may sample anything. Elevating pots on a deck or balcony adds protection. If browsing is a problem, apply a repellent spray labeled for ornamentals, reapplying after rain.
Conclusion
Growing coral bells in containers is one of the most rewarding ways to enjoy these remarkable foliage plants. With the right pot, a well-draining mix, proper planting depth, and consistent care, you can cultivate stunning specimens that return year after year. The flexibility to move them for optimal light, protect them from extreme weather, and redesign your combinations each season makes container growing ideal for both novice and experienced gardeners.
Start with a single twelve inch pot and a variety that catches your eye. ‘Caramel’ for warmth, ‘Obsidian’ for drama, ‘Lime Rickey’ for brightness. Follow the crown-above-soil rule religiously. Water when the top inch is dry. Feed lightly in spring. Groom occasionally. Protect the pot in winter if you garden where the ground freezes. Before you know it, you will be eyeing that empty corner of the patio and planning your next heuchera combination. The world of coral bells is vast, colorful, and perfectly suited to life in a pot. Your container garden will thank you.
Frequently Asked Questions
Can coral bells survive winter in pots?
Coral bells can survive winter in pots if you provide protection. In zones 7 and warmer, they often overwinter fine with minimal care. In zones 4-6, move pots to an unheated garage, sink them into the ground, or wrap containers with insulation. The key is preventing the root ball from freezing solid and protecting against freeze-thaw cycles.
Should I cut back coral bells in the fall?
Yes, after the first hard frost, cut back all foliage to about 2 inches above the crown. This removes diseased leaves, eliminates pest habitat, and tidies the plant for winter. In mild climates where foliage stays evergreen, you can wait until late winter to remove only damaged leaves before new growth emerges.
Why are my coral bells dying in the pot?
The most common causes are crown rot from planting too deep or overwatering, root rot from poor drainage, vine weevil larvae eating roots, or winter kill in unprotected pots. Check that the crown sits above soil level, ensure the pot has multiple drainage holes, and inspect roots for white, C-shaped grubs if the plant wilts suddenly.
Can I grow coral bells in full sun in a container?
Some varieties tolerate full sun, especially those with H. villosa parentage like ‘Citronelle,’ ‘Caramel,’ and the Primo series. However, most coral bells prefer morning sun with afternoon shade. Light-colored varieties (chartreuse, yellow, silver) scorch easily in hot afternoon sun. Dark-leaved types handle more sun but still need consistent moisture.
How do I fertilize coral bells in pots?
Mix a balanced slow-release fertilizer (14-14-14 or similar) into the top inch of soil in early spring. This feeds for 3-4 months. Optionally, supplement with half-strength liquid fertilizer every 3-4 weeks during active growth. Stop fertilizing by late July so growth hardens before frost. Never fertilize dry soil.
Can I divide coral bells growing in a container?
Yes, divide every 3-4 years in early spring when repotting. Remove the plant, shake off old soil, and gently pull or cut the rhizomes apart. Each division needs roots and at least one growing point (crown). Replant divisions in fresh potting mix with crowns slightly above soil level. Water well and keep shaded for a week.