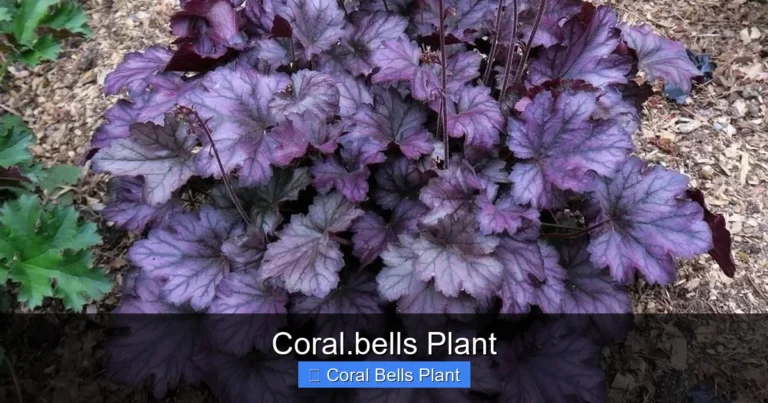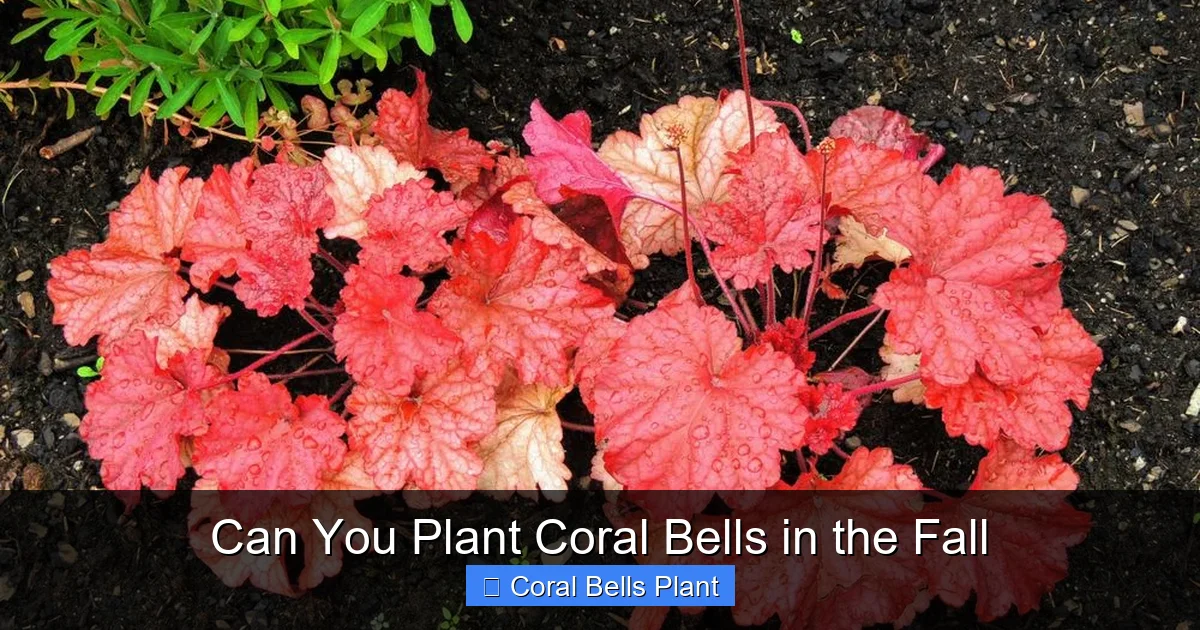
Can You Plant Coral Bells in the Fall
Yes, you can plant coral bells in the fall and it’s actually one of the best times to do so. The cool temperatures and consistent moisture help roots establish before winter, giving plants a strong start for spring growth.
If you have ever wandered through a garden center in October and spotted those gorgeous coral bells with their ruffled leaves in shades of purple, caramel, lime, and near-black, you might have wondered: can you plant coral bells in the fall? The short answer is yes. The longer answer is that fall might just be the absolute best time to get these shade-loving perennials in the ground.
Many gardeners instinctively reach for their trowels in spring. Spring planting feels natural. The world is waking up. Nurseries are bursting with fresh stock. But here is a little secret that experienced gardeners know: fall planting often beats spring planting for perennials like coral bells. The soil is still warm from summer. The air is cool. Rain tends to be more reliable. And the plants can focus all their energy on root growth instead of trying to push out flowers and foliage at the same time.
Coral bells, known botanically as Heuchera, are native to North America. They grow in woodlands, on rocky slopes, and along creek banks. They are tough, adaptable, and incredibly diverse thanks to modern breeding. But they have one non-negotiable requirement: good drainage. If you can give them that, plus the right timing, you will be rewarded with years of colorful foliage and delicate flower spikes that hummingbirds adore.
Key Takeaways
- Fall is ideal: Cool weather and warm soil create perfect conditions for root establishment before winter dormancy.
- Timing matters: Plant at least 6 weeks before your first hard frost to give roots time to anchor.
- Soil preparation is key: Amend with compost for drainage and nutrients since coral bells hate wet feet.
- Mulch heavily: Apply 2-3 inches of mulch after planting to protect roots from freeze-thaw cycles.
- Water consistently: Keep soil evenly moist until the ground freezes to support root development.
- Choose healthy plants: Select container-grown specimens with vigorous foliage and no signs of disease.
- Expect spring rewards: Fall-planted coral bells often outperform spring plantings with earlier blooms and fuller growth.
Quick Answers to Common Questions
How late in fall can you plant coral bells?
Plant at least 6 weeks before your average first hard frost date. In most regions, this means planting by mid-October to early November. Later planting is possible but reduces root establishment time.
Do coral bells need to be cut back in fall?
No, leave the foliage intact through winter. The leaves protect the crown and provide winter interest. Remove dead leaves in early spring when new growth appears.
Will fall-planted coral bells bloom the first spring?
Yes, fall-planted coral bells typically bloom on schedule the following spring. They often bloom more heavily than spring-planted ones because they have a better established root system.
Can you plant coral bells in fall in zone 4?
Yes, but plant early (early to mid-September) and mulch heavily after the ground freezes. Choose cold-hardy varieties like ‘Palace Purple’ or the Northern Exposure series.
Should you fertilize coral bells when planting in fall?
No, avoid fertilizing at fall planting time. Fertilizer encourages tender new growth that will be damaged by frost. The compost amended into the soil provides sufficient nutrients for root establishment.
📑 Table of Contents
- Why Fall Planting Works So Well for Coral Bells
- When Exactly Should You Plant Coral Bells in Fall
- Preparing the Perfect Planting Site
- Step-by-Step Fall Planting Guide
- Caring for Fall-Planted Coral Bells Through Winter
- Common Mistakes to Avoid
- Spring Care for Fall-Planted Coral Bells
- Design Ideas for Fall-Planted Coral Bells
- Troubleshooting Common Problems
- Best Coral Bells Varieties for Fall Planting
- Conclusion
Why Fall Planting Works So Well for Coral Bells
The Root Growth Advantage
When you plant in spring, the plant has a split personality. It wants to grow roots. It also wants to grow leaves. It wants to flower. It wants to do everything at once. This divides its energy. In fall, the story changes. The shortening days and cooling temperatures signal the plant to slow down top growth. But the soil stays warm well into autumn. This means the roots keep growing even as the leaves take a break.
Root growth continues until soil temperatures drop below about 40 degrees Fahrenheit. In many regions, that gives you a solid 6 to 8 weeks of pure root establishment after planting. By the time spring arrives, your fall-planted coral bells already have a robust root system ready to support vigorous top growth. They wake up ready to run.
Moisture Consistency
Spring weather can be fickle. One week brings gentle rains. The next brings a heat wave that bakes the soil dry. Fall tends to offer more consistent moisture. Cooler temperatures mean less evaporation. Rainfall is often steadier. This consistent moisture is exactly what newly planted coral bells need. They have shallow, fibrous root systems that dry out quickly. Fall weather does a lot of the watering work for you.
Less Transplant Shock
Transplant shock happens when a plant loses more water through its leaves than its damaged roots can replace. In spring, hot sun and wind pull water from leaves aggressively. In fall, the lower sun angle and cooler air reduce transpiration dramatically. The plant loses less water. The roots have an easier time keeping up. This means less wilting, less stress, and faster recovery.
Fewer Pest and Disease Pressures
Many garden pests are winding down their life cycles in fall. Japanese beetles are gone. Aphid populations crash. Fungal diseases that thrive in hot, humid summer weather lose their momentum. Your new plants face fewer enemies during their vulnerable establishment period. They can put energy into roots instead of fighting off attackers.
When Exactly Should You Plant Coral Bells in Fall
The Six-Week Rule
The golden rule for fall planting of any perennial is simple: get them in the ground at least six weeks before your average first hard frost date. A hard frost means temperatures dropping to 28 degrees Fahrenheit or lower for several hours. This is the point where soil temperature drops enough to stop root growth.
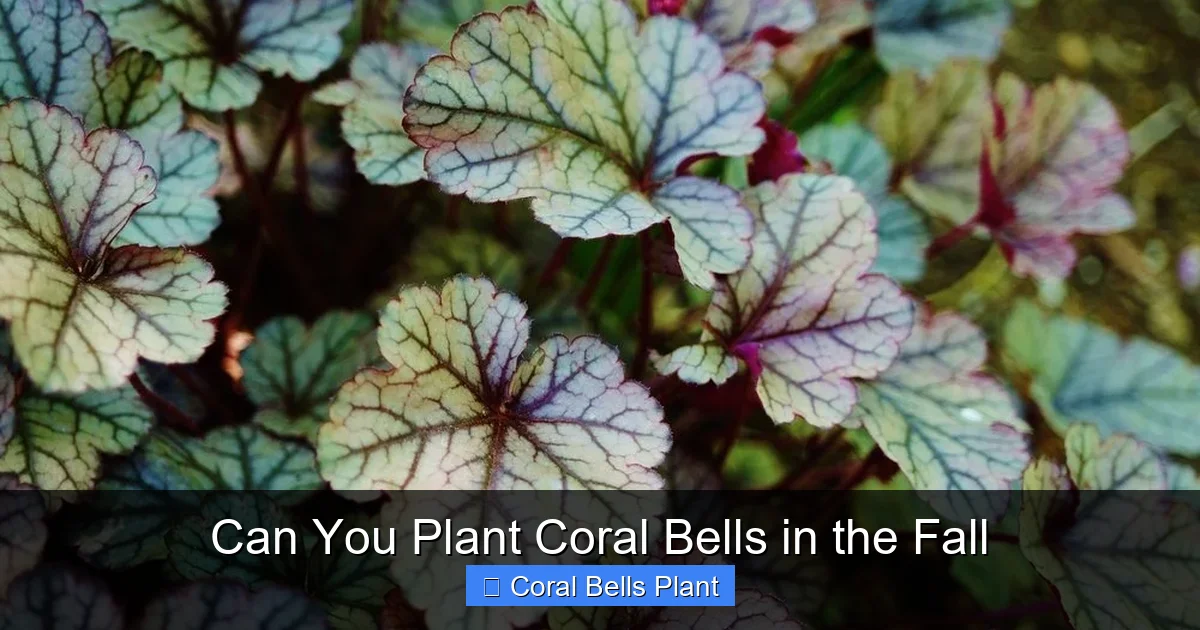
Visual guide about Can You Plant Coral Bells in the Fall
Image source: gardenloversclub.com
If you do not know your first frost date, check with your local extension office or use an online frost date calculator. Count back six weeks. That is your planting deadline. In zone 5, this might be early October. In zone 7, you might plant into November. In zone 8 or 9, you can often plant all winter long.
Earlier Is Better Than Later
If you have a choice between planting in early September or late October, choose September. Every extra week of root growth before winter pays dividends in spring. Plants installed in early fall often show noticeably better performance their first year compared to those planted at the last minute.
Watch the Weather Window
Ideally, pick a stretch of calm, overcast days for planting. Avoid planting right before a predicted heat wave or cold snap. If a heat wave hits after planting, you will need to water aggressively. If an early freeze hits, the plants may not have time to settle in. A gentle week with highs in the 60s or low 70s and lows in the 40s or 50s is perfect.
What If You Miss the Window
If you find yourself holding coral bells in pots after the six-week window has passed, you have options. You can still plant them if the ground is not frozen. They may not grow much root before winter, but they will be in place for spring. Alternatively, you can heel them in. Dig a trench in a protected spot, lay the pots on their sides, and cover the root balls with soil or mulch. Water well. They will survive winter this way and can be planted properly in early spring.
Preparing the Perfect Planting Site
Light Requirements
Coral bells are famously shade-tolerant, but “shade” covers a wide range. Most modern varieties perform best in part shade. This means morning sun and afternoon shade, or dappled light throughout the day. Dark-leaved varieties like ‘Palace Purple’ or ‘Obsidian’ can handle more sun, especially in cooler climates. Light-leaved varieties like ‘Lime Rickey’ or ‘Citronelle’ need more protection from hot afternoon sun to prevent scorching.
In the deep south, almost all coral bells appreciate full shade. In the Pacific Northwest or coastal regions, they can take nearly full sun. Know your climate. When in doubt, err toward more shade. You can always move them later if they seem stretched or dull.
Soil Drainage Is Non-Negotiable
This is the single most important factor for coral bells success. They will not tolerate wet feet. Their crowns rot quickly in soggy soil. If your soil is heavy clay, you must amend it. If water pools on the surface after rain, do not plant there until you fix the drainage.
Test your drainage by digging a hole 12 inches deep and 12 inches wide. Fill it with water. Let it drain. Fill it again. If the second fill takes more than 4 hours to drain, you have a drainage problem. Solutions include raised beds, mounding the planting area, or amending heavily with coarse organic matter like pine bark fines, composted leaves, or coarse sand.
Soil Preparation Steps
Start by removing any grass or weeds from the planting area. Loosen the soil to a depth of 12 to 18 inches. This is deeper than the root ball, but it encourages roots to penetrate downward. Mix in 2 to 3 inches of compost or well-rotted leaf mold. This improves both drainage and moisture retention. It also adds slow-release nutrients.
If your soil is very acidic (below 5.5), add some garden lime. If it is very alkaline (above 7.5), add elemental sulfur or peat moss. Coral bells prefer slightly acidic to neutral soil, around 6.0 to 7.0. A simple soil test from your extension office takes the guesswork out of this.
Spacing Considerations
Check the plant tag for mature width. Most coral bells spread 12 to 24 inches. Space them accordingly. Planting too close creates competition for water and nutrients. It also reduces air circulation, which invites foliar diseases. If you are planting a drift for ground cover effect, space at the closer end of the range. For specimen plants, give them full elbow room.
Step-by-Step Fall Planting Guide
Gather Your Tools and Materials
You will need a garden spade or trowel, a garden fork for loosening soil, a bucket or wheelbarrow for soil amendments, compost, mulch (shredded bark, pine straw, or leaf mold), a watering can or hose with a gentle nozzle, and gloves. Having everything ready makes the process smooth and fast, which reduces root exposure to air.
Prepare the Plant
Water the coral bells thoroughly in its pot an hour before planting. This hydrates the plant and makes the root ball easier to remove without crumbling. Gently squeeze the sides of the pot to loosen the root ball. Tip the pot on its side and slide the plant out. Never pull the plant by its foliage.
Examine the roots. If they are circling the bottom or sides of the pot, gently tease them apart with your fingers. If they are severely root-bound, make three or four vertical cuts 1/2 inch deep down the sides of the root ball with a clean knife. This sounds harsh but it stimulates new outward growth. Loosen the bottom roots so they point downward.
Dig the Hole
Dig a hole twice as wide as the root ball but no deeper. The top of the root ball should sit level with or slightly above the surrounding soil. Planting too deep is a common mistake that leads to crown rot. The crown, where stems meet roots, must stay at soil level.
Use your garden fork to loosen the bottom and sides of the hole. This prevents the “bathtub effect” where water sits in a smooth-walled clay hole. Rough sides let roots penetrate into the surrounding soil.
Position and Backfill
Set the plant in the hole. Step back and check the level. Adjust by adding or removing soil from the bottom. Once the height is right, begin backfilling with your amended soil. Fill halfway, then water gently to settle the soil and eliminate air pockets. Finish backfilling. Firm the soil lightly with your hands. Do not stomp with your feet. This compacts the soil and reduces oxygen to roots.
Water Thoroughly
Give the newly planted coral bells a deep, slow watering. You want the water to penetrate the full depth of the root ball and the surrounding soil. A gentle stream for several minutes works better than a quick blast. This initial watering is critical for establishing good soil-to-root contact.
Apply Mulch
Spread 2 to 3 inches of mulch around the plant in a donut shape. Keep the mulch 2 to 3 inches away from the crown. Piling mulch against the crown traps moisture and causes rot. Mulch insulates the soil, moderates temperature swings, conserves moisture, and suppresses weeds. In fall, it also protects against frost heave.
Label Your Plants
Place a durable plant label next to each coral bells. Include the variety name and planting date. Fall-planted perennials can be hard to locate in early spring before they leaf out. Labels prevent accidental damage during spring cleanup. They also help you track which varieties perform best in your garden.
Caring for Fall-Planted Coral Bells Through Winter
Watering Schedule
After the initial planting watering, check soil moisture every few days. Stick your finger 2 inches into the soil near the root ball. If it feels dry, water deeply. Continue this until the ground freezes solid. In mild climates where the ground does not freeze, water during dry spells all winter. The goal is consistently moist but never soggy soil.
Do not rely on rainfall alone unless you get a steady soaking rain of an inch or more. Light rains often wet only the mulch layer. Always check the actual soil.
Mulch Maintenance
Check your mulch after heavy rains or wind storms. Replenish any thin spots. After the ground freezes, you can add an extra inch of mulch for winter protection. This is especially important in zones 4 and 5 where freeze-thaw cycles can push plants out of the ground (frost heave). If you see a plant heaved up, gently press it back down and add more mulch around it.
Foliage Care
Leave the foliage on the plant through winter. The leaves protect the crown and provide some insulation. They also look attractive in the winter garden, especially varieties with persistent color. Do not cut them back in fall. Wait until early spring when you see new growth emerging from the center.
Protection from Critters
In areas with high deer or rabbit pressure, consider temporary protection. Coral bells are not usually a first choice for browsers, but hungry animals will eat almost anything in winter. A cylinder of hardware cloth or chicken wire around the plant, or a spray repellent applied according to label directions, can prevent damage.
Container Considerations
If you planted coral bells in containers for fall display, they need extra protection. Containers freeze faster and deeper than ground soil. Move pots to an unheated garage, shed, or protected corner against the house. Cluster them together. Mulch over the tops. Water monthly if the soil is not frozen. In spring, move them back out and plant in the ground or repot.
Common Mistakes to Avoid
Planting Too Deep
This is the number one killer of coral bells. The crown must remain at soil level. If you bury it, even by half an inch, you create a moist, dark environment where crown rot fungi thrive. The plant may look fine for weeks, then suddenly collapse. Always err on the side of planting slightly high. You can add a thin layer of mulch around the base, but never over the crown.
Skipping Soil Amendment
Planting into unamended clay or sand sets the plant up for struggle. Clay holds too much water. Sand holds too little. Both lack organic matter. Take the time to amend the planting area broadly, not just the hole. This encourages roots to explore beyond the original root ball.
Overwatering
Consistent moisture does not mean constantly wet. Soggy soil excludes oxygen. Roots need oxygen. If your soil feels wet at 2 inches deep, do not water. Wait until it feels just barely moist. This is especially important in heavy soils and during cool, cloudy periods when evaporation is slow.
Fertilizing at Planting
Do not add fertilizer to the planting hole. Do not use quick-release fertilizers in fall. You want the plant to focus on roots, not tender new growth that will be killed by frost. The compost you mixed in provides plenty of gentle nutrition. Wait until spring to apply a balanced slow-release fertilizer if needed.
Ignoring Variety Needs
Not all coral bells are created equal. Some are bred from Heuchera villosa, which handles heat and humidity better. Some come from Heuchera micrantha, which prefers cooler conditions. Some are villosa hybrids with larger, more rugged leaves. Read the tag. Match the variety to your conditions. A variety that thrives in Seattle may melt in Atlanta.
Planting in Poor Drainage
We cannot say this enough. If the site stays wet, coral bells will die. No amount of mulch or careful watering fixes bad drainage. If you have a wet spot, choose a different plant for that location. Try Japanese iris, cardinal flower, or swamp milkweed instead. Save the coral bells for a well-drained spot.
Spring Care for Fall-Planted Coral Bells
The Big Reveal
As spring temperatures rise, you will see new leaves emerging from the center of the plant. This is the moment you have been waiting for. Gently remove any winter mulch that has matted down over the crown. Pull away any dead or damaged leaves from last year. Be careful not to damage the tender new growth.
Spring Fertilizing
Once you see active growth, apply a balanced slow-release fertilizer. A 10-10-10 or 14-14-14 formula works well. Scatter it around the drip line (the outer edge of the foliage) and scratch it lightly into the soil surface. Water well. Alternatively, top-dress with an inch of compost. This feeds the soil and the plant simultaneously.
Division Timeline
Fall-planted coral bells do not need division for several years. They typically benefit from division every 3 to 4 years when the center becomes woody and flowering declines. The best time to divide is early spring or early fall. If you planted in fall, wait at least two full growing seasons before considering division.
Deadheading and Grooming
Coral bells produce delicate flower spikes in late spring to early summer. Hummingbirds love them. After flowering, you can cut the spent spikes back to the base to tidy the plant. This sometimes encourages a light rebloom. Remove any tattered leaves throughout the season to keep the plant looking fresh.
Monitoring for Issues
Watch for signs of stress in the first spring. Yellowing leaves can indicate overwatering, underwatering, or nutrient deficiency. Brown crispy edges usually mean too much sun or not enough water. Holes in leaves might be slugs or beetles. Crown rot shows as sudden wilting with blackened stems at the soil line. Catch problems early for the best outcome.
Design Ideas for Fall-Planted Coral Bells
Shade Garden Combinations
Coral bells shine in shade gardens. Pair dark purple varieties like ‘Black Pearl’ or ‘Forever Purple’ with golden Japanese forest grass (Hakonechloa ‘Aureola’) for dramatic contrast. Plant lime-green ‘Electra’ or ‘Lime Marmalade’ alongside blue hostas and white astilbe for a cool, sophisticated palette. The foliage colors hold all season, unlike flowers that come and go.
Woodland Edge Plantings
Since coral bells are native to woodland edges, they naturalize beautifully under deciduous trees. Plant them in drifts of 5 to 7 plants of the same variety for impact. Mix in spring bulbs like daffodils or snowdrops. The bulbs bloom before the coral bells fully leaf out. By the time bulb foliage fades, the coral bells cover it up.
Container Gardens
Coral bells are stellar container plants. Their mounding habit and colorful foliage provide structure all season. Use them as the “filler” in thriller-filler-spiller combinations. Pair with a tall fern or grass as the thriller, and a trailing plant like creeping jenny or ivy as the spiller. Choose a pot with drainage holes and use high-quality potting mix, not garden soil.
Rock Garden and Slope Plantings
The excellent drainage of rock gardens and slopes suits coral bells perfectly. Tuck them between rocks or along the edge of a retaining wall. Their evergreen or semi-evergreen foliage provides winter interest when many rock garden plants go dormant. Varieties with ruffled leaves like ‘Caramel’ or ‘Peach Flambe’ catch the light beautifully in these settings.
Border Edging
Use coral bells to edge a shady border or pathway. Their neat mounds create a clean line. Choose a single variety for a formal look, or mix 3 to 5 complementary colors for a tapestry effect. Space them so they will just touch at maturity. This suppresses weeds and creates a living mulch.
Troubleshooting Common Problems
Frost Heave
If you notice your fall-planted coral bells pushing up out of the ground in late winter, do not panic. This is frost heave, caused by repeated freezing and thawing of the soil. Gently press the plant back down with your foot or hand. Add more mulch around it. The roots will re-establish contact with the soil as it thaws.
Winter Burn
In exposed locations, winter wind and sun can dry out the foliage, causing brown, crispy edges. This is winter burn. The roots are frozen and cannot replace lost moisture. An anti-desiccant spray applied in late fall can help. So can a burlap screen on the windward side. Usually, the plant recovers in spring with new growth.
Crown Rot
If the plant wilts suddenly in spring and the stems are black and mushy at the soil line, it is crown rot. This is usually caused by planting too deep or poor drainage. There is no cure. Remove the plant and dispose of it (do not compost). Improve drainage before replanting. Consider a raised bed for the replacement.
Slug and Snail Damage
Slugs love the tender new leaves of coral bells in spring. You will see irregular holes with slime trails. Use iron phosphate slug bait (safe for pets and wildlife), beer traps, or copper tape around pots. Diatomaceous earth works when dry. Encourage natural predators like toads and ground beetles by providing habitat.
Sun Scorch
If leaves develop bleached, crispy patches in summer, the plant is getting too much sun. This is common with light-colored varieties in hot climates. You can move the plant in early fall or early spring to a shadier spot. Or provide a temporary shade cloth during the hottest weeks. Morning sun is fine. Afternoon sun is the problem.
Best Coral Bells Varieties for Fall Planting
Heat and Humidity Tolerant
If you garden in the Southeast or Midwest, look for varieties with Heuchera villosa parentage. ‘Caramel’ (apricot to amber leaves), ‘Citronelle’ (electric lime), ‘Mocha’ (deep chocolate), and ‘Brownies’ (large ruffled bronze leaves) handle heat and humidity better than most. The Primo series from Proven Winners is also bred for vigor in tough conditions.
Cold Climate Champions
For zones 3 and 4, choose varieties with Heuchera sanguinea or micrantha parentage. ‘Palace Purple’ (the classic metallic purple), ‘Plum Pudding’ (shiny plum leaves), and ‘Purple Palace’ are time-tested cold survivors. The Northern Exposure series is specifically bred for extreme cold hardiness.
Sun Tolerant Selections
If you have a spot with 4 to 6 hours of sun, try ‘Obsidian’ (jet black, holds color in sun), ‘Midnight Rose’ (black with pink spots), ‘Georgia Peach’ (peach with silver overlay), or ‘Southern Comfort’ (cinnamon to amber). These have thicker leaves that resist scorching. Still, they need adequate moisture.
Container Superstars
Compact varieties with dense habits work best in pots. ‘Delta Dawn’ (gold with red centers), ‘Fire Alarm’ (bright red), ‘Cherry Cola’ (red-brown), and ‘Appletini’ (chartreuse with red veins) stay neat and colorful all season. Their smaller root systems also handle container life better.
Cut Flower Foliage
Coral bells leaves last remarkably long in floral arrangements. Varieties with sturdy stems and striking colors like ‘Blackout’ (near black), ‘Electra’ (gold with red veins), ‘Spellbound’ (silver with purple edges), and ‘Berry Smoothie’ (rose pink) are favorites of floral designers. Plant a few extra for cutting.
Conclusion
So, can you plant coral bells in the fall? Absolutely. Not only can you, but you probably should. Fall planting gives these wonderful perennials a head start that pays off in bigger, healthier, more colorful plants come spring. The keys to success are simple: choose healthy plants, prepare the soil well, plant at the right depth, water consistently until freeze-up, and mulch for winter protection.
Whether you are adding a single specimen to a shade container or planting a sweeping drift along a woodland path, coral bells planted in autumn will reward you with years of low-maintenance beauty. Their incredible range of foliage colors means there is a variety for every design scheme. Their toughness means they will keep coming back. And their appeal to hummingbirds and pollinators means your garden will buzz with life.
Next time you see those tempting pots of coral bells at the nursery in September or October, do not hesitate. Bring them home. Get them in the ground. Your spring garden will thank you.
Frequently Asked Questions
Can you plant coral bells in the fall in containers?
Yes, coral bells grow well in fall containers. Use a high-quality potting mix with good drainage. Choose a pot with drainage holes. Protect containers over winter by moving them to an unheated garage or clustering them against a protected wall with mulch over the tops.
What is the best mulch for fall-planted coral bells?
Shredded bark, pine straw, or shredded leaves work well. Apply 2-3 inches in a donut shape around the plant, keeping mulch away from the crown. Avoid large wood chips that can trap too much moisture against the stems.
How often should you water coral bells after fall planting?
Water deeply after planting, then check soil moisture every 3-4 days. Water when the top 2 inches of soil feel dry. Continue until the ground freezes. In mild climates, water during winter dry spells.
Do deer eat coral bells planted in fall?
Coral bells are considered deer-resistant but not deer-proof. In areas with high deer pressure, new plantings may be sampled. Use repellent sprays or temporary fencing for the first season until plants are established.
Can you divide coral bells in the fall?
Early fall is a good time to divide established coral bells (3+ years old). Divide at least 6 weeks before frost. Replant divisions immediately at the same depth. Water well and mulch. Spring division also works well.
Why are my fall-planted coral bells heaving out of the ground?
Frost heave occurs when repeated freeze-thaw cycles push shallow-rooted plants upward. Gently press plants back into place during a thaw. Add more mulch around the base. This is common in the first winter after fall planting.