When to Plant Coral Bells
The ideal time to plant coral bells is early spring or early fall when temperatures are mild and rainfall is consistent. These hardy perennials establish strong root systems during these windows, rewarding you with stunning foliage color for years to come.
If you have ever wandered through a shade garden and spotted those ruffled leaves in shades of purple, caramel, lime, or near-black, you have met coral bells. These charming perennials, botanically known as Heuchera, have become garden superstars for good reason. They offer year-round foliage interest, delicate bell-shaped flowers that attract hummingbirds, and a toughness that belies their delicate appearance. But like any garden plant, timing makes all the difference between a thriving specimen and a struggling one.
Knowing when to plant coral bells is the first step toward success. Get the timing right, and these plants will settle in quickly, developing the strong root systems they need to handle whatever weather comes their way. Get it wrong, and you might watch your new investment wither in summer heat or heave out of frozen ground in winter. The good news? The planting window is generous if you understand the principles behind it. Let me walk you through everything you need to know about timing, technique, and aftercare for these shade garden gems.
Key Takeaways
- Spring planting works best: Plant coral bells in early spring after the last frost for optimal root establishment before summer heat.
- Fall is your second window: Early fall planting gives roots 6-8 weeks to establish before winter dormancy sets in.
- Avoid summer and winter: Extreme heat stresses new plants, while frozen ground prevents root growth in winter.
- Soil temperature matters more than air temperature: Wait until soil reaches 50°F (10°C) for successful transplanting.
- Container plants offer flexibility: Potted coral bells can be planted throughout the growing season with extra watering attention.
- Regional timing varies: Adjust planting dates based on your USDA hardiness zone and local frost dates.
- Proper preparation ensures success: Amend soil with organic matter and ensure good drainage before planting.
Quick Answers to Common Questions
What is the absolute best month to plant coral bells?
April is ideal for most regions, offering warm soil, cool air, and reliable rainfall for root establishment before summer heat.
Can I plant coral bells in summer if I water them daily?
You can, but survival rates drop significantly. Heat stress and rapid evaporation make establishment difficult even with diligent watering.
How late in fall can I plant coral bells?
Plant at least 6-8 weeks before your average first hard frost date so roots can establish before the ground freezes.
Do coral bells need full shade or can they take sun?
Most prefer morning sun with afternoon shade. Dark-leaved varieties tolerate more sun than light-colored ones.
Should I fertilize coral bells when planting?
Use only slow-release organic fertilizer mixed into backfill soil. Avoid high-nitrogen fertilizers that promote weak leaf growth over roots.
📑 Table of Contents
- Understanding Coral Bells Growth Cycles
- Spring Planting: The Prime Window
- Fall Planting: The Excellent Alternative
- Why Summer and Winter Planting Fail
- Container vs. Bare Root: Timing Differences
- Regional Planting Calendars
- Soil Preparation: The Foundation of Success
- Aftercare During Establishment
- Common Planting Mistakes to Avoid
- Companion Planting and Design Timing
- Troubleshooting Establishment Issues
- Long-Term Care After Establishment
- Conclusion
Understanding Coral Bells Growth Cycles
Before we dive into specific dates, it helps to understand how coral bells grow. These plants are herbaceous perennials, meaning their tops die back in winter (in colder zones) or remain semi-evergreen (in milder areas), while their roots persist year-round. The crown, where leaves emerge from the root system, sits at or just below soil level. This crown is the heart of the plant, and protecting it during establishment is crucial.
Root Development Patterns
Coral bells spend their first growing season focusing on root development. Above ground, you might see modest leaf growth and perhaps a few flower spikes. Below ground, however, the plant is busy creating a network of fibrous roots that will support years of growth. This root-first strategy explains why planting timing matters so much. The plant needs favorable conditions, cool soil, consistent moisture, and mild air temperatures, to build that foundation without stress.
Dormancy and Active Growth
In zones 4 through 6, coral bells typically enter full dormancy in late fall. The leaves may die back completely or remain as a tattered rosette. Growth resumes in early spring as soil temperatures climb. In zones 7 through 9, many varieties remain evergreen through winter, though growth slows significantly. Understanding your zone’s pattern helps you choose the optimal planting window. The goal is always to plant when the plant can immediately begin root growth without facing extreme conditions.
Spring Planting: The Prime Window
Ask any experienced gardener when to plant coral bells, and most will say early spring. This window, typically March through May depending on your location, offers the longest stretch of favorable growing conditions before summer stress arrives. The soil has warmed sufficiently for root activity, but air temperatures remain cool enough to limit transplant shock and water loss through leaves.
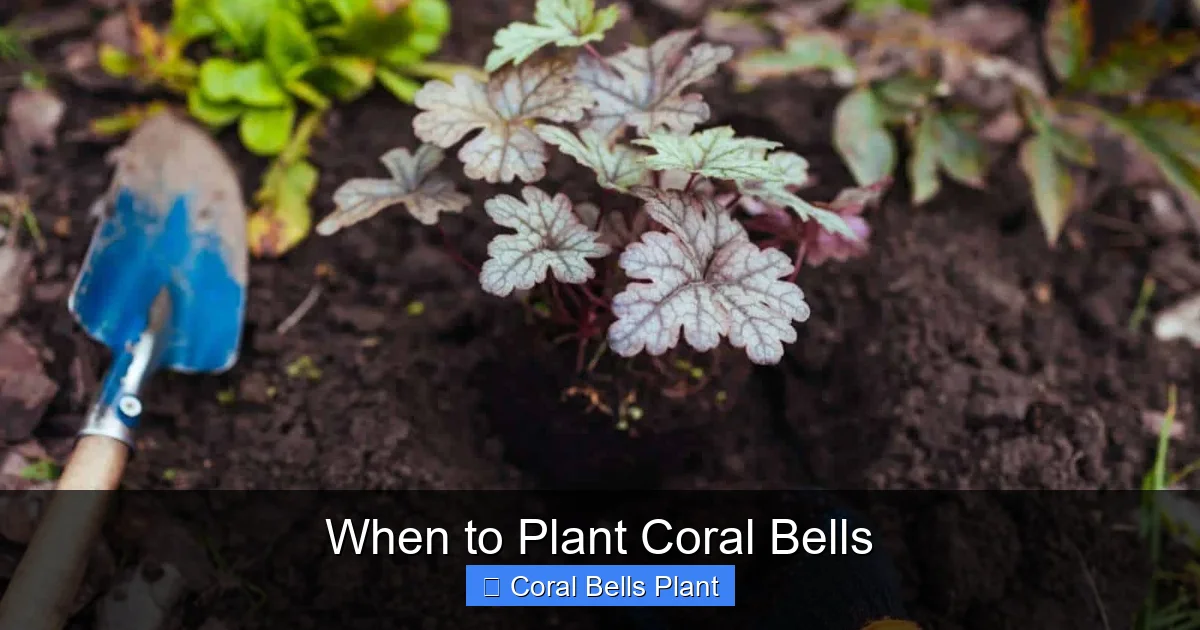
Visual guide about When to Plant Coral Bells
Image source: planetnatural.com
Timing by Hardiness Zone
In zones 3 and 4, wait until late April or early May. The ground needs to be fully thawed and workable. A good rule of thumb: if you can easily push a shovel into the soil and it crumbles rather than clumping, you are ready. Zones 5 and 6 can usually plant in mid to late April. Zones 7 and 8 often plant in March, while zone 9 gardeners might plant as early as February. Always reference your average last frost date and plan to plant two to four weeks after that date for the safest results.
Why Spring Works So Well
Spring planting aligns perfectly with the coral bells natural growth cycle. As day length increases and soil warms, the plant wants to grow. By planting in early spring, you give the roots eight to twelve weeks of ideal conditions before summer heat arrives. Rainfall is typically reliable in spring, reducing your watering burden. The plant can establish a robust root system capable of supporting lush foliage and handling occasional dry spells later in the season.
Spring Planting Step by Step
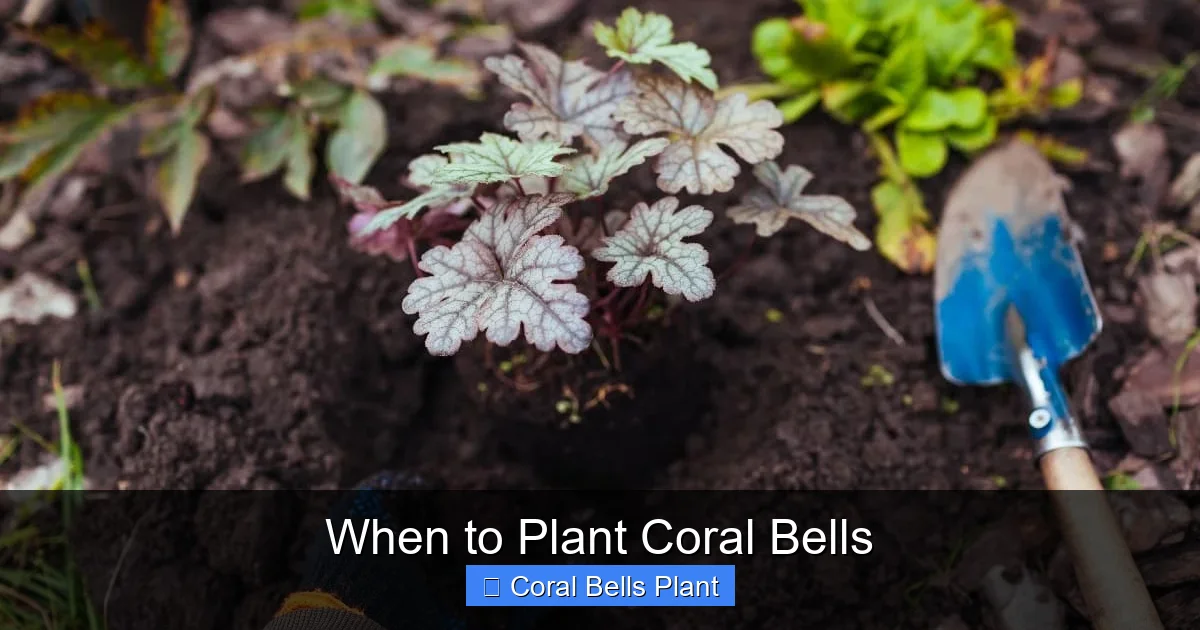
Start by preparing your planting area. Coral bells prefer rich, well-draining soil with a slightly acidic to neutral pH (6.0 to 7.0). Work in two to three inches of compost or well-rotted manure to improve both drainage and moisture retention. Dig a hole twice as wide as the root ball but no deeper. The crown should sit at soil level, not buried. Backfill with amended soil, firm gently, and water thoroughly to eliminate air pockets. Apply a two-inch layer of shredded bark or leaf mulch, keeping it away from the crown to prevent rot.
Fall Planting: The Excellent Alternative
If you miss the spring window, do not despair. Early fall is arguably just as good for planting coral bells, and some gardeners prefer it. The soil retains summer warmth, encouraging rapid root growth, while cooler air temperatures reduce stress on foliage. The key is planting early enough, at least six to eight weeks before your average first hard frost.
The Fall Advantage
Fall-planted coral bells often outperform spring-planted ones by the following summer. Why? They have two root-growing seasons (fall and spring) before facing their first summer heat. The roots continue growing until soil temperatures drop below 40°F (4°C), giving them a significant head start. Additionally, fall typically brings more reliable rainfall than summer, and weed pressure diminishes as the season progresses.
Calculating Your Fall Deadline
Check your average first frost date and count back eight weeks. In zone 5, with a first frost around October 15, you should plant by late August. Zone 6 gardeners have until mid-September. Zone 7 can plant through late September, and zone 8 often into October. If you are buying plants in late fall at clearance prices, go ahead and plant them, but understand they may need extra winter protection and might not perform their best until the following year.
Fall Planting Considerations
Do not fertilize fall-planted coral bells. You want to encourage root growth, not tender new foliage that frost will damage. Water regularly until the ground freezes, especially if autumn is dry. Apply a generous mulch layer (three to four inches) after the ground freezes to prevent frost heaving, the cycle of freezing and thawing that can push shallow-rooted plants out of the ground. Remove excess mulch in early spring to prevent crown rot.
Why Summer and Winter Planting Fail
Understanding when to plant coral bells also means knowing when not to plant. Summer and winter present challenges that even experienced gardeners struggle to overcome. While it is technically possible to plant during these seasons with intensive care, the failure rate is high enough that most experts advise against it.
Summer Stress Factors
Summer planting faces a triple threat: intense heat, high evaporation rates, and often inconsistent rainfall. A newly planted coral bells has a tiny root system confined to the shape of its nursery pot. In July heat, that root ball can dry out in hours. The plant cannot take up water fast enough to replace what the leaves lose through transpiration. Even with daily watering, the stress often causes leaf scorch, stunted growth, or death. If you absolutely must plant in summer, choose a cloudy week, provide temporary shade cloth, and commit to monitoring soil moisture twice daily.
Winter Dormancy Problems
Winter planting fails for different reasons. Frozen soil cannot be worked properly, leading to air pockets around roots. The plant is dormant and cannot grow new roots to anchor itself. Frost heaving is almost guaranteed without established roots to hold the plant in place. Come spring, you often find the plant pushed halfway out of the ground with exposed, desiccated roots. The only exception is in the warmest zones (9 and 10) where the ground does not freeze, but even there, winter planting offers no advantage over fall or spring.
Container vs. Bare Root: Timing Differences
The form in which you buy your coral bells affects planting flexibility. Most garden centers sell container-grown plants, but mail-order nurseries often ship bare-root divisions in early spring. Each has its own optimal timing considerations.
Container-Grown Plants
Container coral bells offer the most planting flexibility. Because their root systems are intact and undisturbed, they can be planted any time the ground is workable, provided you can meet their water needs. This means you can successfully plant container specimens in late spring, early summer, or early fall with proper care. The intact root ball suffers less transplant shock than bare-root plants. However, they still prefer the mild conditions of spring and fall for easiest establishment.
Bare-Root Divisions
Bare-root coral bells are typically only available in early spring (March through April). These plants have been dug from fields, cleaned of soil, and stored in cool, humid conditions. They must be planted promptly upon arrival, ideally within a day or two. The planting window is narrow because bare-root plants have no soil buffer, their roots are exposed to air and begin drying immediately. Plant them in early spring as soon as your soil is workable. Soak the roots in water for an hour before planting, spread them over a mound of soil in the planting hole, and ensure the crown sits at the correct level.
Dividing Established Plants
If you are dividing your own coral bells, timing is critical. The best time to divide is early spring, just as new growth emerges, or early fall, at least six weeks before frost. Spring division allows the divisions a full growing season to recover. Fall division works well in milder climates. Never divide in summer heat or winter dormancy. Each division needs three to five healthy shoots and a good root portion. Replant immediately at the same depth, water well, and mulch.
Regional Planting Calendars
Because the United States spans such diverse climates, a single planting calendar will not work for everyone. Let me break down when to plant coral bells by major climate regions so you can pinpoint your ideal window.
Northeast and Midwest (Zones 3-6)
In these regions, spring planting dominates. The ground freezes solid in winter, and summer heat can be intense. Plant in April (zone 3-4) or late March to April (zone 5-6). Fall planting works in zones 5-6 if done by mid-September. Zone 3-4 fall planting is risky; the window between cool weather and frozen ground is too short. If you are in a microclimate near large bodies of water (Great Lakes, coastal areas), you may gain a week or two in either direction.
Southeast (Zones 7-8)
Southern gardeners have a long fall planting window and an early spring window. Spring planting can begin in February (zone 8) or March (zone 7). Fall planting is excellent from September through October. The challenge here is summer heat and humidity, which can cause crown rot in poorly drained soils. Ensure excellent drainage and avoid planting in low spots. Many coral bells varieties struggle with the Southeast’s heavy clay and summer wetness; choose heat-tolerant cultivars like ‘Caramel,’ ‘Citronelle,’ or ‘Southern Comfort.’
Pacific Northwest (Zones 7-9)
This region offers perhaps the easiest coral bells growing conditions. Mild winters and cool summers mean you can plant from February through May and again September through November. The main concern is winter wetness causing crown rot. Plant on slight mounds or in raised beds to ensure drainage. The long, cool springs give fall-planted specimens a tremendous head start.
Southwest and West Coast (Zones 8-10)
In these hot, dry climates, fall planting is strongly preferred. Plant in October or November when temperatures moderate and winter rains begin. Spring planting works in February to March but requires diligent irrigation through the first summer. Choose varieties bred for heat tolerance and provide afternoon shade. Mulch heavily to conserve moisture and keep roots cool. Avoid planting in June through September entirely.
Mountain West and High Desert (Zones 4-6)
High elevation gardens face intense sun, low humidity, and rapid temperature swings. Spring planting after the last frost (often May or even June at high elevations) is best. Fall planting is risky due to early freezes and lack of snow cover for insulation. Amend soil heavily with organic matter to improve water retention. Provide afternoon shade and wind protection. Winter watering (monthly during dry spells) is essential for fall-planted specimens.
Soil Preparation: The Foundation of Success
Timing gets the plant in the ground at the right moment, but soil preparation determines how well it thrives long-term. Coral bells are not overly demanding, but they have specific preferences that, when met, reward you with vigorous growth and brilliant color.
Drainage Is Non-Negotiable
The number one killer of coral bells is wet feet, especially in winter. These plants need moisture-retentive but well-draining soil. Heavy clay holds water around the crown, leading to rot. Sandy soil drains too fast, leaving roots dry. The solution for both is organic matter. Work in compost, leaf mold, or well-rotted manure to a depth of twelve inches. In extreme clay, consider raised beds or planting on a slight berm. A simple drainage test: dig a hole twelve inches deep, fill with water, let it drain, fill again. If the second filling does not drain in four hours, improve drainage before planting.
Soil pH and Nutrients
Coral bells prefer slightly acidic soil, pH 6.0 to 6.5, but tolerate 5.5 to 7.0. Most garden soils fall in this range. A soil test from your extension service tells you exactly where you stand. If pH is too high (alkaline), incorporate elemental sulfur or peat moss. If too low (acidic), add lime. Avoid high-nitrogen fertilizers at planting time; they promote soft leaf growth at the expense of roots. A balanced, slow-release organic fertilizer mixed into the backfill soil is sufficient.
Creating the Ideal Planting Hole
Dig a hole twice the width of the root ball but only as deep. This encourages roots to spread horizontally into the amended soil rather than circling in a deep, narrow column. Rough up the sides of the hole with your shovel to prevent glazing (smooth, compacted walls that roots cannot penetrate). Create a small mound of soil in the center for bare-root plants to sit on, spreading roots downward. For container plants, gently loosen any circling roots before placing in the hole.
Aftercare During Establishment
You have chosen the perfect planting time and prepared the soil beautifully. Now comes the critical establishment period, the first eight to twelve weeks when the plant transitions from nursery life to garden independence. Your attention during this window pays dividends for years.
Watering Regimen
Newly planted coral bells need consistent moisture, not soggy soil. Water deeply at planting, then check soil moisture daily for the first two weeks. Stick your finger two inches into the soil near the root ball. If it feels dry at that depth, water. After two weeks, reduce to every two to three days, then weekly by week six. The goal is to encourage roots to chase moisture deeper into the soil. Mulch helps enormously by reducing evaporation and moderating soil temperature.
Monitoring for Stress
Watch for signs of transplant shock: wilting that does not recover by morning, leaf scorch (brown edges), yellowing lower leaves, or stunted growth. Some wilting on hot afternoons is normal even for established plants. Morning wilting indicates a water issue. Leaf scorch suggests too much sun or insufficient root uptake. Yellowing often means overwatering or poor drainage. Adjust care accordingly. Do not fertilize during the first growing season beyond the initial slow-release application.
First Winter Protection
Fall-planted and late-spring-planted coral bells benefit from extra winter protection in their first year. After the ground freezes (usually December in cold zones), apply a four-inch layer of straw, pine needles, or shredded leaves over the crown. This prevents frost heaving and insulates against temperature swings. Remove the heavy mulch gradually in early spring as new growth appears. Leave a light mulch layer year-round to conserve moisture and suppress weeds.
Common Planting Mistakes to Avoid
Even experienced gardeners make mistakes when planting coral bells. Here are the most frequent errors and how to avoid them, saving you time, money, and disappointment.
Planting Too Deep
This is the number one mistake. The crown, where leaves emerge, must sit at or slightly above soil level. Burying the crown leads to crown rot, a fungal disease that kills the plant. When backfilling, periodically check the crown level. It is better to plant slightly high and mulch to cover exposed roots than to plant too deep. If you accidentally plant too deep, gently lift the plant and add soil underneath.
Choosing the Wrong Location
Coral bells are often marketed as shade plants, but most varieties need some sun for best color. Deep shade produces leggy, green growth. Full sun in hot climates scorches leaves. The sweet spot is morning sun with afternoon shade, or dappled shade all day. Dark-leaved varieties (purple, black, red) tolerate more sun than light-leaved ones (yellow, lime, silver). Read the plant tag and observe your garden’s light patterns before choosing a spot.
Ignoring Spacing Requirements
Those cute quart pots grow into substantial clumps. Most coral bells reach twelve to eighteen inches wide at maturity, with some varieties spreading to two feet. Plant them eighteen to twenty-four inches apart (center to center) for a filled-in look, or thirty inches apart for specimen plants. Crowding reduces air circulation, inviting fungal diseases like powdery mildew. It also makes future division more difficult.
Skipping Soil Amendment
Planting into unamended native soil, especially clay or sand, sets the plant up for struggle. Coral bells have fine, fibrous roots that need loose, organic-rich soil to penetrate. The effort of amending a wide planting area pays off in faster establishment, better drought tolerance, and more vibrant foliage. Think of it as investing in the plant’s long-term home.
Companion Planting and Design Timing
When planning when to plant coral bells, consider what they will grow alongside. These perennials shine in combination with other shade lovers, and coordinating planting times creates a cohesive garden that establishes together.
Spring Bulb Partners
Plant coral bells in early spring alongside or immediately after spring bulbs (daffodils, tulips, hyacinths) finish blooming. The coral bells’ emerging foliage hides the bulbs’ yellowing leaves. Since both are planted in fall (bulbs) or early spring (coral bells), you can coordinate the work. Fall-planted coral bells will be ready to perform this hiding act their first spring.
Shade Garden Succession
Pair coral bells with hostas, ferns, astilbes, and brunnera for a season-long tapestry. Hostas and ferns emerge later in spring, so planting everything in early spring means they establish simultaneously. Astilbes bloom in early summer, complementing coral bells’ late spring flowers. Brunnera’s forget-me-not flowers coincide with coral bells blooms. A spring planting of this entire community creates a mature-looking bed by midsummer.
Container Combinations
Coral bells excel in containers, where their foliage provides year-round interest. Plant container specimens in early spring using high-quality potting mix with added perlite for drainage. Combine with trailing plants like creeping jenny or ivy, and upright accents like carex or small ferns. Containers allow you to move plants to optimal seasonal locations, morning sun in spring, full shade in summer, protected spot in winter.
Troubleshooting Establishment Issues
Even with perfect timing, issues can arise. Recognizing and addressing problems early saves plants. Here are the most common establishment challenges and their solutions.
Frost Heaving
If you notice a fall-planted coral bells rising out of the ground in late winter, frost heaving is the culprit. The freeze-thaw cycle pushes the shallow root ball upward. Gently press the plant back into the soil during a thaw, or add soil around the exposed roots. Do not step on the plant. Prevent future heaving with a heavy winter mulch applied after the ground freezes.
Crown Rot
Black, mushy crown tissue with a foul smell indicates crown rot, usually from excessive moisture or deep planting. Improve drainage immediately. Remove affected tissue with a sterile knife, dust with fungicide (copper-based), and replant higher with excellent drainage. Reduce watering. Unfortunately, advanced crown rot is often fatal. Prevention through proper planting depth and drainage is far easier than cure.
Poor Growth or Color
If your coral bells sits sulking with minimal growth or dull color, check three things: light, nutrients, and pH. Too much shade reduces color intensity, especially in colored varieties. A light feeding with balanced organic fertilizer in spring can jump-start growth. Soil pH outside the 5.5-7.0 range locks up nutrients. A soil test guides corrections.
Pest Damage
Vine weevils are the primary coral bells pest. Adults notch leaf edges at night; larvae eat roots, causing sudden wilting. Check for C-shaped white grubs in the soil. Apply beneficial nematodes in spring or fall for biological control. Slugs and snails also enjoy the foliage. Use iron phosphate bait or beer traps. Deer and rabbits occasionally browse; repellents or fencing help.
Long-Term Care After Establishment
Once your coral bells has survived its first year, care shifts from establishment to maintenance. These are long-lived perennials that, with minimal attention, provide decades of beauty.
Annual Maintenance Calendar
Early spring: Remove winter mulch from crowns. Cut back any tattered evergreen foliage to make way for new growth. Apply a light side-dressing of compost or balanced organic fertilizer. Late spring: Deadhead flower spikes after blooming to redirect energy to foliage, unless you want seeds. Summer: Water during extended drought. Mulch to conserve moisture. Fall: Cut back flower stems. Apply winter mulch after ground freezes in cold zones. Winter: In zones 7+, enjoy evergreen foliage. In colder zones, plants are dormant.
Division Every Three to Five Years
Coral bells benefit from periodic division. The center of old clumps becomes woody and dies out, leaving a ring of growth. Division rejuvenates the plant and gives you free plants. Divide in early spring or early fall. Dig the entire clump, shake off soil, and pull or cut apart into sections with roots and shoots. Replant the best pieces, discard the woody center. Water well and mulch.
Variety Selection for Your Zone
Not all coral bells perform equally in all climates. The species Heuchera americana and its hybrids handle heat and humidity best (Southeast). Heuchera villosa hybrids offer exceptional heat tolerance. Heuchera sanguinea types prefer cooler, drier climates (Southwest). The popular villosa-americana hybrids like ‘Caramel,’ ‘Mocha,’ and ‘Berry Smoothie’ are widely adaptable. Research varieties suited to your region before buying.
Conclusion
Knowing when to plant coral bells transforms these stunning perennials from garden center impulses into lasting landscape investments. Early spring and early fall offer nature’s ideal conditions, cool soil, gentle sun, reliable moisture, giving roots the time they need to anchor deeply before facing seasonal extremes. Whether you are tucking a single ‘Palace Purple’ into a shaded corner or designing a tapestry of chartreuse, caramel, and near-black varieties along a woodland path, timing your planting right sets the stage for years of low-maintenance beauty.
Remember the core principles: avoid summer heat and winter freeze, prepare soil thoughtfully, plant at the correct depth, water consistently during establishment, and mulch wisely. Pay attention to your specific region’s calendar, watch your soil temperature, and listen to what the plants tell you. A coral bells planted at the right time in the right place asks for little and gives much, waves of colorful foliage, delicate bells dancing above the leaves, hummingbirds visiting in summer, and a garden that looks professionally designed with a fraction of the effort.
So mark your calendar for early spring or early fall. Prepare your beds now. Choose varieties that make your heart sing. And when the timing aligns, plant with confidence. Your future self, admiring those ruffled leaves catching morning light, will thank you for the patience and knowledge that brought them there.
Frequently Asked Questions
When to plant coral bells in zone 5?
Plant coral bells in zone 5 from mid-April to early May in spring, or late August to mid-September in fall. Spring planting after the last frost gives the longest establishment period before winter.
Can coral bells be planted in winter?
Winter planting is not recommended in zones where the ground freezes. Frozen soil prevents root growth and causes frost heaving. Only zones 9-10 with unfrozen ground can consider winter planting.
How deep should I plant coral bells?
Plant coral bells with the crown (where leaves meet roots) at or slightly above soil level. Burying the crown causes rot. The planting hole should be twice as wide as the root ball but no deeper.
Do coral bells come back every year?
Yes, coral bells are hardy perennials that return year after year in zones 4-9. They may be evergreen in mild winters or die back to the ground in cold climates, regrowing from the crown in spring.
What soil do coral bells prefer?
Coral bells thrive in rich, well-draining soil with pH 6.0-7.0. Amend heavy clay or sandy soil with 2-3 inches of compost. Good drainage is essential to prevent crown rot, especially in winter.
How far apart should I space coral bells?
Space coral bells 18-24 inches apart for most varieties. Larger cultivars need 24-30 inches. Proper spacing ensures good air circulation, reducing fungal diseases and making future division easier.