How to Choose Best Unglazed for Mint
Choosing the right unglazed pot for mint ensures proper drainage, root health, and vigorous growth. Terracotta and clay pots prevent waterlogging while allowing roots to breathe. This guide covers everything from material selection to seasonal care for thriving mint plants.
If you have ever grown mint, you know it is a vigorous plant. It spreads fast. It drinks water like there is no tomorrow. And it will happily take over your garden if you let it. That is why growing mint in containers is the smart move. But not just any container will do. The material matters. A lot.
When you start looking for the perfect home for your mint, you will hear a lot about unglazed pots. Gardeners swear by them. Nurseries stock them in rows. But walking into a garden center and seeing stacks of terracotta, clay, and ceramic options can feel overwhelming. They all look similar. They all claim to be the best. How do you actually choose the right one? This guide breaks it all down. We will talk about materials, sizes, drainage, and the little details that make a big difference. By the end, you will know exactly how to pick the best unglazed pot for mint and keep your herbs happy for years.
Key Takeaways
- Terracotta is ideal: Its porous nature prevents root rot and regulates moisture for mint roots
- Size matters: Choose pots at least 12 inches wide to accommodate mint’s aggressive spreading habit
- Drainage is non-negotiable: Ensure multiple drainage holes and use a quality potting mix
- Seasonal care extends pot life: Protect unglazed pots from freeze-thaw cycles in winter
- Weight considerations: Heavier pots provide stability but consider mobility needs
- Pre-soak new pots: Soak terracotta before planting to prevent it from wicking moisture from soil
- Monitor moisture daily: Unglazed pots dry faster than glazed or plastic containers
Quick Answers to Common Questions
What is the best unglazed pot material for mint?
Terracotta is the best unglazed pot material for mint due to its high porosity, which provides excellent drainage and air exchange for the roots while regulating soil moisture and temperature naturally.
How big should an unglazed pot be for mint?
Choose an unglazed pot at least 12 inches in diameter and 10-12 inches deep for a single mint plant; 16-18 inches allows multiple varieties or years of growth without repotting.
Do I need to soak a new unglazed pot before planting mint?
Yes, soak new unglazed pots for at least one hour (overnight is better) before planting to saturate the clay pores so the pot doesn’t wick moisture away from the mint’s root ball.
How often should I water mint in an unglazed pot?
Check daily by feeling the soil two inches deep; water thoroughly when dry, which may be daily in summer and every 2-3 days in cooler weather, as unglazed pots dry faster than glazed or plastic containers.
Can unglazed pots stay outside in winter?
In zones 6 and warmer, unglazed pots can stay outside with protection (burlap wrap, mulch, elevation); in zones 5 and below, empty and store them dry indoors to prevent freeze-thaw cracking.
📑 Table of Contents
- Why Unglazed Pots Work Best for Mint
- Understanding Your Material Options
- Sizing Your Pot for Mint Success
- Drainage The Non-Negotiable Feature
- Preparing Your Unglazed Pot for Planting
- Ongoing Care for Mint in Unglazed Pots
- Seasonal Considerations and Winter Care
- Common Mistakes to Avoid
- Creative Display and Companion Ideas
- Conclusion
Why Unglazed Pots Work Best for Mint
Let us start with the basics. Why do experienced gardeners reach for unglazed clay when planting mint? The answer lies in the relationship between the pot material and the plant’s roots. Mint has a shallow but aggressive root system. It sends out runners underground. These runners become new plants. This means the root zone stays busy. It needs oxygen. It needs consistent moisture. But it hates sitting in water.
The Science of Porosity
Unglazed clay is porous. Tiny microscopic pores cover the surface. You cannot see them. But they are there. These pores allow air and water vapor to move through the pot walls. This creates a natural exchange. Excess moisture evaporates through the sides. Fresh air enters the root zone. This process prevents the soggy bottom conditions that cause root rot. For a thirsty plant like mint, this balance is critical. The soil stays evenly moist. Not wet. Not bone dry. Just right.
Temperature Regulation
Clay pots also act as insulation. In hot summer sun, the thick walls protect roots from overheating. The evaporation from the pores creates a slight cooling effect. In cooler weather, the thermal mass of the clay holds warmth longer than thin plastic. This extends your growing season slightly. Mint appreciates this stability. It reduces stress. Less stress means better flavor and more vigorous growth.
Preventing the Mint Takeover
There is another practical reason. Mint is invasive. In the ground, it travels. In a pot, it stays contained. But only if the pot is intact. Unglazed clay is rigid. It does not flex. It does not crack easily under root pressure like some brittle plastics. The roots hit the wall and stop. They circle. They fill the pot. But they do not escape. This makes unglazed pots a physical barrier as much as a growing vessel.
Understanding Your Material Options
Not all unglazed pots are created equal. The term “unglazed” covers several materials. Each has distinct properties. Knowing the difference helps you match the pot to your specific growing conditions.
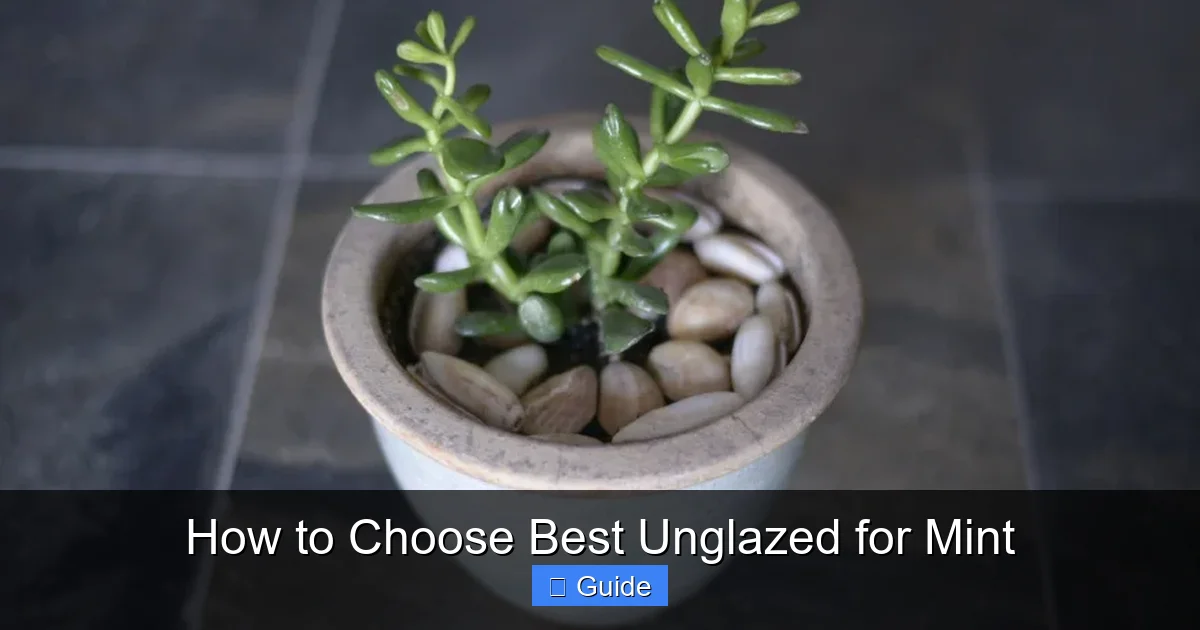
Visual guide about How to Choose Best Unglazed for Mint
Image source: essentialhouseplants.com
Terracotta The Classic Choice
Terracotta is the most common unglazed pot. It is made from red clay fired at relatively low temperatures. The iron content gives it that warm orange-red color. It is highly porous. It is affordable. It is available everywhere. For mint, terracotta is hard to beat. The high porosity matches mint’s water needs perfectly. The thick walls provide good insulation. The weight keeps tall mint varieties from toppling in wind.
But terracotta has quirks. It dries out fast. In peak summer, you may water daily. The porous surface attracts mineral deposits. White crusty lines appear over time. Some gardeners love this patina. Others hate it. Terracotta is also fragile. Drop it, and it shatters. Freeze-thaw cycles can crack it in winter. If you live in a cold climate, you must store it empty and dry.
Unglazed Stoneware The Durable Upgrade
Stoneware is fired at higher temperatures. The clay vitrifies partially. It becomes denser. Less porous than terracotta. But still unglazed. It often comes in gray, brown, or buff colors. Stoneware lasts decades. It resists cracking from freezing better than terracotta. The lower porosity means slower drying. This can be good or bad. In hot climates, it reduces watering frequency. In humid climates, it might hold too much moisture for mint.
Stoneware costs more. It is heavier. Moving a large planted stoneware pot requires two people or a dolly. But if you want a pot that stays outdoors year-round in zone 6 or warmer, stoneware is a strong contender.
Unglazed Earthenware The Traditional Option
Earthenware is similar to terracotta but made from different clay bodies. It fires at low temperatures. It is very porous. Often more fragile than terracotta. You see it in traditional olive jars, Mexican cazuelas, or Asian planting pots. It works well for mint if you can find large sizes. The high porosity demands frequent watering. The aesthetic is rustic and beautiful. But availability in large sizes can be limited.
Fiber-Reinforced Clay The Modern Hybrid
Some manufacturers add fibers to clay. This creates a lighter, stronger pot. It looks like terracotta or stoneware. But it weighs less. It resists cracking better. The porosity is similar to the base clay. These are excellent for balcony gardens or rooftops where weight matters. They cost more than basic terracotta. But the durability often justifies the price.
Sizing Your Pot for Mint Success
Size is the second critical decision. Mint grows fast. A small pot becomes root-bound in weeks. A too-large pot holds excess moisture. You need the Goldilocks zone.
Minimum Dimensions
For a single mint plant, start with a pot at least 12 inches in diameter. 14 inches is better. Depth should be 10 to 12 inches. Mint roots are shallow but wide. They spread horizontally. A wide shallow pot works better than a narrow deep one. The wider surface area also allows more evaporation through the clay walls. This enhances the porosity benefit.
Why Bigger Is Usually Better
Larger soil volume buffers moisture. It buffers temperature. It holds more nutrients. It gives runners room to roam before circling. A 16 to 18 inch pot can hold two or three mint varieties. Or one very happy plant for years without repotting. The weight of a large clay pot also anchors the plant. Mint gets top-heavy when flowering. A broad base prevents tipping.
Consider the Saucer
You need a saucer. Unglazed pots drain fast. Water runs out. A saucer catches it. But do not let the pot sit in standing water. Empty the saucer after watering. Or use pot feet. Pot feet elevate the pot. Air circulates underneath. This prevents the bottom holes from clogging. It prevents staining on your deck. It improves drainage. Simple. Essential.
Weight and Mobility Reality Check
A 16 inch terracotta pot filled with wet soil weighs 60 to 80 pounds. Stoneware weighs more. Before you buy, decide where it lives. Will you move it? For winter protection? For sun tracking? If yes, get a plant caddy with wheels. Locking wheels. Or choose fiber-reinforced clay. Or accept that the pot stays put. There is no shame in a stationary garden. Just plan for it.
Drainage The Non-Negotiable Feature
You can have the perfect pot. The perfect soil. The perfect mint. But without drainage, it fails. Mint roots rot in standing water. Period.
Hole Count and Size
Look for multiple drainage holes. One hole clogs. Three to five holes distribute drainage. Holes should be at least half an inch wide. Smaller holes clog with soil particles. Some pots have a single large central hole. That works if you cover it properly. But multiple holes are better insurance.
Covering the Holes
Do not use gravel. Do not use pot shards. Research shows these create a perched water table. Water sits above the gravel. Roots rot. Instead, use a piece of landscape fabric. Or a coffee filter. Or a square of window screen. These let water pass. They hold soil. They do not impede drainage. Cut a piece slightly larger than the hole. Lay it flat. Add soil. Done.
Pot Feet Are Essential
Pot feet lift the pot off the ground. Even a quarter inch matters. It prevents the holes from sealing against the surface. It allows air entry from below. It prevents root escape through the holes. Three feet minimum. Four is better for stability. You can buy decorative clay feet. Or use wine corks. Or plastic caps. Just get the pot off the ground.
Testing Drainage Before Planting
Fill the pot with your chosen mix. Water it thoroughly. Watch the water exit. It should flow freely within seconds. If water pools on top, the mix is too dense. If no water comes out, the holes are blocked. Fix it before adding the plant. This test saves heartache later.
Preparing Your Unglazed Pot for Planting
New unglazed pots need preparation. Skipping this step stresses your mint from day one. The clay is thirsty. It will steal water from your soil.
The Pre-Soak Ritual
Submerge the new pot in water. A bathtub works. A large tote works. A wheelbarrow works. Let it soak for at least one hour. Overnight is better. You will see bubbles rising. That is air escaping the pores. The clay saturates. When you plant, the pot will not wick moisture from the root ball. This gives your mint a fair start. Do this every time you use a new unglazed pot. Even if it looks clean.
Cleaning Used Pots
If reusing a pot, clean it first. Old soil carries pathogens. Salt buildup burns roots. Scrub the pot with a stiff brush. Use hot water. Add a cup of vinegar per gallon if mineral deposits are heavy. Rinse thoroughly. Then soak in clean water for an hour. Let it dry completely before planting. This prevents disease carryover. It resets the porosity.
Sealing the Exterior Optional
Some gardeners seal the outside of terracotta. This slows evaporation. It reduces the white mineral crust. It keeps the pot looking new. Use a breathable masonry sealer. Not paint. Not waterproofing. You want vapor transmission. Apply two thin coats. Let cure fully. This is optional. Many prefer the natural aging. But in extreme heat, sealing can reduce watering frequency by twenty percent.
Choosing the Right Potting Mix
The pot is only half the equation. The mix matters equally. Garden soil is too heavy. It compacts. It drowns roots. Use a quality potting mix. Look for peat or coir based. Added perlite or pumice. Good drainage. Some compost for nutrients. Avoid mixes with water-retention crystals. Mint in unglazed clay does not need them. The clay manages moisture. The mix provides structure and nutrients.
Ongoing Care for Mint in Unglazed Pots
You have the pot. You have the plant. Now the daily routine. Unglazed pots change the care rhythm. Pay attention.
Watering Frequency and Technique
Check daily. Stick your finger two inches deep. If dry, water. In summer, this might be daily. In spring, every two to three days. Water until it flows from the bottom holes. This ensures the entire root zone is moist. It flushes accumulating salts. Morning watering is best. Foliage dries before evening. This prevents fungal issues. Mint gets rust and powdery mildew. Wet leaves at night invite them.
Fertilizing in Porous Pots
Water leaches nutrients faster in unglazed pots. The frequent watering flushes fertilizer. Feed lightly but often. A half-strength liquid fertilizer every two weeks during active growth. Or slow-release granules scratched into the surface in spring. Organic options like fish emulsion or seaweed extract work well. They feed soil microbes too. Stop fertilizing in late summer. Let the plant harden off.
Managing the Mineral Crust
White crust on the outside is mineral salts. It is harmless. It is unsightly to some. To remove it, scrub with a vinegar solution. One part vinegar to four parts water. Use a stiff brush. Rinse well. Do this when the pot is empty. Or carefully with the plant in place. Avoid getting solution in the soil. The crust inside the pot matters more. If you see white buildup on the soil surface, scrape it off. Replace the top inch with fresh mix. This prevents salt damage to surface roots.
Pruning and Harvesting
Mint in pots needs regular haircuts. Harvest frequently. Cut stems just above a leaf node. This encourages branching. Prevents flowering. Flowering changes leaf flavor. Makes it bitter. If flowers appear, pinch them off. Every few weeks, cut the whole plant back to three inches. It regrows fast. Fresh tender leaves. Better flavor. This also reduces the plant’s water demand. Less top growth means less transpiration. Helpful in hot spells.
Repotting Schedule
Mint fills a pot in one season. Roots circle. Soil exhausts. Plan to repot annually. Early spring is best. Before new growth starts. Tip the plant out. Tease the roots. Trim any circling masses. Divide if crowded. One pot becomes two or three. Refresh the mix. Replant. Water well. This reset keeps mint vigorous. It prevents the center die-out common in older pots.
Seasonal Considerations and Winter Care
Your climate dictates the winter plan. Unglazed clay and freezing temperatures are enemies. Water in pores expands. The pot cracks. Sometimes it shatters.
Cold Climate Strategy Zones 5 and Below
Empty the pots. Store them dry. Garage. Basement. Shed. Stack them with cardboard between. The mint? Two options. Bring a small division indoors. Grow on a sunny windowsill. Or let the mother plant die back. Mulch heavily if planted in ground elsewhere. Start fresh in spring. Mint grows so fast that starting over is not a loss. It is a refresh.
Mild Climate Strategy Zones 6 to 8
You can leave pots outdoors. But protect them. Group pots together against a south wall. Mulch the soil surface with straw. Wrap the pots in burlap. Or bubble wrap. Elevate on pot feet. Keep them slightly dry. Wet clay freezes harder. Do not water before a hard freeze. The mint will die back. Roots survive. New growth appears in March.
Warm Climate Strategy Zones 9 and Up
Mint grows year-round. No special winter care needed. But watch for summer heat stress. Afternoon shade helps. Double potting helps. Place the clay pot inside a larger decorative pot. Air gap between insulates. Light colored outer pot reflects heat. This keeps roots cooler. Mint appreciates it.
Spring Reawakening
When temperatures stabilize, inspect pots. Check for cracks. Hairline cracks are okay. They self-seal with mineral deposits. Large cracks mean replacement. Refresh top soil. Resume watering. Watch for new shoots. First harvest comes fast. Mint does not linger.
Common Mistakes to Avoid
Even experienced gardeners slip up. Here are the pitfalls specific to mint in unglazed pots.
Choosing a Pot Too Small
It looks cute at the nursery. A ten inch pot. The mint fits. For two weeks. Then it sulks. Leaves yellow. Growth stops. Roots bake. Water runs straight through. Do not do it. Start with twelve inches minimum. Your back will thank you. Less watering. Less stress. Better harvest.
Using a Saucer Without Feet
The pot sits flat in the saucer. Water pools. The bottom holes seal. The soil stays wet. Roots rot. The pot stains your patio. Always use feet. Always empty the saucer. This is the number one killer of mint in containers.
Skipping the Pre-Soak
You plant directly into dry terracotta. The clay sucks moisture from the root ball. The plant wilts instantly. You water. The clay drinks. The plant stays dry. You water more. The clay drinks more. The plant dies. Soak the pot. Every time. No exceptions.
Overwatering Because the Surface Looks Dry
Unglazed pots dry from the outside in. The surface looks parched. Two inches down, it is soaked. Finger test. Always finger test. Visual inspection lies. Trust your finger. Or a moisture meter. But your finger is free and always with you.
Planting Multiple Mint Varieties Together
Chocolate mint. Peppermint. Spearmint. Apple mint. They smell amazing together. But one wins. Usually the most aggressive. The others disappear. Give each variety its own pot. Or accept a monoculture. Label the pots. You will forget which is which.
Ignoring the Weight Until Moving Day
You need to move the pot. For a party. For a storm. For winter. You realize it weighs as much as a teenager. You strain your back. You crack the pot. Plan for weight. Use a caddy. Choose lighter materials. Accept the location. Do not improvise with brute force.
Creative Display and Companion Ideas
Function meets beauty. Unglazed pots have a timeless look. Use it.
Grouping for Impact
Three pots. Three sizes. Three mint varieties. Clustered on a patio. The repetition pleases the eye. The height variation adds dimension. Use matching saucers. Matching feet. Cohesion without monotony. This works on steps. On a wall top. Along a path.
Vertical Mint Garden
Stack pots. Use a tiered plant stand. Or a ladder shelf. Each level gets a mint variety. Water from the top. Let it trickle down. Catch excess at the bottom. Saves space. Looks striking. Great for small balconies.
Companion Planting in Large Pots
An 18 inch pot holds mint plus companions. Chives deter pests. Nasturtiums trail over the edge. Marigolds add color. All like similar conditions. Just ensure the mint does not crowd them. Harvest mint aggressively. Give companions space.
Indoor Winter Herb Station
Bring a small division inside. A six inch unglazed pot. South window. Grow light backup. Fresh mint all winter. The clay looks good on a kitchen counter. It reminds you of summer. It humidifies dry indoor air slightly. Win win.
Conclusion
Choosing the best unglazed pot for mint is not about finding a magic vessel. It is about understanding the relationship between clay, water, roots, and your specific growing conditions. Terracotta remains the gold standard for good reason. Its porosity matches mint’s needs perfectly. Stoneware offers durability for permanent placements. Fiber-reinforced clay solves weight issues. The material matters less than the fundamentals. Adequate size. Excellent drainage. Proper preparation. Consistent care.
Start with a twelve inch terracotta pot. Soak it overnight. Use quality potting mix. Plant your mint. Water thoroughly. Set it on feet. Check it daily. Harvest often. Repot annually. That is the entire system. Simple. Effective. Time-tested.
Your mint will reward you with abundant leaves for tea, mojitos, tabbouleh, and garnish. The pot will develop character. The white patina of minerals. The darkened rim from water. The chip on the edge from that one move. It becomes part of your garden story. And that is the real harvest. Not just the leaves. But the connection. The rhythm. The simple satisfaction of growing something well.
Now go get your hands dirty. Your mint is waiting.
Frequently Asked Questions
Why does my mint wilt even though the soil feels wet?
Unglazed pots dry from the outside in, so the surface may feel dry while the root zone is waterlogged. Always check moisture two inches deep with your finger before watering to avoid overwatering.
Can I paint or seal my unglazed mint pot?
You can seal the exterior with a breathable masonry sealer to slow evaporation and reduce mineral crust, but never paint or waterproof it, as this blocks the porosity that benefits mint roots.
What causes the white crust on my terracotta mint pot?
The white crust is mineral salt deposits from water evaporating through the porous clay; it is harmless but can be scrubbed off with a vinegar solution (1:4 vinegar to water) when the pot is empty.
Should I put rocks in the bottom of my unglazed pot for drainage?
No, rocks create a perched water table that keeps soil wetter; instead, cover drainage holes with landscape fabric or a coffee filter and use pot feet to elevate the container for proper airflow.
Can I grow different mint varieties in the same unglazed pot?
It is not recommended because one variety will dominate; give each mint type its own pot to maintain distinct flavors and prevent aggressive spreaders from crowding out others.
How do I know when to repot my mint?
Repot annually in early spring when roots circle the pot, growth slows, or water runs straight through; divide the plant, refresh the potting mix, and replant in the same or slightly larger unglazed container.