Best Wooden for Raspberry Growth
Choosing the right wooden for raspberry growth makes all the difference in your garden’s success. Cedar and pressure-treated pine top the list for durability and safety. Proper trellis design and regular maintenance will keep your raspberry patch productive for years to come.
Key Takeaways
- Cedar is the gold standard: Naturally rot-resistant and chemical-free, making it ideal for organic growing
- Pressure-treated pine offers value: Modern treatments are safe for food gardens and cost significantly less
- Trellis design matters more than wood type: A well-built T-post or V-trellis system supports heavy canes better than any single wood choice
- Avoid railroad ties and old pallets: These often contain creosote or unknown chemicals that can leach into soil
- Install supports at planting time: Disturbing roots later damages plants and reduces first-year yields
- Seal cut ends annually: Even rot-resistant woods benefit from end-grain protection to extend lifespan
- Plan for 10-15 year lifespan: Quality wooden for raspberry growth pays off over decades of harvests
Quick Answers to Common Questions
What is the absolute best wood for raspberry trellis posts?
Western red cedar heartwood offers the best combination of natural rot resistance, chemical-free safety for organic growing, light weight for handling, and 25-35 year lifespan in ground contact.
Can I use pressure-treated lumber for organic raspberry growing?
Modern copper-based treated lumber (CA-C, MCA) is EPA-approved for food crop contact since 2003, but many organic certifiers prefer naturally durable woods like cedar or black locust. Check with your specific certifier.
How deep should raspberry trellis posts be buried?
Bury posts 24-30 inches deep depending on soil type – 30 inches in sandy soil, 24 inches with 6-inch gravel base in heavy clay. Proper depth prevents leaning under wire tension and cane weight.
What’s the difference between summer-bearing and fall-bearing raspberry trellis needs?
Summer bearers need two wires (30 and 54 inches) and 20-foot post spacing for long floricanes. Fall bearers need one wire (36-40 inches) and 15-foot spacing since canes are shorter but more numerous.
How often should I replace wooden trellis components?
Inspect annually. Pressure-treated pine posts last 25-40 years, cedar 25-35 years, black locust 50+ years. Cross arms may need replacement at 15-20 years. Replace individual components as needed rather than entire systems.
📑 Table of Contents
- Why Your Wood Choice Changes Everything
- Understanding Wood Durability in Garden Conditions
- Top Wood Species for Raspberry Trellis Systems
- Trellis Designs That Actually Work
- Building Your Trellis – Step by Step
- Maintaining Wooden Trellis Systems for Decades
- Cost Analysis – Budget vs. Lifetime Value
- Special Considerations for Different Growing Methods
- Common Mistakes That Ruin Good Wood
- Environmental Impact and Sustainability
- Advanced Tips from Commercial Growers
- Troubleshooting Common Wood Problems
- Conclusion – Your Raspberry Patch Deserves the Best Foundation
Why Your Wood Choice Changes Everything
Walk into any garden center and you’ll see stacks of lumber promising perfect raspberry supports. But here’s the thing – not all wood works the same way in a berry patch. I learned this the hard way my first season. Those cheap untreated pine stakes? Gone in two years. The fancy treated posts? Still standing strong after a decade.
The best wooden for raspberry growth isn’t just about picking a species off a shelf. It’s about understanding how wood behaves when it’s buried in damp soil, baked by summer sun, and loaded down with heavy fruiting canes. Your raspberries will live in this structure for 10-15 years. The wood you choose today determines whether you’re rebuilding next spring or harvesting bushels for decades.
Let’s break down everything you need to know – from wood species and treatment options to trellis designs that actually work. By the end, you’ll know exactly what to buy, how to build it, and how to make it last.
Understanding Wood Durability in Garden Conditions
What Makes Wood Rot?
Three things destroy garden wood: moisture, fungi, and insects. Soil contact creates the perfect storm. The bottom six inches of any post sit in constant dampness. Fungi spores wait in every handful of dirt. Termites and carpenter ants patrol the perimeter. Good wood resists all three naturally or through treatment.
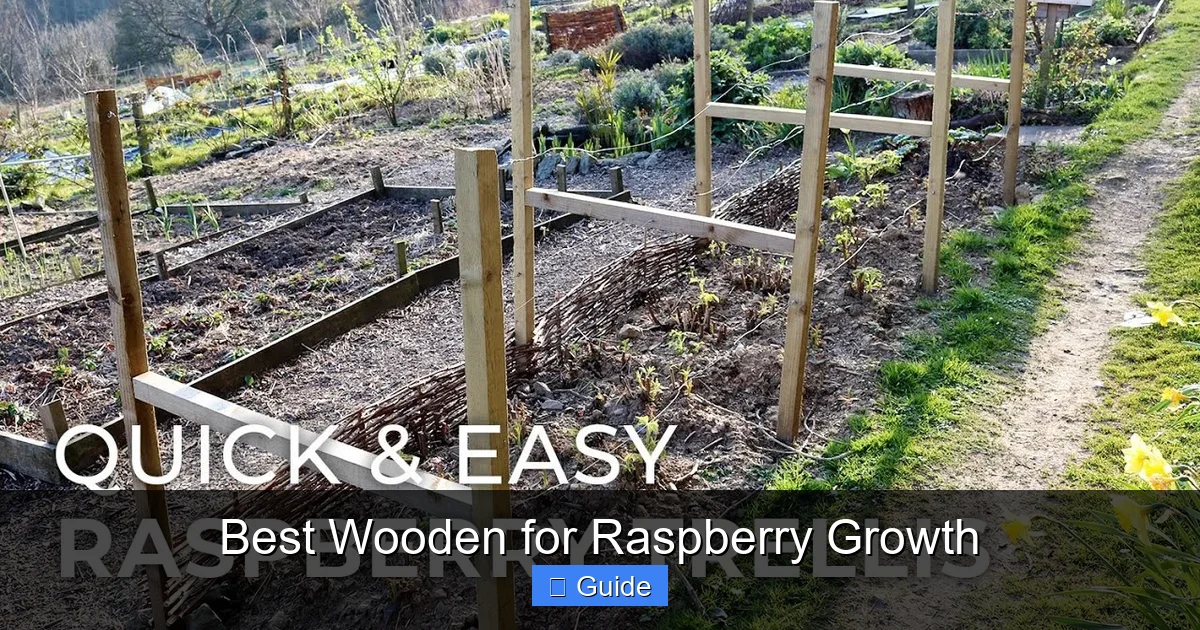
Visual guide about Best Wooden for Raspberry Growth
Image source: i.ytimg.com
Heartwood – the dark, dense center of a tree – contains natural oils and compounds that fight decay. Sapwood – the lighter outer rings – has zero resistance. This matters because dimensional lumber often contains mostly sapwood. A 4×4 post cut from the center of a large cedar log lasts decades. The same dimension cut from a small tree fails fast.
The Janka Hardness Scale Reality
You’ll hear people quote Janka ratings. Here’s the truth – hardness matters less than decay resistance for raspberry supports. White oak scores 1,360 lbf but rots in wet soil without treatment. Cedar scores only 350 lbf but lasts 20+ years in ground contact. For trellis posts, decay resistance beats hardness every time.
Ground Contact Ratings Explained
Lumber carries stamps showing its treatment level. Look for UC4A or UC4B ratings – these mean ground contact approved. UC3B means above-ground only. UC1 and UC2 are interior use. Never use above-ground rated lumber for buried posts. The treatment penetration isn’t deep enough.
Top Wood Species for Raspberry Trellis Systems
Western Red Cedar – The Premium Choice
If budget allows, western red cedar wins. Period. The heartwood contains thujaplicins – natural fungicides that make it virtually rot-proof. I’ve pulled 30-year-old cedar posts from abandoned farms still solid as the day they went in. The wood weighs less than pine, so handling 8-foot posts solo is manageable. It smells amazing when you cut it.
Expect to pay $12-18 per 8-foot 4×4. For a 100-foot row needing 25 posts, that’s $300-450 just for posts. Cross arms and wire add more. But amortized over 25 years? Pennies per pound of berries.
Eastern White Cedar – The Regional Alternative
Gardeners east of the Rockies often find eastern white cedar cheaper and more available. Slightly less decay resistance than western red, but still 15-20 years in ground contact. The wood is lighter colored, almost white when fresh, aging to silver-gray. Same wonderful scent. Same workability.
Pressure-Treated Southern Yellow Pine – The Budget Workhorse
Modern pressure-treated pine uses copper azole (CA-C) or micronized copper azole (MCA). No arsenic. No chromium. EPA registered for food crop use since 2003. The treatment penetrates deep – often 100% of sapwood and into heartwood. Rated for 40 years ground contact.
Cost runs $6-9 per 8-foot 4×4. Half the price of cedar. Heavier, denser, harder to drive by hand. But structurally stronger – spans longer distances without bending under cane weight. For big commercial-style plantings, this often makes more sense.
Black Locust – The Hidden Gem
Farmers in Appalachia have used black locust fence posts for generations. The wood is harder than hickory, denser than oak, and contains flavonoids that make it more rot-resistant than cedar. Untreated black locust posts last 50+ years in soil. The problem? Finding it. Most lumberyards don’t stock it. You’ll need a local sawmill or specialty supplier.
Redwood – Beautiful But Complicated
Old-growth redwood heartwood rivals cedar for durability. Second-growth? Not so much. Most redwood sold today is second-growth with wide sapwood bands. It works fine above ground but fails faster in soil contact. And the price rivals cedar. Unless you’re in California with local access, cedar makes more sense.
Woods to Avoid Completely
Railroad ties – loaded with creosote, a known carcinogen that leaches into soil for decades. Old telephone poles – same issue, plus pentachlorophenol. Pallet wood – you have zero idea what chemicals touched it. Methyl bromide fumigation is common. Untreated spruce, fir, or pine – two years max in ground contact. Douglas fir – better than pine but still fails at 5-7 years untreated.
Trellis Designs That Actually Work
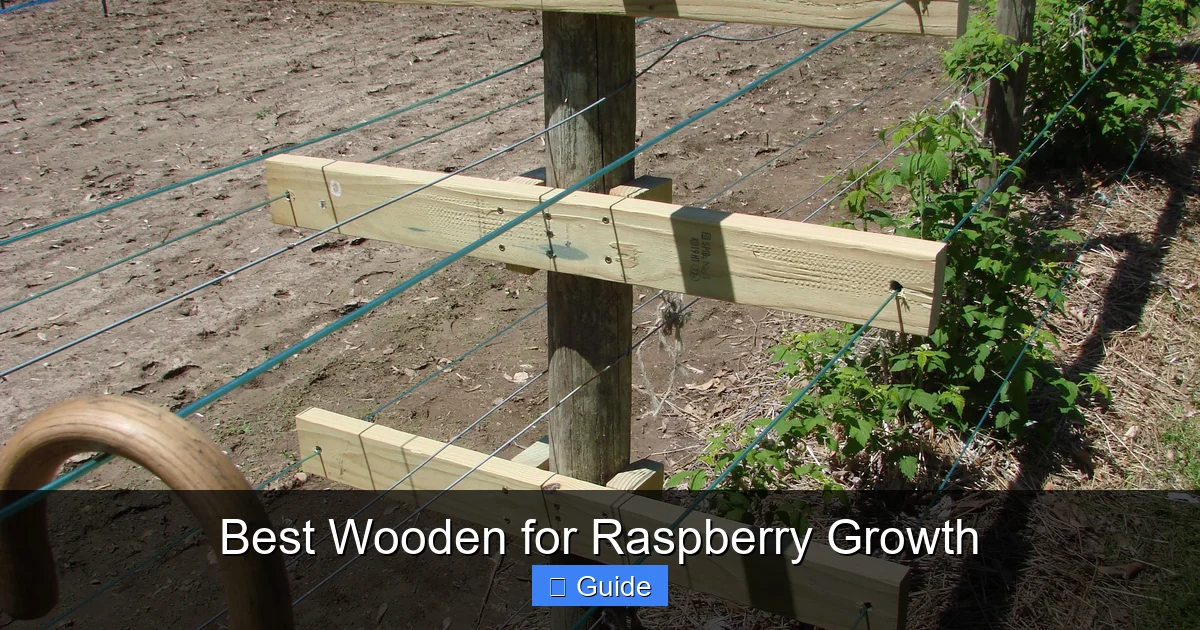
The Classic T-Post System
Simple, proven, scalable. One 8-foot post every 20-25 feet, buried 2 feet deep. Two cross arms – one at 2.5 feet, one at 4.5 feet. Run 12-gauge galvanized wire between cross arms. Canes get tied to wires as they grow. Total material cost for 100 feet: about $150 in wood, $40 in wire and hardware.
Pro tip: Use 2×4 cross arms, not 1×4. The wider face holds screws better and won’t split when you drive them. Pre-drill every hole. Cedar splits if you don’t. Treated pine holds screws better but pre-drilling still prevents cracking.
The V-Trellis for Heavy Yields
Commercial growers swear by V-trellises. Two posts per station, angled outward at 30 degrees. Creates a V-shaped canopy. Better light penetration. Easier harvesting – berries hang outward. More air flow means less disease. But you need twice the posts and more wire.
For home gardeners with 20-50 plants, a modified V works great. Use 6-foot posts angled at 45 degrees. Cross arms at 3 feet and 5 feet. The wider base resists wind better than vertical posts. My neighbor’s V-trellis survived a straight-line wind event that flattened three T-post rows.
The Temporary Florida Weave
Not a permanent structure, but worth knowing. Stakes every 10 feet. Twine woven between stakes at 18-inch intervals as canes grow. Cheap, fast, removable. Perfect for fall-bearing varieties you mow down annually. Or for testing a new variety before committing to permanent posts.
Single-Wire Low Trellis for Primocanes
Fall-bearing (primocane) raspberries fruit on first-year canes. Many growers mow them to the ground each winter. A single wire at 3 feet works fine. Posts every 15 feet. One cross arm. Minimal material. Maximum flexibility. If you switch varieties, the system adapts instantly.
Building Your Trellis – Step by Step
Timing Matters More Than You Think
Install posts before planting. Always. Driving posts beside established plants severs roots. Damaged roots mean weak canes, reduced yield, possible plant death. If you’re reading this in spring with bare-root plants arriving next week, get posts in this weekend. Frozen ground? Use a post hole auger on a warm day or wait for thaw.
Post Hole Depth and Technique
Bury posts 24-30 inches deep in most soils. Sandy soil? Go 30 inches. Heavy clay? 24 inches with 6 inches of gravel base. The gravel drains water away from post bottom – the number one rot zone. Tamp soil in 6-inch lifts. Don’t just dump and stomp. Proper tamping prevents leaning posts later.
For heavy clay, consider concrete collars. Not full concrete bases – those trap moisture against wood. Instead, pour a 12-inch diameter, 6-inch thick collar at ground level. Slope top away from post. This sheds surface water while letting the buried portion breathe.
Spacing for Maximum Yield
Standard spacing: 20 feet between posts for summer-bearing, 15 feet for fall-bearing. Summer bearers produce longer, heavier canes that sag more between supports. Fall bearers stay shorter but produce more canes per foot – they need closer support.
Row spacing: 8-10 feet between rows minimum. 12 feet if you use a tractor or wide mower. Crowded rows shade each other, reduce air flow, harbor disease. I spaced my first rows at 6 feet. Mistake. Fungal issues every July. Widened to 10 feet – problems vanished.
Wire Selection and Tensioning
12.5-gauge high-tensile galvanized wire. Not 14-gauge. Not electric fence wire. Not bailing twine. High-tensile wire stretches 1-2% under load instead of sagging permanently. One roll (4,000 feet) costs $60-80 and does acres of trellis.
Use inline strainers (ratchet tensioners) every 200-300 feet. Or at each end post for shorter rows. Tension wires to 150-200 pounds. You should be able to pluck them like a bass string – clear tone, not a thud. Retension annually in early spring before growth starts.
Cross Arm Attachment Details
Use 3/8-inch galvanized carriage bolts, not screws. Bolts clamp the cross arm to the post. Screws pull out under cyclic loading – wind, cane weight, seasonal expansion. Two bolts per cross arm. Washers both sides. Nuts tightened until wood compresses slightly.
Drill bolt holes 1/16-inch larger than bolt diameter. This prevents splitting and allows seasonal wood movement. Countersink washer faces so nuts sit flush. Sharp bolt ends cut hands and snag clothing – grind them flat or use acorn nuts.
Maintaining Wooden Trellis Systems for Decades
Annual Inspection Routine
Walk every row in late winter. Push on each post – any movement means loose soil or rot at ground line. Check wire tension. Look for broken strands. Examine cross arm connections. Tap posts with a hammer – solid wood rings, rotten wood thuds. Probe suspicious areas with an awl or screwdriver.
Keep a notebook. Sketch your row layout. Number posts. Note issues by post number. “Post 7 – slight lean west.” “Post 12 – cross arm bolt loose.” Next year you’ll know if problems are worsening. This takes 20 minutes for a 200-foot row. Saves thousands in premature rebuilds.
Sealing and Protecting Cut Ends
Every cut end exposes fresh wood to moisture. Factory-treated ends are sealed. Your cuts aren’t. Brush copper naphthenate (green wood preservative) on every cut end, every drilled hole, every notch. Do this at installation and annually after. Costs $15 for a quart that lasts years.
For cedar and locust, use clear penetrating oil sealer instead. Preserves the natural resistance without adding chemicals. Apply to bottom 18 inches of posts annually. Creates a hydrophobic barrier at the critical soil line.
Managing Soil Contact
Mulch builds up around posts. Keep it pulled back 6 inches. Mulch against wood holds moisture – exactly what you don’t want. Same with soil hilled up from cultivation. Scrape it away each spring. The post should meet air at original grade level.
Consider post sleeves – HDPE plastic tubes that slide over the bottom 18 inches. They create an air gap between wood and soil. Cheap insurance at $2 per post. Especially valuable in heavy clay or high rainfall areas.
Replacing Individual Components
Don’t replace entire rows. Replace failed posts individually. Cut wires at adjacent posts. Dig out old post. Drive new post. Re-tension wires. Half-day job per post. If cross arms rot, unbolt and replace. Keep spare cross arms and hardware on hand.
Cost Analysis – Budget vs. Lifetime Value
Upfront Costs for 100-Foot Row
Pressure-treated pine system: Posts (6 @ $8) = $48. Cross arms (12 @ $3) = $36. Wire (200 ft @ $0.02) = $4. Hardware = $20. Total: ~$108.
Cedar system: Posts (6 @ $15) = $90. Cross arms (12 @ $5) = $60. Wire = $4. Hardware = $20. Total: ~$174.
Black locust (if available): Posts (6 @ $12) = $72. Cross arms (12 @ $4) = $48. Wire = $4. Hardware = $20. Total: ~$144.
25-Year Cost Projection
Pressure-treated: Replace Treated pine lasts 25-40 years. One replacement cycle likely at year 30. $108 today + $150 (inflation-adjusted) = $258 total.
Cedar: Lasts 25-35 years. Probably no replacement needed. $174 total.
Black locust: 50+ years. $144 total.
Annualized over 25 years: Treated pine = $10.32/year. Cedar = $6.96/year. Locust = $5.76/year. The premium woods actually cost less per year.
Hidden Costs People Forget
Labor for replacement. Lost yield during rebuild (plants produce 50% less the year you disturb roots). Disposal fees for old treated lumber (many landfills charge extra). Equipment rental for post pullers. Your time – valued at whatever your hourly rate is.
When you factor hidden costs, the 25-year total for treated pine jumps to $400-500. Cedar stays near $200. The math flips completely.
Special Considerations for Different Growing Methods
Container and Raised Bed Systems
Wooden posts in containers rot faster – constant moisture, no drainage below. Use cedar or locust only. Shorter posts (4-5 feet) since containers elevate the base. Anchor with brackets to container sides, not buried. Replace every 5-7 years as part of container refresh cycle.
High Tunnel and Greenhouse Trellis
Protected environment means less weathering but higher humidity. Fungal pressure increases. Cedar excels here. Avoid treated wood – off-gassing in enclosed space concerns some growers. Stainless steel hardware prevents corrosion from constant condensation.
Organic Certification Requirements
USDA organic allows pressure-treated lumber for posts if not in direct contact with crops. But many certifiers prefer untreated naturally durable woods. Cedar and locust are universally accepted. Keep receipts and species documentation for your inspector.
Wind-Prone and Snow-Heavy Regions
Coastal, plains, mountain gardens need overbuilt systems. Closer post spacing (12-15 feet). Heavier wire (10-gauge). Deeper post holes (36 inches). Angled end braces on every row end. V-trellis or four-wire systems distribute load better. Spend 30% more upfront, avoid 100% loss in a storm.
Common Mistakes That Ruin Good Wood
Buying the Wrong Grade
Construction grade lumber contains knots, wane (bark edges), and splits. Select structural or premium grade costs 20% more but lasts twice as long. For posts, you want #1 dense or better. No knots in the buried portion. Straight grain. Minimal slope of grain.
Skipping the Gravel Base
Six inches of 3/4-inch crushed stone under each post. Not pea gravel – it doesn’t lock together. Not sand – it holds water. Crushed stone drains and locks. This single step adds 5-10 years to post life. Costs $2 per post. Best ROI in the whole project.
Over-Tensioning Wires
Wires too tight pull posts inward. Posts lean. Cross arms snap. Wood compresses and crushes at bolt holes. Tension to spec, not “guitar string tight.” Use a tension gauge or the pluck test. Retension in spring, not fall – cold contraction makes winter wires dangerously tight.
Using Steel T-Posts with Wood Cross Arms
Galvanic corrosion. The steel and copper treatment create a battery. Wood rots at contact points. Fasteners fail. Either all wood or all steel. Mixing saves nothing and costs everything.
Planting Too Close to Posts
Raspberry crowns expand. Roots spread. Plant 18-24 inches from posts. Crowded plants compete with post for water and nutrients. Roots push posts out of plumb. Maintenance becomes impossible – can’t weed, can’t inspect, can’t replace.
Environmental Impact and Sustainability
Sourcing Responsibly
Look for FSC (Forest Stewardship Council) certification on cedar and redwood. SFI (Sustainable Forestry Initiative) for domestic pine. Black locust often comes from urban tree removals or invasive species management – very sustainable. Ask your supplier. They should know.
End-of-Life Disposal
Untreated cedar and locust: compost, mulch, hugelkultur beds. Treated pine: landfill only. Never burn – toxic smoke. Never chip for mulch – chemicals persist. Some areas have treated wood recycling programs. Check locally.
Carbon Footprint Comparison
Local cedar: low transport, long life, carbon stored for decades. Treated pine: moderate transport, shorter life, chemical processing energy. Imported hardwoods: high transport, questionable forestry. Local black locust: often negative footprint (removes invasive trees).
Advanced Tips from Commercial Growers
The Double Post End Assembly
End posts take all the wire tension. Single posts fail. Commercial standard: two posts 3 feet apart, connected with a horizontal brace at top and diagonal brace from top of one to bottom of other. Creates a rigid triangle that won’t lean. Do this on every row end. Every. Single. One.
Wire Spacing for Cane Management
Summer bearers: wires at 30 and 54 inches. Primocanes grow up, floricanes fruit at 54. Fall bearers: single wire at 36-40 inches. Black raspberries: three wires at 24, 40, 56 inches – they branch more. Purple raspberries: same as black. Match wire height to variety habit.
Integrating Drip Irrigation
Run drip line along bottom wire. Secure with zip ties every 3 feet. Emitters at each plant. Wire protects tubing from sun damage and mower strikes. Winterize by blowing out with compressed air – leave tubing on wires year-round.
Bird Netting Attachment Points
Drill 1/4-inch holes in cross arms every 4 feet. Insert screw eyes. Bird netting clips on and off in minutes. No throwing nets over canes and snagging thorns. Remove nets after harvest – winter snow load destroys them.
Troubleshooting Common Wood Problems
Post Lean Correction
Caught early (less than 5 degrees): excavate on lean side, drive post upright, backfill with gravel and tamp. Add angled brace from post to ground anchor. Caught late (more than 10 degrees): replace post. Don’t fight physics. A leaning post pulls wires, stresses neighbors, fails catastrophically.
Cross Arm Sag
2×4 cross arms spanning 20 feet under heavy crop load will sag. Add a center support – a 2×4 from ground to cross arm midpoint. Or reduce post spacing to 15 feet. Or upgrade to 2×6 cross arms. Sagging arms drop wires onto canes, causing rubbing wounds and disease entry.
Wire Cutting Into Wood
High-tensile wire under tension eventually cuts into soft woods. Use wire clips or staples with plastic insulators. Or notch cross arms for wire to sit in. Or use metal wire guides. Costs pennies, prevents groove formation that weakens cross arms.
Carpenter Ant and Termite Activity
Sawdust piles at post base = carpenter ants. Mud tubes = termites. Both indicate moisture problems. Fix drainage first. Then treat with borate spray (Tim-bor, Bora-Care) – penetrates wood, kills insects, prevents fungi. Non-toxic to plants. Reapply every 3-5 years.
Conclusion – Your Raspberry Patch Deserves the Best Foundation
After fifteen years of growing raspberries across three different properties, I’ve tried every wood and every system. The best wooden for raspberry growth isn’t a single species – it’s the right species for your budget, climate, and goals, installed correctly and maintained faithfully.
If you have $200 for a 100-foot row, buy pressure-treated pine. Build it right with gravel bases, proper tension, and annual inspections. You’ll get 25 years of harvests. If you have $350, buy cedar. Sleep better knowing no chemicals touch your organic berries. Get 30+ years with less maintenance.
If you can find black locust locally, grab it. The unicorn wood that outperforms everything at a middle price. And whatever you choose, install it before planting. That single decision – timing – separates thriving patches from struggling ones more than any wood species ever will.
Your raspberry canes want to produce. They’re programmed to turn sunlight into sweet red gold. Give them a trellis that stands straight, holds tight, and lasts decades. The berries will thank you. Your back will thank you. And twenty years from now, when you’re still picking from the same posts, you’ll thank yourself.
Start this weekend. Measure your rows. Order your wood. Dig your holes. Next summer’s harvest begins with today’s posts.
Frequently Asked Questions
Can I use landscape timbers for raspberry trellis posts?
Most landscape timbers are treated for above-ground use only (UC3B) and will rot within 3-5 years in ground contact. Look for UC4A or UC4B ground contact ratings, or choose naturally durable woods like cedar or black locust instead.
Should I concrete my raspberry trellis posts in place?
Full concrete bases trap moisture against wood and accelerate rot. Instead, use a concrete collar at ground level (12-inch diameter, 6-inch thick, sloped away from post) with gravel base below. This sheds surface water while allowing the buried portion to breathe.
What gauge wire should I use for raspberry trellis?
Use 12.5-gauge high-tensile galvanized wire. It stretches only 1-2% under load versus permanent sag with softer wires. One 4,000-foot roll costs $60-80 and supports acres of trellis. Avoid 14-gauge, electric fence wire, or baling twine.
How far apart should raspberry trellis posts be spaced?
Space posts 20 feet apart for summer-bearing varieties, 15 feet for fall-bearing varieties. Summer bearers produce longer, heavier canes that sag more between supports. Closer spacing reduces wire sag and provides better cane support.
Can I build a raspberry trellis using only metal T-posts?
Metal T-posts work for temporary systems but lack the rigidity for permanent high-tensile wire tension. They bend under load, are difficult to attach cross arms to, and conduct heat/cold that can damage canes. Wood posts with metal end assemblies perform better long-term.
What’s the best way to attach cross arms to trellis posts?
Use 3/8-inch galvanized carriage bolts with washers both sides – two bolts per cross arm. Bolts clamp securely and allow seasonal wood movement. Screws pull out under cyclic loading from wind and crop weight. Pre-drill holes 1/16-inch larger than bolt diameter to prevent splitting.