When Should You Plant Coral Bells
Coral bells thrive when planted in spring or fall, avoiding extreme heat and frost. Early spring after the last frost or early fall 6-8 weeks before first frost gives roots time to establish. Your USDA zone determines the exact window.
If you have ever walked through a shade garden and spotted those ruffled, colorful leaves catching dappled light, you have likely met coral bells. These perennials, known botanically as Heuchera, have become garden favorites for good reason. They offer year-round foliage interest, delicate flower spikes that attract hummingbirds, and remarkable adaptability. But here is the thing many gardeners learn the hard way: timing makes all the difference. Knowing when should you plant coral bells can mean the difference between a thriving patch and a struggling plant that never quite takes off.
I have watched gardeners plant these beauties in the heat of July only to watch them wither. I have also seen fall plantings rot because they went in too late. The sweet spot exists, and it shifts depending on where you live. This guide walks you through everything you need to know about timing, preparation, and aftercare so your coral bells settle in happily and reward you with years of color.
Key Takeaways
- Spring and fall are ideal: Plant coral bells in early spring after frost danger passes or early fall 6-8 weeks before first frost for best root establishment.
- Zone matters significantly: Your USDA hardiness zone shifts the planting window by weeks. Warmer zones favor fall planting; cooler zones prefer spring.
- Avoid summer heat and winter freeze: Planting during temperature extremes stresses young plants and reduces survival rates dramatically.
- Soil preparation is critical: Well-draining, organic-rich soil with neutral to slightly acidic pH prevents crown rot and supports healthy growth.
- Water consistently after planting: New coral bells need regular moisture for 4-6 weeks until roots establish. Mulch helps retain moisture and regulate soil temperature.
- Container plants offer flexibility: Potted coral bells can be planted throughout the growing season with extra attention to watering and shade.
- Divide in spring or fall: Mature clumps benefit from division every 3-4 years during the same optimal planting windows.
Quick Answers to Common Questions
What is the absolute best month to plant coral bells?
There is no single best month nationwide. In most zones, April to May (spring) or September to October (fall) are ideal. Your specific USDA zone and local frost dates determine the exact window.
Can I plant coral bells in summer if I water them daily?
You can, but it is stressful for the plant. If you must plant in summer, provide shade, water daily for two weeks, and expect some leaf scorch. Spring or fall planting yields much better results with less effort.
How late in fall can I plant coral bells?
Plant at least 6-8 weeks before your average first frost date. This gives roots time to anchor before the ground freezes. In zone 5, that means early October. In zone 7, you can plant into November.
Should I fertilize coral bells when I plant them?
No. Do not fertilize at planting time. The amended soil provides sufficient nutrients. Wait 4-6 weeks until roots establish, then apply a balanced slow-release fertilizer at half strength or top-dress with compost.
Can coral bells be planted in full sun?
In cool zones (3-5), some varieties tolerate full sun with adequate moisture. In warm zones (7+), afternoon shade is essential. Dark-leaved varieties handle more sun than light-leaved ones. Morning sun with afternoon shade works for almost all varieties.
📑 Table of Contents
- Understanding Coral Bells: A Quick Primer
- The Best Time to Plant Coral Bells by Season
- Regional Planting Guidelines (USDA Zones)
- Preparing Your Garden for Coral Bells
- Step-by-Step Planting Process
- Aftercare: The First Critical Weeks
- Common Planting Mistakes to Avoid
- Special Situations and Pro Tips
- Conclusion
Understanding Coral Bells: A Quick Primer
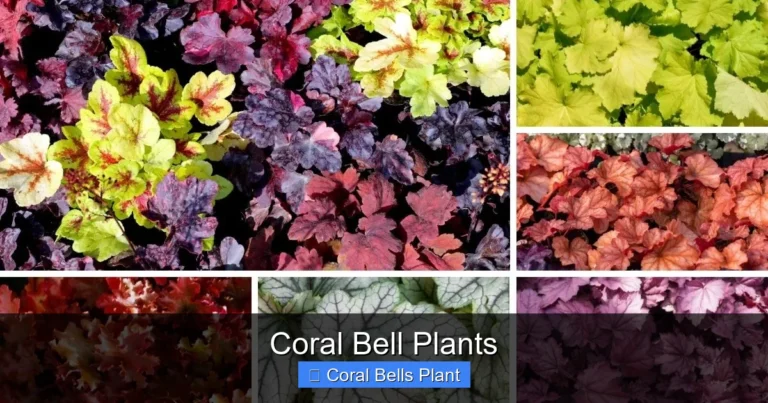
Before we dive into timing, let us get to know the plant. Coral bells belong to the Saxifragaceae family and are native to North America. They grow as mounding perennials with a woody crown at soil level. The leaves emerge in a stunning array of colors, from deep purple and caramel to lime green, silver, and near-black. In late spring to early summer, wiry stems rise above the foliage bearing tiny bell-shaped flowers, usually pink, red, or white.
Why Timing Matters for Heuchera
Coral bells have a shallow, fibrous root system that sits close to the surface. This makes them sensitive to both drought and waterlogging. They also have a crown that can rot if buried too deep or kept too wet. When you plant at the right time, the roots have a chance to grow into the surrounding soil before facing stress from heat, cold, or drought. A well-established root system is the plant’s insurance policy.
Growth Cycle Basics
Understanding the annual cycle helps you pick the right moment. In spring, coral bells push fresh foliage from the crown. Energy goes into leaf production. By early summer, flower stalks appear. After flowering, the plant focuses on root growth and storing energy. Fall brings another flush of root activity before dormancy. Winter is rest time, though in mild climates the foliage often stays evergreen. Planting during active root growth periods gives the best results.
The Best Time to Plant Coral Bells by Season
Spring Planting: The Classic Choice
Spring is the most popular time to plant coral bells, and for good reason. As soil warms and days lengthen, the plant wants to grow. Aim to plant after your last average frost date when the soil has warmed to at least 50°F (10°C). In most regions, this falls between March and May. The plant has the entire growing season ahead to establish roots before winter.
Spring planting works especially well in zones 3 through 6 where winters are harsh. The long runway of mild weather lets roots penetrate deeply. You will see top growth within weeks. Just watch for late cold snaps. A sudden freeze after planting can damage tender new leaves. Keep frost cloth handy for the first few weeks if your area is prone to surprise frosts.
Fall Planting: The Secret Weapon
Many experienced gardeners actually prefer fall planting. The soil is still warm from summer, encouraging rapid root growth, but the air is cooler, reducing transplant shock and water demand. Plant 6 to 8 weeks before your average first frost date. This typically means September through October in most areas.
Fall planting shines in zones 7 through 9 where summers are brutal. A spring-planted coral bell in zone 9 might fry before it establishes. Fall gives it a gentle entry. The plant focuses energy underground all winter, then explodes with growth at the first hint of spring warmth. Mulch heavily after fall planting to prevent frost heaving, which can push the shallow crown out of the ground.
Summer Planting: Proceed with Caution
Can you plant coral bells in summer? Technically yes. Practically, it is risky. If you must plant in June, July, or August, choose a cloudy week. Provide temporary shade with shade cloth or a garden umbrella. Water daily for the first two weeks, then taper to every other day. Expect some leaf scorch. The plant will survive but may not look its best until the following spring. Only attempt summer planting with container-grown stock that has a robust root ball.
Winter Planting: Generally a No-Go
Planting in winter is not recommended in zones where the ground freezes. The roots cannot grow in frozen soil, and the crown is exposed to freeze-thaw cycles that cause heaving. In frost-free zones like parts of zone 10, you can plant in winter, but growth will be minimal until spring. If you find a bargain plant in December in zone 5, pot it up and keep it in a protected cold frame until spring.
Regional Planting Guidelines (USDA Zones)
Zones 3-4: Short Season Strategy
In the coldest zones, the planting window is tight. Spring planting should happen as soon as the soil is workable, usually late April to early May. Fall planting must be done by early September. The ground freezes early and hard. Mulch with 3-4 inches of straw or shredded leaves after fall planting. Consider planting on the east side of a structure for morning sun and afternoon shade, which reduces winter desiccation.
Zones 5-6: The Sweet Spot
These zones offer the most flexibility. Spring plant from mid-April through May. Fall plant from early September through mid-October. Both work beautifully. Spring gives a longer establishment period. Fall gives a head start on next year. If your soil is heavy clay, spring may be better so you can amend and work the soil when it is not soggy. Sandy soils drain well year-round, making fall planting easy.
Zones 7-8: Fall Favored
In these mild-winter zones, fall is often superior. Spring-planted coral bells face hot, humid summers before they are ready. Fall planting from late September through November lets roots grow through winter. Spring planting works too, but do it early, by March, so roots establish before the heat hits. Watch for crown rot in humid summers. Excellent drainage is non-negotiable.
Zone 9: Fall or Early Spring Only
Zone 9 gardeners should avoid spring planting after March. The heat arrives fast. Fall planting from October through December is ideal. In the warmest parts of zone 9, coral bells may struggle long-term. Look for heat-tolerant cultivars like ‘Southern Comfort’ or ‘Georgia Peach’. Provide afternoon shade and consistent moisture. Consider treating them as cool-season annuals if they decline in summer.
Zone 10 and Beyond: Special Considerations
In subtropical zones, coral bells are often grown as winter annuals or in containers that can be moved to shade. Plant in late fall or winter. Choose the most heat-tolerant varieties. ‘Caramel’, ‘Citronelle’, and ‘Electric Lime’ handle warmth better than dark-leaved types. Expect shorter lifespans. Many zone 10 gardeners replace plants every year or two.
Preparing Your Garden for Coral Bells
Choosing the Right Location
Coral bells are often labeled as shade plants, but the truth is more nuanced. Most varieties prefer morning sun and afternoon shade. In cooler zones, they tolerate more sun. In hot zones, they need more shade. Dark-leaved varieties generally handle more sun than light-leaved ones. The golden rule: if the leaves scorch or fade, they are getting too much light. If the plant gets leggy and flower production drops, it needs more light.
Soil Requirements and Amendments
Well-draining soil is the single most important factor. Coral bells hate wet feet. The crown sits at soil level, and constant moisture causes crown rot. Test drainage by digging a 12-inch hole, filling with water, and timing how long it takes to drain. If it takes more than 2 hours, amend heavily or choose a raised bed.
Ideal soil is rich in organic matter with a pH of 6.0 to 7.0. Work in 2-3 inches of compost, leaf mold, or well-rotted manure before planting. If your soil is heavy clay, add coarse sand or fine gravel along with organic matter. For sandy soil, extra compost helps retain moisture. Avoid fresh manure, which can burn the shallow roots.
Spacing and Layout Planning
Space plants 12 to 18 inches apart, depending on the mature size of your variety. Large cultivars like ‘Palace Purple’ need 18 inches. Compact ones like ‘Little Cutie’ series can go 10-12 inches. Plant in odd-numbered groups for a natural look. Consider the viewing angle. The ruffled foliage looks best when you can see the texture, so place them along paths, at the front of borders, or in containers at eye level.
Container Preparation
Coral bells thrive in containers, which is great news for gardeners with poor soil or limited space. Choose a pot at least 12 inches wide and deep. Use a high-quality potting mix with added perlite or pumice for drainage. Ensure the pot has drainage holes. Do not use garden soil in pots. It compacts and drains poorly. Container plants need more frequent watering and fertilizing but give you the flexibility to move them as seasons change.
Step-by-Step Planting Process
Tools and Materials You Will Need
Gather these before you start: garden spade or trowel, compost or organic matter, mulch (shredded bark, straw, or pine needles), watering can or hose with gentle nozzle, gloves, and optionally a soil knife for root teasing. If planting in fall, have frost cloth ready. For spring, have shade cloth if a heat wave threatens.
Removing the Plant from Its Pot
Water the plant thoroughly an hour before planting. This reduces transplant shock and helps the root ball hold together. Turn the pot on its side and gently slide the plant out. If it resists, squeeze the pot sides or tap the bottom. Never pull by the stems. You may see roots circling the bottom. This is normal for container plants.
Root Inspection and Teasing
Examine the root ball. If roots are densely circling, gently tease them apart with your fingers or a soil knife. Loosen the bottom inch of roots so they grow outward into the new soil. If the plant is severely root-bound, make 3-4 vertical cuts 1/2 inch deep around the root ball. This sounds harsh but stimulates new root growth. Remove any dead or mushy roots.
Planting Depth: The Critical Detail
This is where many gardeners go wrong. The crown, where stems meet roots, must sit at or slightly above soil level. Not buried. Not exposed. Dig a hole twice as wide as the root ball but no deeper. Place the plant in the hole. Check the crown level by laying a tool handle across the hole. Adjust soil underneath until the crown sits perfectly. Backfill with amended soil, firming gently with your fingers, not your foot. Water thoroughly to settle soil and eliminate air pockets.
Mulching Done Right
Apply 2 inches of mulch around the plant, but keep it away from the crown. Leave a 1-inch gap. Mulch against the crown traps moisture and invites rot. Shredded bark, pine straw, or leaf mold work well. Avoid large wood chips, which can smother the shallow roots. Mulch conserves moisture, suppresses weeds, and moderates soil temperature.
Watering In
Give a deep, slow watering immediately after planting. Use a gentle stream so you do not wash away soil or mulch. Water until the soil is moist 6-8 inches down. Check by sticking your finger in the soil. This first watering is crucial for soil-to-root contact. For the first two weeks, check soil moisture daily. Water when the top inch feels dry.
Aftercare: The First Critical Weeks
Watering Schedule for New Plantings
Consistent moisture is key for the first 4-6 weeks. The roots have not yet reached into the surrounding soil. Water deeply every 2-3 days in spring, daily in hot weather, every 3-4 days in cool fall weather. Adjust for rain. The goal is evenly moist, not soggy. After 6 weeks, taper to once a week, then to as-needed based on rainfall. Established coral bells are moderately drought-tolerant but look best with regular water.
Fertilizing: Less Is More
Do not fertilize at planting time. The amended soil provides enough nutrients. Fertilizing too early encourages top growth before roots are ready. Wait 4-6 weeks, then apply a balanced, slow-release fertilizer like 10-10-10 at half the recommended rate. Or top-dress with compost in spring. Avoid high-nitrogen fertilizers, which produce lush leaves but weak roots and fewer flowers.
Monitoring for Stress Signs
Watch your new plants daily for the first month. Wilting in morning indicates underwatering. Wilting in afternoon heat that recovers by evening is normal. Yellowing lower leaves can mean overwatering or poor drainage. Brown, crispy leaf edges suggest too much sun or not enough water. Slugs and deer love tender new growth. Use organic slug bait and deer repellent if needed.
Dealing with Frost Heaving
Fall-planted coral bells in cold zones face frost heaving. Freeze-thaw cycles push the shallow crown up. Check plants monthly through winter. If you see the crown exposed, gently press it back down and add more mulch. Do not step on the plant. In spring, assess any damage. Heaved plants often recover if the roots stayed moist.
Common Planting Mistakes to Avoid
Planting Too Deep
This is the number one killer of coral bells. The crown must breathe. Buried crowns rot. Always plant at the same depth the plant was in the pot, or slightly higher to allow for settling. If you are unsure, err on the side of high. You can always add soil later. You cannot easily fix a buried crown without disturbing roots.
Poor Drainage
Clay soil without amendment is a death sentence. Even with amendment, low spots that collect water will rot coral bells. If your yard has drainage issues, build raised beds or plant in containers. A simple test: dig the planting hole, fill with water. If it is not gone in 2 hours, fix drainage or move the location.
Wrong Light Conditions
Deep shade makes coral bells leggy and dull. Full sun in zone 8 fries them. Match the variety to your light. Chartreuse and yellow varieties need more shade to prevent burning. Purple and red varieties tolerate more sun. When in doubt, choose morning sun and afternoon shade. It works for almost every variety.
Skipping Mulch
Bare soil around coral bells invites problems. Soil temperature fluctuates wildly. Moisture evaporates fast. Weeds compete for nutrients. Mulch solves all three. But remember the crown gap. Mulch volcanoes kill plants.
Planting at the Wrong Time for Your Zone
A zone 4 gardener planting in November. A zone 9 gardener planting in June. Both will struggle. Know your zone. Know your frost dates. Plan accordingly. The plant tag gives hardiness zones, not planting times. Those are different things.
Special Situations and Pro Tips
Dividing Established Clumps
Every 3-4 years, coral bells benefit from division. The center gets woody and dies out. Division rejuvenates the plant and gives you free plants. Do this in early spring as new growth emerges, or early fall. Dig the whole clump. Wash off soil. Pull or cut apart into sections, each with roots and several growth buds. Replant immediately at proper depth. Water well. Divisions may look sad for a few weeks but bounce back fast.
Transplanting Mature Plants
Need to move an established coral bell? Spring or fall. Dig widely to get as much root ball as possible. The roots are shallow but wide. Prepare the new hole first. Move quickly. Plant at the same depth. Water deeply. Provide shade for a week. Expect some dieback. Cut off damaged leaves. The plant will recover.
Planting Bare Root Coral Bells
Mail-order plants often arrive bare root. Soak roots in water for 1-2 hours before planting. Spread roots over a mound of soil in the planting hole. Backfill carefully, working soil between roots. Crown at soil level. Water well. Bare root plants take longer to establish. Plant in spring only. Fall bare root planting has high failure rates in cold zones.
Companion Planting Ideas
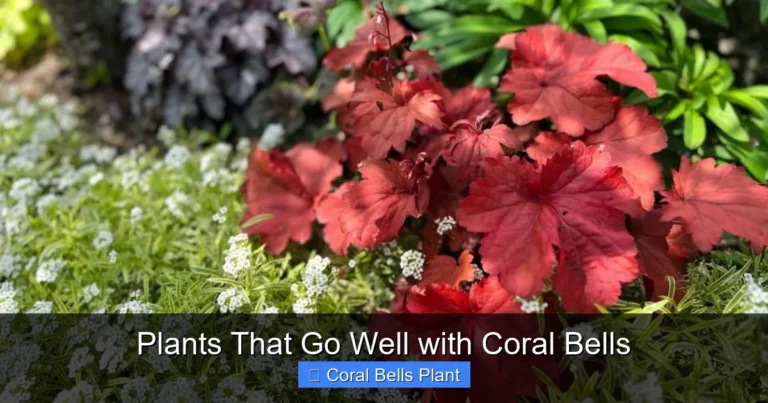
Coral bells play well with others. Pair with hostas, ferns, astilbes, and foamflowers for a shade tapestry. In sunnier spots, combine with ornamental grasses, sedum, and salvia. The foliage colors echo or contrast beautifully. Plant spring bulbs like daffodils between clumps. The coral bells hide the dying bulb foliage. Consider the color wheel. Purple leaves next to chartreuse hostas pop. Silver leaves calm hot colors.
Container Combinations
In pots, coral bells are the perfect “filler” in the thriller-filler-spiller formula. Pair a tall grass or canna (thriller) with coral bells (filler) and trailing lobelia or creeping jenny (spiller). Use a large pot. Crowded containers dry out fast. Fertilize monthly with diluted liquid fertilizer. Overwinter pots in zone 5 and below by moving to an unheated garage or burying the pot in the ground.
Conclusion
Knowing when should you plant coral bells transforms these perennials from fussy to fabulous. The answer is not a single date on the calendar. It is a window that opens in spring after frost and again in fall before frost. Your zone, your soil, your microclimate, and even the specific variety all nudge that window. But the principles stay the same: plant when roots can grow without stress, prepare the soil like you mean it, plant at the right depth, mulch with a crown gap, and water like it matters. Because it does.
I have seen coral bells thrive in the most unlikely spots when the gardener got the timing right. And I have seen them fail in perfect soil when the timing was wrong. The plant wants to live. It wants to show you those ruffled leaves in colors that seem painted by a rainbow’s brush. Give it the right start, and it will reward you for years. So check your calendar. Check your soil. Check your zone. And then plant with confidence. Your shade garden is waiting.
Frequently Asked Questions
When should you plant coral bells in zone 6?
In zone 6, plant coral bells in spring from mid-April through May after the last frost, or in fall from early September through mid-October. Both windows work well. Spring gives a longer establishment period before winter. Fall planting allows roots to grow in warm soil before dormancy.
Can you plant coral bells in the winter?
Winter planting is not recommended in zones where the ground freezes. Roots cannot grow in frozen soil, and freeze-thaw cycles push the shallow crown out of the ground. In frost-free zones 9-10, winter planting is possible but growth will be minimal until spring warmth returns.
How deep do you plant coral bells?
Plant coral bells with the crown (where stems meet roots) at or slightly above soil level. The planting hole should be twice as wide as the root ball but no deeper. Burying the crown causes rot. Planting too high exposes roots to drying out.
Do coral bells come back every year?
Yes, coral bells are hardy perennials that return each year in zones 4-9. In colder zones, they may need winter mulch protection. In very hot zones, they may decline after a few years. Divide clumps every 3-4 years to maintain vigor and prevent the center from dying out.
How long does it take for coral bells to establish?
Coral bells typically establish a functional root system in 4-6 weeks with consistent watering. Full establishment, where the plant is drought-resilient and reaches mature size, takes one full growing season. Fall-planted coral bells often establish faster due to warm soil and cool air temperatures.
What happens if you plant coral bells too deep?
Planting coral bells too deep buries the crown, which leads to crown rot. The crown needs air circulation. Symptoms include yellowing leaves, mushy stems at soil level, and plant collapse. If caught early, gently dig up the plant and replant at the correct depth with the crown visible.