Wall-mounted Buying Guide for Haworthia
Transform your space with living art using our comprehensive wall-mounted buying guide for Haworthia. These compact succulents thrive in vertical systems, offering year-round beauty with minimal maintenance. From selecting the right planter to mastering watering techniques, we cover everything you need for a thriving wall garden.
Key Takeaways
- Haworthia varieties excel in wall-mounted systems due to their shallow roots, slow growth, and tolerance for lower light conditions compared to other succulents.
- Choose planters with excellent drainage and airflow to prevent root rot, the number one killer of vertically grown Haworthia.
- East or north-facing walls provide ideal light for most Haworthia species, offering bright indirect light without harsh afternoon sun.
- Water sparingly using the soak-and-dry method adapted for vertical systems — less frequent but thorough watering prevents both rot and dehydration.
- Modular panel systems offer the most flexibility for rearranging, replacing plants, and adjusting designs as your collection grows.
- Group plants by water needs and growth habits to simplify maintenance and create visually cohesive living wall displays.
- Regular inspection catches pests early — mealybugs and spider mites love the protected environment of wall-mounted planters.
Quick Answers to Common Questions
Can Haworthia survive in a wall-mounted planter without drainage holes?
No. Haworthia is extremely prone to root rot. Every wall-mounted planter must have drainage holes and a well-draining gritty soil mix. Without drainage, water pools at the bottom and kills the roots within weeks.
How often should I water a wall-mounted Haworthia display?
Water when the top inch of soil is dry — typically every 7-10 days in spring and fall, every 2-3 weeks in summer, and monthly in winter. Always check with a moisture meter or skewer before watering, as vertical planters dry unevenly.
Which Haworthia varieties are best for beginners doing a wall mount?
Haworthia fasciata, Haworthia attenuata, and Haworthia reinwardtii are the most forgiving. They tolerate brighter light, irregular watering, and the faster drying of vertical systems better than windowed varieties.
Do I need grow lights for an indoor Haworthia wall?
Only if your wall receives less than 1,000 foot-candles of indirect light. East or north-facing windows usually provide enough. For darker walls, a full-spectrum LED grow bar running 12-14 hours daily works well.
How do I fertilize Haworthia in a vertical system without burning roots?
Use 1/4 strength liquid fertilizer monthly during active growth (spring/fall only), or mix a tiny amount of slow-release fertilizer into the soil at planting. The small soil volume in vertical pockets concentrates salts quickly — less is safer.
📑 Table of Contents
- Introduction: Bringing Haworthia to New Heights
- Why Haworthia Shines in Wall-Mounted Displays
- Understanding Haworthia Varieties for Vertical Gardens
- Selecting the Right Wall-Mounted System
- Light Requirements and Placement Strategy
- Watering and Maintenance for Vertical Haworthia
- Design Ideas and Creative Arrangements
- Troubleshooting Common Wall-Mounted Haworthia Problems
- Conclusion: Your Living Wall Journey Starts Now
Introduction: Bringing Haworthia to New Heights
There is something magical about seeing plants grow vertically. A wall-mounted Haworthia display turns an empty wall into a living tapestry of geometric rosettes, translucent leaf windows, and fascinating textures. These compact succulents, native to southern Africa, have adapted to thrive in rocky crevices and shaded spots — making them perfect candidates for vertical gardening.
If you have ever walked past a living wall in a boutique hotel or a modern office and thought, “I could never do that at home,” this guide is for you. Wall-mounted systems have come a long way from complex hydroponic installations. Today, modular planters, pocket panels, and magnetic mounts make it possible for anyone to create a stunning Haworthia feature wall. The key is understanding what these unique plants need when they are growing sideways instead of upright.
This wall-mounted buying guide for Haworthia walks you through every decision point — from choosing the right species and mounting system to mastering the watering routine that keeps rosettes plump and healthy. Whether you have a sunny kitchen wall, a bright bathroom, or a shaded balcony, there is a Haworthia and a mounting solution that will work for you. Let us dig in.
Why Haworthia Shines in Wall-Mounted Displays
Natural Adaptations for Vertical Living
Haworthia species evolved in the cracks and crevices of rocky outcrops across South Africa. They grow wedged between stones, often on vertical or near-vertical faces, clinging to minimal soil. This natural history gives them a huge advantage in wall-mounted systems. Their root systems are shallow and fibrous, designed to anchor in thin soil layers and absorb moisture quickly from brief rains or morning dew.
Visual guide about Wall-mounted Buying Guide for Haworthia
Image source: trees.com
Unlike trailing succulents such as String of Pearls or Burro’s Tail, Haworthia maintains a compact rosette form. This means your wall display keeps its structured, architectural look without becoming a tangled mess. The leaves are thick and water-storing, allowing the plant to survive the faster drying times typical of vertical planters. Many species also feature translucent leaf tips — called leaf windows — that allow light to penetrate deep into the leaf tissue, an adaptation for growing in partial shade.
Space Efficiency and Visual Impact
One of the biggest draws of a wall-mounted Haworthia garden is the sheer density of beauty you can pack into a small footprint. A single square foot of wall space can host a dozen different Haworthia varieties, each with distinct leaf patterns, colors, and textures. From the zebra-striped Haworthia fasciata to the crystal-clear windows of Haworthia cooperi var. truncata, the variety is staggering.
This density creates a living mosaic effect that changes subtly through the seasons. Some species blush pink or red under bright light. Others produce delicate white flowers on tall stalks in spring or summer. Because Haworthia grows slowly, your design stays recognizable for months or even years without major pruning or restructuring.
Lower Light Tolerance Opens More Locations
Most succulents demand full sun to maintain their compact form and color. Haworthia breaks this rule. Many species prefer bright indirect light and can tolerate lower light levels than Echeveria, Sedum, or Crassula. This means you can install a Haworthia wall on an east-facing kitchen wall, a north-facing bathroom, or even a shaded patio wall where other succulents would stretch and fade.
This flexibility is a game-changer for apartment dwellers and anyone with limited sunny wall space. You are not locked into the one south-facing wall in your home. You can put your living art where you will actually see and enjoy it every day.
Understanding Haworthia Varieties for Vertical Gardens
Hard-Leaved vs. Soft-Leaved Groups
Haworthia falls broadly into two categories based on leaf texture, and this distinction matters for wall mounting. Hard-leaved species — including Haworthia fasciata, Haworthia attenuata, and Haworthia reinwardtii — have thick, rigid leaves with raised white tubercles. These are tougher, more drought-tolerant, and handle the faster drying of vertical planters exceptionally well. They are the best choice for beginners and for locations with brighter light.
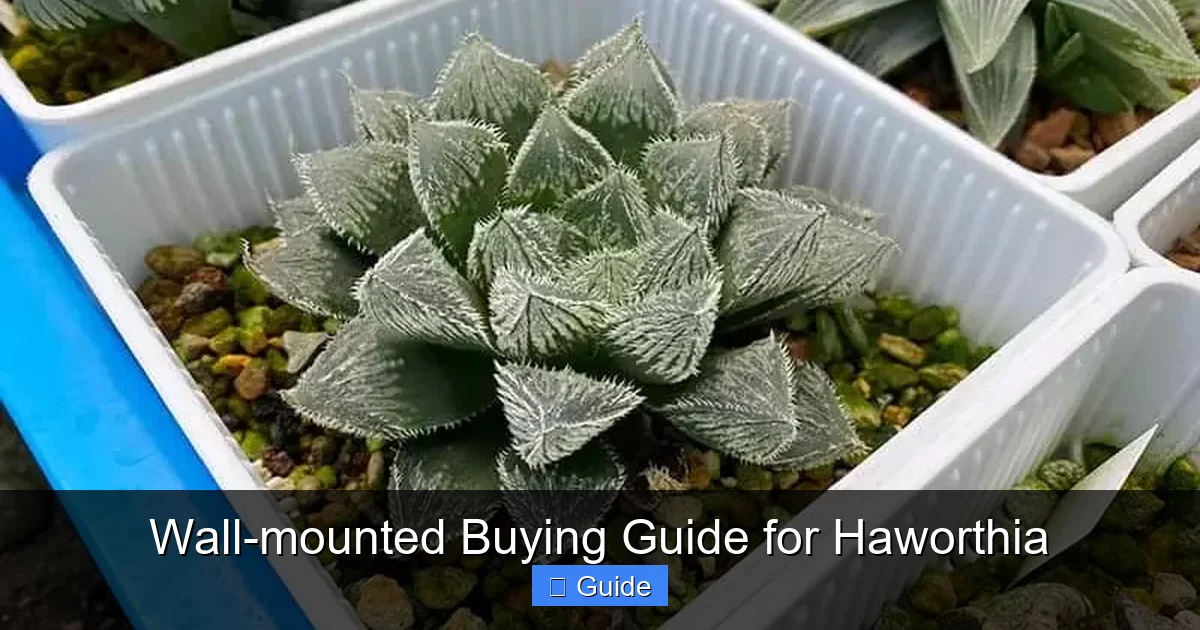
Soft-leaved or “windowed” Haworthia — such as Haworthia cooperi, Haworthia cymbiformis, Haworthia obtusa, and the stunning Haworthia truncata — have plump, translucent leaf tips. These are more sensitive to drying out and prefer slightly more consistent moisture and lower light. They create the most dramatic visual effect in a wall display, with their jewel-like leaves catching light, but they demand more attentive care.
Top Species for Wall-Mounted Success
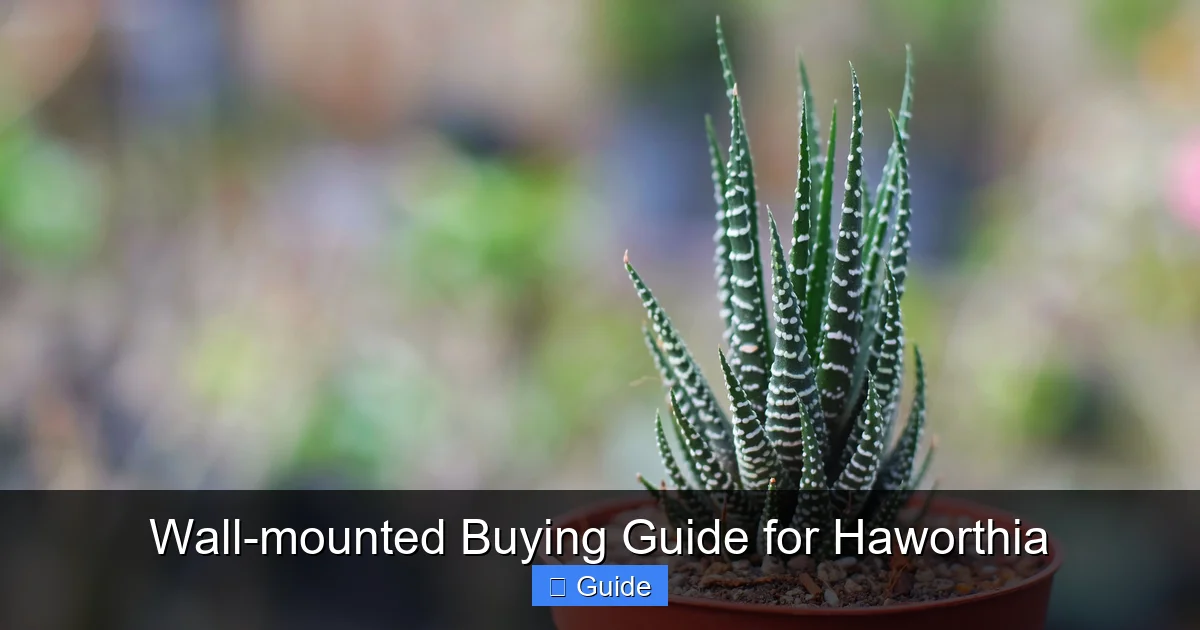
Haworthia fasciata (Zebra Plant) remains the gold standard for vertical gardens. Its upright, stiff leaves with bold white bands create strong vertical lines that read beautifully on a wall. It tolerates a wide range of light, handles irregular watering, and stays compact for years. Haworthia attenuata looks similar but has tubercles on both leaf surfaces, giving it a rougher texture.
For windowed varieties, Haworthia cooperi var. truncata is a showstopper. Its flat-topped leaves look like tiny green gems pressed against the wall. Haworthia cymbiformis forms dense clusters of boat-shaped leaves with clear windows, creating a bubbly, organic texture. Haworthia limifolia (Fairy Washboard) offers dramatic ridged leaves that add strong architectural lines.
Consider mixing three to five varieties in a single display. Choose one hard-leaved anchor species, one or two windowed showpieces, and a contrasting texture like Haworthia reinwardtii with its stacked, columnar growth. Avoid mixing species with drastically different water needs in the same planter pocket unless you can water them individually.
Growth Habits and Long-Term Planning
Most Haworthia species are slow growers, adding only a few leaves per year. However, they do produce offsets (pups) around the base. In a pot, these gradually fill the container. In a wall-mounted pocket, they will eventually crowd each other. Plan for this by choosing a system with removable modules or pockets large enough to accommodate a small cluster.
Some species, like Haworthia reinwardtii and Haworthia coarctata, grow in stacked columns that slowly elongate. These can become top-heavy in a vertical orientation. Provide a slightly deeper pocket or a small stake for support. Others, like Haworthia truncata, stay nearly flat against the ground in nature and adapt beautifully to pressing against a vertical back panel.
Selecting the Right Wall-Mounted System
Modular Panel Systems
Modular panel systems consist of a frame mounted to the wall with interchangeable planting cells or pots that slot into the frame. Brands like Florafelt, WallyGrow, and custom metal grid systems fall into this category. These are the most versatile option for Haworthia because you can remove individual cells for watering, repotting, or redesigning without disturbing the whole wall.
Look for cells at least 3 inches deep and 3-4 inches wide. Haworthia roots need some room to spread horizontally. Cells with built-in drainage holes and a small reservoir at the bottom help maintain consistent moisture without waterlogging. Felt-based systems wick moisture evenly but can stay too wet for Haworthia unless you use a very gritty soil mix. Rigid plastic or ceramic cells with good airflow around the root zone are safer.
Pocket Planters and Fabric Systems
Fabric pocket planters — essentially heavy-duty felt or canvas pouches mounted on a backing board — are affordable and lightweight. They conform to the wall and create a soft, organic look. However, they dry out unevenly (top pockets dry faster than bottom ones) and the fabric can wick moisture away from the soil too quickly for windowed Haworthia varieties.
If you choose a pocket system, line each pocket with a piece of landscape fabric cut larger than the pocket, fill with an extremely well-draining mix, and consider adding a small piece of capillary matting at the bottom of each pocket to act as a moisture buffer. Water each pocket individually rather than pouring water over the top.
Magnetic and Adhesive Mounts for Small Displays
For a small collection — say, six to twelve plants — magnetic planters or adhesive-backed ceramic pots offer a renter-friendly, damage-free option. These work best on metal surfaces (refrigerator, metal backsplash) or smooth tile. The planters are typically small (2-3 inch diameter), so they suit young plants or naturally tiny species like Haworthia bayeri or Haworthia pygmaea.
The main limitation is soil volume. Tiny pots dry out in hours under warm conditions. You will need to water frequently or use a moisture-retentive (but still draining) mix with a touch of coconut coir. These systems are best for people who enjoy daily plant interaction and have consistent schedules.
DIY Frame and Shelf Options
Building your own frame lets you customize dimensions, materials, and cell layout. A simple wooden frame with chicken wire backing and landscape fabric lining creates a rustic living wall. Individual terracotta pots can be wired into the grid. This approach gives maximum airflow — excellent for Haworthia — but requires more carpentry skill and wall anchoring.
Floating shelves with a lip to hold pots are another DIY-friendly route. They are not truly “wall-mounted” in the vertical sense, but a staggered arrangement of shallow shelves creates a similar visual effect with much easier watering access. Each pot can be rotated for even light exposure.
Drainage and Wall Protection Essentials
No matter which system you choose, protecting your wall from moisture is non-negotiable. Water will escape — from drainage holes, from overwatering, from condensation. Every system needs a waterproof backing board (PVC, HDPE, or marine-grade plywood sealed with waterproof membrane) between the planter and your wall.
Include a drainage tray or gutter at the bottom of the installation to catch runoff. Some modular systems have integrated drip trays that slide out. For DIY builds, a simple aluminum angle flashing bent into a U-shape and mounted below the frame works well. Run a length of clear tubing from the tray to a nearby sink or bucket if you want fully automated drainage.
Light Requirements and Placement Strategy
Reading Your Wall’s Light Profile
Before buying a single plant or planter, spend a few days observing your chosen wall. Note the hours of direct sun, the intensity of indirect light, and how patterns shift through the seasons. A south-facing wall in July delivers very different light than the same wall in January. Use a light meter app on your phone (many free options exist) to measure foot-candles or lux at different times of day.
Haworthia generally thrives in 1,000 to 3,000 foot-candles of indirect light. Direct sun above 5,000 foot-candles can scorch windowed varieties, though hard-leaved types can acclimate to a few hours of morning sun. If your wall gets intense afternoon sun, you will need a sheer curtain, a shade cloth, or to choose only the toughest species.
Best Orientations for Haworthia Walls
East-facing walls are the gold standard. They receive gentle morning sun (2-4 hours) followed by bright indirect light all day. This mimics the Haworthia’s natural habitat — rocky slopes that catch dawn light but are shaded by midday. North-facing walls (in the northern hemisphere) provide consistent, moderate indirect light all day. They work well for windowed varieties but may not give enough intensity for strong coloration in hard-leaved types.
West-facing walls are tricky. The intense afternoon heat and light can cook plants in shallow vertical planters. If this is your only option, install a 30-50% shade cloth a few inches in front of the wall, or choose only Haworthia fasciata, attenuata, and reinwardtii. South-facing walls work in higher latitudes or with significant shading, but in sunbelt regions they are usually too intense without protection.
Supplemental Lighting for Darker Walls
If your dream wall location is a dim hallway or a basement room, grow lights make it possible. LED grow bars or panels mounted above the wall can provide the spectrum and intensity Haworthia needs. Look for full-spectrum white LEDs (4000K-6500K) with a PPFD (photosynthetic photon flux density) of 100-200 µmol/m²/s at plant level.
Run lights 12-14 hours daily on a timer. Position the light 12-18 inches from the wall for even coverage. Remember that grow lights produce heat — ensure airflow between the light fixture and the plants. A small clip-on fan circulating air across the wall prevents fungal issues and strengthens plant tissue.
Seasonal Adjustments and Plant Rotation
Light changes with the seasons. A wall that is perfect in spring may get scorching sun in summer or deep shade in winter. Modular systems shine here — you can swap cells between walls or rotate the entire frame if it is on a French cleat mount. For fixed installations, consider seasonal shade cloth or moving the most sensitive plants to lower-light pockets during summer.
Rotate individual plants 180 degrees every month so they grow evenly. In a vertical orientation, the top of the rosette gets more light than the bottom. Without rotation, plants lean and become lopsided. This is especially noticeable in windowed varieties where the leaf windows should face the light source for the best visual effect.
Watering and Maintenance for Vertical Haworthia
The Vertical Watering Challenge
Watering a wall-mounted garden is fundamentally different from watering pots on a shelf. Gravity pulls water down through the soil column rapidly. The top of a pocket dries out while the bottom stays soggy. Water poured at the top may channel straight through without wetting the root zone evenly. Haworthia, with its shallow roots concentrated in the upper soil layer, can miss out entirely.
The solution is slow, targeted watering. Use a squeeze bottle with a narrow spout or a turkey baster to deliver water directly to the base of each plant. Water until you see a drop or two exit the drainage hole — then stop. Do not saturate the entire pocket. For modular cells, remove the cell, water it in a sink, let it drain fully, then replace it. This is the single best practice for vertical Haworthia success.
Soak-and-Dry Adapted for Walls
The classic succulent advice — soak thoroughly, then let dry completely — needs modification for vertical systems. “Completely dry” in a shallow wall pocket can happen in 24 hours in summer, leading to desiccation of windowed varieties. “Thoroughly soaked” can mean waterlogged bottom roots.
Instead, aim for “mostly dry in the top inch, slightly moist at the bottom.” Check by inserting a wooden skewer or moisture meter into the side of the pocket. Water when the top half is dry. In practice, this means watering every 7-10 days in active growth (spring/fall), every 14-21 days in summer heat (when many Haworthia semi-dormant), and every 3-4 weeks in winter.
Soil Mix: The Foundation of Vertical Success
Standard cactus soil is too moisture-retentive for wall-mounted Haworthia. You need a mix that drains in seconds, holds almost no water, but still provides mineral nutrients. A proven recipe: 2 parts pumice (3-5mm), 1 part coarse perlite, 1 part decomposed granite or chicken grit, 1 part coconut coir (finely screened), and 0.5 part worm castings or slow-release fertilizer.
This mix is essentially inorganic. It will not compact, it wets and rewets easily, and it provides excellent airflow to roots. The small amount of coir gives just enough water retention to bridge the gap between waterings without staying wet. Screen all components to remove dust and fines — those create the perched water table that kills roots in shallow vertical pockets.
Fertilizing: Less Is More
Haworthia grows slowly and needs little fertilizer. In a vertical system with minimal soil volume, salt buildup from fertilizer happens fast. Use a dilute (1/4 strength) balanced liquid fertilizer (10-10-10 or 20-20-20) only during active growth — typically March through May and September through November. Apply once a month at most. Skip entirely in summer heat and winter cold.
Alternatively, incorporate a teaspoon of slow-release osmocote (14-14-14, 3-4 month release) per gallon of soil mix at planting time. This feeds gently for the season without salt spikes. Top-dress with a fresh sprinkle each spring when you refresh the top layer of soil.
Pest Management in Vertical Systems
Mealybugs love the tight, protected crevices of Haworthia rosettes. In a wall-mounted system, they can spread quickly from plant to plant because leaves touch or overlap. Spider mites thrive in the warm, dry microclimate against a heated interior wall. Inspect weekly with a flashlight, checking leaf axils and undersides.
At the first sign of mealybugs (white cottony spots), isolate the affected cell if possible. Treat with 70% isopropyl alcohol on a cotton swab, touching each bug directly. For spider mites (fine webbing, stippled leaves), spray the whole wall with a strong jet of water (take the system down or protect the wall), then apply neem oil or insecticidal soap weekly for three weeks. Good airflow and avoiding water on leaves prevent most fungal issues.
Grooming and Seasonal Refresh
Remove dead lower leaves as they dry — they harbor pests and fungi. Use tweezers to pull them cleanly. If a plant becomes etiolated (stretched from low light), you can behead it: cut the rosette with a clean knife, let the cut callus for a week, then press it into fresh mix. The old root base often produces new pups.
Once a year, ideally in early spring, remove each cell or pocket and check root health. Trim any black, mushy roots. Refresh the top inch of soil. Replant any offsets that have crowded the mother plant. This annual reset keeps a wall-mounted Haworthia display looking sharp for years.
Design Ideas and Creative Arrangements
Color and Texture Palettes
Design your Haworthia wall like a painting. Group plants by color theme for impact. A “cool tones” wall uses Haworthia cooperi (pale green), Haworthia truncata (gray-green), Haworthia bayeri (dark green with white stripes), and Haworthia attenuata ‘Variegata’ (cream and green). A “warm tones” wall features Haworthia limifolia (bronze-green), Haworthia reinwardtii (reddish tips in sun), Haworthia coarctata (brown-green), and Haworthia fasciata ‘Alba’ (white bands).
Texture contrast creates depth. Pair smooth, windowed leaves with heavily tubercled, rough leaves. Mix flat rosettes (truncata, cooperi) with columnar stacks (reinwardtii, coarctata). The eye moves across the wall, discovering new details. Repeat each variety 3-5 times across the design for rhythm — a single specimen of each looks like a botanical collection, not a designed composition.
Geometric Patterns and Living Mosaics
Modular grid systems invite geometric layouts. Plant in a checkerboard of two contrasting varieties. Create a gradient from dark green at the bottom to pale green at the top. Arrange in concentric diamonds or radiating lines from a central showpiece. The grid itself becomes part of the design — choose frames in matte black, natural wood, or brushed aluminum to complement the plants.
For a mosaic effect, use many small pockets (2×2 inches) each with a single plant. The grout lines between pockets read like the leading in stained glass. This works beautifully with the jewel-like windowed Haworthia. Backlight the wall with LED strip lighting for a dramatic evening effect — the translucent leaf windows glow like lanterns.
Integrating Non-Plant Elements
Incorporate hardscape elements for year-round structure. A piece of drilled lava rock mounted among the planters adds texture and a naturalistic touch. Small ceramic or stone sculptures nestled between pockets create focal points. Preserved reindeer moss (in colors from chartreuse to deep forest) fills gaps between planters and hides mounting hardware.
Consider a “frame within a frame” — mount a shallow shadow box on the wall, then install the Haworthia system inside it. The box depth creates a shadow line that makes the planting pop. Paint the box interior a dark charcoal or matte black to make the green hues vibrate.
Small Space Solutions
No room for a full wall? A single 12×12 inch panel with 9-12 cells makes a stunning “living picture frame” above a desk or bedside table. Magnetic planters on a metal backsplash turn a kitchen into a succulent gallery. A vertical row of three wall-mounted ceramic cones (each with one Haworthia) flanks a mirror or artwork elegantly.
For renters, a freestanding room divider with planter pockets on both sides gives you a portable Haworthia wall. Build it from 2x4s and welded wire mesh, or buy a ready-made trellis planter. When you move, the wall comes with you.
Seasonal and Thematic Rotations
Because modular cells are removable, you can rotate “guest plants” into your Haworthia wall for seasonal interest. In spring, swap a few cells for flowering bulbs (Muscari, species tulips) or annuals. In winter, add small air plants (Tillandsia) wired into the frame — they need only misting and complement the Haworthia aesthetic. For holidays, tuck in battery-operated fairy lights or tiny ornaments.
This flexibility keeps the display fresh and lets you experiment with new Haworthia varieties without committing to a full redesign. Keep a few spare cells planted with “understudies” — extra plants ready to sub in when a specimen needs a rest or goes into summer dormancy.
Troubleshooting Common Wall-Mounted Haworthia Problems
Shriveling Leaves Despite Regular Watering
If leaves wrinkle and flatten but you are watering on schedule, the water is likely not reaching the roots. In vertical pockets, water channels down the sides of the root ball. The fix: water slowly with a syringe or turkey baster inserted into the soil at the base of the plant. Add a wick (cotton rope) from the bottom reservoir up into the root zone. Or switch to bottom-watering: remove the cell, sit it in a tray of water for 10 minutes, drain, replace.
Yellowing, Translucent, Mushy Leaves
Classic overwatering or poor drainage. The bottom of the pocket is staying saturated. Check that drainage holes are clear. Increase the pumice ratio in your mix. Reduce watering frequency. Ensure the wall gets enough airflow — a small fan on low for a few hours daily works wonders. Remove any mushy leaves immediately to prevent rot spread.
Stretched, Pale Growth (Etiolation)
Not enough light. The plant is reaching for the source. Move the wall to a brighter location, add grow lights, or replace with more shade-tolerant varieties (Haworthia cooperi, cymbiformis, obtusa). Behead severely stretched rosettes and reroot — the new growth will be compact if light improves.
Brown, Crispy Leaf Tips
Usually salt burn from fertilizer buildup or fluoride in tap water. Flush the soil thoroughly (remove cell, run water through for 2 minutes). Switch to distilled or rainwater. Cut back fertilizer. Trim crispy tips with sterilized scissors — they will not recover but the plant will push new growth.
Pests Spreading Rapidly Across the Wall
The close quarters of a vertical garden accelerate infestations. At first sign, remove affected cells entirely. Treat off-wall. Quarantine for two weeks before returning. Consider a preventive monthly spray of diluted neem oil (1 tsp per quart water with a drop of dish soap) on all plants, applied in the evening so leaves dry before light hits them.
Conclusion: Your Living Wall Journey Starts Now
Creating a wall-mounted Haworthia garden is one of the most rewarding plant projects you can undertake. It combines horticulture, design, and a touch of engineering into a living artwork that changes and grows with you. The compact nature of Haworthia, their fascinating leaf architecture, and their adaptability to vertical life make them the ideal genus for this format.
Start small if you are new to vertical gardening. A single modular panel with six to nine cells, three well-chosen varieties, and a commitment to learning the watering rhythm will teach you everything you need. Observe daily. Take notes. Adjust. The plants will tell you what they need — through leaf plumpness, color, and growth direction.
Remember that every wall is different. Your light, your humidity, your schedule, your aesthetic — all shape what works. Use this wall-mounted buying guide for Haworthia as your foundation, but trust your observations above all. The gardener who pays attention always wins.
Soon, you will find yourself propagating offsets to share, designing new patterns for the seasons, and showing off your living wall to every visitor. That empty wall? It is not empty anymore. It is waiting for its Haworthia moment. Go make it happen.
Frequently Asked Questions
What is the best wall-mounted system for Haworthia?
Modular panel systems with removable cells (3+ inches deep) are ideal. They allow individual watering, easy plant swaps, and good airflow. Look for rigid cells with drainage holes rather than fabric pockets, which dry unevenly and can stay too wet for Haworthia roots.
Can I mount Haworthia on a west-facing wall?
West-facing walls work only with protection. The intense afternoon sun and heat can scorch most Haworthia, especially windowed varieties. Install a 30-50% shade cloth or choose only hard-leaved types like Haworthia fasciata and attenuata. Monitor closely for stress signs.
How do I prevent soil from falling out of a vertical planter?
Use a well-draining mix with large particles (pumice, perlite, decomposed granite) that locks together. Line pockets with landscape fabric before adding soil. For modular cells, a piece of fine mesh or coffee filter over the drainage holes keeps mix in while letting water out.
Why are my wall-mounted Haworthia leaves turning brown at the tips?
Brown tips usually indicate salt buildup from fertilizer or fluoride in tap water. Flush the soil thoroughly with distilled water, reduce or stop fertilizing, and switch to rainwater or distilled water for future watering. Trim damaged tips with clean scissors.
Can I grow Haworthia in a magnetic planter on my refrigerator?
Yes, but only for very small plants or juveniles. Magnetic planters hold little soil, so they dry out in hours. You must water daily or use a moisture-retentive (but draining) mix. Best for Haworthia bayeri, pygmaea, or young offsets. Not a long-term solution for mature plants.
How do I redesign my Haworthia wall without damaging plants?
Modular systems make this easy — simply unclip cells and rearrange them. For fixed systems, work in early spring. Remove plants gently, keeping root balls intact. Replant immediately into pre-moistened fresh mix. Water lightly after redesign and keep in slightly lower light for a week to reduce transplant shock.