Echeveria Yellow Leaves Causes
Echeveria yellow leaves causes range from overwatering and poor drainage to sunburn, pests, and nutrient deficiencies. Identifying the specific cause is essential for saving your plant and preventing future problems.
You walk over to your windowsill and notice something wrong. Your beautiful echeveria, once a perfect rosette of blue-green leaves, now shows yellow patches. Maybe the lower leaves have turned pale. Maybe the tips look burned. Your stomach drops. Is it dying? Did you kill it?
Take a breath. Yellow leaves on echeveria are common. They happen to everyone — beginners and experts alike. The good news? Your plant is talking to you. Those yellow leaves are a message. Once you learn to read that message, you can fix the problem. Most of the time, your echeveria will bounce back stronger than before. This guide walks you through every common cause, how to spot the difference, and exactly what to do next.
Key Takeaways
- Overwatering is the number one cause: Soggy soil leads to root rot and yellow, mushy leaves on echeveria plants.
- Sunburn causes yellow patches: Intense direct light creates bleached yellow spots on leaves, especially after sudden exposure changes.
- Underwatering creates wrinkled yellow leaves: Dehydrated echeveria leaves turn yellow, become thin, and feel crispy to the touch.
- Nutrient deficiencies show specific patterns: Nitrogen deficiency yellows older leaves first, while iron deficiency affects new growth with yellowing between veins.
- Pests like mealybugs and aphids drain plant sap: These insects cause yellowing, stunted growth, and sticky residue on affected echeveria.
- Poor drainage mimics overwatering symptoms: Even correct watering fails if soil retains too much moisture around the roots.
- Natural aging yellows bottom leaves only: Older lower leaves naturally yellow and die as the plant grows upward — this is normal.
Quick Answers to Common Questions
Why are my echeveria leaves turning yellow and mushy?
Yellow mushy leaves almost always mean overwatering or root rot. The roots have drowned and can’t transport water, so the plant sacrifices leaves. Stop watering immediately, check roots, and repot in dry gritty soil if needed.
Can sunburned echeveria leaves recover?
No, sunburned tissue is permanently dead. The yellow or white patches won’t turn green again. However, the plant will grow new healthy leaves from the center. Remove burned leaves only after new growth is established.
How do I tell if yellow leaves are from underwatering vs overwatering?
Feel the leaves. Overwatered leaves are soft, mushy, translucent. Underwatered leaves are thin, wrinkled, crispy, papery. Also check soil — wet means overwatering, bone dry means underwatering.
Is it normal for bottom echeveria leaves to turn yellow?
Yes, if only the lowest 1-2 leaves yellow and they’re dry/papery, not mushy. This is natural aging as the plant grows upward. Gently remove them. If many leaves yellow or they’re mushy, it’s a problem.
Should I fertilize my echeveria with yellow leaves?
Only if you’ve confirmed nutrient deficiency and it’s growing season (spring-fall). Never fertilize a stressed, overwatered, or dormant plant. Fertilizer burns damaged roots. Fix the root cause first, then fertilize lightly if needed.
📑 Table of Contents
- Understanding Your Echeveria’s Language
- Overwatering: The Silent Killer
- Underwatering: The Other Extreme
- Sunburn and Light Stress
- Nutrient Deficiencies: The Hidden Hunger
- Pests: Tiny Thieves Causing Big Problems
- Root and Soil Problems Beyond Watering
- Temperature Stress and Cold Damage
- Natural Aging: When Yellow Is Normal
- Diagnostic Flowchart: Finding Your Cause
- Prevention: The Best Cure
- When to Give Up (And When Not To)
- Conclusion
Understanding Your Echeveria’s Language
Echeveria plants are succulents native to semi-desert regions of Mexico and Central America. They store water in thick, fleshy leaves. This adaptation helps them survive drought. But it also makes them sensitive to excess moisture. Their natural habitat gives clues to what they need: bright light, excellent drainage, and infrequent but deep watering.
When something goes wrong, the leaves change color. Yellow is the most common warning sign. But not all yellow looks the same. The pattern matters. The texture matters. Which leaves are affected matters. Top leaves versus bottom leaves. Soft and mushy versus dry and crispy. Yellow spots versus overall yellowing. Each pattern points to a different cause.
Why Yellow? The Science Behind the Color Change
Green leaves get their color from chlorophyll. Chlorophyll captures sunlight for photosynthesis. When a plant is stressed, chlorophyll breaks down. The green fades. Yellow pigments (carotenoids) that were always there become visible. Think of autumn leaves — same process. Stress triggers the plant to dismantle chlorophyll and reabsorb nutrients. The leaf sacrifices itself for the plant’s survival.
Different stresses trigger this process in different ways. Overwatering drowns roots, cutting off nutrient uptake. Sunburn destroys chlorophyll directly with UV radiation. Nutrient deficiency means the plant cannot make new chlorophyll. Pests steal the sugars produced by photosynthesis. The result looks similar — yellow leaves — but the root cause differs completely.
Overwatering: The Silent Killer
If you remember one thing from this guide, make it this: overwatering kills more echeveria than anything else. These plants evolved for drought. Their roots need air as much as water. Wet soil pushes air out. Roots suffocate. Then they rot. Rotten roots cannot absorb water or nutrients. The plant starves and drowns simultaneously.
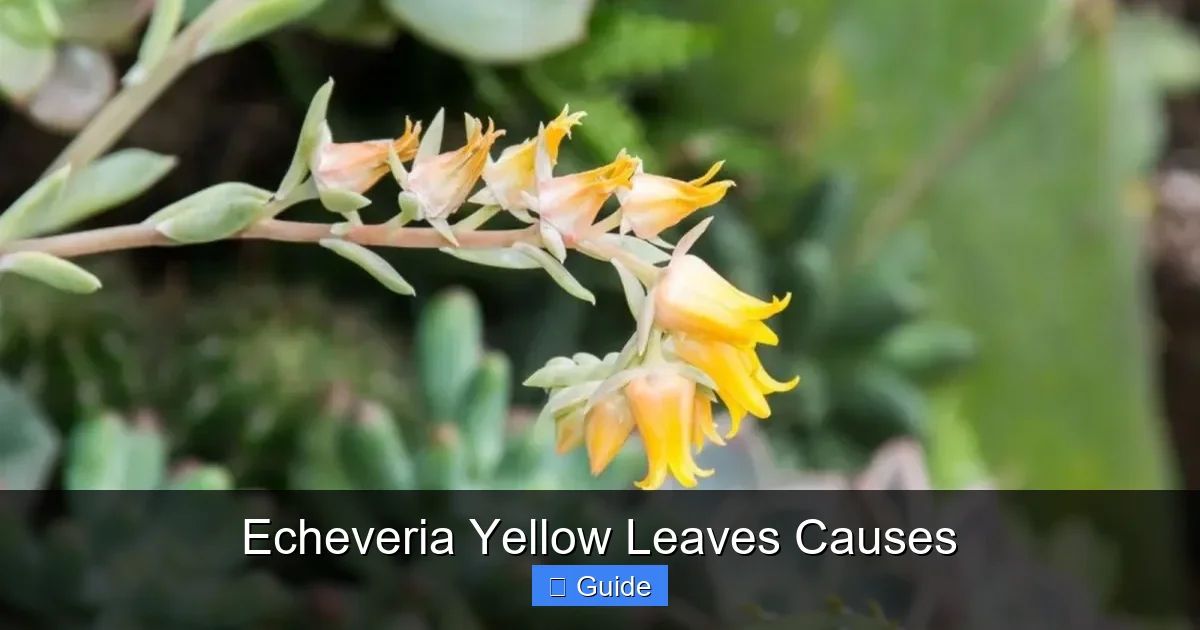
Visual guide about Echeveria Yellow Leaves Causes
Image source: positivebloom.com
How to Spot Overwatering Yellow Leaves
Overwatering creates a distinct look. The yellow leaves feel soft. Mushy. Translucent. They may look swollen or waterlogged. The yellowing often starts at the bottom of the plant and moves up. Leaves fall off with a gentle touch. The stem may feel soft or look dark near the soil line. You might see black or brown mushy spots — that’s rot spreading.
The soil tells the story too. It stays wet days after watering. It may smell musty or sour. Fungus gnats might hover around. White mold might appear on the surface. The pot feels heavy. If you pull the plant gently, roots look brown or black instead of white or tan. They slip off the stem like wet noodles.
Why It Happens (Even When You Think You’re Careful)
Many growers water on a schedule — once a week, every Sunday, whatever. But echeveria needs vary wildly. A plant in a small terracotta pot in summer sun needs water weekly. The same plant in a large plastic pot in a humid bathroom in winter might need water monthly. Schedule watering ignores reality.
Pot choice matters enormously. No drainage hole? Water pools at the bottom. Roots sit in soup. Plastic and glazed ceramic hold moisture longer than terracotta. Soil choice matters too. Regular potting soil holds water like a sponge. Echeveria needs gritty, fast-draining mix. Even the right soil breaks down over time, becoming compacted and water-retentive.
Fixing Overwatering Step by Step
First, stop watering. Immediately. Let the soil dry completely. This might take weeks. If the plant is mildly affected, this alone may save it. But if leaves are mushy or the stem is soft, you need surgery.
Remove the plant from its pot. Shake off all wet soil. Inspect roots. Healthy roots are firm, white or tan. Rotten roots are brown, black, mushy, hollow. Cut away every bit of rot with clean, sharp scissors. Sterilize between cuts with rubbing alcohol. Let the plant sit bare-root for three to seven days in bright indirect light. Callus forms over cuts.
Repot in fresh, dry succulent mix. Use a pot with drainage holes. Terracotta is ideal. Wait three to five days before first water. Then water deeply until water runs out the bottom. Wait until soil is bone dry before watering again. The plant may look worse before better — it’s regrowing roots. Be patient.
Underwatering: The Other Extreme
People hear “succulents hate water” and stop watering entirely. Or they water lightly, just a sip. The soil stays dry deep down. Roots die back from dehydration. The plant cannibalizes its own leaves for moisture. Bottom leaves yellow, wrinkle, and crisp up.
Recognizing Underwatering Symptoms
Underwatered echeveria leaves feel thin. Papery. Crispy. They wrinkle like deflated balloons. The yellow is dull, not translucent. Leaves curl inward or downward. The rosette may close up tightly — a survival response to reduce surface area. Growth stops. Flower stalks wither. The plant feels light in its pot.
Soil pulls away from pot edges. It’s hydrophobic — water runs straight through without absorbing. You might see aerial roots forming on the stem — the plant desperately searching for moisture. These look like tiny pink or white nubs along the stem.
The “Sip” Watering Trap
Many people give succulents a tablespoon of water weekly. This wets the top half-inch. Roots stay dry. The plant gets neither a good drink nor a dry period. It’s the worst of both worlds. Succulents want a flood, then a drought. Deep watering encourages deep roots. Shallow watering encourages shallow roots that dry out instantly.
Rehydrating a Thirsty Echeveria
Place the pot in a basin of water. Let it soak from the bottom for twenty to thirty minutes. The soil will absorb water upward through the drainage hole. Top water afterward to ensure even saturation. Let drain completely. The leaves should plump up within days.
Going forward, water deeply. Check soil moisture with a wooden skewer or your finger — all the way to the bottom. Water only when completely dry. In summer, this might be weekly. In winter, monthly or less. Adjust for your conditions, not a calendar.
Sunburn and Light Stress
Echeveria loves light. But there’s a limit. Sudden intense sun destroys chlorophyll. The leaves bleach yellow or white. This is sunburn. It happens fast — hours can do it. The damage is permanent on affected leaves.
What Sunburn Looks Like
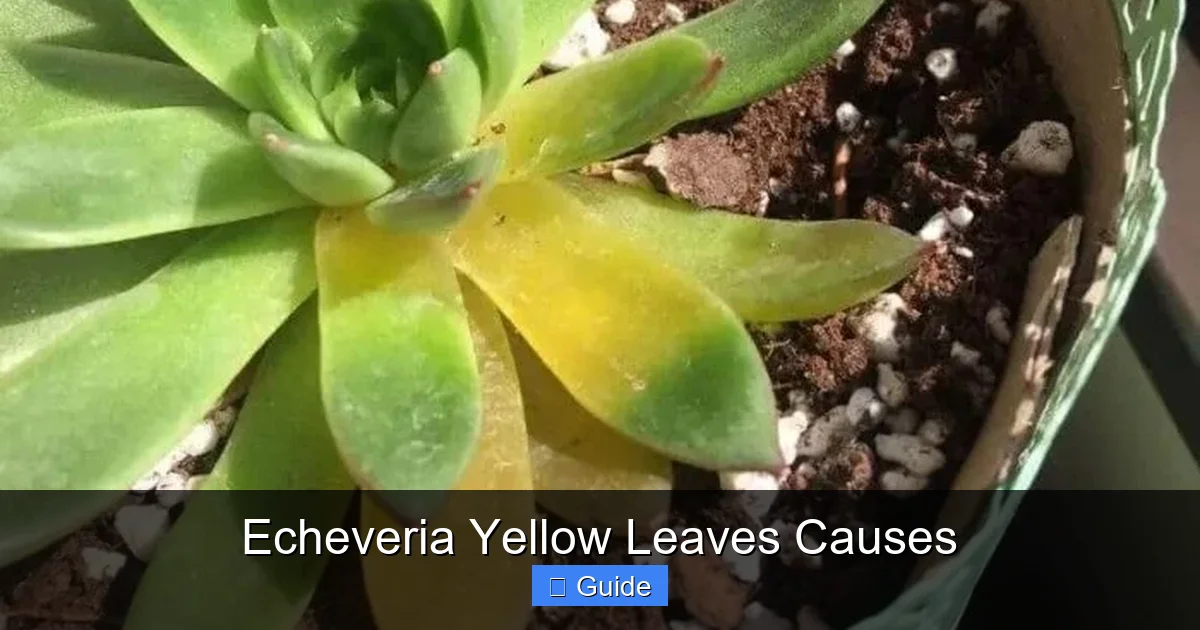
Sunburn appears as irregular patches. Yellow, white, or beige. Often on the top or outer leaves facing the light source. The patches feel dry, papery, crispy. Not mushy. The tissue is dead. Edges may brown. The pattern follows light exposure — one side of the plant, or the upper surfaces. New growth in the center often stays green.
This differs from overwatering yellowing. Sunburn is localized. Dry. Crispy. Overwatering is widespread. Soft. Mushy. Sunburned leaves don’t fall off easily — they stay attached but dead.
Common Sunburn Scenarios
Moving an indoor plant directly into full outdoor sun. Spring sun after a cloudy winter. A heatwave with intense UV. Removing a shade cloth too quickly. Placing a plant against a hot window with magnified glass effect. Reflected light off light-colored walls or concrete. Even grow lights too close or too intense.
Echeveria can handle full sun — but they must acclimate. Two weeks of gradual exposure. Start with morning sun only. Add an hour daily. Watch for stress colors (red/purple edges are good; yellow/white patches are bad).
Managing Sunburned Plants
Move the plant to bright indirect light immediately. Do not remove burned leaves yet — they still protect the stem and photosynthesize at the edges. Once new growth appears and the plant stabilizes (weeks to months), gently remove dead leaves. They’ll come off easily.
Prevent future burns with shade cloth (30-50%), sheer curtains, or strategic placement. Morning sun is gentler than afternoon sun. East-facing windows are safer than west or south. Rotate pots weekly for even growth.
Nutrient Deficiencies: The Hidden Hunger
Echeveria grows in nutrient-poor soil naturally. But in pots, nutrients deplete. Repotting yearly with fresh soil usually prevents this. But long-term plants in depleted soil show specific yellowing patterns.
Nitrogen Deficiency
Nitrogen builds chlorophyll. Without it, older leaves yellow first — uniformly, from tip to base. The whole plant looks pale. Growth slows. New leaves are small. This is the most common deficiency. Fix with diluted balanced fertilizer (half strength) during growing season. Or repot with fresh soil containing slow-release fertilizer.
Iron Deficiency (Chlorosis)
Iron helps make chlorophyll. Deficiency shows as yellowing between leaf veins while veins stay green. This is interveinal chlorosis. It affects new growth first. Common in alkaline soil or water. Echeveria prefers slightly acidic conditions (pH 6.0-6.5). Fix with chelated iron supplement or repot in acidic succulent mix. Rainwater or distilled water helps if tap water is alkaline.
Magnesium Deficiency
Magnesium is central to chlorophyll molecules. Deficiency yellows older leaf edges and tips, moving inward. Veins stay green longer. Leaves may curl. Epsom salts (magnesium sulfate) at one teaspoon per gallon water, applied monthly during growing season, corrects this.
Potassium Deficiency
Potassium regulates water and nutrient movement. Deficiency causes yellowing at leaf tips and margins, with brown crispy edges. Weak stems. Poor root growth. Balanced fertilizer with adequate potassium prevents this.
Fertilizing Echeveria Correctly
Less is more. Fertilize only during active growth (spring to early fall). Use cactus/succulent fertilizer at quarter to half strength. Or balanced 10-10-10 at quarter strength. Monthly is plenty. Never fertilize dormant plants (winter). Never fertilize dry soil — water first, then fertilize next watering. Flush soil occasionally to prevent salt buildup.
Pests: Tiny Thieves Causing Big Problems
Pests suck sap from leaves. This steals nutrients and water. Leaves yellow, distort, stunt. Honeydew (sticky residue) attracts sooty mold. Ants farm pests for honeydew. Check plants weekly. Early detection saves plants.
Mealybugs: The Cottony Invaders
Mealybugs look like tiny white cotton balls. They hide in leaf axils, under leaves, on roots. They excrete honeydew. Leaves yellow, wilt, drop. Roots mealybugs are worse — you won’t see them until repotting. Plant declines mysteriously.
Treatment: Isolate immediately. Dab visible bugs with alcohol-soaked cotton swab. Spray with insecticidal soap or neem oil weekly for three weeks. For root mealybugs, bare-root, wash roots, soak in systemic insecticide, repot in fresh soil.
Aphids: The Green (or Black) Clusters
Aphids cluster on new growth and flower stalks. Green, black, orange, woolly. They reproduce fast — live birth, no mating needed. Leaves curl, yellow, distort. Honeydew everywhere. Ants often present.
Treatment: Blast with water hose. Spray insecticidal soap. Neem oil. Ladybugs eat them outdoors. Repeat weekly until gone.
Spider Mites: The Invisible Web Spinners
Too small to see easily. Look for fine webbing on leaf undersides. Stippled yellow dots on leaves — feeding marks. Leaves bronze, yellow, fall. Thrive in hot, dry, dusty conditions.
Treatment: Increase humidity. Spray water forcefully on leaf undersides daily. Neem oil or horticultural oil. Predatory mites for severe cases. Keep plants clean — dust attracts mites.
Scale Insects: The Armored Bumps
Look like small brown, tan, or white bumps on stems and leaves. Immobile adults under protective shells. Crawlers (babies) move. Yellow halos around feeding sites. Leaves yellow, drop.
Treatment: Scrape off with fingernail or toothbrush. Alcohol swabs. Horticultural oil smothers them. Systemic insecticide for heavy infestation. Repeat — shells protect adults from contact sprays.
Root and Soil Problems Beyond Watering
Sometimes watering is perfect but roots still suffer. The medium itself causes trouble.
Compacted Soil
Organic matter breaks down. Peat moss decomposes. Soil becomes dense, airless. Roots suffocate. Water runs straight through or pools on top. Yellowing mimics overwatering. Fix: repot yearly. Use mineral-heavy mix (pumice, perlite, coarse sand, gravel). Less organic matter lasts longer.
Pot-Bound Roots
Roots fill the pot. Circle endlessly. No soil left to hold water or nutrients. Plant yellows, stunts, declines. Water runs through instantly. Fix: repot into slightly larger pot. Loosen root ball. Trim circling roots. Fresh soil.
Wrong Pot Size
Too large a pot holds excess soil that stays wet. Roots can’t use all that moisture. Rot risk skyrockets. Echeveria prefers snug pots. One to two inches wider than rosette is plenty. Shallow pots work better than deep — roots spread horizontally.
Salt Buildup
Fertilizer salts accumulate. Tap water minerals accumulate. White crust on soil surface or pot rim. Root tips burn. Leaves yellow from tips inward. Fix: flush soil thoroughly. Water until three pot volumes run through. Repeat monthly. Use rainwater or distilled water occasionally.
Temperature Stress and Cold Damage
Echeveria prefers 65-80°F (18-27°C). Below 50°F (10°C), growth stops. Below freezing, cells burst. Cold damage shows as yellow, mushy, translucent patches — looks like overwatering but appears after cold exposure. Leaves may turn black later.
Heat stress above 90°F (32°C) with intense sun causes yellowing, especially if soil is dry. Plant goes dormant. Leaves yellow, drop. Move to shade. Water sparingly until temps normalize.
Sudden temperature swings shock plants. Bringing outdoor plants inside for winter — the dry heated air causes yellowing. Gradual transition helps. Humidity trays help.
Natural Aging: When Yellow Is Normal
Not all yellow is bad. Echeveria grows from the center. Old bottom leaves complete their job. The plant reabsorbs nutrients. Leaves yellow, dry, papery. They pull away easily. This is normal. One or two bottom leaves at a time. The rest of the plant looks healthy. New growth in center is vibrant.
If only bottom leaves yellow, and they’re dry not mushy, and the plant is otherwise perky — relax. Gently remove dead leaves to prevent rot and pests. This is just life.
Diagnostic Flowchart: Finding Your Cause
Use this mental checklist when you spot yellow leaves:
- Feel the leaves: Soft/mushy = overwatering or cold. Dry/crispy = underwatering or sunburn.
- Check which leaves: Bottom only = natural aging or nitrogen deficiency. Top/new growth = sunburn, iron deficiency, pests. All over = overwatering, severe underwatering, root issues.
- Check the soil: Wet days later = overwatering/drainage. Bone dry = underwatering. White crust = salt buildup.
- Check the roots: White/firm = healthy. Brown/mushy = rot. Circling = pot-bound. Cottony = root mealybugs.
- Check for pests: Undersides, leaf axils, new growth, soil surface. Magnifying glass helps.
- Recent changes: Moved? Repotted? Fertilized? Weather swing? New light? Schedule change?
Match symptoms to cause. Treat accordingly. Monitor. Adjust.
Prevention: The Best Cure
Healthy echeveria resists problems. Build good habits:
- Use gritty, fast-draining soil (50% mineral, 50% organic max).
- Choose pots with drainage holes. Terracotta preferred.
- Water deeply only when soil is completely dry.
- Provide bright light with gradual sun exposure.
- Repot yearly in spring with fresh soil.
- Fertilize lightly during growing season only.
- Inspect weekly for pests.
- Remove dead leaves promptly.
- Provide good air circulation.
- Protect from extreme temperatures.
Consistency beats perfection. A plant in decent conditions with consistent care outperforms a plant in perfect conditions with erratic care.
When to Give Up (And When Not To)
Sometimes a plant is too far gone. Stem is mushy black. Roots all rotted. Center crown is soft. No firm tissue left. But echeveria surprises people. A single healthy leaf can propagate. A beheaded rosette can reroot. Even a stem with one node can regrow.
Before tossing, try propagation. Remove healthy leaves. Let callus. Lay on dry soil. Mist occasionally. Roots and babies appear in weeks. Behead the rosette above rot. Let callus. Root in dry soil. You might get multiple plants from one “dead” one.
Conclusion
Yellow leaves on echeveria feel alarming. But they’re just information. Your plant is telling you what it needs. Overwatering? Cut back. Underwatering? Drink up. Sunburn? Give shade. Hungry? Feed lightly. Bugs? Evict them. Old leaves? Say thanks and remove them.
Every grower loses plants. Every expert killed dozens before succeeding. The difference is they learned from each yellow leaf. You will too. Your echeveria wants to live. Help it understand how. Watch. Learn. Adjust. Repeat. Soon you’ll read those leaves like a book — and your plants will thank you with colors, shapes, and blooms that make every mistake worth it.
Next time you see yellow, don’t panic. Investigate. The answer is there in the pattern, the texture, the location. You have the knowledge now. Trust it. Trust your plant. Grow on.
Frequently Asked Questions
What are the most common echeveria yellow leaves causes?
The most common causes are overwatering, underwatering, sunburn, nutrient deficiencies, and pest infestations. Overwatering leads to soft mushy yellow leaves, while underwatering creates wrinkled crispy yellow leaves. Sunburn causes dry bleached patches on light-exposed surfaces.
How do I fix yellow leaves on my echeveria?
Identify the cause first by checking leaf texture, soil moisture, and which leaves are affected. For overwatering, stop watering and repot in dry gritty soil. For underwatering, soak the pot thoroughly. For sunburn, move to indirect light. For pests, treat with insecticidal soap or neem oil.
Can yellow echeveria leaves turn green again?
No, once a leaf loses chlorophyll and turns yellow, it cannot revert to green. The plant will absorb remaining nutrients from that leaf and eventually shed it. Focus on fixing the underlying issue so new growth emerges healthy and green.
Why are my echeveria leaves turning yellow after repotting?
Transplant shock, root damage during repotting, or soil that retains too much moisture can cause yellowing. Use fast-draining succulent mix, don’t water for 3-5 days after repotting, and keep in bright indirect light while roots recover.
Do echeveria need direct sunlight to prevent yellow leaves?
Echeveria need bright light but can yellow from too much direct sun too quickly. They prefer 4-6 hours of morning sun or filtered all-day light. Sudden exposure to intense afternoon sun causes sunburn yellow patches. Acclimate gradually over 2 weeks.
How often should I water echeveria to avoid yellow leaves?
Water only when soil is completely dry throughout the pot. This varies from weekly in hot summer to monthly in cool winter. Check with a wooden skewer to the bottom. Deep soak until water drains out, then wait for full dryness. Never water on a fixed schedule.