Palms Soil Drainage Tips
Proper drainage is the single most important factor for healthy palm trees. This guide covers everything from choosing the right soil mix to fixing drainage problems in ground and container plantings. Follow these expert tips to prevent root rot and help your palms thrive.
Key Takeaways
- Drainage prevents root rot: Standing water suffocates roots and invites fungal diseases that kill palms quickly.
- Sandy loam is ideal: A mix of sand, organic matter, and native soil creates the perfect balance of drainage and moisture retention.
- Test before you plant: Dig a hole, fill with water, and measure drainage time to know exactly what you are working with.
- Containers need extra attention: Use pots with multiple drainage holes and a gritty mix to prevent waterlogging.
- Amend heavy clay soils: Add coarse sand, perlite, and compost to improve structure and water movement.
- Elevate planting areas: Mounds or raised beds solve drainage issues in low-lying or compacted sites.
- Monitor regularly: Check soil moisture weekly and adjust watering based on season and weather conditions.
Quick Answers to Common Questions
How fast should soil drain for healthy palms?
Ideal drainage for palms is one to three inches per hour. Test by filling a twelve-inch hole with water twice and timing the second drain.
Can I use regular potting soil for container palms?
No. Regular potting soil compacts and holds too much water. Use a soilless mix with pine bark fines, perlite, and coconut coir for proper aeration.
What is the biggest mistake when planting palms?
Planting too deep. The root flare must sit at or slightly above soil grade. Buried trunks rot quickly and kill the tree.
How do I fix a palm in heavy clay soil?
Amend with coarse sand, perlite, and compost in a wide planting hole. Or build a raised mound eighteen inches high with amended soil.
Should I put gravel in the bottom of palm pots?
No. Gravel creates a perched water table that saturates roots. Use a quality soilless mix throughout the pot with adequate drainage holes.
📑 Table of Contents
- Why Palms Soil Drainage Tips Matter for Every Grower
- Understanding Why Drainage Makes or Breaks Palm Health
- Testing Your Soil Drainage Before You Plant
- Best Soil Mixes for In-Ground Palm Plantings
- Container Drainage Solutions for Potted Palms
- Fixing Drainage Problems in Established Palms
- Seasonal Watering Adjustments for Optimal Drainage
- Common Drainage Mistakes That Kill Palms
- Advanced Palms Soil Drainage Tips for Challenging Sites
- Monitoring and Maintaining Perfect Drainage Long-Term
- Conclusion: Your Palms Deserve the Best Drainage
Why Palms Soil Drainage Tips Matter for Every Grower
If you have ever lost a palm tree to root rot, you know the heartbreak. One day the fronds look green and strong. The next week they turn yellow, then brown, and the whole tree collapses. The culprit is almost always poor drainage. Water sits around the roots. Oxygen cannot reach them. Fungi move in and destroy the root system from the inside out.
Palms soil drainage tips are not just for experts. Every homeowner with a palm tree needs to understand how water moves through soil. Whether you grow a majestic Canary Island date palm in your front yard or a petite parlor palm on your patio, the principles are the same. Good drainage means healthy roots. Healthy roots mean a thriving tree that resists pests, handles drought, and looks beautiful year after year.
This guide walks you through everything you need to know. We will cover soil testing, the best soil mixes, container strategies, fixes for existing plantings, and common mistakes that ruin good palms. By the end, you will have the confidence to create the perfect growing environment for any palm species.
Understanding Why Drainage Makes or Breaks Palm Health
How Palm Roots Breathe
Palm roots need oxygen just like the leaves do. In nature, palms grow in sandy soils where water drains quickly. Air fills the spaces between soil particles. Roots absorb that oxygen and use it for essential functions. When soil stays soggy, water pushes air out of those spaces. Roots suffocate. They stop growing. They stop taking up nutrients. The tree begins to starve even if fertilizer is abundant.
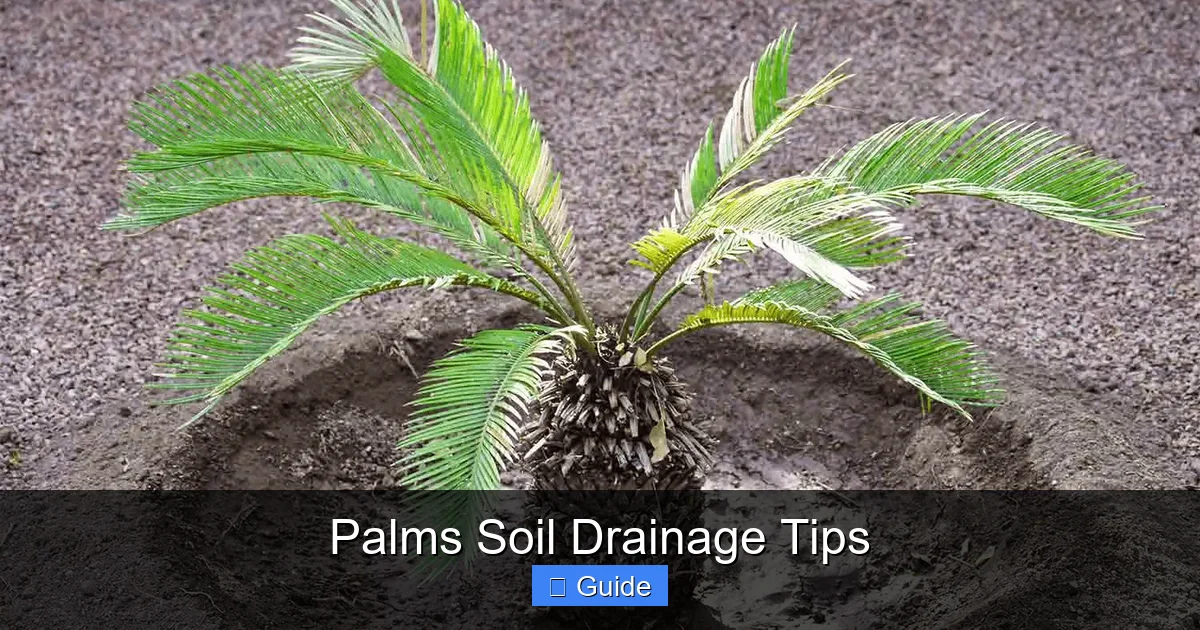
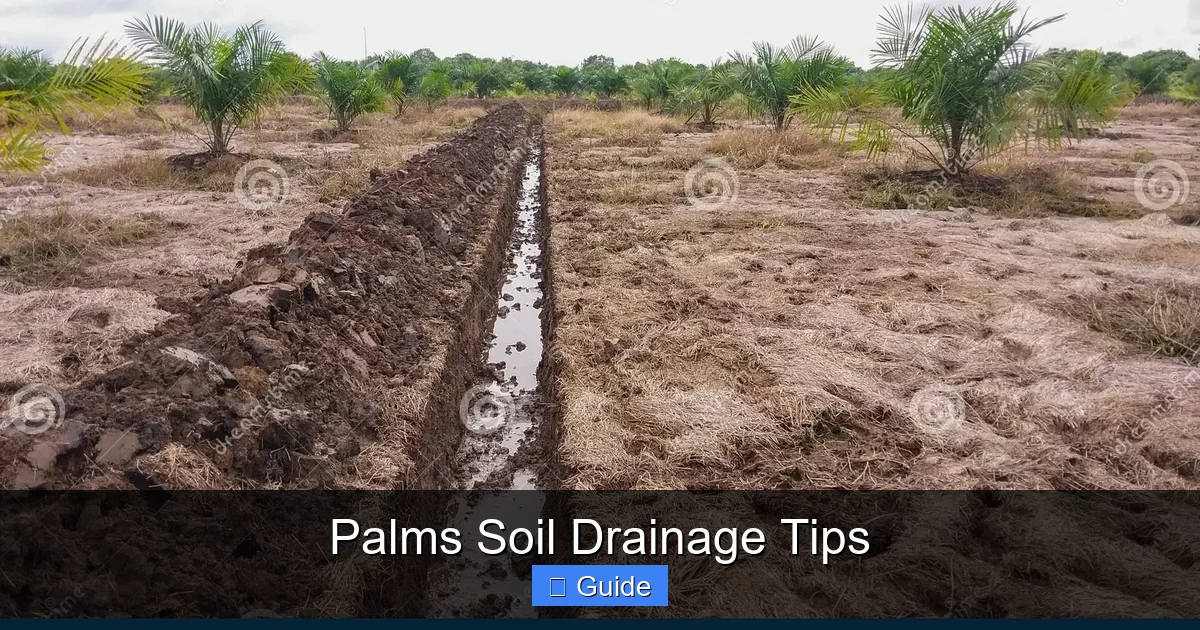
Visual guide about Palms Soil Drainage Tips
Image source: eureka-farms.com
The Root Rot Connection
Root rot fungi love wet, oxygen-poor conditions. Phytophthora and Pythium species are the most common attackers. They swim through water-filled pores to reach roots. Once inside, they destroy tissue and block water transport. The irony is that a tree with root rot looks thirsty. The leaves wilt. The owner waters more. The cycle accelerates. Within weeks, a mature palm can die from a disease that started with one heavy rain in poorly drained soil.
Signs Your Palm Has Drainage Problems
Watch for these warning signals. Yellowing lower fronds often appear first. The spear leaf, the newest growth at the center, may turn brown or pull out easily. The trunk might feel soft or show dark, oozing lesions near the soil line. A sour smell from the root zone confirms anaerobic conditions. If you dig gently near the root ball and find black, mushy roots instead of firm white ones, drainage has already caused damage.
Testing Your Soil Drainage Before You Plant
The Simple Percolation Test
Never guess about drainage. Test it. Dig a hole twelve inches wide and twelve inches deep where you plan to plant. Fill it with water. Let it drain completely. This saturates the surrounding soil. Fill it again. Set a timer. Measure how fast the water level drops. Ideal drainage for palms is one to three inches per hour. Faster than four inches means very sandy soil that may not hold enough moisture. Slower than one inch means poor drainage that needs correction before planting.
Reading Your Soil Texture
Grab a handful of moist soil. Squeeze it. Sandy soil falls apart immediately. Loam holds shape but crumbles with a light touch. Clay forms a tight ribbon that stretches without breaking. Palms prefer sandy loam. If you have clay, you will need amendments. If you have pure sand, you will need organic matter to retain moisture and nutrients.
Checking for Hardpan and Compaction
Sometimes the top foot drains well but a dense layer underneath traps water. This hardpan can be natural or caused by construction equipment. Dig deeper test holes at two and three feet. If water pools at a certain depth, roots will hit that barrier and rot. You may need to break through with a pickaxe or auger, or create a drainage chimney filled with gravel.
Best Soil Mixes for In-Ground Palm Plantings
The Classic Sandy Loam Recipe
For most palms, mix one part coarse sand, one part native soil, and one part compost or well-rotted manure. Coarse sand means builder’s sand or horticultural sand, not play sand. Play sand has fine particles that compact like cement. The compost adds nutrients and microbial life. The native soil provides minerals and helps the tree transition to its permanent home. Mix thoroughly in a wheelbarrow or on a tarp before backfilling.
Adjusting for Clay-Heavy Sites
Clay soils need more aggressive amendment. Use one part coarse sand, one part perlite or pumice, one part compost, and one part native clay. The perlite or pumice creates permanent air channels that clay cannot collapse. Do not use vermiculite. It holds too much water. Work this mix into a wide planting hole, at least three times the width of the root ball. Depth should match the root ball height only. Planting too deep causes trunk rot.
Amending Very Sandy Soils
Pure sand drains too fast. Palms in pure sand suffer drought stress and nutrient leaching. Increase organic matter to two parts compost, one part native sand, and one part coconut coir or peat moss. The coir holds water without becoming soggy. Add a slow-release palm fertilizer with micronutrients at planting time. Mulch heavily with wood chips to reduce evaporation and feed soil life as it breaks down.
Special Mixes for Specific Palm Species
Desert palms like Washingtonia and Phoenix dactylifera tolerate leaner, grittier soil. Use extra pumice and less compost. Tropical palms like Roystonea and Archontophoenix want richer, moisture-retentive mixes. Increase compost and add worm castings. Cold-hardy palms like Trachycarpus and Sabal do well in the standard sandy loam. Always research your specific species for fine-tuning.
Container Drainage Solutions for Potted Palms
Choosing the Right Pot
Pot selection is your first drainage decision. Terra cotta breathes but dries fast. Plastic retains moisture but needs excellent drainage holes. Glazed ceramic looks beautiful but often has only one tiny hole. Drill extra holes if needed. A twelve-inch pot needs at least four half-inch holes. Larger pots need more. Elevate pots on feet or bricks. Never let a pot sit flat on a saucer full of water. That creates a perched water table that rots roots from the bottom up.
The Ideal Container Mix
Garden soil in pots is a disaster. It compacts, drains poorly, and brings pests. Use a soilless mix: two parts pine bark fines, one part coarse perlite, one part coconut coir, and half part compost. Pine bark fines create structure and decompose slowly. Perlite adds aeration. Coir holds water evenly. Compost feeds microbes. Avoid mixes with water-retaining crystals. They create soggy zones that kill palm roots.
Repotting Without Damaging Roots
Palms hate root disturbance. Repot only when roots circle the pot bottom or emerge from drainage holes. Spring is best. Choose a pot just two inches wider. Gently loosen the outer roots. Place fresh mix in the bottom. Set the palm at the same depth it grew before. Backfill with mix. Tap the pot to settle. Do not pack down. Water thoroughly until it runs freely from the holes. Let drain completely before moving to its spot.
Indoor Palm Drainage Challenges
Indoor palms face low light, dry air, and overwatering by well-meaning owners. Use a moisture meter. Water only when the top two inches read dry. Empty the saucer within thirty minutes of watering. Group plants to raise humidity instead of misting, which encourages fungal spots. Rotate the pot weekly for even growth. Flush the soil monthly with heavy watering to prevent salt buildup from fertilizer.
Fixing Drainage Problems in Established Palms
Vertical Mulching for Compacted Soil
If an established palm shows decline from compaction, vertical mulching helps. Drill holes eighteen inches deep in a grid pattern around the drip line. Use a two-inch auger bit. Space holes two feet apart. Fill with coarse sand, perlite, or small gravel. This creates drainage columns that bypass compacted layers. Roots will follow these channels to deeper oxygen. Repeat every two years as organic matter decomposes.
Installing French Drains
For low spots where water pools after rain, a French drain redirects flow. Dig a trench sloping away from the palm at a one percent grade. Line with landscape fabric. Lay perforated pipe. Cover with gravel. Fold fabric over. Backfill with soil. The pipe carries water away from the root zone. Ensure the outlet discharges where it will not cause erosion or neighbor issues.
Creating Raised Planting Mounds
In heavy clay or high water table areas, plant on a mound. Build a berm eighteen inches high and six feet wide using your amended soil mix. Plant the palm in the center. The elevated root ball stays above the saturated zone. Mulch the slopes to prevent erosion. This technique saves palms in places where nothing else works. Many botanical gardens use mounds for their most valuable specimens.
Root Crown Excavation
Sometimes the problem is buried trunk. Soil or mulch piled against the trunk causes crown rot. Carefully excavate down to the root flare, where the first major roots emerge. Use a soft brush and gentle water spray. Expose the flare completely. Keep mulch six inches away from the trunk. This simple fix stops active rot and prevents future infection. Do it any time of year when you notice the issue.
Seasonal Watering Adjustments for Optimal Drainage
Summer Heat Management
Hot weather increases evaporation. Palms need more frequent watering but never soggy soil. Water deeply early morning. This encourages deep roots that find moisture below the hot surface zone. Apply three to four inches of mulch to keep soil cool and moist. Check soil daily during heat waves. A probe or long screwdriver slides easily into moist soil. Resistance means it is time to water.
Winter Dormancy Care
Cool weather slows growth and water uptake. Overwatering in winter is a top killer. Reduce frequency but not depth. Water only when the top three inches are dry. In rainy climates, turn off irrigation entirely. Ensure drainage paths are clear of leaf litter. Cold wet soil grows different fungi than warm wet soil. Both destroy roots. A moisture meter prevents guesswork.
Spring Transition Strategy
As temperatures rise, gradually increase watering. Watch new spear growth. A healthy spear extends steadily. Stalled spears often mean root issues. Apply a balanced palm fertilizer with micronutrients. Magnesium and manganese deficiencies show as yellow bands on older fronds. Good drainage ensures these nutrients stay available instead of leaching away.
Fall Preparation
Taper watering as days shorten. This hardens off new growth before cold snaps. Deep water once before the first freeze if soil is dry. Moist soil insulates roots better than dry soil. But do not saturate. Wet soil freezes harder and damages roots. Clean drainage areas of fallen fronds and debris. Good airflow at soil level reduces fungal pressure.
Common Drainage Mistakes That Kill Palms
Using Gravel at the Bottom of Pots
This old advice creates a perched water table. Water does not move easily from fine soil into coarse gravel. It sits at the interface, saturating the root zone. The gravel layer effectively raises the bottom of the pot. Roots have less usable soil volume. Skip the gravel. Use a quality mix throughout. A piece of screen over the hole keeps mix in while letting water out.
Planting Too Deep
Palms cannot tolerate buried trunks. The root flare must sit at or slightly above grade. Nursery containers often have soil too high on the trunk. Remove excess before planting. Check depth by laying a straight edge across the hole. The flare should touch the straight edge. Backfill to match. Water to settle. Add more mix if it sinks. Never mound soil against the trunk.
Overwatering New Plantings
New palms need consistent moisture but not swamp conditions. Water every two to three days for the first month, then weekly. Check soil before each watering. If the root ball is wet, wait. Roots grow into moist soil seeking water. Constant saturation makes them lazy and weak. They stay in the original root ball instead of exploring. This creates a tree that blows over in the first storm.
Ignoring Slope and Grading
Water flows downhill. If your palm sits at the bottom of a slope, it receives runoff from the entire yard. That runoff carries fertilizer, herbicide, and excess water. Regrade to divert flow around the root zone. Create a shallow swale uphill. Or plant on a mound as described earlier. Never assume flat ground drains well. Subtle low spots collect water invisibly.
Using Fine-TreeAdvanced Palms Soil Drainage Tips for Challenging Sites
Coastal and Salt-Affected Soils
Salt buildup destroys soil structure. Clay particles disperse and seal the surface. Water cannot penetrate. Gypsum helps flocculate clay, reopening pores. Apply fifty pounds per thousand square feet annually. Irrigate heavily to leach salts below the root zone. Choose salt-tolerant species like Phoenix canariensis, Washingtonia robusta, or Sabal palmetto. Mulch heavily to reduce evaporation that concentrates salts.
High Water Table Solutions
If the water table sits within three feet of the surface, only mounds or raised beds work. Build beds eighteen to twenty-four inches high. Use rot-resistant lumber or stone. Fill with a fast-draining mix. Install a perforated pipe at the base of the bed leading to a lower area. This creates an artificial water table below the root zone. Many tropical fruit growers use this method for palms in wet climates.
Urban Compacted Soils
Construction compacts soil to ninety-five percent density. Roots cannot penetrate. Air and water cannot move. Before planting, fracture the subsoil with a backhoe or pickaxe. Incorporate organic matter deeply. Consider structural soil mixes designed for sidewalk trees. These mixes use gap-graded gravel with soil in the voids. They support pavement while allowing root growth. Expensive but permanent.
Hydrophobic Soil Remediation
Dry organic matter becomes hydrophobic. Water beads and runs off instead of soaking in. This happens in pots and landscape beds. Apply a soil wetting agent following label rates. Water slowly with a soaker hose. Fork the surface gently to break the crust. Add fresh compost and mulch. The microbes in compost produce natural surfactants that restore wettability over time.
Monitoring and Maintaining Perfect Drainage Long-Term
Monthly Soil Checks
Make drainage inspection a habit. Once a month, dig a small test hole six inches deep near the drip line. Feel the soil. It should be moist and crumbly, not wet and sticky. Smell it. Earthy is good. Sour or swampy means trouble. Look for earthworms. Their presence indicates healthy aeration. Record observations in a garden journal. Patterns emerge that guide future care.
Mulch Management
Mulch conserves moisture but too much creates a wet blanket. Keep mulch three to four inches deep maximum. Pull it back from the trunk. Fluff it occasionally with a rake to prevent matting. Matted mulch sheds water. Replace decomposed mulch annually. As it breaks down, it improves soil structure from the top down. This is nature’s way of building drainage.
Irrigation System Audits
Automatic irrigation often overwater. Run each zone and watch. Look for runoff, pooling, or misting. Adjust heads for head-to-head coverage. Install a rain sensor. Upgrade to a smart controller that adjusts for weather. Drip irrigation delivers water directly to the root zone with minimal waste. Convert spray zones to drip where possible. Check for leaks monthly. A small leak creates a big drainage problem over time.
Fertilizer Practices That Protect Drainage
Excess fertilizer salts damage soil structure. They disperse clay and reduce pore space. Use slow-release organic fertilizers. Apply at half the label rate twice as often. Water deeply after fertilizing to distribute nutrients evenly. Avoid high-nitrogen lawn fertilizers near palms. They promote weak, thirsty growth. Palm-specific formulas with magnesium, manganese, and iron support strong roots that improve soil structure naturally.
Conclusion: Your Palms Deserve the Best Drainage
You now have a complete toolkit of palms soil drainage tips. From testing your soil to choosing the right mix, from container strategies to fixing established trees, every technique serves one goal. Healthy roots in well-aerated soil. That foundation supports everything else you want for your palms. Lush fronds. Strong trunks. Resistance to cold, heat, pests, and disease.
Start with one action today. Test your drainage. Check your mulch depth. Drill an extra hole in a pot. Small steps prevent big disasters. The palms you plant or care for will reward you with decades of beauty. They are ancient plants, survivors of millions of years. Give them the drainage they evolved for, and they will thrive in your care.
Remember that drainage is not a one-time fix. It is an ongoing relationship with your soil. Observe. Adjust. Learn. Each palm teaches you something new. Share what you discover with fellow growers. Together we keep these magnificent trees gracing our landscapes for generations. Your palms are counting on you. You have the knowledge. Now put it to work.
Frequently Asked Questions
How often should I water newly planted palms?
Water newly planted palms every two to three days for the first month, then weekly. Always check soil moisture before watering. The root ball should be moist but not soggy. Reduce frequency in cool or rainy weather.
What soil amendments improve drainage in clay?
Coarse sand, perlite, pumice, and compost improve clay drainage. Mix one part each of sand, perlite, compost, and native clay. Avoid fine sand or vermiculite which worsen compaction.
Can palms recover from root rot?
Early root rot can be reversed by improving drainage and reducing watering. Expose the root flare, apply fungicide labeled for palms, and let soil dry between waterings. Advanced rot with trunk damage is usually fatal.
Do indoor palms need different drainage than outdoor palms?
Yes. Indoor palms need faster-draining mixes because evaporation is slower. Use extra perlite and water only when the top two inches are dry. Empty saucers promptly to prevent root zone saturation.
What mulch is best for palm drainage?
Coarse wood chips or pine bark nuggets three to four inches deep. They allow air exchange while conserving moisture. Avoid fine mulch, rubber mulch, or rock which can compact or overheat roots.
How do I know if my palm has drainage problems?
Yellowing lower fronds, brown spear leaf, soft trunk near soil, sour soil smell, and black mushy roots indicate drainage issues. Test soil percolation and check for standing water after rain.