Orchid Care Mistakes to Avoid
Orchid care mistakes to avoid include overwatering, wrong light levels, improper potting mix, and neglecting humidity needs. Master these basics and your orchids will reward you with stunning blooms year after year.
Orchids have a reputation for being fussy divas. Many plant lovers bring one home, watch it decline, and swear off orchids forever. The truth? Most orchid deaths come down to a handful of common errors. Understanding orchid care mistakes to avoid changes everything. These plants are not difficult. They are just different from typical houseplants.
In their natural habitat, most popular orchids grow on tree branches, not in soil. Their roots wrap around bark, exposed to air, rain, and dappled sunlight. When we pot them in dense soil and water them like ferns, we create conditions they cannot survive. The good news is that once you grasp their basic needs, orchids become some of the most rewarding plants you can grow. They bloom for months. They live for decades. They become part of your home.
This guide walks through the most frequent orchid care mistakes to avoid with practical fixes for each one. Whether you are nursing a grocery store Phalaenopsis or building a collection of Cattleyas, these principles apply. Let us start with the number one killer.
Key Takeaways
- Overwatering kills more orchids than anything else: Let roots dry between waterings and use pots with drainage holes.
- Light matters more than you think: Bright indirect light is best; direct sun burns leaves while deep shade prevents blooming.
- Regular potting soil suffocates orchid roots: Use bark-based mix designed for epiphytes and repot every one to two years.
- Humidity and airflow prevent disease: Aim for fifty to seventy percent humidity with gentle air movement.
- Weak weekly feeding beats strong monthly doses: Use quarter-strength fertilizer weekly during active growth.
- Watch for pests early: Inspect leaves weekly for scale, mealybugs, and spider mites before infestations spread.
- Respect the rest period: Reduce water and fertilizer after blooming to trigger the next flower cycle.
Quick Answers to Common Questions
How often should I water my orchid?
Water when the potting medium feels dry about an inch down. This usually means every 7-10 days for bark mixes, but always check first rather than watering on a schedule.
Why are my orchid leaves turning yellow?
Bottom leaves yellowing naturally is normal aging. Widespread yellowing usually means too much light, overwatering, or nutrient deficiency. Check roots and light levels to diagnose.
Can I use regular potting soil for orchids?
No. Regular soil suffocates orchid roots. Use a bark-based orchid mix with large chunks for airflow and drainage. Epiphytic orchids grow on trees, not in dirt.
How do I get my orchid to rebloom?
Provide bright indirect light, a 10-15 degree day-night temperature drop in fall, reduce water and fertilizer after blooming, and be patient. Phalaenopsis often rebloom on old spikes if you cut above a node.
What is the white fuzzy stuff on my orchid?
Mealybugs look like cotton tufts. Scale looks like brown or white bumps. Both suck plant sap. Remove with alcohol on a cotton swab and treat with insecticidal soap or neem oil weekly for three weeks.
📑 Table of Contents
Overwatering: The Number One Killer
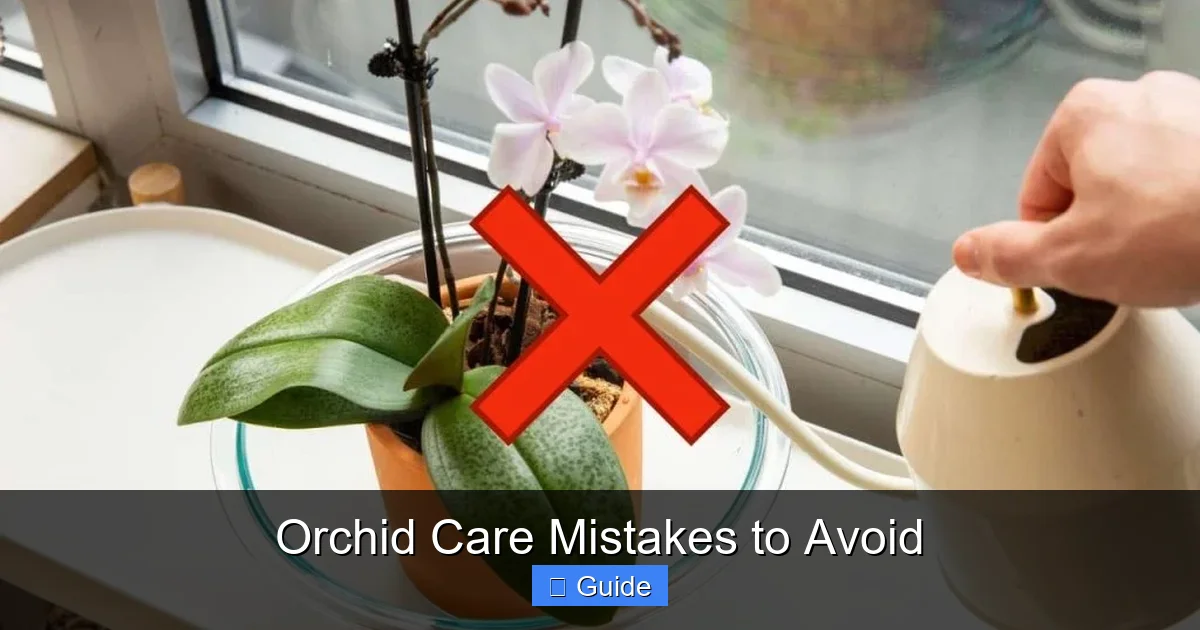
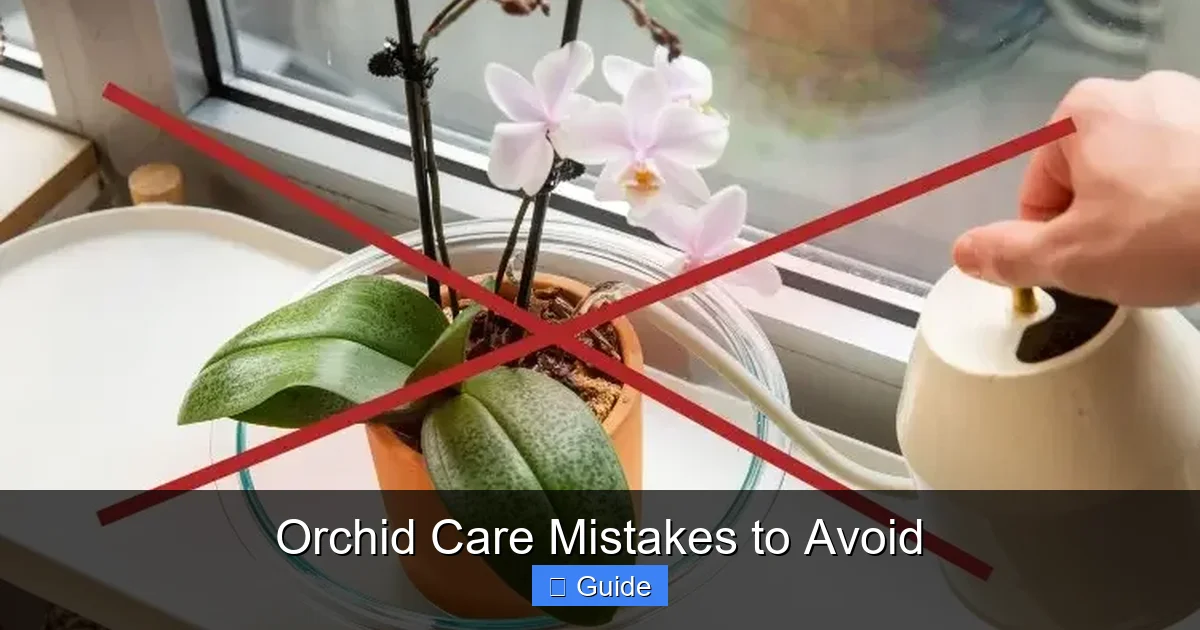
If you remember only one thing from this article, make it this. More orchids die from too much water than from all other causes combined. The roots of epiphytic orchids need air. They evolved to grab moisture from humid air and brief rain showers, then dry out quickly. Sitting in soggy medium suffocates them. Rot sets in fast.
Why Overwatering Happens
Most people water on a schedule. Every Sunday. Every three days. Orchids do not work on human calendars. Their water needs change with light, temperature, humidity, season, and growth stage. A plant in active growth in July needs far more water than the same plant resting in January. Watering by the calendar ignores all of this.
Another trap is decorative pots without drainage. That beautiful ceramic cachepot holds water like a bathtub. The inner plastic pot sits in a pool. Roots at the bottom never dry. Rot creeps up. Always empty the outer pot after watering. Better yet, water in the sink and let the plant drain fully before returning it to its display spot.
How to Water Correctly
Check the medium before watering. Stick your finger an inch into the bark. Feel the weight of the pot. A dry pot feels light. Wet bark feels cool and heavy. Clear pots let you see condensation on the sides. No condensation usually means time to water. When in doubt, wait one more day. Orchids tolerate drought far better than drowning.
Water thoroughly when you do water. Run lukewarm water through the pot for thirty seconds. Let it drain completely. This flushes salts and wets all the bark evenly. Avoid ice cubes. The cold shocks tropical roots. Avoid softened water. The sodium builds up and burns roots. Rainwater, distilled water, or tap water left out overnight works best.
Signs of Overwatering
Yellowing leaves starting at the bottom. Mushy, brown, or black roots. A sour smell from the pot. Leaves that feel limp and leathery despite wet medium. New growths that rot before maturing. If you see these, unpot immediately. Cut away all dead roots with sterile scissors. Repot in fresh bark. Hold off watering for a few days to let cuts callous.
Light Mistakes: Too Much or Too Little
Light is energy. Orchids need the right amount to photosynthesize, grow, and bloom. Too little light gives you a healthy-looking green plant that never flowers. Too much light scorches leaves and stresses the plant. Finding the sweet spot is essential.
Visual guide about Orchid Care Mistakes to Avoid
Image source: deavita.net
Understanding Light Levels
Orchid growers talk in foot-candles. Phalaenopsis want 1,000 to 1,500 foot-candles. Cattleyas want 2,000 to 3,000. Vandas want 3,000 to 5,000. Most homes provide 100 to 500 foot-candles away from windows. You need to place orchids near bright windows or supplement with grow lights.
East windows are ideal for many orchids. Morning sun is gentle. South windows work with sheer curtains. West windows can be too hot in afternoon summer sun. North windows rarely provide enough light for blooming unless you are in a very bright climate or use artificial light.
Reading Your Plant’s Leaves
Leaves tell you everything. Medium grassy green means perfect light. Dark, lush, deep green means too little light. The plant is making extra chlorophyll to capture every photon. Yellowish or reddish leaves mean too much light. The plant is producing protective pigments. Bleached white patches or brown crispy spots are sunburn. That damage is permanent.
Feel the leaves. They should be cool or room temperature. Hot leaves mean too much direct sun. Move the plant back or add a sheer curtain. Rotate plants weekly so all sides get even light. This prevents lopsided growth.
Artificial Light Solutions
If natural light falls short, LED grow lights work beautifully. Look for full-spectrum lights around 5,000 to 6,500 Kelvin. Position lights six to twelve inches above plants. Run them twelve to fourteen hours daily. A simple timer makes this effortless. Many growers achieve better blooms under lights than on windowsills because the light is consistent year-round.
Wrong Potting Medium and Repotting Errors
Walk into any garden center and you will see “orchid soil” that looks like dirt. Do not buy it. Most orchids are epiphytes. They grow on trees. Their roots need air pockets, rapid drainage, and something to grip. Regular potting soil holds water like a sponge and compacts over time. It smothers roots.
Choosing the Right Mix
Quality orchid mix is bark-based. Fir bark, coconut husk, charcoal, perlite, and sometimes sphagnum moss. The ratios depend on your watering habits and humidity. If you water often, use chunkier bark with less moss. If you forget to water, add more moss for water retention. Commercial mixes labeled for your orchid type (Phalaenopsis mix, Cattleya mix) are fine starting points.
Avoid mixes with lots of fine dust. Dust compacts and blocks airflow. Sift out fines before using. Avoid mixes with fertilizer already added. You cannot control the feeding. Avoid garden soil, peat-heavy houseplant mixes, or straight moss unless you are an experienced grower managing moisture precisely.
When and How to Repot
Repot every one to two years. Bark breaks down. It holds too much water. It becomes acidic. The best time is right after blooming when new roots emerge. This minimizes stress. Never repot a plant in spike or full bloom unless it is an emergency. The flowers will likely drop.
Gently remove old medium. Rinse roots with lukewarm water. Trim dead roots. They are brown, mushy, or hollow. Healthy roots are firm and white or green. Choose a pot just large enough for the root mass. Orchids like tight quarters. Clear plastic pots with lots of drainage holes let you monitor roots. Place the plant so the newest growth sits at the rim with room to grow. Fill with pre-moistened bark. Tap the pot to settle. Do not pack tight. Stake if wobbly.
Common Repotting Mistakes
Using a pot too large. The medium stays wet too long. Repotting into the same old medium. It is already broken down. Burying the crown or pseudobulbs. This causes crown rot. Watering heavily right after repotting. Wait a few days to let root cuts heal. Fertilizing immediately. Wait three to four weeks. The plant has no roots to absorb nutrients yet.
Temperature and Humidity Blunders
Orchids come from tropical and subtropical regions. They expect warm days, cooler nights, and humid air. Most homes are too dry, especially in winter with heating. Temperature swings near drafty windows or vents stress plants. Getting these environmental factors right makes a huge difference.
Ideal Temperature Ranges
Most popular orchids fall into three groups. Warm growers like Phalaenopsis and Vandas want 70 to 85 degrees Fahrenheit days and 60 to 70 nights. Intermediate growers like Cattleyas and Oncidiums prefer 65 to 80 days and 55 to 65 nights. Cool growers like Cymbidiums and Masdevallias need 60 to 75 days and 50 to 60 nights. A ten to fifteen degree day-night drop triggers blooming in many species.
Check your actual conditions. A thermometer near your plants reveals surprises. That sunny windowsill might hit 95 degrees in afternoon sun. The floor near a heating vent might be bone dry. Move plants seasonally as needed. Summer outdoors in shade benefits many orchids if nights stay above 55 degrees.
Humidity Solutions
Fifty to seventy percent humidity is ideal. Most homes run twenty to forty percent. Humidity trays help. Fill a tray with pebbles and water. Set pots on pebbles, not in water. Grouping plants creates a humid microclimate. A small humidifier near your collection works best. Misting gives only temporary relief and can encourage fungal spots if leaves stay wet overnight.
Air movement prevents disease. Stagnant humid air grows fungus and bacteria. A small fan on low, aimed above plants (not directly at them), keeps air circulating. This mimics the breezy tree canopy orchids love. Run the fan during daylight hours.
Seasonal Adjustments
Winter is the danger season. Heating dries air. Shorter days reduce light. Cold windowsills chill roots. Move plants back from freezing glass. Increase humidity. Reduce watering and fertilizing for plants not in active growth. Watch for spider mites. They thrive in warm dry air. A cool period (fifty-five to sixty degrees for a few weeks) initiates spikes on many Phalaenopsis.
Fertilizing Faux Pas
Fertilizer is not plant food. Plants make their own food through photosynthesis. Fertilizer provides mineral building blocks. Orchids need very little. In nature, they get nutrients from decaying leaves, bird droppings, and mineral-rich rain. A constant weak supply beats occasional heavy doses.
The Weekly Weakly Rule
Use a balanced fertilizer (20-20-20 or similar) at one-quarter strength every week during active growth. That means one-quarter teaspoon per gallon if the label says one teaspoon per gallon. Skip fertilizer every fourth week and flush with plain water to prevent salt buildup. In winter or rest periods, cut back to once a month at quarter strength or stop entirely.
Choosing the Right Formula
Balanced fertilizer works for most situations. Some growers switch to high-phosphorus (10-30-20) when spikes appear to boost blooms. Others use high-nitrogen (30-10-10) during leaf growth. Honestly, balanced at weak strength covers all bases without complication. Avoid urea-based nitrogen. Orchids prefer nitrate or ammoniacal nitrogen. Urea needs soil bacteria to convert. Bark has few bacteria.
Fertilizer Mistakes to Avoid
Fertilizing dry roots burns them. Always water first, then fertilize. Or fertilize in the same watering session. Fertilizing a sick or rootless plant. It cannot absorb nutrients. Salts accumulate and kill remaining roots. Using softened water with fertilizer. Double sodium dose. Getting fertilizer on flowers. It shortens bloom life. Applying to dry medium. Roots get shocked.
Organic Options
Fish emulsion, seaweed extract, and compost tea work but are less predictable. They can smell. They vary in strength. They may clog sprayers. If you prefer organic, use commercial organic orchid fertilizer at label rates. Still follow weekly weakly. Flush monthly. The orchid does not care about the source. It cares about the concentration.
Ignoring Pest and Disease Signs
Healthy orchids resist pests. Stressed orchids attract them. The most common pests are scale, mealybugs, spider mites, thrips, and aphids. Diseases include bacterial rot, fungal leaf spots, and viruses. Early detection saves plants. Weekly inspection takes two minutes and prevents disasters.
Common Pests and Identification
Scale looks like small brown or white bumps on leaves and stems. They do not move. They suck sap. Mealybugs look like tiny cotton tufts in leaf axils and roots. Spider mites are microscopic. You see fine webbing and stippled silvery leaves. Thrips are tiny slivers. Flowers deform and show silvery streaks. Aphids cluster on new growth and flower spikes.
Check undersides of leaves. Check where leaves meet stems. Check roots through clear pots. Check flowers. Use a magnifying glass. Sticky residue (honeydew) means sucking insects. Black sooty mold grows on honeydew. Ants farm aphids and mealybugs for honeydew. If you see ants, look for the pests they protect.
Treatment Strategies
Isolate affected plants immediately. Mechanical removal works for light infestations. Rub scale and mealybugs off with alcohol on a cotton swab. Spray mites off with strong water jet. Insecticidal soap or neem oil treats most soft-bodied pests. Apply in early morning or evening. Cover all surfaces. Repeat weekly for three weeks to catch hatchlings. Systemic insecticides work for scale but use as last resort.
Disease Prevention and Action
Bacterial rot spreads fast. Water-soaked spots turn brown and mushy. Smell is foul. Cut infected tissue well into healthy green. Sterilize tools between cuts. Cinnamon on cuts acts as fungicide. Fungal leaf spots are circular with yellow halos. Improve air flow. Reduce leaf wetness. Remove badly spotted leaves. Viruses show as color breaks in flowers, ringspots, or mosaic patterns on leaves. No cure. Destroy virused plants to protect others.
Quarantine New Plants
Every new orchid stays separate for four to six weeks. Inspect thoroughly on arrival. Treat preventively with neem oil. Watch for problems. Many pests hatch from eggs after two weeks. This one habit saves collections. I learned this the hard way when a beautiful discounted Cattleya brought spider mites to my entire shelf.
Neglecting the Rest Period
Many orchids need a rest period after blooming. This is not neglect. It is biology. In nature, dry seasons or cool seasons signal the plant to conserve energy and prepare for the next growth cycle. Skipping this rest leads to weak growth and poor blooming.
Understanding Growth Cycles
Phalaenopsis are somewhat evergreen but still slow down after blooming. Cattleyas, Dendrobiums, Oncidiums, and Cymbidiums have distinct growth and rest phases. New pseudobulbs or leaves mature. Then the plant rests. During rest, reduce water. Reduce fertilizer. Keep light bright. Maintain humidity. The plant is not dead. It is charging batteries.
How to Manage Rest
Watch for signals. Growth stops. New leaves or pseudobulbs harden off. For deciduous types like some Dendrobiums, leaves yellow and drop. This is normal. Cut water back by half or more. Stop fertilizer. Keep the plant in its usual light. Do not move it to a dark corner. After four to eight weeks (or when you see new root tips or growth eyes swelling), resume normal care.
Triggering Rebloom
For Phalaenopsis, a cool period often initiates spikes. Three to four weeks of nights around fifty-five to sixty degrees with days ten degrees warmer does the trick. Place near a cool window in fall. Or set the thermostat lower at night. Once a spike emerges, return to normal temps. Do not rotate the plant once the spike starts growing. It will twist toward light and look awkward.
Conclusion
Orchid care mistakes to avoid are really just misunderstandings of what these plants need. They want what they get in nature. Air on their roots. Bright filtered light. Warm days and cooler nights. Humid breezy air. A weak steady diet. A dry rest after blooming. Vigilance against pests. None of this is hard. It is just different from caring for a pothos or peace lily.
Start with one orchid. A Phalaenopsis from the grocery store is perfect. Apply these principles. Watch your plant. It will teach you. The leaves change color. The roots change color. The weight of the pot changes. New growth appears. A spike emerges. Buds form. Flowers open. That first homegrown bloom hooks you for life.
Remember that every expert grower killed orchids at first. The difference is they learned from each loss. You now have the roadmap. Avoid the big mistakes. Water less. Light more. Bark not soil. Humidity up. Fertilizer down. Inspect weekly. Respect the rest. Your orchids will thrive. And your home will fill with some of the most extraordinary flowers on earth.
Frequently Asked Questions
Should I cut the flower spike after my orchid finishes blooming?
For Phalaenopsis, you can cut the spike above a visible node to encourage a secondary bloom, or cut it at the base if the spike turns brown. For other orchids, cut spent spikes at the base once flowers drop.
Why are my orchid roots growing out of the pot?
Aerial roots are normal and healthy. They absorb moisture and nutrients from the air. Do not cut them or force them into the pot. They indicate your orchid is happy and growing well.
Can I put my orchid outside in summer?
Yes, most orchids benefit from summer outdoors in bright shade with good air movement. Wait until nights stay above 55°F. Bring them in before fall temperatures drop. Check for pests before returning indoors.
Is misting good for orchids?
Misting provides only brief humidity and can promote fungal spots if leaves stay wet overnight. A humidity tray, humidifier, or grouping plants works better for sustained humidity.
What does a healthy orchid root look like?
Healthy roots are firm and plump. They are silvery-green when dry and bright green when wet. Dead roots are brown, mushy, hollow, or papery. Check through clear pots regularly.
How long do orchid blooms last?
Phalaenopsis blooms last 2-6 months. Cattleyas last 2-4 weeks. Oncidiums last 4-6 weeks. Dendrobiums last 6-8 weeks. Good care extends bloom life. Avoid moving plants once buds form to prevent blast.