How to Plant Wild Ginger
Wild ginger makes an excellent native groundcover for shady gardens. This low-maintenance perennial thrives in rich, moist soil and spreads slowly to form beautiful colonies. Follow our step-by-step guide to plant and establish wild ginger successfully in your woodland garden.
If you have a shady spot in your garden that feels impossible to fill, wild ginger might be exactly what you need. This native woodland perennial creates a lush carpet of heart-shaped leaves that stays attractive from spring through fall. Unlike its tropical namesake used in cooking, this plant grows for its foliage and unique flowers rather than its roots. I first discovered wild ginger on a hike through a local nature preserve. The dense mats of deep green leaves covering the forest floor caught my eye immediately. That experience taught me everything I needed to know about where this plant likes to grow.
Wild ginger belongs to the genus Asarum, with several species native to North America. The most common garden variety is Asarum canadense, also called Canadian wild ginger. This plant has earned its place in shade gardens across the continent. It forms colonies slowly but steadily, outcompeting weeds without becoming aggressive. The flowers hide beneath the foliage, shaped like little jugs in shades of purple-brown. Pollinators like beetles and flies find them fascinating. Once established, wild ginger asks for very little. It handles drought better than many shade plants and returns reliably each spring. Let me walk you through everything you need to know to grow this woodland treasure successfully.
Key Takeaways
- Choose the right location: Wild ginger needs full to partial shade and rich, well-draining soil with consistent moisture.
- Plant in spring or fall: These cooler seasons give roots time to establish before extreme temperatures arrive.
- Prepare soil thoroughly: Amend planting areas with compost and leaf mold to mimic natural woodland conditions.
- Space plants properly: Set divisions 12 to 18 inches apart to allow for natural spreading over time.
- Water consistently: Keep soil evenly moist during the first growing season for strong root development.
- Mulch with organic matter: Apply leaf litter or shredded bark to retain moisture and suppress weeds.
- Practice patience: Wild ginger spreads slowly but forms long-lived, carefree colonies once established.
Quick Answers to Common Questions
How deep should I plant wild ginger rhizomes?
Plant wild ginger rhizomes horizontally just below the soil surface, covered with about one inch of soil. Planting too deep can cause rot or prevent emergence.
When is the best time to divide wild ginger?
Divide wild ginger in early spring as new growth emerges or in fall after foliage dies back. Both times allow divisions to establish roots before extreme temperatures.
Does wild ginger need fertilizer?
Wild ginger rarely needs fertilizer in properly prepared soil rich in organic matter. A light top-dressing of compost in spring is usually sufficient for healthy growth.
Can wild ginger grow in full sun?
No, wild ginger cannot tolerate full sun. It requires full to partial shade and will scorch and decline quickly in direct sunlight, especially in warmer climates.
How fast does wild ginger spread?
Wild ginger spreads slowly, typically expanding a few inches per year. It forms dense colonies over time but is not aggressive or invasive in garden settings.
📑 Table of Contents
Understanding Wild Ginger Basics
What Is Wild Ginger?
Wild ginger is not related to the culinary ginger you buy at the grocery store. That ginger comes from Zingiber officinale, a tropical plant from Southeast Asia. Our native wild ginger belongs to the birthwort family, Aristolochiaceae. The name comes from the ginger-like scent released when you crush the roots or stems. Early settlers used the roots as a ginger substitute, hence the common name. However, modern research suggests consuming large quantities may be unsafe. Today we grow wild ginger purely for its ornamental value.
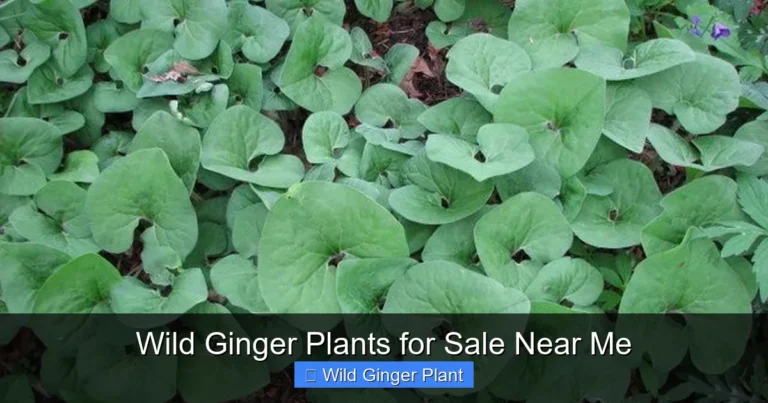
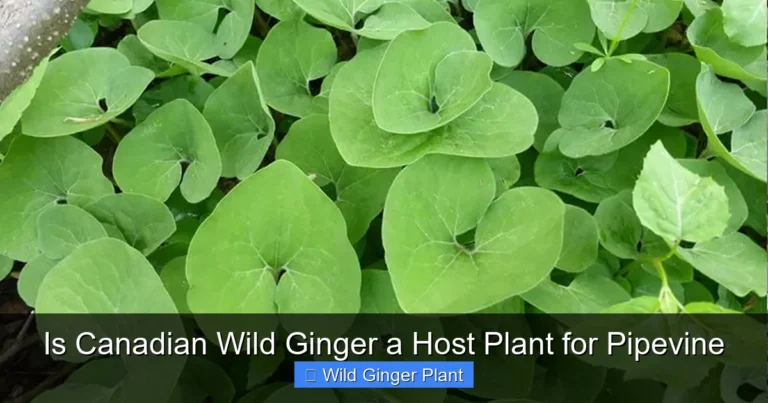
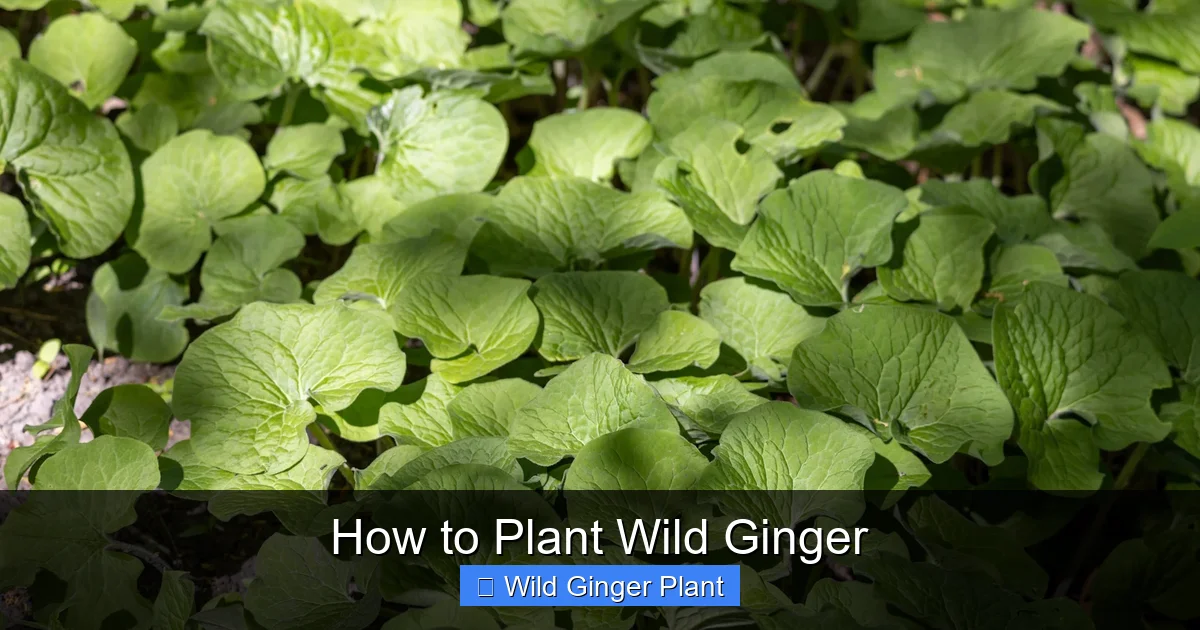
The plant grows from shallow rhizomes that creep just below the soil surface. Each rhizome produces a pair of leaves each spring. These leaves are kidney or heart-shaped, ranging from three to six inches wide. They have a soft, almost velvety texture and rich green color. In spring, unusual flowers appear at ground level. They sit hidden beneath the leaf litter, pollinated by small flies and beetles attracted to their earthy scent. After flowering, the plant focuses energy on leaf production and rhizome expansion. A single plant can eventually form a colony several feet across.
Native Range and Natural Habitat
Canadian wild ginger grows naturally across eastern North America. Its range extends from Manitoba east to Nova Scotia, south to Georgia, and west to Missouri. You will find it in rich, deciduous woodlands, often on north-facing slopes. It prefers areas with deep leaf litter and consistent moisture. The soil in these habitats tends to be slightly acidic to neutral, high in organic matter. Wild ginger often grows alongside other spring ephemerals like trillium, bloodroot, and Virginia bluebells.
Understanding this natural habitat gives you the blueprint for success in your garden. The plant evolved to thrive in dappled shade under mature trees. It expects a steady supply of decomposing leaves each autumn. The rhizomes grow horizontally, not deeply, so they benefit from the loose, humus-rich topsoil of the forest floor. Recreating these conditions in your garden makes all the difference between struggling plants and a thriving colony.
Benefits of Growing Wild Ginger
Wild ginger offers numerous advantages for the shade gardener. First, it provides excellent groundcover where grass refuses to grow. The dense foliage suppresses weeds naturally once established. Unlike some aggressive groundcovers, wild ginger spreads at a polite pace. You will not find it invading your lawn or choking out desirable plants. The foliage remains attractive all season, unlike spring ephemerals that disappear by summer.
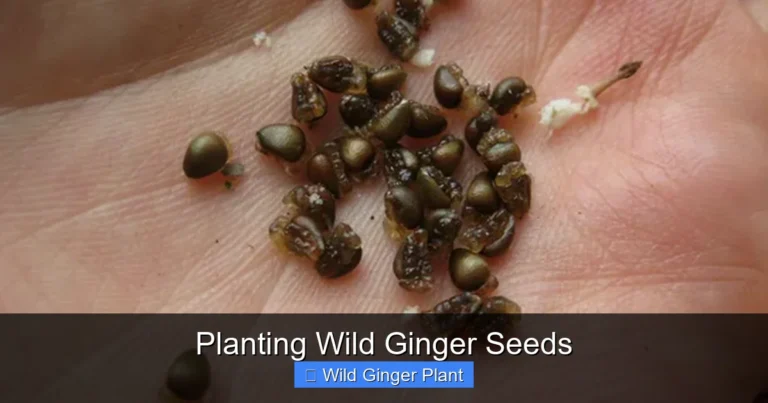
Wild ginger supports local ecology in meaningful ways. The flowers provide early-season nectar for specialized pollinators. Ants disperse the seeds, carrying them to their nests where the seeds germinate in nutrient-rich waste piles. The foliage offers shelter for small woodland creatures. Deer and rabbits typically leave wild ginger alone, making it valuable in areas with high browsing pressure. As a native plant, it contributes to the ecological integrity of your landscape. It also pairs beautifully with other shade lovers like ferns, hostas, and foamflower.
Selecting the Perfect Planting Site
Light Requirements
Light is the single most important factor for wild ginger success. This plant evolved on the forest floor. It needs shade, but not all shade is created equal. Full shade under mature deciduous trees works beautifully. The spring sun filters through bare branches, giving the plant energy for growth and flowering. Then the summer canopy provides protection from intense heat. Dappled shade throughout the day also works well. Morning sun with afternoon shade is acceptable in cooler climates.
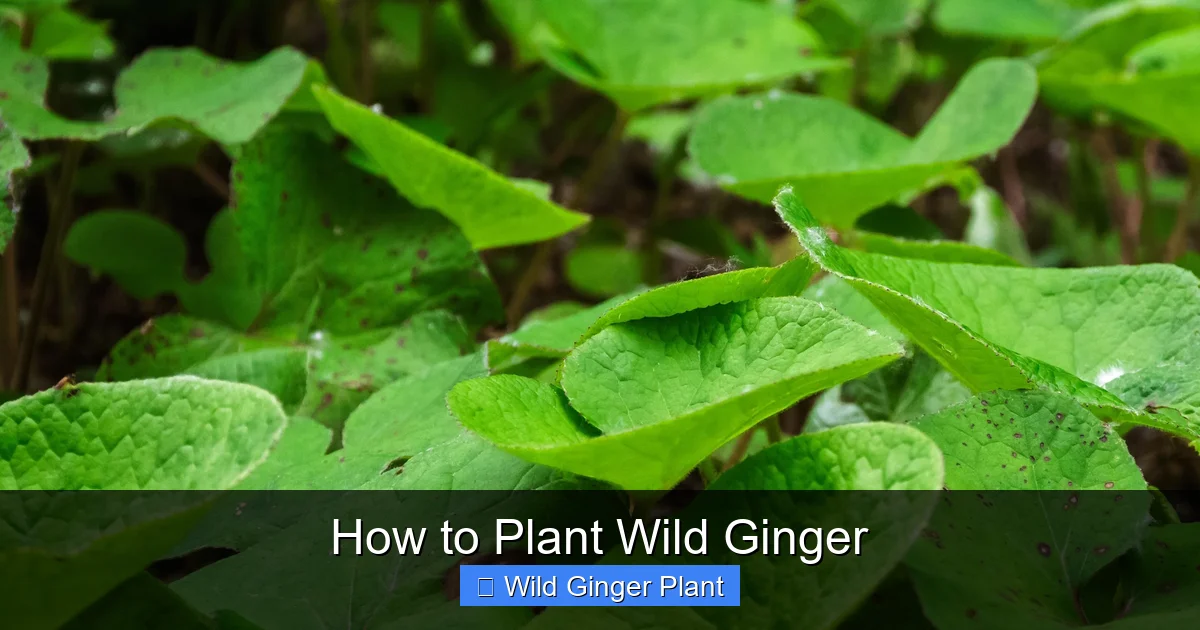
Visual guide about How to Plant Wild Ginger
Image source: cdn.mos.cms.futurecdn.net
Avoid deep, year-round shade under dense evergreens. The plant needs some light for photosynthesis. Also avoid full sun, especially in southern regions. The leaves will scorch and the plant will decline rapidly. If you are unsure about your light conditions, observe the site throughout the day. Take notes or photos every two hours. You want at least two to three hours of direct morning light or consistent dappled shade. The north side of a building or fence often provides ideal conditions. East-facing slopes under deciduous trees are also excellent.
Soil Conditions
Wild ginger demands rich, well-draining soil high in organic matter. Think forest floor. The ideal soil is loose, crumbly, and dark brown. It should hold moisture without becoming waterlogged. A pH between 5.5 and 7.0 suits wild ginger perfectly. Most woodland soils fall in this slightly acidic to neutral range. If your soil is heavy clay or pure sand, you will need to amend it significantly before planting.
Test your soil if possible. A simple home test kit gives you pH and basic nutrient information. Your local extension office can provide more detailed analysis. Look for organic matter content above five percent. Forest soils often exceed ten percent. If your soil tests low, plan to incorporate generous amounts of compost, leaf mold, or well-rotted manure. The planting area should be prepared to a depth of at least eight inches. Wild ginger rhizomes stay shallow, but they appreciate loose soil for easy expansion.
Moisture and Drainage
Consistent moisture makes wild ginger happy. The plant does not tolerate drought well, especially during establishment. However, it also cannot survive standing water. The rhizomes will rot in poorly drained soil. Your goal is evenly moist, never soggy, never bone dry. A site that stays naturally damp from spring through fall is ideal. Low areas that collect runoff work well if they drain within a few hours after rain.
Consider your water access when choosing a site. If you cannot easily water the area, select a naturally moist location. Near a downspout (but not in the direct flow), at the base of a slope, or beside a woodland path often works. Mulch heavily to reduce watering frequency. If you have an irrigation system, include the wild ginger zone on a schedule for shade plants. Drip irrigation or soaker hoses work best. Overhead watering can promote fungal issues on the foliage.
Companion Planting Considerations
Wild ginger plays well with others. Its low, spreading habit makes it an excellent living mulch beneath taller shade plants. Pair it with upright perennials like Solomon’s seal, ferns, or bugbane. Spring ephemerals like trillium and bloodroot emerge before wild ginger reaches full size. They bloom and fade while wild ginger foliage expands to cover the bare ground. Hostas make classic companions, though watch for slug damage on both plants.
Avoid planting wild ginger near aggressive spreaders like English ivy, periwinkle, or goutweed. These will overwhelm the slower ginger. Also avoid areas where you frequently dig or cultivate. The shallow rhizomes damage easily. Wild ginger works beautifully along woodland paths, beneath specimen trees, or on shaded slopes. It can even grow in containers if kept consistently moist and shaded. Just remember the rhizomes will eventually circle the pot and need division.
When to Plant Wild Ginger
Spring Planting Advantages
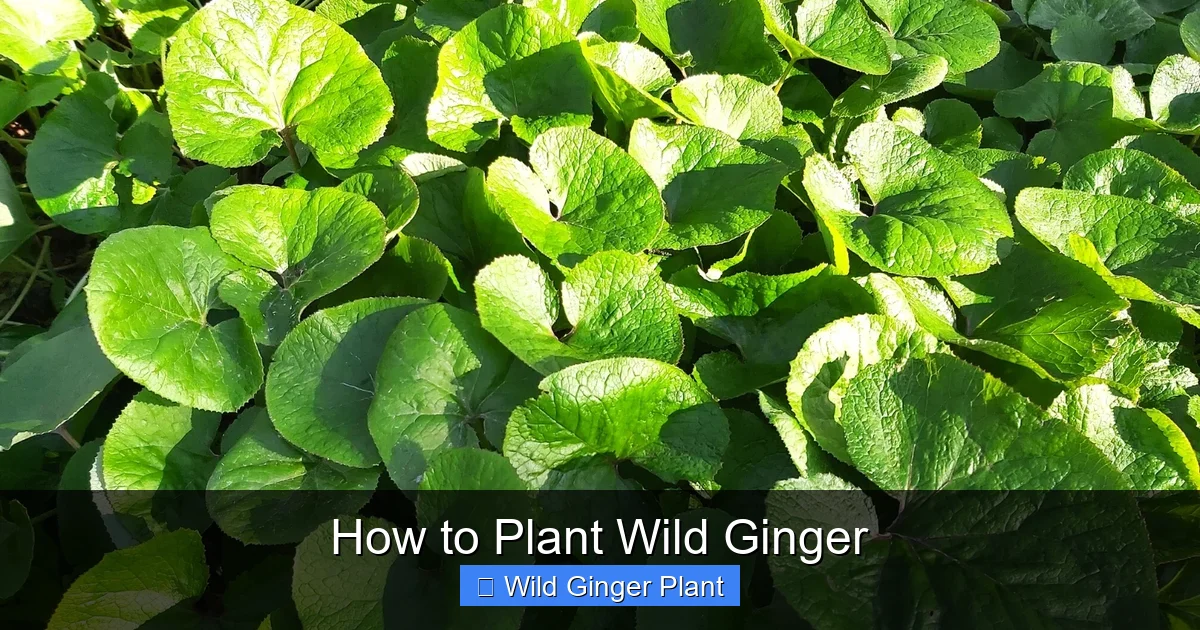
Spring is the traditional planting time for wild ginger. As soon as the soil can be worked, usually April through May in most regions, you can plant. The cool, moist conditions of spring mimic the plant’s natural growth cycle. Roots establish before summer heat arrives. You will often see top growth within weeks. Spring-planted divisions have the full growing season to develop before winter.
Visual guide about How to Plant Wild Ginger
Image source: epicgardening.com
Bare-root divisions are commonly available in spring from native plant nurseries. These should be planted immediately upon arrival. Keep them cool and moist if planting must wait a few days. Wrap the roots in damp newspaper and store in a plastic bag in the refrigerator. Potted plants offer more flexibility. They can be planted anytime the ground is not frozen. Spring planting also lets you see where existing colonies are emerging, helping you space new plants appropriately.
Fall Planting Benefits
Fall planting works equally well, sometimes better. September through October gives roots time to establish before the ground freezes. The soil is warm from summer, encouraging root growth. Cooler air temperatures reduce stress on foliage. Fall rains often provide consistent moisture without extra watering. Plants focus energy on roots rather than top growth, building a strong foundation for spring.
Fall-planted wild ginger often outperforms spring-planted divisions the following year. The roots have a head start. You also avoid the spring rush at nurseries. Selection may be better in fall as nurseries clear inventory. Mulch heavily after fall planting to prevent frost heaving. A three-inch layer of shredded leaves or straw protects the shallow rhizomes. Water well at planting and during any dry spells before the ground freezes.
Regional Timing Considerations
Your specific climate determines the exact planting window. In zones 3-4, spring planting should wait until late April or early May. Fall planting needs to happen by early September. Zones 5-6 offer the widest windows, April through May and September through October. Zones 7-8 can plant in March or early April, and October through November. In zone 9, stick to fall planting only. Summer heat makes spring establishment difficult.
Microclimates matter too. A north-facing slope stays cooler longer in spring. A protected courtyard may allow earlier planting. Urban heat islands extend fall planting windows. Pay attention to your specific site conditions rather than just your zone number. When in doubt, fall planting carries less risk in most regions. The plant evolved to establish roots in cooling autumn soils.
Buying Healthy Plants
Source matters tremendously with wild ginger. Never dig plants from the wild. This depletes natural populations and is often illegal. Purchase from reputable native plant nurseries. Look for nurseries that propagate their own plants from seed or division. Avoid big-box stores that may sell mislabeled or poorly grown stock. Ask about the source of their plants. Ethical nurseries will tell you exactly where their seed or stock plants originated.
Inspect plants carefully before buying. Healthy wild ginger has firm, creamy-white rhizomes. The roots should be light tan and fibrous, not black or mushy. Foliage should be deep green without yellowing, spots, or holes. Avoid plants with circling roots in pots. A few leaves are fine, but the plant should not be root-bound. Bare-root divisions should have at least one growing point (a visible bud) and several inches of rhizome. Smaller divisions take longer to establish but cost less.
Preparing the Planting Area
Clearing Existing Vegetation
Start with a clean slate. Remove all grass, weeds, and invasive plants from the planting area. Do not use herbicides near where you plan to plant. The chemicals can persist and damage sensitive wild ginger roots. Hand-pull weeds, getting as much root as possible. For grass, use a sharp spade to cut and remove sod. Shake excess soil off the grass roots back into the bed. If the area has heavy weed pressure, consider sheet mulching for a season before planting.
Sheet mulching works beautifully for woodland gardens. Lay down cardboard or thick newspaper over the area. Overlap edges by at least six inches. Wet it thoroughly. Cover with four to six inches of wood chips, leaves, or straw. Leave it for three to six months. The existing vegetation dies and decomposes. Earthworms and microbes improve the soil structure. You can plant directly into the mulch layer when ready. This method builds soil while eliminating weeds without chemicals.
Soil Amendment Strategies
Amend the soil based on your test results and existing conditions. Most garden soils benefit from organic matter addition. Spread two to three inches of compost over the planting area. Leaf mold is even better if you can get it. It mimics the natural forest floor perfectly. Well-rotted manure works too, but use sparingly. Too much nitrogen encourages lush foliage at the expense of root development.
Work amendments into the top eight to ten inches of soil. A garden fork works better than a tiller for this. Tilllers destroy soil structure and harm beneficial fungi. Fork the soil gently, lifting and turning. Mix amendments thoroughly but avoid pulverizing the soil. You want a loose, crumbly texture with visible organic matter. If your soil is very heavy clay, add coarse sand or fine gravel along with organic matter. Aim for a fifty-fifty mix of native soil and amendments in the planting zone.
Creating the Ideal Planting Bed
Shape your planting bed with gentle curves. Straight lines look unnatural in woodland settings. The bed should be at least three feet wide for a decent colony. Wider is better. Mark the outline with a hose or rope. Step back and view from different angles. Adjust until it feels right. Remove any remaining debris, large rocks, or roots. Rake the surface smooth but not compacted.
Consider edging the bed to keep lawn grass from creeping in. Natural stone, logs, or metal edging all work. Bury the edging a few inches deep. Leave the top slightly above soil level to hold mulch. If planting on a slope, create small terraces or planting pockets. This prevents erosion and holds moisture around each plant. A slight depression around each planting hole helps direct water to the roots.
Pre-Planting Watering
Water the prepared bed thoroughly a day before planting. The soil should be moist but not muddy when you plant. This ensures good contact between roots and soil. Dry soil pulls moisture from the root ball, stressing the plant. Overly wet soil compacts easily and lacks oxygen. Test by squeezing a handful. It should hold together but crumble when poked. If water drips out, wait a day. If it falls apart immediately, water more.
This pre-watering step is especially important for bare-root plants. Their roots have no soil buffer. They need immediate access to moisture. For potted plants, water them well in their containers a few hours before transplanting. This reduces transplant shock. The root ball should slide out intact, not crumble or stay stuck in the pot. If roots are circling, gently tease them apart. Make a few vertical cuts in the root ball if it is severely root-bound.
Step-by-Step Planting Process
Spacing and Layout
Proper spacing ensures good air circulation and room for expansion. Space wild ginger plants twelve to eighteen inches apart. Closer spacing fills in faster but costs more. Wider spacing saves money but takes longer for a solid mat. For a natural look, avoid straight rows. Stagger plants in a triangular pattern. This mimics natural colonization. Use a tape measure or marked stick for consistency.
Lay out all plants in their pots before digging any holes. Step back and visualize the mature colony. Adjust spacing as needed. Consider the viewing angle. Place larger divisions where they will be seen first. Smaller divisions can go toward the back or edges. If planting on a slope, space slightly closer uphill and wider downhill. Gravity helps the downhill spread. Mark each planting spot with a trowel or stick before removing pots.
Planting Bare-Root Divisions
Bare-root divisions require gentle handling. Soak the roots in water for thirty to sixty minutes before planting. This rehydrates them fully. Dig a shallow trench or individual holes two to three inches deep. The rhizome should sit horizontally, just below the soil surface. The growing points (buds) should face upward. Spread the roots out gently in the hole or trench.
Backfill with amended soil. Firm gently with your fingers, not your foot. The rhizome should be covered with about one inch of soil. No deeper. Wild ginger rhizomes planted too deep may rot or fail to emerge. Water each division immediately after planting. Use a gentle stream to settle soil around roots. Add more soil if settling exposes the rhizome. Mulch lightly around but not over the growing points.
Planting Container-Grown Plants
Container plants are more forgiving but still need care. Dig holes twice as wide as the pot and the same depth. Slide the plant out carefully. If roots circle the bottom, loosen them gently. Place the plant so the crown sits at soil level. The crown is where stems meet roots. It should not be buried. Backfill with amended soil, firming gently as you go.
Create a shallow basin around each plant to hold water. Water thoroughly until the soil is saturated. This eliminates air pockets. Check that the plant has not settled too deep. Adjust if needed. Mulch around the plant, keeping mulch away from the crown. A two-inch gap prevents rot. Label each plant if you are trying different varieties or sources. This helps track performance over time.
Post-Planting Care
The first few weeks are critical. Water every two to three days if no rain falls. Check soil moisture daily. Stick your finger two inches deep. If dry, water. Do not let the soil dry out completely during establishment. After two weeks, reduce to weekly watering. After a month, water only during dry spells. The goal is to encourage roots to seek moisture deeper in the soil.
Watch for signs of stress. Wilting in morning indicates dry soil. Wilting in afternoon with moist soil may be heat stress. Yellowing leaves suggest overwatering or poor drainage. Brown leaf edges often mean too much sun or wind. Adjust conditions if possible. Add temporary shade cloth for plants getting too much light. Increase mulch for plants drying out too fast. Patience is key. Wild ginger grows slowly at first. You may see little top growth for weeks while roots establish.
Ongoing Care and Maintenance
Watering Established Plants
Once established, wild ginger becomes more drought tolerant. But it never likes to dry out completely. In average garden soil, water deeply once a week during dry periods. Sandy soils need more frequent watering. Clay soils need less. The finger test remains your best guide. Mulch heavily to reduce watering needs. A three-inch layer of shredded leaves cuts water loss dramatically.
Consider installing a rain gauge. One inch of rain per week is ideal. Supplement only when rainfall falls short. Water at the base of plants, not overhead. Wet foliage invites fungal diseases. Morning watering allows any splashed leaves to dry quickly. Soaker hoses or drip irrigation on timers make this effortless. Adjust schedules seasonally. Plants need more water in hot, windy weather. Less in cool, cloudy periods.
Mulching Practices
Mulch is non-negotiable for wild ginger. It replicates the leaf litter of the forest floor. Apply two to three inches of organic mulch annually. Shredded leaves are perfect. They break down quickly, feeding the soil. Wood chips work but decompose slower. Pine needles add slight acidity, which wild ginger appreciates. Avoid dyed mulches, rubber mulch, or stone. These do not improve soil.
Apply mulch in late fall after the ground freezes. This prevents frost heaving. Or apply in early spring before new growth emerges. Keep mulch pulled back from crowns. A donut shape, not a volcano. Replenish as needed throughout the season. Earthworms will pull mulch into the soil, improving structure. This natural process is exactly what wild ginger evolved with. Let it happen.
Fertilizing Needs
Wild ginger rarely needs fertilizer in properly prepared soil. The organic matter you added at planting provides slow-release nutrients. Mulch decomposition adds more each year. If growth seems weak or leaves are pale, a light application of balanced organic fertilizer in early spring helps. Use half the recommended rate. Too much nitrogen produces soft growth susceptible to pests and disease.
Compost tea or liquid kelp applied monthly during the growing season provides gentle nutrition. Top-dressing with an inch of compost each spring works beautifully. Simply spread it around plants and water in. The nutrients filter down to the rhizome zone. Avoid chemical fertilizers. They disrupt the soil microbiome that native plants depend on. Remember, wild ginger thrives in lean forest soils. Less is more.
Dividing Established Colonies
Division rejuvenates old colonies and provides free plants. The best time is early spring as growth emerges, or fall after foliage dies back. Dig up a section of the colony with a garden fork. Shake off excess soil. You will see the rhizome network. Each segment with a growing point can become a new plant. Cut or break rhizomes into three to six inch pieces. Each piece needs at least one bud and some roots.
Replant divisions immediately using the same process as new plants. Water well and mulch. The mother colony will fill in quickly. Divisions may take a year to reach full size. Division every three to five years keeps colonies vigorous. It also prevents the center from dying out, which happens when rhizomes become too crowded. Share extras with friends or expand your own plantings.
Pest and Disease Management
Wild ginger is remarkably pest-resistant. Slugs and snails occasionally nibble leaves, especially in wet springs. Hand-pick at night or use iron phosphate baits. Diatomaceous earth around plants helps. Copper tape barriers work for small areas. Encourage natural predators like ground beetles and toads. They patrol the mulch layer at night.
Fungal leaf spots appear in humid conditions with poor air circulation. Remove affected leaves promptly. Thin crowded colonies to improve airflow. Avoid overhead watering. Root rot occurs in poorly drained soil. Prevention through proper site selection and soil preparation is the only cure. Once rot starts, the plant rarely recovers. Deer and rabbits rarely browse wild ginger. The aromatic compounds deter them. This makes it valuable in unfenced woodland gardens.
Designing with Wild Ginger
Woodland Garden Integration
Wild ginger shines in naturalistic woodland gardens. Plant it in drifts beneath canopy trees. Let it mingle with native ferns, sedges, and spring ephemerals. The heart-shaped leaves provide texture contrast to feathery ferns and strappy sedges. Use it to soften edges of paths and patios. It creates a seamless transition from cultivated beds to wild areas.
Consider the seasonal progression. Spring brings hidden flowers and fresh foliage. Summer offers a solid green carpet. Fall may bring yellow tones before dormancy. Winter reveals the rhizome network if you brush away leaves. Design for all seasons. Pair with plants that offer winter interest like evergreen ferns or interesting bark. Wild ginger’s consistency makes it a reliable design anchor.
Erosion Control on Slopes
The rhizomatous habit makes wild ginger excellent for shaded slopes. The shallow but dense root network holds soil effectively. Plant in staggered rows across the slope. Space closer than on flat ground, ten to twelve inches. Mulch heavily with shredded leaves held by jute netting on steep slopes. Water carefully to avoid washing out new plants.
Combine with other erosion-control natives. Pennsylvania sedge, wild geranium, and Christmas fern all work well. Their different root depths create a layered stabilization system. Avoid planting on slopes steeper than 2:1 without professional guidance. Wild ginger helps but cannot hold vertical cuts. It works best as part of a comprehensive slope management plan.
Container and Small Space Gardening
No woodland? No problem. Wild ginger grows well in containers. Choose a wide, shallow pot. The rhizomes spread horizontally. A twelve-inch diameter pot holds three to five divisions. Use high-quality potting mix amended with compost. Ensure excellent drainage. Place in full shade on a north-facing porch or under dense trees.
Container plants need more frequent watering. Check daily in summer. Fertilize lightly with liquid kelp monthly. Repot every two to three years as rhizomes fill the container. Divide at repotting time. Winter protection is crucial in pots. The roots freeze faster than in ground. Move pots to an unheated garage or bury them in mulch. In zones 7 and warmer, they may survive outdoors against a protected wall.
Companion Plant Combinations
Create stunning combinations with thoughtful pairings. For spring interest, plant wild ginger with Virginia bluebells and celandine poppy. The bluebells go dormant as ginger expands. For summer texture, combine with lady fern and hosta. The fine fern fronds contrast bold ginger leaves. For fall color, add white wood aster and zigzag goldenrod. They bloom as ginger foliage turns golden.
Consider height layers. Tall: bugbane, goat’s beard. Medium: ferns, wild geranium. Ground: wild ginger, foamflower, sedges. This creates a complete woodland community. All these plants share similar cultural needs. They support each other ecologically. The result looks like a slice of natural forest, not a planted garden.
Troubleshooting Common Problems
Slow Establishment
Wild ginger tests your patience. It may show minimal top growth for the first year. This is normal. The plant invests in roots first. If you see healthy leaves, even few, the plant is fine. Do not fertilize to force growth. This backfires. Ensure consistent moisture and proper shade. Mulch well. By year three, the colony should expand noticeably. By year five, you will have a solid mat.
If a plant shows zero growth after a full season, investigate. Gently dig around one rhizome. Check for firm, white tissue. Mushy or black means rot. Dry and brittle means drought death. Firm but no buds means it may need more time. Some divisions lack viable growing points. This happens occasionally. Replace failures in fall or spring. Learn from the loss and adjust conditions for replacements.
Leaf Scorch and Sun Damage
Brown, crispy leaf edges signal too much sun. This often happens when a shade tree is removed or limbs are pruned. The plant cannot adapt quickly. Provide immediate shade with cloth or a temporary screen. Water deeply. Do not remove damaged leaves until new growth appears. They still photosynthesize. Plan long-term solutions: plant a replacement tree, install a shade structure, or transplant to a shadier spot in fall.
Reflected heat from walls or pavement can also cause scorch. Even in shade, radiated heat damages foliage. Mulch heavily to cool the root zone. Consider a living screen of taller shade plants. Avoid planting near south-facing walls. The heat load is too intense. East or north walls are safer.
Poor Spreading
If your colony refuses to expand, check the basics. Soil compaction stops rhizome growth. Aerate gently with a fork around the colony. Add compost. Competition from tree roots can starve wild ginger. Large trees take most moisture and nutrients. Supplemental watering and fertilizing help. But sometimes the tree wins. Consider moving the colony to a less competitive spot.
pH imbalance inhibits growth. Test soil. Wild ginger prefers slightly acidic. Alkaline soil locks up nutrients. Add elemental sulfur to lower pH gradually. Do not use aluminum sulfate. It can be toxic. Nutrient deficiency shows as pale leaves with green veins (iron chlorosis) or overall yellowing (nitrogen). Address with appropriate organic amendments. Patience combined with correct diagnosis solves most spreading issues.
Winter Damage
Wild ginger is hardy to zone 3, but winter can still cause problems. Frost heaving pushes shallow rhizomes out of the ground. This exposes them to drying wind and freezing temperatures. Heavy mulch after ground freeze prevents this. Apply three to four inches of shredded leaves in late fall. Remove excess in early spring as growth emerges.
Winter desiccation occurs when frozen soil prevents water uptake but wind continues to transpire moisture from leaves. Evergreen foliage is most susceptible. Wild ginger is semi-evergreen in mild winters. Anti-desiccant sprays help. Apply in late fall on a dry day above freezing. Burlap screens block drying winds. Snow cover is the best protection. If snow is unreliable, mulch heavily.
Conclusion
Planting wild ginger rewards you with one of the most satisfying groundcovers for shade. This native woodland plant brings ecological value, seasonal beauty, and low maintenance to difficult garden spots. The keys to success are simple: choose a shady site with rich, moist soil, prepare the bed thoroughly, plant at the right depth, and mulch generously. Then practice the gardener’s greatest virtue, patience.
Your wild ginger colony will grow slowly at first. You might wonder if it is working. Then one spring you will notice the patch has doubled. A few years later, it forms a seamless carpet suppressing weeds and sheltering wildlife. The hidden flowers will delight you each April. The heart-shaped leaves will stay fresh through summer heat. You will find yourself dividing and sharing pieces with fellow gardeners, spreading not just plants but the joy of native gardening.
Remember that every garden teaches its gardener. Your wild ginger will show you exactly what it needs through its responses. Observe, adjust, and enjoy the process. You are not just planting a groundcover. You are restoring a piece of native woodland ecology to your landscape. That is something to feel good about every time you walk through your shade garden.
Frequently Asked Questions
Is wild ginger edible like culinary ginger?
While early settlers used wild ginger roots as a ginger substitute, modern research indicates potential toxicity concerns with consumption. Today it is grown exclusively as an ornamental native groundcover for shade gardens.
What is the difference between wild ginger and European ginger?
European ginger (Asarum europaeum) has glossier, more leathery leaves and is evergreen in milder climates. Canadian wild ginger (Asarum canadense) has softer, matte leaves and is deciduous. Both make excellent shade groundcovers.
Will wild ginger choke out other plants?
Wild ginger spreads slowly and politely. It forms dense mats that suppress weeds but does not aggressively invade or choke out established perennials. It coexists well with other shade-loving natives.
How do I control slugs on wild ginger?
Hand-pick slugs at night, use iron phosphate baits, apply diatomaceous earth around plants, or create copper tape barriers. Encouraging natural predators like toads and ground beetles also helps control slug populations naturally.
Can I grow wild ginger under pine trees?
Yes, wild ginger grows well under pine trees as long as the shade is not too dense and you can provide consistent moisture. The pine needles create acidic mulch that wild ginger appreciates, though you may need to supplement water due to root competition.
Why is my wild ginger not flowering?
Wild ginger flowers are often hidden beneath leaf litter at ground level, making them easy to miss. Plants may also need several years to mature before flowering. Ensure adequate shade, moisture, and organic soil for best flowering performance.