How to Fertilize Air Plant
Fertilizing air plants is essential for vibrant growth and blooming, but it requires a gentle touch. Use a bromeliad or Tillandsia-specific fertilizer at quarter strength once a month during the growing season. Always apply after watering when leaves are wet, and never fertilize dry plants or during dormancy.
Key Takeaways
- Use the right fertilizer: Choose bromeliad or Tillandsia-specific fertilizer with low copper content, diluted to quarter strength.
- Fertilize monthly during growing season: Apply once per month from spring through early fall when plants are actively growing.
- Never fertilize dry plants: Always soak or mist your air plant first, then apply fertilizer while leaves are still wet.
- Skip winter fertilizing: Reduce or stop fertilizing during winter dormancy when growth naturally slows down.
- Watch for burn signs: Brown, crispy leaf tips indicate over-fertilization — flush with water immediately.
- Blooming plants need extra care: Fertilize blooming Tillandsia lightly to support flower and pup production.
- Rainwater is best: Use rain, filtered, or distilled water for mixing fertilizer to avoid mineral buildup.
Quick Answers to Common Questions
How often should I fertilize my air plant?
Fertilize once per month during the active growing season (spring through early fall). Stop or reduce fertilizing in winter when growth slows down.
Can I use regular houseplant fertilizer on air plants?
No. Most houseplant fertilizers contain copper, which is toxic to air plants. Use only copper-free bromeliad or Tillandsia-specific fertilizer.
Should I fertilize my air plant before or after watering?
Always water first. Soak or mist your air plant until leaves are wet, then apply fertilizer. Never fertilize a dry plant.
What strength should I mix air plant fertilizer?
Mix at quarter-strength (25% of label rate). For most bromeliad fertilizers, this means 1/4 teaspoon per gallon of water.
Why are my air plant tips turning brown after fertilizing?
Brown tips indicate fertilizer burn from over-concentration or fertilizing dry plants. Flush with plain water and reduce strength next time.
📑 Table of Contents
- Introduction
- Understanding Air Plant Nutrition Basics
- Choosing the Right Fertilizer for Air Plants
- When and How Often to Fertilize Air Plants
- Step-by-Step Guide: How to Fertilize Air Plant Collections
- Common Mistakes and How to Avoid Them
- Advanced Tips for Thriving Air Plants
- Troubleshooting Fertilizer Problems
- Conclusion
Introduction
If you have fallen in love with air plants, you are not alone. These quirky little Tillandsia have taken the plant world by storm. They live without soil. They cling to driftwood, sit in glass globes, and perch on seashells. They look like alien creatures from a sci-fi movie. But here is the thing — they still need nutrients. Many beginners think air plants survive on air alone. The name is misleading. In nature, they catch dust, decaying leaves, and insect droppings with their trichomes. Those tiny silver hairs on their leaves are actually nutrient traps. Indoors, your air is too clean. Your plant will survive for a while without fertilizer. But it will not thrive. It will not bloom. It will not produce pups. This guide walks you through everything you need to know about how to fertilize air plant collections the right way.
We will cover what fertilizer to buy. We will cover how often to apply it. We will cover the exact mixing ratios. We will cover the mistakes that kill plants. And we will cover special situations like blooming plants, mounted displays, and sick plants. By the end, you will feel confident feeding your Tillandsia. Your plants will reward you with intense color, regular blooms, and plenty of babies to share with friends.
Understanding Air Plant Nutrition Basics
How Tillandsia Absorb Nutrients
Air plants belong to the bromeliad family. They are epiphytes. This means they grow on other plants or objects, not in soil. Their roots serve one purpose — anchoring. They do not absorb water or nutrients. The leaves do all the work. Tiny scales called trichomes cover the leaf surface. These trichomes act like microscopic sponges. They trap moisture from humidity. They catch airborne dust and organic debris. They absorb dissolved nutrients directly through the leaf tissue. This is why foliar feeding works so well. The fertilizer goes straight to where the plant can use it.
Visual guide about How to Fertilize Air Plant
Image source: airplantexpert.com
Different species have different trichome densities. Xeric types like Tillandsia xerographica have thick, silvery coats. They come from dry, high-light environments. They trap every bit of moisture they can. Mesic types like Tillandsia bulbosa have greener, smoother leaves. They come from humid, shaded forests. They absorb nutrients more readily but also burn faster. Knowing your species helps you adjust feeding strength.
What Nutrients Air Plants Actually Need
Air plants need the same macro-nutrients as other plants — nitrogen, phosphorus, and potassium. But they need them in different ratios. Nitrogen drives leaf growth and green color. Phosphorus supports root development and flowering. Potassium regulates water movement and overall vigor. They also need micro-nutrients. Calcium builds strong cell walls. Magnesium sits at the center of chlorophyll molecules. Iron prevents yellowing between leaf veins. The critical difference? Copper. Most general fertilizers contain copper as a micro-nutrient. Copper is toxic to bromeliads at very low levels. It damages trichomes. It stops nutrient uptake. It kills the plant slowly. This is why you must use bromeliad-specific or Tillandsia-specific fertilizer. Never use Miracle-Gro. Never use orchid fertilizer unless it states copper-free. Never use fish emulsion at full strength.
Signs Your Air Plant Is Hungry
How do you know when to fertilize air plant specimens? Look for these clues. Growth has stalled for months during growing season. Leaves look pale or yellowish instead of vibrant green or silver. The plant has not bloomed in years despite mature size. No pups appear after a bloom cycle. Leaf tips turn brown but the plant is well-watered. The plant feels light and papery rather than plump. A healthy, well-fed air plant feels substantial. The leaves have tension. The color is intense. Xeric types show bright silver. Mesic types show deep green. Blooming plants throw intense color — reds, pinks, purples — from the center leaves. If your plant looks dull, it is probably hungry.
Choosing the Right Fertilizer for Air Plants
Best Commercial Fertilizers for Tillandsia
Walk into a garden center and you will see dozens of fertilizers. Ignore 90 percent of them. You need a product labeled for bromeliads, air plants, or Tillandsia. Here are the top choices trusted by collectors. Grow More Bromeliad Fertilizer 17-8-22 is the gold standard. It has the ideal NPK ratio. It contains zero copper. It dissolves instantly. One jar lasts years. Epiphytes Delight Air Plant Fertilizer comes in a convenient spray bottle. It is pre-diluted. Great for beginners who fear mixing errors. Tillandsia International Fertilizer is another copper-free option. It comes in powder form. Dyna-Gro Grow 7-9-5 works if you cannot find bromeliad-specific fertilizer. It is urea-free and low in copper. Use at one-eighth teaspoon per gallon. Always check the label for copper content. If copper is listed in the guaranteed analysis, put it back.
Understanding NPK Ratios for Air Plants
The three numbers on fertilizer labels represent nitrogen-phosphorus-potassium. For air plants, you want higher nitrogen for leaf growth. You want moderate phosphorus for blooming. You want higher potassium for stress tolerance. A 17-8-22 ratio is excellent. A 16-9-25 ratio works too. Avoid high-phosphorus “bloom boosters” like 10-30-10. They cause salt buildup. They do not trigger blooming in Tillandsia. Blooming is triggered by maturity, light, and temperature changes — not phosphorus overload. Balanced nutrition supports the plant so it CAN bloom when ready.
Why Copper-Free Is Non-Negotiable
Let me say this again. Copper kills air plants. It accumulates in the trichomes. It blocks iron uptake. It causes chlorosis — yellowing between leaf veins. It causes necrotic spots. It causes leaf curling. Eventually the plant collapses. Many fertilizers include copper because most plants need trace amounts. Bromeliads are uniquely sensitive. Even copper plumbing can leach enough to harm sensitive species. If you use a copper watering can, switch to plastic. If your tap water runs through copper pipes, let it sit overnight or use filtered water. The fertilizer you choose must explicitly state “copper-free” or “safe for bromeliads.” If the label does not mention copper, assume it contains some.
Liquid vs Powder vs Spray Forms
Each form has pros and cons. Powder concentrates are most economical. A 1-pound jar treats thousands of gallons. You control the exact strength. They store indefinitely dry. You must measure carefully each time. Liquid concentrates are easier to measure. Use a dropper or syringe. They can settle or crystallize over time. Shake well before each use. Ready-to-spray bottles are foolproof. No mixing. No measuring. Just spray. They cost more per application. They are perfect for small collections. Fertilizer spikes or granules do not work. They need soil to break down. Do not buy them.
When and How Often to Fertilize Air Plants
Seasonal Fertilizing Schedule
Air plants follow seasonal rhythms. Spring through early fall is active growing season. Fertilize once per month. In warm climates or under grow lights, you can fertilize every three weeks. Late fall through winter is rest season. Stop fertilizing completely. Or fertilize once at half strength in mid-winter if growing under lights year-round. The plant cannot use nutrients when growth slows. Excess salts sit on leaves. They burn trichomes. They invite fungal issues. Follow the plant, not the calendar. If your plant pushes new leaves in January, feed it lightly. If it sits static in July, skip that month.
Fertilizing During Different Growth Stages
Young plants and offsets need gentle feeding. Use quarter-strength monthly. They have fewer trichomes. They burn easily. Mature plants handle full quarter-strength well. Blooming plants need consistent nutrition. The flower spike consumes massive energy. Feed monthly at quarter-strength throughout the bloom cycle. After blooming, the mother plant declines. Keep feeding monthly. She directs energy to pup production. Pups appear at the base. Once pups reach one-third mother size, they can be separated. Or leave them to form a clump. Clumps need slightly more fertilizer — more leaf surface to feed.
Special Timing: Before and After Blooming
Many growers ask about fertilizing to trigger blooms. Fertilizer does not trigger blooms. Maturity triggers blooms. Light triggers blooms. Temperature drop triggers blooms. But a well-fed plant produces a better bloom. The spike is taller. The bracts are more colorful. The flowers last longer. More pups form. If you know your species blooms in spring, ensure it is well-fed all winter. Do not suddenly double the dose. That causes burn. Consistency matters more than intensity.
Step-by-Step Guide: How to Fertilize Air Plant Collections
Preparing Your Fertilizer Solution
Start with the right water. Rainwater is best. Distilled water works. Reverse osmosis water works. Tap water varies. Hard water leaves mineral deposits on trichomes. Chlorine damages sensitive tissues. If using tap water, let it sit 24 hours for chlorine to dissipate. Or run it through a carbon filter. Measure your container. A gallon jug works well. Add fertilizer at quarter-strength. For Grow More 17-8-22, that is one-quarter teaspoon per gallon. For other brands, check the label for “monthly maintenance” rate and divide by four. Mix thoroughly. Label the jug. Store in a cool, dark place. Use within two weeks. Discard if it smells sour or grows algae.
The Soak-and-Fertilize Method
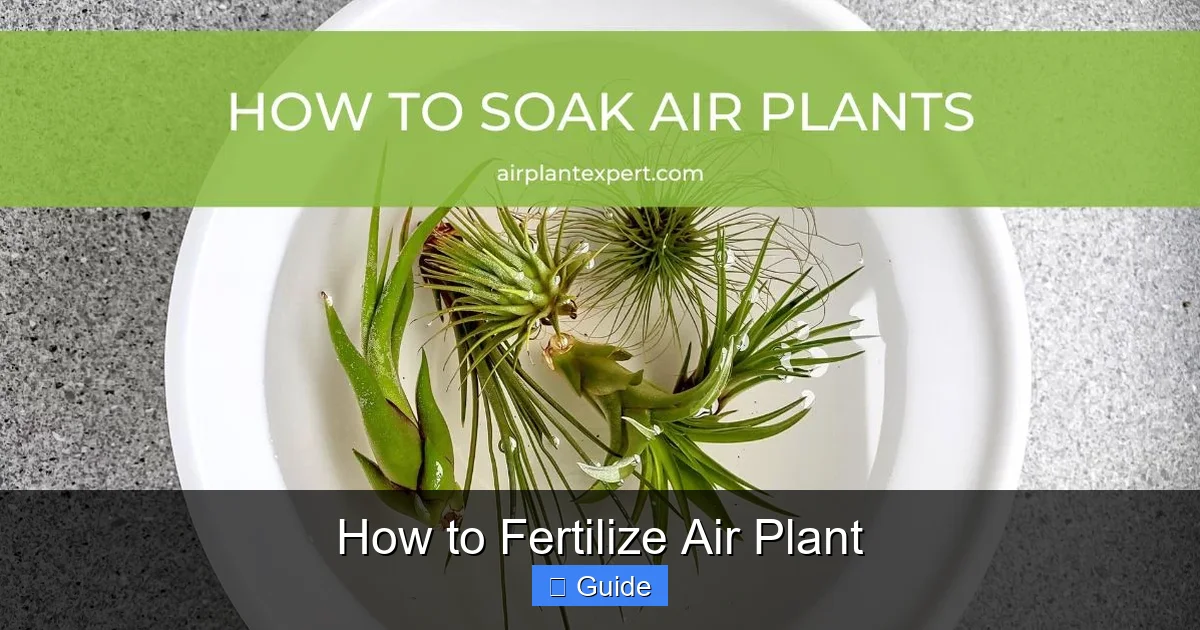
This is the most effective method. Fill a bowl with room-temperature water. Submerge your air plants. Soak for 20 to 30 minutes. This hydrates the trichomes fully. Remove plants. Shake gently to remove excess water. Place plants on a towel. While leaves are still wet, apply fertilizer. You can dip them in the fertilizer solution. Or spray thoroughly with a spray bottle. Ensure all leaf surfaces get coated. The wet trichomes absorb nutrients immediately. Let plants dry upside down on a towel. Good air circulation is critical. They must dry within four hours. Return to display.
The Spray-Only Method
For mounted plants or quick feeding, use the spray method. Mist plants with plain water first. Wait two minutes. Spray fertilizer solution until dripping. Cover top and bottom of leaves. Get into the leaf axils where pups emerge. Let dry completely. This method delivers less total nutrient. It works for maintenance between soaks. It works for large mounted specimens you cannot remove. It works for terrarium plants you cannot soak. Do this monthly during growing season.
Fertilizing Mounted and Displayed Air Plants
Many air plants live glued to wood, tucked in shells, or wired to frames. You cannot soak these easily. Do not soak the mount. Wood rots. Shells trap water. Glue fails. Instead, take the whole display to the sink. Spray with plain water until saturated. Spray with fertilizer solution. Let drip dry. Or use a pump sprayer for large displays. Move display to a well-ventilated area to dry. If the mount stays damp too long, use a fan. Rotate the display so all sides get light and air. Mounted plants dry slower. They need more airflow.
Fertilizing Air Plants in Terrariums
Closed terrariums create special challenges. Fertilizer salts accumulate. No rain flushes them away. Humidity stays high. Fungal risk increases. Fertilize terrarium plants at half the normal strength. Once every six weeks instead of monthly. Remove plants from terrarium if possible. Soak and fertilize outside. Return when dry. If plants are permanently fixed, spray very lightly. Wipe glass after. Increase ventilation for 24 hours. Monitor for mold. White fuzzy growth on leaf bases means too much moisture, too little air, or too much fertilizer.
Common Mistakes and How to Avoid Them
Over-Fertilizing: The Silent Killer
More is not better. Over-fertilizing is the number one way enthusiasts kill air plants. Signs appear slowly. Leaf tips turn brown and crispy. Brown patches spread inward. Leaves curl excessively. The plant feels dry despite watering. Silver trichomes turn gray or black. Growth stops. The plant declines over weeks. If you see these signs, stop fertilizing immediately. Soak the plant in plain water for one hour. Repeat daily for three days. This flushes excess salts. Resume fertilizing at half the previous strength after two months. Some plants never recover. Prevention is everything.
Fertilizing Dry Plants
Never apply fertilizer to a dry air plant. The trichomes are closed. The concentrated solution sits on leaf surfaces. It burns on contact. It draws moisture out of cells. Always water first. Soak or mist thoroughly. Wait until leaves are visibly wet. Then apply fertilizer. The open trichomes drink the solution safely. This rule has no exceptions. Even the spray method requires pre-misting.
Using the Wrong Water
Softened water contains sodium. Sodium kills air plants. It replaces potassium in cells. It destroys trichome function. Never use water from a salt-based softener. Hard water leaves calcium deposits. These clog trichomes. They look like white dust on leaf tips. Distilled or RO water lacks minerals. Long-term use can starve plants. Rainwater is ideal. It has balanced minerals. It is slightly acidic. It mimics natural conditions. Collect rainwater in clean barrels. Filter through cheesecloth. Store in food-grade containers.
Fertilizing During Dormancy
Winter is not growing season for most air plants. Light levels drop. Temperatures drop. Metabolism slows. The plant cannot process nutrients. Fertilizer sits on leaves. Salts accumulate. Trichomes burn. Fungus moves in. Stop fertilizing when growth stops. Resume when you see new leaf emergence in spring. If you grow under lights year-round, the plant may not go dormant. Watch the plant. Feed only when actively growing.
Ignoring Species-Specific Needs
Tillandsia ionantha is a tough little tank. It handles fertilizer well. Tillandsia tectorum has dense trichomes. It catches everything. It burns at half strength. Tillandsia capitata turns red before blooming. High nitrogen keeps it green. You want it red. Reduce nitrogen for color. Tillandsia xerographica grows slowly. It needs less frequent feeding. Tillandsia usneoides (Spanish moss) grows fast. It appreciates slightly more frequent feeding. Research your species. Adjust accordingly.
Advanced Tips for Thriving Air Plants
Combining Fertilizing with Proper Watering
Watering and fertilizing go hand in hand. The soak method does both at once. Soak in plain water. Then fertilize while wet. Or add fertilizer to the soak water at quarter-strength. This saves time. But it means the plant sits in fertilizer solution for 30 minutes. Some growers prefer this. Others worry about overexposure. Both work. Try both. See what your plants prefer. The key is consistency. Pick a schedule. Stick to it. Mark your calendar. Set a phone reminder. “First Saturday: Feed air plants.”
Using Fertilizer to Encourage Pups
Everyone wants pups. Baby air plants are the best reward. Fertilizer helps. A well-fed mother produces more pups. She produces larger pups. They detach easier. They establish faster. After blooming, continue monthly feeding. The mother sacrifices herself for the pups. Her leaves may wither. That is normal. Do not remove her until she is completely dry and brown. She is still feeding the pups through shared tissue. Once pups are one-third her size, you can separate. Or leave them. Clumps are stunning.
Foliar Feeding vs Root Feeding
Remember — air plants have no functional roots for feeding. Roots are anchors only. Foliar feeding is the only way. This is why spray and soak methods work. This is why soil fertilizers fail. This is why copper matters so much. The trichomes are the gateway. Keep them clean. Dust blocks them. Rinse plants monthly with plain water. No fertilizer. Just a gentle shower. This removes dust, salts, and debris. Clean trichomes absorb better.
Creating a Fertilizing Calendar
Get a wall calendar. Mark fertilizing days. January: Skip or half-strength. February: Skip. March: Full strength — spring growth starts. April: Full strength. May: Full strength. June: Full strength. July: Full strength. August: Full strength. September: Full strength. October: Half-strength — slowing down. November: Skip. December: Skip. Adjust for your hemisphere. Adjust for grow lights. Adjust for your species. The calendar keeps you honest. It prevents “I think I fed them last month?” moments.
Troubleshooting Fertilizer Problems
Identifying Fertilizer Burn
Fertilizer burn looks distinct. Brown, crispy leaf tips. Often symmetrical on multiple leaves. The brown area is dry and papery. It does not spread like rot. Rot is mushy. Rot smells bad. Burn has no smell. Burn starts at tips. Rot starts at base or between leaves. Burn happens days after fertilizing. Rot happens days after overwatering. If you see burn, flush immediately. Soak in plain water one hour daily for three days. Increase air flow. Do not fertilize for eight weeks.
Dealing with Salt Buildup
White crusty deposits on leaf tips. White dust on trichomes. Gritty feel when you touch leaves. This is salt buildup. It comes from fertilizer. It comes from hard water. It comes from not drying fast enough. Rinse plants thoroughly. Soak in distilled water for two hours. Gently brush deposits with a soft paintbrush. Do not scrape. Do not use chemicals. Return to rainwater. Reduce fertilizer strength. Increase drying time.
Reviving an Over-Fertilized Plant
Act fast. Remove from display. Soak in room-temperature distilled water for one hour. Repeat daily for five days. Place in bright indirect light. High airflow. No fertilizer. No bloom boosters. No “rescue” tonics. Watch for new growth at center. If center is green and firm, it may recover. If center is brown and mushy, it is gone. Compost it. Learn from it. Your next plant will do better.
When to Seek Expert Help
Most issues you can solve. But sometimes you need help. If multiple species decline simultaneously. If you see unusual spotting — black, yellow, orange rings. If plants collapse despite correct care. If you suspect virus or bacterial infection. Join air plant forums. Post clear photos. Include care details. Experienced growers diagnose fast. The Tillandsia community is generous. We have all killed plants. We want you to succeed.
Conclusion
Learning how to fertilize air plant collections changes everything. Your plants transform. They grow faster. They color deeper. They bloom reliably. They multiply generously. The secret is not magic. It is consistency. It is the right product at the right strength at the right time. It is respecting the trichomes. It is watching the plant and responding. Start simple. Buy a copper-free bromeliad fertilizer. Mix at quarter-strength. Feed monthly during growing season. Always water first. Watch your plants. They will tell you what they need. A happy Tillandsia is a beautiful thing. Silver leaves catching light. A sudden flush of red before bloom. A tiny pup peeking from the base. These moments make the effort worth it. Now go feed your air plants. They are waiting.
Frequently Asked Questions
Can I fertilize air plants with orchid fertilizer?
Only if the orchid fertilizer explicitly states it is copper-free and safe for bromeliads. Many orchid fertilizers contain copper, which damages air plant trichomes. When in doubt, use a dedicated Tillandsia fertilizer.
Do air plants need fertilizer to bloom?
Fertilizer does not trigger blooming — maturity, light, and temperature changes do. However, regular fertilizing ensures the plant has enough energy to produce a strong bloom spike and healthy pups afterward.
Can I put fertilizer in my air plant’s soaking water?
Yes, you can add quarter-strength fertilizer directly to the soak water. This saves time and ensures even distribution. Just ensure the plant dries completely within four hours after soaking.
Is it okay to fertilize air plants in a closed terrarium?
Fertilize terrarium air plants at half the normal strength and half the frequency (every 6-8 weeks). Salts accumulate faster in closed environments. Remove plants for soaking when possible.
What water should I use to mix air plant fertilizer?
Rainwater, distilled water, or reverse osmosis water are best. Avoid softened water (contains sodium) and hard tap water (leaves mineral deposits). Let tap water sit 24 hours to dissipate chlorine.
How do I fertilize a large mounted air plant display?
Take the entire mount to a sink. Thoroughly mist with plain water, then spray with quarter-strength fertilizer solution until dripping. Let dry completely in a well-ventilated area before returning to display.