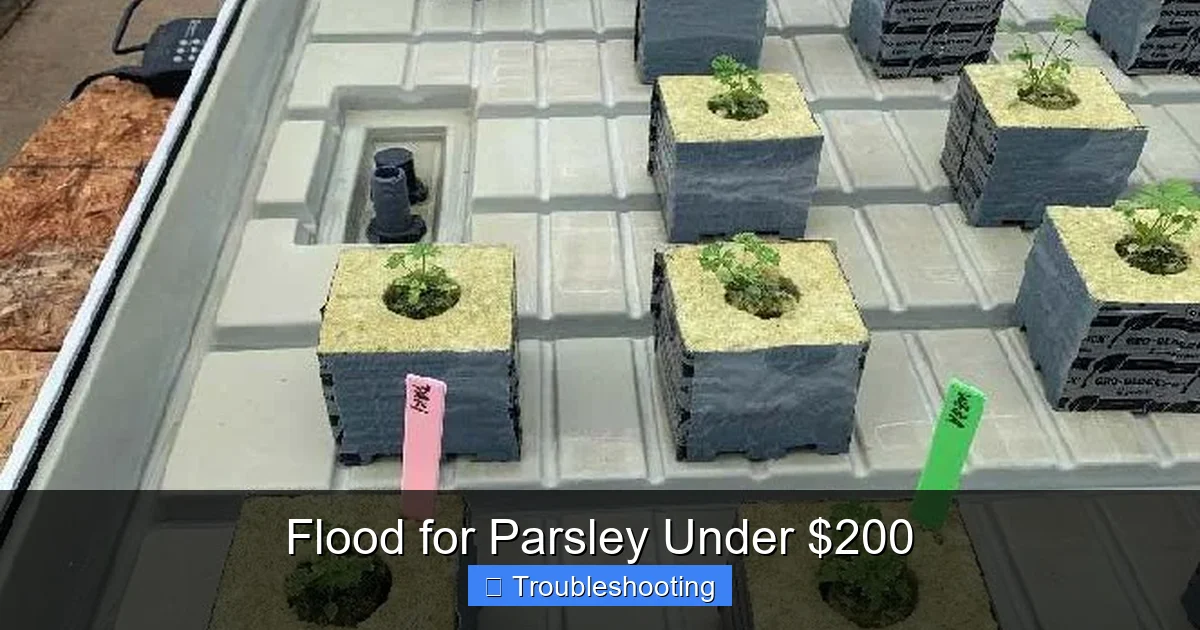
Flood for Parsley Under $200
Looking to grow fresh parsley year-round without breaking the bank? A flood and drain hydroponic system under $200 gives you professional-grade results at a fraction of the cost. This guide covers everything from choosing the right system to troubleshooting common issues, so you can harvest flavorful parsley in just weeks.
Key Takeaways
- Flood and drain systems deliver nutrients efficiently: These systems periodically flood plant roots with nutrient solution then drain it away, providing optimal oxygen and nutrition for parsley growth.
- Quality systems exist under $200: Several reliable ebb and flow kits include everything needed – tray, reservoir, pump, timer, and fittings – without exceeding a modest budget.
- Parsley thrives in hydroponic environments: With proper pH (5.5-6.5), EC levels (1.0-1.8), and 12-16 hours of light daily, parsley grows faster and more abundantly than in soil.
- Common issues are easily fixed: Pump failures, algae growth, root rot, and nutrient imbalances have straightforward solutions when caught early through regular monitoring.
- DIY options save even more money: Building a custom system with storage totes and quality components can cost under $150 while offering more growing space.
- Proper timing prevents problems: Flood cycles of 15 minutes every 2-3 hours during light periods keep roots oxygenated without waterlogging.
- Harvest management extends production: Cutting outer stems first encourages continuous growth, giving you months of fresh parsley from a single planting.
Quick Answers to Common Questions
What’s the minimum budget for a functional flood and drain parsley system?
You can build a basic DIY system for around $150 using a storage tote reservoir, concrete mixing tray, quality pump, digital timer, and clay pebbles. Complete kits start around $165-180. Avoid anything cheaper – components fail quickly and cost more long-term.
How often should I flood parsley in clay pebbles?
Every 2-3 hours during light periods for 10-15 minutes per flood. Adjust based on temperature, humidity, and plant size. Hot dry conditions need more frequent floods. Cool humid conditions need less. The finger test 30 minutes after drain is your best guide.
Why does my parsley keep bolting (flowering) under lights?
Parsley is biennial and sensitive to long photoperiods. Reduce light to 12 hours on/12 hours off. Keep temperatures 60-70°F. Harvest flower stalks immediately. Italian flat-leaf bolts faster than curly varieties. Stagger plantings every 6 weeks for continuous supply.
Can I use tap water in my flood and drain system?
Yes, but test it first. Let it sit 24 hours to off-gas chlorine, or use a carbon filter. Check EC – above 0.4 means significant dissolved minerals. Hard water may need pH adjustment down. RO or distilled water requires Cal-Mag supplement. Know your water before adding nutrients.
How do I prevent root rot in flood and drain systems?
Keep reservoir 65-68°F. Ensure complete drainage between floods. Add beneficial bacteria (Hydroguard). Clean system monthly with hydrogen peroxide. Don’t over-flood – 15 minutes max. Use quality clay pebbles, not cheap substitutes that break down. Healthy roots are white and crisp.
📑 Table of Contents
- Why Flood and Drain Systems Make Sense for Parsley
- Understanding Flood and Drain Basics
- Top Flood and Drain Systems Under $200
- Setting Up Your System for Parsley Success
- Troubleshooting Common Flood and Drain Issues
- Advanced Tips for Maximum Parsley Yields
- Seasonal Adjustments and Long-Term Maintenance
- Conclusion
Why Flood and Drain Systems Make Sense for Parsley
Growing parsley at home used to mean a sunny windowsill and a pot of soil. Today, more home gardeners are discovering flood for parsley under $200 setups that deliver restaurant-quality herbs year-round. These systems, also called ebb and flow, work by flooding a grow tray with nutrient-rich water then letting it drain back into a reservoir. The cycle repeats on a timer, giving roots perfect access to both nutrients and oxygen.
Parsley responds beautifully to this method. Its taproot system appreciates the periodic drying between floods, which prevents the root rot that kills so many soil-grown plants. The controlled environment means no weeds, no soil-borne pests, and consistent harvests regardless of outdoor weather. A quality flood for parsley under $200 kit pays for itself within months compared to buying fresh bunches at the grocery store.
But not all systems are created equal. Some budget kits cut corners on pump reliability or timer accuracy. Others skip essential components like overflow fittings or quality growing media. This guide walks through everything you need to know – from selecting the right system to troubleshooting the issues that inevitably pop up. Whether you’re a complete beginner or upgrading from a basic setup, you’ll find practical advice that saves time, money, and frustration.
Understanding Flood and Drain Basics
How the Cycle Works
The flood and drain cycle is beautifully simple. A submersible pump in the reservoir pushes nutrient solution up through tubing into the grow tray. The tray fills until it reaches an overflow fitting, which prevents overfilling and returns excess solution to the reservoir. Once the timer shuts off the pump, gravity drains the tray completely through the same tubing. Roots get soaked, then exposed to air. This rhythm mimics natural wet-dry cycles that stimulate strong root development.

Visual guide about Flood for Parsley Under $200
Image source: files01.pna.gov.ph
For parsley specifically, the ideal flood duration is 10-15 minutes. Frequency depends on your growing media, plant size, and environment. Clay pebbles need more frequent floods than rockwool or coco coir because they hold less water. Young seedlings might need flooding every 3-4 hours. Mature plants in hot, dry conditions might need it every 2 hours. The key is watching your plants – they’ll tell you what they need.
Essential Components Every System Needs
Any flood for parsley under $200 worth buying includes these non-negotiable parts. The reservoir holds 10-20 gallons of nutrient solution. Bigger is better – larger volumes resist temperature swings and pH drift. The grow tray sits above the reservoir and holds your plants in net pots filled with growing media. A reliable submersible pump rated for 200-400 gallons per hour handles the flooding. Digital timers with 15-minute increments give precise control. Overflow and drain fittings prevent disasters. Quality tubing that won’t kink or degrade connects everything.
Growing media deserves special attention. Expanded clay pebbles (hydroton) are popular for flood and drain because they’re reusable, pH-neutral, and provide excellent aeration. Rockwool cubes work well for starting seeds but can stay too wet between floods. Coco coir holds moisture nicely but breaks down over time. Many experienced growers mix media – clay pebbles on bottom for drainage, coco coir on top for moisture retention. Whatever you choose, rinse it thoroughly before use to remove dust and debris.
Space and Light Requirements
Before buying any flood for parsley under $200 system, measure your space. A standard 2×4 foot tray fits four to six parsley plants comfortably. You’ll need 18-24 inches of vertical clearance above the tray for mature plants and lighting. LED grow lights in the 30-50 watt range work perfectly for this footprint. Look for full-spectrum lights with both blue (vegetative) and red (flowering) wavelengths, though parsley stays in vegetative growth so blue-heavy spectrum is fine.
Temperature matters more than many beginners realize. Parsley prefers 60-70°F (15-21°C). Nutrient solution should stay within this range too – warmer water holds less dissolved oxygen, inviting root rot. If your grow space gets hot, consider a reservoir chiller or simply frozen water bottles swapped out daily. Cold temperatures below 55°F slow growth dramatically. A simple aquarium heater in the reservoir solves this for winter growing.
Top Flood and Drain Systems Under $200
Complete Kits for Beginners
The Active Aqua Grow Flow system consistently ranks as the best flood for parsley under $200 for beginners. Around $180 gets you a 2×4 foot tray, 25-gallon reservoir, 400 GPH pump, digital timer, all fittings, and even a starter pack of clay pebbles. The tray’s built-in overflow prevents flooding accidents. Assembly takes under an hour with basic tools. The pump is surprisingly quiet – important if your system lives in a living space.

Visual guide about Flood for Parsley Under $200
Image source: media.tegna-media.com
Viagrow’s Ebb and Flow kit at roughly $165 offers similar specs but with a 15-gallon reservoir. The smaller reservoir means more frequent nutrient changes but fits tighter spaces. Their pump runs a bit louder but includes a flow control valve for fine-tuning flood speed. Both systems use standard 1/2 inch tubing and fittings, making replacement parts easy to find at any hydroponic shop or hardware store.
For the absolute tightest budget, the Hydrofarm Active Aqua Root Spa 5-gallon bucket system runs about $90. It’s technically a deep water culture system but can be converted to flood and drain with a timer. You’d need multiple buckets for meaningful parsley production, pushing the total over $200. Still, it’s a legitimate entry point for learning hydroponic basics before investing in a proper tray system.
DIY Builds That Save Money
Building your own flood for parsley under $200 system often yields better quality for less money. Start with a 27-gallon black storage tote for the reservoir ($15) and a concrete mixing tray from the hardware store for the grow bed ($25). A Vivosun 400 GPH submersible pump ($25), Century 7-day digital timer ($20), and bulkhead fittings with overflow kit ($30) handle the plumbing. Fifty liters of clay pebbles ($40) fills the tray. That’s roughly $155 for a system with double the reservoir capacity of most kits.
The DIY route lets you customize dimensions for your space. Need a 3×3 foot tray instead of 2×4? Grab a different mixing tray. Want a 40-gallon reservoir? Upgrade to a larger tote. The tradeoff is time – expect 3-4 hours for assembly and testing. You’ll also need basic tools: drill with hole saw bits, silicone sealant, tubing cutter, and zip ties. Watch a few YouTube tutorials first. The Hydroponics 101 channel has excellent step-by-step flood and drain builds.
One critical DIY tip: test your flood and drain cycle with plain water before adding plants or nutrients. Run the system for 24 hours minimum. Check for leaks at every connection. Verify the timer triggers correctly. Confirm the overflow handles maximum pump flow without backing up. Fixing a leaky bulkhead fitting is easy when the system is empty. It’s a disaster when full of expensive nutrient solution and mature plants.
What to Avoid in Budget Systems
Cheap flood for parsley under $200 systems often share the same flaws. Avoid any kit with an analog timer – the pins strip, they lose time during power outages, and 30-minute minimum increments waste water and stress plants. Pumps rated under 200 GPH struggle to flood trays quickly, leaving dry spots. Trays without built-in overflow fittings rely on the timer alone; if the timer fails, your floor gets flooded.
Watch out for systems using proprietary fittings or tubing sizes. Standard 1/2 inch ID vinyl tubing and barbed fittings are universal. Proprietary parts mean waiting for online orders when something breaks. Also skip kits that include “starter nutrients” but no pH testing supplies. You absolutely need a pH pen or drops from day one. The $15 you save on a kit without them costs hours of frustration and potentially dead plants.
Finally, read reviews specifically about pump longevity. A $30 pump that dies in three months costs more than a $50 pump running for years. Look for pumps with ceramic shafts and magnetic drive – they resist mineral buildup and run cooler. Brands like Vivosun, EcoPlus, and Active Aqua have decent track records. Unknown brands with zero replacement parts availability are false economy.
Setting Up Your System for Parsley Success
Starting Seeds vs. Transplants
Parsley seeds are notoriously slow to germinate – 14-28 days is normal. Soaking seeds overnight in warm water speeds things up slightly. For flood and drain systems, start seeds in 1.5-inch rockwool cubes or rapid rooter plugs. Keep them moist but not soaked in a humidity dome at 70°F. Once seedlings show true leaves (about 3-4 weeks), transplant the whole cube into a net pot surrounded by clay pebbles. The cube wicks moisture from the pebbles during the transition.
Buying transplants from a nursery saves a month but introduces risks. Soil roots must be washed completely clean before going hydroponic – any remaining soil rots and causes disease. Gently massage roots in lukewarm water until clean. Trim any brown or mushy roots with sterilized scissors. Expect transplant shock for 5-7 days. Keep nutrient strength at half concentration during recovery. Many growers start their own seeds specifically to avoid this hassle.
For continuous harvests, stagger plantings every 4-6 weeks. Parsley is biennial – it produces leaves the first year, flowers and seeds the second. In hydroponics with optimal conditions, plants often bolt (flower) faster than in soil. Having replacements ready keeps your supply steady. A 2×4 tray holds six plants comfortably. Plant two every six weeks, harvesting the oldest two. This rotation gives you fresh parsley indefinitely.
Nutrient Management Made Simple
Parsley isn’t a heavy feeder, but it needs consistent nutrition. A general-purpose hydroponic nutrient formula at 600-800 PPM (parts per million) or 1.0-1.4 EC works well. The General Hydroponics FloraSeries three-part system lets you adjust ratios – more Grow (high nitrogen) for leafy production, less Bloom. Many budget growers use MasterBlend 4-18-38 tomato formula with calcium nitrate and magnesium sulfate. It’s incredibly cheap per gallon and works beautifully for herbs.
Change the reservoir every 10-14 days regardless of how it looks. Nutrient ratios drift as plants uptake elements at different rates. Topping off with plain water between changes maintains volume but doesn’t rebalance ratios. When changing, clean the reservoir with hydrogen peroxide (3ml per gallon of 3% solution) to prevent biofilm buildup. Rinse well. This 15-minute maintenance prevents 90% of nutrient-related problems.
Monitor pH daily for the first week, then every 2-3 days once stable. Parsley wants 5.5-6.5. Most tap water runs 7.0-8.0. pH Down (phosphoric acid) brings it down. pH Up (potassium hydroxide) raises it. Make adjustments in small increments – 1ml per 5 gallons, wait 15 minutes, retest. Never mix pH Up and Down together. Keep a log. Patterns emerge that help you predict and prevent drift.
Lighting Schedule and Placement
Parsley needs 12-16 hours of light daily for vigorous growth. 14 hours on, 10 hours off is a sweet spot. Use a separate timer for lights – don’t try to sync with flood cycles. LED panels should hang 12-18 inches above plant tops. Adjust height as plants grow. Too close causes light burn (bleached, crispy leaf edges). Too far creates leggy, weak stems stretching for light.
Reflective material on walls doubles effective light. Mylar sheeting ($20 for a 4×8 roll) stapled to walls or cardboard reflectors behind plants makes a noticeable difference. White paint works too. The goal is preventing light from escaping your grow area. Every photon that hits a wall instead of a leaf is wasted energy.
Watch for photoperiod sensitivity. Some parsley varieties bolt under long days (16+ hours). If you see flower stalks forming – thick central stems with small leaves – reduce to 12 hours immediately. Harvest the flower stalk and surrounding leaves. The plant may return to leaf production. Italian flat-leaf parsley tends to bolt faster than curly varieties under artificial light.
Troubleshooting Common Flood and Drain Issues
Pump and Timer Problems
The pump is the heart of any flood for parsley under $200 system. When it fails, plants die fast – especially in clay pebbles which dry out in hours. Prevention starts with monthly pump maintenance. Unplug, remove from reservoir, disassemble the impeller housing (usually tool-free), and clean mineral deposits with a toothbrush and vinegar. Check the intake screen for root intrusion. Reassemble and test before returning to service.
Timer failures cause two opposite disasters. Stuck “on” floods continuously, drowning roots and overflowing onto floors. Stuck “off” leaves plants bone dry. Digital timers with battery backup survive power outages. Mechanical timers don’t. Test your timer monthly by manually advancing through a cycle. Replace timer batteries every 6 months regardless of indicator. A $15 timer replacement is cheap insurance.
Power outages are inevitable. For short outages (under 4 hours), plants survive fine. Longer outages need backup. A small UPS (uninterruptible power supply) runs pump and timer for 8-12 hours. Cost: $60-80. Cheaper option: battery-operated air pump with air stones in the reservoir ($25). It keeps roots oxygenated but doesn’t flood. Manual flooding with a watering can every few hours works for dedicated growers. Have a plan before you need it.
Root Rot and Oxygen Issues
Root rot is the number one killer in flood and drain systems. Healthy roots are white, crisp, and smell fresh. Rotting roots turn brown, slimy, and smell swampy. Causes: water too warm (above 72°F), floods too long or frequent, poor drainage leaving stagnant pockets, or Pythium fungus introduced from contaminated media or tools. Prevention beats treatment every time.
Keep reservoir temps 65-68°F. Frozen water bottles swapped twice daily work surprisingly well. Ensure complete drainage between floods – no puddles in tray corners. Add beneficial bacteria like Hydroguard or Great White to the reservoir. They outcompete Pythium for resources. If rot appears, act fast. Remove affected plants. Trim all brown roots. Dip remaining roots in 3% hydrogen peroxide (1:10 dilution) for 30 seconds. Clean entire system with peroxide. Restart with fresh nutrients and beneficial bacteria.
Oxygen starvation mimics rot symptoms but roots stay white. Plants wilt despite wet media. Growth stalls. Fix: increase flood frequency, decrease flood duration, add air stones to reservoir, lower water temperature. Clay pebbles need more frequent floods than you think – every 2 hours in warm conditions. The “finger test” works: stick finger into pebbles 2 inches deep 30 minutes after drain. Should feel barely moist, not wet, not bone dry.
Algae and Biofilm Control
Green slime on clay pebbles, reservoir walls, or tubing means algae. It’s unsightly, competes for nutrients, and harbors pests. Light hitting nutrient solution causes algae. Fix: opaque reservoirs (black totes, not clear), light-proof tubing, covering all openings. If using a clear reservoir for monitoring, wrap it in black trash bags or paint it. The $2 can of black spray paint saves endless headaches.
Biofilm – that slippery clear coating inside tubing – is bacteria colonies. Some are beneficial. Thick biofilm restricts flow and harbors pathogens. Monthly peroxide flush (3ml per gallon, run 30 minutes, drain, rinse) keeps it manageable. Replace tubing annually. It’s cheap ($10 for 10 feet) and eliminates hidden buildup. Clean pump impeller housing during this maintenance too.
Fungus gnats love wet hydroponic media. Yellow sticky traps catch adults. Mosquito bits (Bacillus thuringiensis israelensis) in the reservoir kill larvae. Let top inch of media dry between floods – gnats need constant moisture. A layer of Growstones or perlite on top of clay pebbles creates a dry barrier. Prevention: sterile media, clean tools, no standing water anywhere in the grow area.
Nutrient Deficiencies and Toxicities
Yellowing older leaves usually mean nitrogen deficiency. Yellowing between veins on new growth suggests iron deficiency – often caused by high pH locking out iron. Purple stems indicate phosphorus deficiency or cold temperatures. Burnt leaf tips mean nutrient burn (too strong) or potassium toxicity. The key is recognizing patterns, not memorizing every symptom.
When in doubt, flush. Run plain pH-adjusted water through the system for 24 hours. Then restart at half-strength nutrients. Increase gradually over a week. This resets the root zone and eliminates guesswork. Keep a photo journal of your plants weekly. Comparing photos reveals slow changes your eyes miss daily. Many “deficiencies” are actually pH issues – fix pH first, wait three days, then reassess.
Calcium and magnesium deficiencies show as brown spots with yellow halos on middle leaves. Common with RO (reverse osmosis) or distilled water which lacks these minerals. Cal-Mag supplement ($15/bottle lasts months) fixes it. Add 2-5ml per gallon with every nutrient change. If using tap water, test first – many municipal supplies have sufficient calcium and magnesium already.
Advanced Tips for Maximum Parsley Yields
Pruning and Harvesting Techniques
How you harvest determines how long your parsley produces. Never pull leaves – cut stems at the base with clean scissors. Take outer stems first, leaving the center growing point intact. This “cut and come again” method yields months of harvests from one plant. Harvest in the morning after lights have been on 2-3 hours – essential oils peak then, giving best flavor.
Remove any yellowing or damaged leaves immediately. They drain energy and attract pests. Flower stalks should be cut the moment they appear unless you’re saving seeds. Once parsley bolts, leaf quality declines rapidly – bitter, tough, less aromatic. Some growers pinch flower buds daily as a meditative practice. It works.
Every 8-12 weeks, consider a “hard reset” harvest. Cut the entire plant to 2 inches above the crown. Feed with half-strength nutrients. The plant regenerates with vigorous new growth. This prevents woody stems and extends productive life. You’ll lose 2-3 weeks of harvest but gain another 3-4 months of prime production. With staggered plantings, you never run out.
CO2 Enhancement on a Budget
Parsley responds dramatically to elevated CO2 – 30-50% faster growth at 1000-1200 ppm vs. ambient 400 ppm. Commercial growers use CO2 tanks. Home growers have cheaper options. Exhale CO2 bags ($35, last 6 months) work for small spaces. Fermentation buckets (sugar, yeast, water) cost pennies but need weekly refresh. Even just breathing on your plants while inspecting them adds measurable CO2 in a small tent.
Critical: CO2 only helps if light, nutrients, and temperature are already optimal. It’s the cherry on top, not the foundation. Seal your grow space reasonably well – CO2 is heavier than air and settles. A small oscillating fan keeps it mixed. Monitor with a cheap CO2 meter ($60) if you get serious. Most hobbyists see great results without ever touching CO2.
Cloning for Free Plants
Parsley clones easily from stem cuttings. Take 4-inch cuttings from healthy plants, remove lower leaves, dip in cloning gel, place in rockwool cubes under a humidity dome. Roots appear in 10-14 days. This gives you genetically identical plants free forever. One mother plant supplies unlimited clones. Keep a dedicated “mother” under 18-hour light to prevent bolting.
Cloning preserves favorite varieties. Found a parsley with exceptional flavor, bolt resistance, or yield? Clone it. Share clones with friends. Trade for other herb varieties. The hydroponic community thrives on sharing genetics. Many unique varieties never reach commercial markets but circulate among home growers.
Seasonal Adjustments and Long-Term Maintenance
Summer Heat Management
Summer turns grow spaces into ovens. Reservoir temps spike. Plants transpire heavily, drinking more water and concentrating nutrients. Check EC daily in heat waves – it climbs fast. Top off with plain pH-adjusted water more frequently. Increase flood frequency to every 90 minutes. Add a clip fan blowing across the reservoir surface – evaporative cooling drops temps 3-5°F.
Consider a chiller if ambient temps regularly exceed 80°F. The Active Aqua 1/10 HP chiller ($250) pays for itself in saved crops. Cheaper hack: freeze 2-liter bottles overnight, rotate three sets through the reservoir daily. Labor-intensive but effective. Insulate reservoir with reflective bubble wrap ($15) to slow heat gain. Every degree matters for root health.
Winter Growing Advantages
Winter is actually easier for flood for parsley under $200 systems. Cooler ambient temps mean stable reservoir temps. Lower humidity reduces fungal pressure. Shorter days mean you control the photoperiod perfectly with lights. The challenge: cold drafts near windows or unheated spaces. Keep roots warm – a seedling heat mat under the reservoir ($20) maintains perfect 68°F solution temp.
Indoor winter air is dry. Parsley likes 50-70% humidity. A small humidifier ($30) in the grow space prevents crispy leaf edges and spider mites. Group plants together – they create a microclimate. A tray of water with pebbles near (not in) the system adds passive humidity. Monitor with a $10 hygrometer. Dry air stresses plants more than most growers realize.
Year-Round Maintenance Schedule
Daily: Check water level, pH, EC. Visual plant inspection. Empty catch trays. Weekly: Clean pump intake screen. Check timer function. Inspect roots through net pots. Prune dead leaves. Bi-weekly: Full reservoir change. Clean reservoir with peroxide. Check all fittings for leaks. Monthly: Deep clean pump impeller. Replace tubing annually. Calibrate pH/EC meters. Quarterly: Replace clay pebbles (or sterilize by boiling 20 minutes). Clean light lenses. Check fan blades for dust.
Keep a maintenance log. Simple notebook or phone app. Date, actions taken, observations, measurements. Patterns emerge: “pH always drifts up day 3 after change” or “EC spikes every summer week 2.” This data makes you a better grower faster than any book. Share your log in online communities – experienced growers spot issues you’ll miss.
Conclusion
Growing parsley in a flood and drain system under $200 isn’t just possible – it’s one of the most rewarding hydroponic projects for beginners and experienced growers alike. The initial learning curve feels steep, but each challenge teaches you something valuable about plant biology, system dynamics, and your specific growing environment. The parsley you harvest will be more flavorful, more nutritious, and infinitely fresher than anything from a store.
Start simple. Buy or build a basic system. Master the fundamentals: pH control, nutrient management, flood timing, temperature stability. Add complexity only when you’re ready – CO2, cloning, advanced nutrients, environmental automation. There’s no rush. Parsley grows fast enough to give quick feedback but forgiving enough to survive mistakes.
Remember that every expert grower killed plants at the start. The difference is they documented what happened, adjusted one variable at a time, and kept going. Your flood for parsley under $200 system will have issues. Pumps will fail. pH will drift. Algae will appear. Each problem solved makes you more capable. In six months, you’ll be the one answering questions in forums. In a year, you’ll wonder why you ever bought parsley at the grocery store.
The fresh sprig of parsley on your dinner tonight? You grew that. From a seed. In water. With a system you built or chose. That satisfaction never gets old. Happy growing.
Frequently Asked Questions
What size flood and drain system do I need for a family of four?
A 2×4 foot tray with six parsley plants provides ample harvests for a family of four. Stagger plantings every 6 weeks (two plants at a time) for continuous year-round supply. This size fits most budget systems under $200 and requires only a 30-50 watt LED light.
How long do parsley plants live in hydroponics?
Parsley is biennial but often bolts in 4-6 months under optimal hydroponic conditions. With aggressive harvesting (cutting to 2 inches every 8-12 weeks) and bolt prevention (12-hour light cycles), plants can produce quality leaves for 8-10 months. Cloning extends genetics indefinitely.
What’s the best growing media for flood and drain parsley?
Expanded clay pebbles (hydroton) are ideal – reusable, pH-neutral, excellent aeration, and perfect for flood cycles. Rinse thoroughly before use. A 50/50 mix of clay pebbles and coco coir works well for moisture retention. Avoid soil, peat moss, or perlite alone – they break down or float.
Do I need an air pump in my flood and drain reservoir?
Not strictly required since the drain cycle oxygenates roots, but highly recommended. A $15 air pump with air stones adds insurance against root rot, especially in warm conditions. It also keeps nutrient solution mixed and prevents stagnation during long off-cycles.
Can I grow other herbs in the same system as parsley?
Yes, but match plants with similar needs. Basil, cilantro, and dill share parsley’s preferences (cool temps, moderate nutrients, 12-14 hour light). Avoid rosemary, thyme, oregano – they want drier conditions, higher light, and lower nutrients. Separate systems work better for diverse herbs.
What causes white crust on my clay pebbles and how do I fix it?
White crust is mineral salt buildup from nutrient solution evaporation. It’s harmless but indicates you should flush more often. Monthly peroxide flushes (3ml/gallon, run 30 minutes, drain) prevent buildup. Replace pebbles annually or boil 20 minutes to sterilize. Wipe reservoir walls during changes.