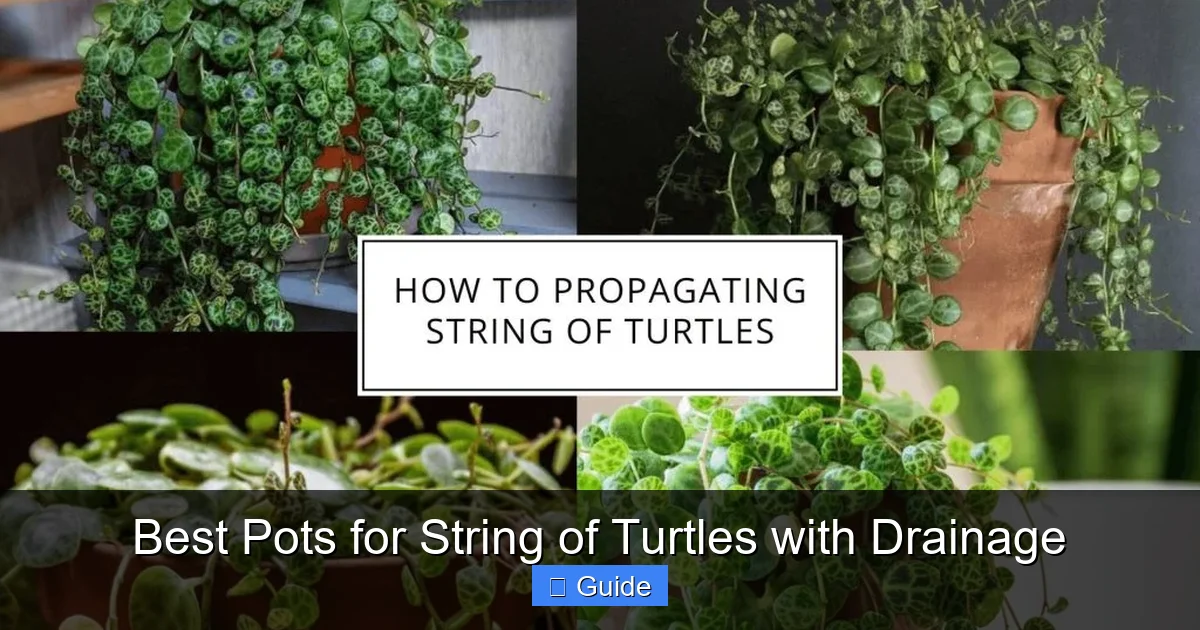
Best Pots for String of Turtles with Drainage
Choosing the right pot is crucial for your string of turtles. This guide covers the best pots for string of turtles with drainage, including terracotta, ceramic, and plastic options. Learn how proper drainage prevents root rot and promotes healthy growth for your peperomia prostrata.
Key Takeaways
- Drainage holes are non-negotiable: String of turtles needs excellent drainage to prevent root rot and fungal issues.
- Terracotta is the top choice: Its porous nature wicks away excess moisture and mimics the plant’s natural environment.
- Size matters more than you think: Choose a pot only 1-2 inches larger than the root ball to avoid water retention.
- Material affects watering frequency: Porous pots dry faster than glazed ceramic or plastic, changing your care routine.
- Elevated feet improve airflow: Pots with feet or risers prevent water from pooling at the bottom.
- Shallow pots work best: String of turtles has shallow roots, so wide, shallow containers are ideal.
- Double potting adds flexibility: Use a nursery pot inside a decorative cachepot for easy watering and style.
Quick Answers to Common Questions
What is the best pot material for string of turtles?
Unglazed terracotta is the best pot material for string of turtles because its porous walls wick excess moisture, provide airflow to roots, and mimic the plant’s natural epiphytic growing conditions.
How big should the pot be for string of turtles?
Choose a pot only 1-2 inches wider than the current root ball. String of turtles has shallow roots and prefers wide, shallow pots over deep ones to prevent water retention in unused soil.
Can I use a pot without drainage holes for string of turtles?
No, drainage holes are essential. Without them, water pools at the bottom causing root rot. Use the pot as a decorative cachepot with a nursery pot inside, or drill holes yourself.
Should I put rocks at the bottom of the pot for drainage?
No, rocks create a perched water table that raises the wet zone closer to roots. Use a well-draining soil mix with perlite or pumice instead. A coffee filter or mesh over holes keeps soil in.
How often should I repot string of turtles?
Repot every 2-3 years in spring, or when roots circle the bottom or exit drainage holes. Only increase pot size by 1-2 inches. String of turtles likes being slightly root-bound.
📑 Table of Contents
- Why Your String of Turtles Deserves the Perfect Pot
- Understanding String of Turtles Root Needs
- Top Pot Materials for String of Turtles
- Pot Size and Shape Guidelines
- Drainage Features That Make a Difference
- Matching Pot to Your Environment
- Double Potting The Best of Both Worlds
- Repotting Your String of Turtles Successfully
- Common Pot Mistakes to Avoid
- Budget-Friendly Pot Solutions
- Seasonal Pot Considerations
- Conclusion Finding Your Perfect Pot Match
Why Your String of Turtles Deserves the Perfect Pot
Let me tell you something I learned the hard way. That gorgeous string of turtles you just brought home? It is not just another pretty trailing plant. This little peperomia prostrata has specific needs, and the pot you choose makes or breaks its success. I killed my first one because I picked a cute ceramic pot with no drainage holes. The roots sat in soggy soil for weeks. By the time I noticed the yellowing leaves, it was too late.
Here is the thing about string of turtles. In nature, these plants grow as epiphytes on tree trunks and rocky outcrops in Brazilian rainforests. Their roots grab onto bark and stone. They get rained on constantly but never sit in standing water. Air flows freely around their root zone. When we pot them up, we need to recreate those conditions as closely as possible. That starts with the container.
The best pots for string of turtles with drainage share a few key traits. They have multiple drainage holes. They are made from breathable materials or have excellent airflow design. They are shallow rather than deep. And they are sized just right for the root system. Get these factors right, and your plant will reward you with those stunning turtle-shell patterned leaves cascading over the edges. Get them wrong, and you are fighting a losing battle against root rot.
Understanding String of Turtles Root Needs
Shallow Root System Explained
String of turtles does not send down a deep taproot. Instead, it develops a fibrous mat of fine roots that spread horizontally just below the soil surface. In the wild, these roots cling to moss-covered branches. They absorb moisture from humid air and brief rain showers. They never encounter deep, waterlogged soil.
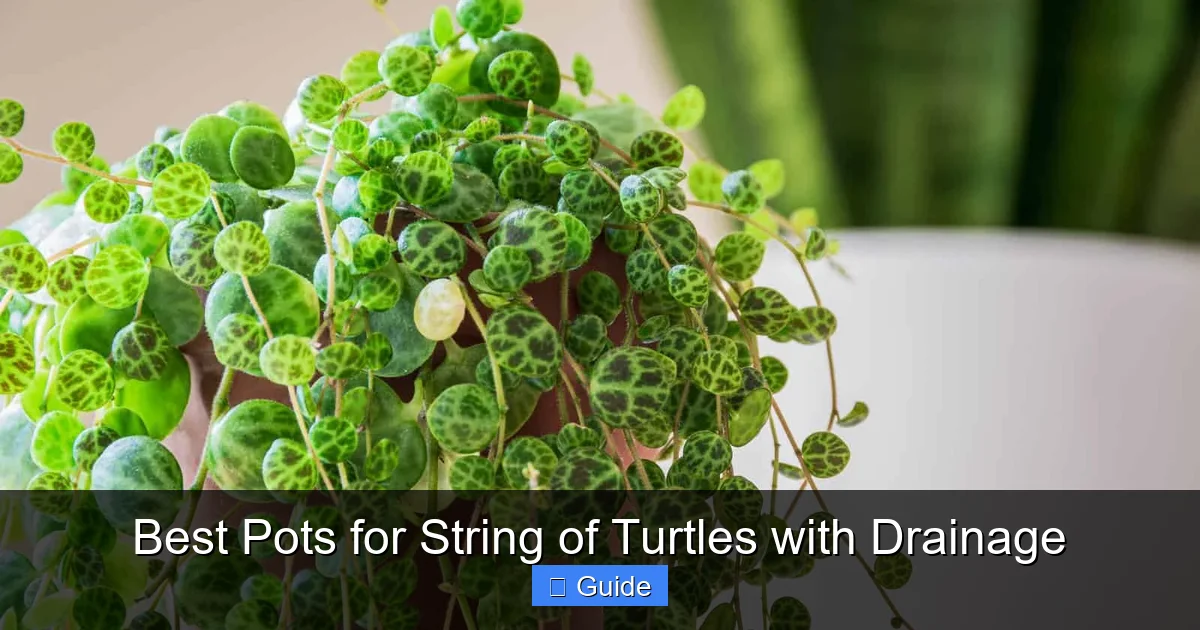
Visual guide about Best Pots for String of Turtles with Drainage
Image source: planetnatural.com
This means a deep pot is actually harmful. All that extra soil at the bottom stays wet long after the top dries out. The roots never reach down there. You end up with a soggy anaerobic zone that breeds harmful bacteria and fungi. A shallow pot that is wider than it is deep matches the natural growth habit perfectly.
Why Drainage Is Life or Death
I cannot stress this enough. Drainage holes are not optional. They are the single most important feature of any pot for this plant. Without them, water pools at the bottom. The soil becomes waterlogged. Oxygen gets pushed out of the pore spaces. Roots suffocate and rot. Once rot starts, it spreads fast through those fine fibrous roots.
One hole in the center is better than none, but multiple holes around the perimeter work best. They allow water to exit evenly from all sides. Some of the best pots for string of turtles with drainage feature a raised bottom with slots or a mesh screen. This creates an air gap beneath the soil. That air gap is gold for root health.
The Role of Airflow Around Roots
Epiphytic plants like string of turtles expect air movement around their roots. In a pot, the only airflow comes from the top of the soil and through the drainage holes. Porous pot materials like unglazed terracotta allow gas exchange through the walls too. This means oxygen enters and carbon dioxide exits through the sides of the pot, not just the bottom.
Plastic and glazed ceramic pots block this side airflow. The soil only breathes from the top and bottom. This is not a dealbreaker, but it means you must be more careful with your soil mix and watering schedule. If you use non-porous pots, add extra perlite or pumice to your mix. Create more air pockets in the soil itself.
Top Pot Materials for String of Turtles
Terracotta The Gold Standard
If you ask any experienced grower about the best pots for string of turtles with drainage, terracotta wins almost every time. Unglazed clay pots are porous. They pull excess moisture out of the soil through their walls. This wicking action creates a gentle gradient. The soil dries from the outside in. Roots get a chance to breathe between waterings.
Terracotta also provides weight and stability. A trailing plant can get top-heavy. Lightweight plastic pots tip over easily. A terracotta pot anchors the plant. The rough texture gives roots something to grip, which they seem to like. And let us be honest, that warm orange clay looks beautiful with the green and silver turtle-patterned leaves.
There are downsides. Terracotta dries out fast. In hot weather or low humidity, you might water every two or three days. The pots can develop mineral deposits on the outside from fertilizer salts. Some people find this unsightly. I think it adds character. Terracotta also breaks if dropped. But for plant health? It is hard to beat.
Unglazed Ceramic A Close Second
Unglazed ceramic shares many benefits with terracotta. It is porous, breathable, and wicks moisture. The clay body is usually finer and fired at higher temperatures. This makes it less prone to cracking and less likely to develop those white mineral crusts. The walls are often thinner, so the pot is lighter.
You find unglazed ceramic in more shapes and colors than terracotta. Matte white, charcoal, sand, sage. These neutral tones fit modern decor beautifully. The drainage holes are usually clean and well-placed. Many come with matching saucers that actually fit. Just make sure the saucer does not trap water against the bottom hole. Empty it after watering.
Glazed Ceramic Beauty With Caveats
Glazed ceramic pots are stunning. The colors, the patterns, the glossy finish. They elevate a plant from greenery to decor. But that glaze seals the clay. No moisture escapes through the walls. No air enters. The soil stays wet longer. For string of turtles, this increases rot risk.
You can still use glazed pots successfully. I have several. The trick is modifying your approach. Use a chunkier soil mix with 50 percent perlite or pumice. Water less frequently. Check the soil with a chopstick or moisture meter before watering. Make sure the pot has multiple large drainage holes. And never let it sit in a saucer of water.
Plastic Practical and Affordable
Plastic nursery pots are what your plant arrives in. They are lightweight, cheap, and have excellent drainage. Many have dozens of holes plus raised bottoms. For pure function, they are fantastic. For display? Not so much. But here is a pro tip. Keep the plant in its nursery pot. Slip that into a decorative cachepot without holes. This is double potting, and it is brilliant.
When watering time comes, lift the nursery pot out. Water thoroughly in the sink. Let it drain completely. Put it back in the pretty pot. No mess, no risk of standing water, and you can swap decorative pots whenever you want. Plastic also works fine as a standalone pot if you drill extra holes. A hot nail or soldering iron makes quick work of thin plastic.
Concrete and Stone Modern and Heavy
Concrete and stone planters have exploded in popularity. They look amazing in modern spaces. The weight keeps large trailing plants stable. But most are not porous unless specifically left unsealed. Sealed concrete acts like glazed ceramic. Water only leaves through the bottom.
Unsealed concrete breathes somewhat. It is alkaline, which can affect soil pH over time. String of turtles prefers slightly acidic soil. If you love the concrete look, look for pots with a sealed interior and unsealed exterior, or use the double pot method. Many concrete planters lack drainage holes entirely. You can drill them with a masonry bit, but it is messy and risky.
Fabric Pots The Breathable Option
Fabric grow bags and pots are gaining fans. They are made from felt-like geotextile. Air prunes the roots when they reach the edges. This prevents circling roots and creates a dense, healthy root ball. The entire surface breathes. Soil dries evenly and fast.
For string of turtles, fabric pots work surprisingly well. The shallow root system loves the air pruning. Watering is foolproof because overwatering is nearly impossible. The downside? They look utilitarian. They sag. They leak water onto surfaces. You need a tray underneath. And they degrade after a few seasons. But for pure plant health, they are top tier.
Pot Size and Shape Guidelines
Why Shallow Beats Deep Every Time
I mentioned this earlier, but it bears repeating. String of turtles roots spread wide, not deep. A pot that is 6 inches wide and 3 inches deep is infinitely better than one that is 4 inches wide and 6 inches deep. The shallow pot puts soil where the roots actually grow. The deep pot wastes soil below the root zone.
Wasted soil stays wet. It becomes a swamp. Even with great drainage, the bottom of a tall pot retains moisture longer due to the physics of water in soil columns. This is called the perched water table. The taller the soil column, the higher the saturated zone at the bottom. Shallow pots minimize this effect.
The 1 to 2 Inch Rule for Upgrading
When repotting, go up only one pot size. Maybe two at most. If your plant is in a 4-inch pot, move to a 5 or 6-inch. Not an 8-inch. Not a 10-inch. The roots need to fill the new soil volume quickly. If they don’t, that extra soil stays soggy. This is the number one mistake I see. People want to give their plant room to grow. They give it a mansion. The plant drowns.
String of turtles actually likes being slightly root bound. It signals the plant to focus on leaf growth rather than root expansion. A snug pot also dries faster, which this plant prefers. Wait until you see roots circling the bottom or poking out drainage holes. Then upgrade modestly.
Width Matters More Than Depth
Look for low bowls, azalea pots, or bulb pans. These are wider than they are tall. Azalea pots are typically three-quarters as tall as they are wide. Bulb pans are even shallower, half as tall as wide. Standard pots are as tall as they are wide. Avoid standard pots for this plant.
A wide shallow pot lets the stems spill over the edges sooner. This creates that lush cascading look faster. It also exposes more soil surface to air, speeding drying. If you cannot find shallow pots locally, you can modify deeper ones. Fill the bottom third with large pumice stones or styrofoam packing peanuts in a mesh bag. This creates a false bottom. Just ensure water can still drain freely.
Drainage Features That Make a Difference
Multiple Holes Versus Single Hole
One hole in the center works okay. Multiple holes work better. Four to eight holes spaced around the bottom perimeter allow water to exit from all sides. This prevents the center of the root ball from staying wet while the edges dry. Some premium pots have a grid of dozens of small holes. These are excellent.
Hole size matters too. Tiny holes clog with soil particles. Large holes let soil wash out. Quarter-inch to half-inch holes are the sweet spot. If holes are large, place a piece of mesh, a coffee filter, or a shard of broken pottery over them. This keeps soil in while letting water out. Do not use gravel layers. They create a perched water table and actually worsen drainage.
Raised Feet and Built-In Risers
Pots with molded feet or a raised base ring are genius. They lift the drainage holes off the surface. Air flows underneath. Water drains completely instead of being trapped by suction against a saucer or shelf. This simple feature dramatically improves root zone aeration.
If your favorite pot lacks feet, add your own. Pot feet, pot risers, or even three wine corks glued to the bottom work. I use adhesive furniture pads on lightweight pots. For heavier pots, those little terracotta feet sold at garden centers are perfect. They come in sets of three or four.
Mesh Bottoms and Slot Designs
Some modern pots feature a fully mesh bottom or longitudinal slots instead of round holes. These maximize drainage and airflow. The mesh is usually stainless steel or heavy-duty plastic. Slots are molded into the pot base. Both designs virtually eliminate the perched water table.
With mesh bottoms, you need a liner to hold soil. Landscape fabric, coconut coir, or a layer of sphagnum moss works. The liner lets water through but keeps soil in. Slot designs often have narrow openings that hold soil without liners. These pots are pricey but worth it for difficult plants.
Self-Watering Pots Proceed With Caution
Self-watering pots have a reservoir at the bottom. A wick draws water up into the soil. For thirsty tropicals, they are great. For string of turtles? Generally a bad idea. These plants want to dry out between waterings. A constant moisture supply from below keeps the lower root zone wet. Rot risk skyrockets.
If you absolutely must use a self-watering pot, treat it like a regular pot. Do not fill the reservoir. Water from the top. Let the soil dry completely before watering again. The reservoir just becomes dead space. Honestly, just skip self-watering for this plant. It solves a problem string of turtles does not have.
Matching Pot to Your Environment
High Humidity Environments
If you live in Florida, Hawaii, or run a humidifier constantly, your soil dries slower. In high humidity, terracotta is your best friend. Its wicking action counters the slow evaporation. You might even get away with glazed ceramic if you use a very chunky mix. But terracotta gives you the widest safety margin.
Plastic pots in high humidity are risky. The soil stays wet for weeks. I learned this when I moved from Arizona to Virginia. My watering schedule that worked perfectly in the desert caused root rot in the humid summer. I switched most plants to terracotta and added more perlite. Problem solved.
Low Humidity and Dry Climates
In dry climates like Arizona, Colorado, or heated homes in winter, terracotta can dry too fast. You might water every other day. The plant stresses from the rapid wet-dry cycles. Glazed ceramic or plastic works better here. They slow evaporation. The soil stays evenly moist longer.
You can also modify terracotta for dry climates. Seal the outside with a breathable sealant. Or line the inside with a plastic bag with drainage holes poked in the bottom. This reduces wicking while keeping the look. Double potting a nursery pot inside terracotta also slows drying. The air gap insulates.
Indoor Versus Outdoor Growing
Outdoor pots face wind, sun, and rain. Terracotta and concrete handle temperature swings well. Plastic becomes brittle in UV light. Glazed ceramic can crack in freeze-thaw cycles. If your string of turtles summers outside, choose accordingly.
Indoors, weight matters less. Aesthetics matter more. You can use delicate pots that would blow over outside. Just remember indoor air is often drier and less circulated. Adjust your pot choice and watering to match. A fan near your plants improves airflow and mimics outdoor conditions.
Light Levels and Pot Choice
Bright light drives faster growth and faster water use. In high light, terracotta keeps up. In low light, growth slows. Water uptake drops. Soil stays wet longer. In low light, non-porous pots or double potting helps prevent overwatering. The plant simply does not drink fast enough to dry out a terracotta pot.
If you only have low light, consider a grow light. String of turtles needs bright indirect light to maintain its compact growth and pattern. In dim conditions, it stretches, loses color, and becomes prone to rot regardless of pot. Light and pot choice work together.
Double Potting The Best of Both Worlds
How Cachepots Work
Double potting is simple. Your plant lives in a functional nursery pot with great drainage. That pot sits inside a decorative cachepot without holes. The cachepot catches water. It provides the look you want. The nursery pot provides the function the plant needs. They do not need to match in size perfectly. A little gap around the sides is fine.
This method lets you use any decorative pot you love. That gorgeous glazed bowl with no holes? Perfect cachepot. The vintage teacup? Cachepot. The concrete planter you drilled holes in but they clogged? Cachepot. You get unlimited style options without compromising plant health.
Benefits Beyond Drainage
Double potting makes watering clean. Lift the inner pot. Water in the sink or tub. Let it drain fully. No water on your furniture. No standing water in the decorative pot. You can also swap the inner pot easily for repotting. The decorative pot stays put.
It also helps with temperature insulation. The air gap between pots buffers root temperature. In summer, roots stay cooler. In winter near a cold window, they stay warmer. And if pests appear in the soil, you can treat the inner pot without messing up the decorative one.
Choosing the Right Cachepot
The cachepot should be slightly wider and taller than the nursery pot. You want easy removal. If it is too tight, you struggle to lift the inner pot. If it is too wide, the plant looks lost. Aim for half an inch to an inch of clearance around the sides.
Depth matters too. The nursery pot should not sit in water that collects at the cachepot bottom. If the cachepot is much deeper, add a layer of pebbles or a plastic lid at the bottom to raise the inner pot. Or just empty the cachepot after watering. I keep a turkey baster handy to suck out excess water from deep cachepots.
When to Avoid Double Potting
Double potting adds height. If your plant sits on a narrow shelf, the extra inch or two might push leaves into the light fixture. It also adds cost. You buy two pots. For large plants, the weight doubles. Moving a big plant in a double pot setup is a workout.
Some cachepots have no drainage and a narrow opening. Water evaporates slowly from the cachepot interior. This creates a humid microclimate around the nursery pot. In some cases, this is good. In others, it encourages fungal growth on the outer pot walls. Monitor and adjust.
Repotting Your String of Turtles Successfully
When to Repot
Spring is the ideal time. The plant enters active growth. It recovers fast from root disturbance. Signs it is time: roots circling the bottom, roots exiting drainage holes, soil drying in a day, plant pushing up out of the pot, or the pot cracking from root pressure. Every two to three years is typical.
Do not repot a new plant immediately. Let it acclimate for a few weeks. The stress of shipping plus repotting can shock it. Exception: if the pot has no drainage or the soil is terrible, repot right away. Use a similar pot size. Do not size up a struggling plant.
Soil Mix for the New Pot
The pot is only half the equation. Soil matters equally. String of turtles needs a chunky, fast-draining mix. My go-to recipe: two parts succulent soil, one part perlite, one part orchid bark, half part horticultural charcoal. This drains instantly but holds some moisture. The bark creates air pockets. Charcoal prevents funk.
Pre-made mixes work if you amend them. Cactus soil plus extra perlite. Or aroid mix with added pumice. Avoid straight potting soil. It compacts and suffocates roots. Avoid moisture-retentive crystals or gels. They keep soil wet too long. When in doubt, add more perlite. You really cannot overdo drainage for this plant.
Step by Step Repotting
Water the plant a day before. Moist soil holds the root ball together. Gently squeeze the nursery pot to loosen. Tip sideways and slide the plant out. If stuck, run a knife around the inside edge. Do not pull on the stems. They snap easily.
Loosen the root ball gently. Tease out circling roots. Trim any black, mushy, or dead roots with clean scissors. Healthy roots are white or light tan and firm. Place a layer of fresh mix in the new pot. Set the plant at the same depth it was growing. Fill around the sides. Tap the pot to settle soil. Do not pack it down.
Wait two to three days before watering. This lets any damaged roots callous over. Then water thoroughly. Let drain completely. Place in bright indirect light. Hold off on fertilizer for a month. The fresh mix has nutrients.
Aftercare Tips
The plant may sulk for a week. Leaves might curl or drop. This is normal transplant shock. Do not overwater to compensate. Keep humidity high if possible. A clear plastic bag tented over the plant helps. Remove daily for air. New growth signals recovery.
Common Pot Mistakes to Avoid
No Drainage Holes
I will say it again because it kills more string of turtles than anything else. No drainage holes equals a death sentence. Even with a layer of rocks at the bottom. Even if you are careful with watering. Even if the pot is expensive and beautiful. Drill holes or use it as a cachepot. No exceptions.
Pot Too Large
We covered this. Oversized pots hold too much soil. That soil stays wet. Roots rot. The plant puts energy into roots instead of leaves. You get a sparse, sad plant in a giant pot. Size up gradually. Patience pays off.
Using Saucers Incorrectly
Saucers protect furniture. They also trap water. If water sits in the saucer, the bottom soil wicks it back up. The pot never fully drains. Always empty saucers within thirty minutes of watering. Better yet, water in the sink. Let drain fully. Then return to the saucer.
Ignoring Pot Material Effects
Switching from plastic to terracotta without adjusting watering kills plants. The soil dries twice as fast. The plant dehydrates. Switching from terracotta to glazed without adjusting causes rot. The soil stays wet twice as long. Know your pot. Adjust your care.
Blocking Drainage Holes
Gravel layers, solid saucers glued on, mesh that clogs, roots growing through and blocking holes. Check holes periodically. Clear them with a chopstick. Repot if roots clog them. A blocked hole is the same as no hole.
Budget-Friendly Pot Solutions
Thrift Store and Yard Sale Finds
Some of my best pots cost fifty cents at a thrift store. Terracotta, ceramic, concrete. People donate them constantly. Look for drainage holes. Check for cracks. Clean with a ten percent bleach solution. Rinse well. You get character and history for pennies.
DIY Drainage Holes
A masonry bit for ceramic and terracotta. A regular bit for plastic. A diamond hole saw for glass and thick ceramic. Go slow. Use water to cool the bit. Start with a small pilot hole. Wear safety glasses. You can turn any container into a plant pot.
Repurposed Containers
Shallow plastic food containers. Takeout bowls. Berry clamshells. Yogurt tubs with holes poked in the bottom. These make great nursery pots or propagation containers. Not pretty, but functional. Hide them in cachepots.
When to Invest in Quality
Spend money on pots for your showcase plants. The ones you see daily. The ones in your living room. Quality pots last decades. They have better drainage design. They look better. They make you happy. Cheap pots crack, fade, and disappoint. A few nice pots beat a shelf of sad ones.
Seasonal Pot Considerations
Summer Outdoor Transition
Moving string of turtles outside for summer? Terracotta and concrete handle the elements. Plastic degrades in UV. Glazed ceramic can overheat in direct sun, cooking roots. Choose light-colored pots outdoors. They reflect heat. Dark pots absorb it. Soil temperatures in black pots can exceed one hundred twenty degrees in full sun.
Outdoor pots dry fast. Wind and sun increase evaporation. You might water daily. Terracotta helps by wicking moisture from deeper soil up to the roots. But monitor closely. A thirsty plant in summer heat declines fast.
Winter Indoor Adjustments
Winter means lower light, lower humidity, and cooler temperatures. Growth slows. Water needs drop. Terracotta might dry too fast near heating vents. Move plants away from direct heat. Consider switching to glazed or plastic for winter. Or group terracotta pots together to create a humidity pocket.
Check soil before watering. The finger test works. Stick your finger two inches deep. If dry, water. If moist, wait. Winter is when most overwatering happens. The plant looks the same but drinks half as much.
Spring Repotting Season
Spring is repotting time. Assess your pots. Cracked terracotta? Replace it. Mineral-crusted beyond cleaning? Replace it. Pot too small? Size up. Pot too big? Size down. Yes, sizing down is a thing. If you overpotted last year, correct it now.
Clean pots before reuse. Scrub with stiff brush. Soak in vinegar solution for mineral deposits. Rinse thoroughly. Sterilize with diluted bleach if pests or disease were present. Fresh pots, fresh soil, fresh start.
Conclusion Finding Your Perfect Pot Match
We have covered a lot of ground. The best pots for string of turtles with drainage share common DNA. They prioritize root health over aesthetics. They breathe. They drain freely. They match the shallow, wide root system. They suit your specific growing conditions.
Terracotta remains the gold standard for a reason. It works with the plant, not against it. But glazed ceramic, plastic, fabric, and concrete all have a place depending on your climate, light, and habits. The double pot method unlocks any decorative container you desire. There is no single perfect pot. There is only the perfect pot for your situation.
Start with a quality terracotta azalea pot or shallow bowl. Use a chunky, well-draining mix. Water when the top inch of soil feels dry. Watch your plant. It will tell you if it is happy. Firm, patterned leaves cascading over the edges? You nailed it. Yellowing, mushy, or shriveled leaves? Adjust the pot, the soil, or the watering.
Remember that pots are tools. They serve the plant. A beautiful pot that kills the plant is a waste. A plain pot that grows a spectacular specimen is a victory. Choose wisely. Repot thoughtfully. Enjoy the journey. Your string of turtles will thank you with those mesmerizing turtle-shell leaves spilling over the edges of whatever perfect pot you choose.
Frequently Asked Questions
Can string of turtles grow in a hanging basket?
Yes, hanging baskets work well for string of turtles because they provide excellent drainage and airflow. Choose a basket with a coconut coir liner or use a plastic nursery pot inside a decorative hanging basket. Ensure the basket is wide and shallow rather than deep.
What type of soil mix works best with terracotta pots?
A chunky mix of 2 parts succulent soil, 1 part perlite, 1 part orchid bark, and 1/2 part horticultural charcoal works perfectly with terracotta. The mix drains fast enough to match terracotta’s wicking action while retaining adequate moisture.
Why are my string of turtles leaves turning yellow in a new pot?
Yellow leaves usually indicate overwatering or poor drainage. Check that the new pot has adequate drainage holes and that you are not watering too frequently. Terracotta pots dry faster than plastic, so adjust your schedule accordingly.
Can I use a self-watering pot for string of turtles?
Self-watering pots are not recommended for string of turtles. These plants prefer to dry out between waterings, and constant moisture from a reservoir leads to root rot. If you must use one, keep the reservoir empty and water from the top only.
How do I know if my pot is too big for my string of turtles?
If the soil stays wet for more than a week, the plant shows no new growth, or leaves yellow and drop, the pot is likely too large. Excess soil retains water the shallow roots cannot reach. Downsize to a pot 1-2 inches wider than the root ball.
Is it okay to plant multiple string of turtles in one pot?
Yes, planting several cuttings or small plants together creates a fuller look faster. Ensure the pot is wide enough to accommodate all root systems without overcrowding. Use the same shallow, well-draining pot principles and monitor for even moisture distribution.