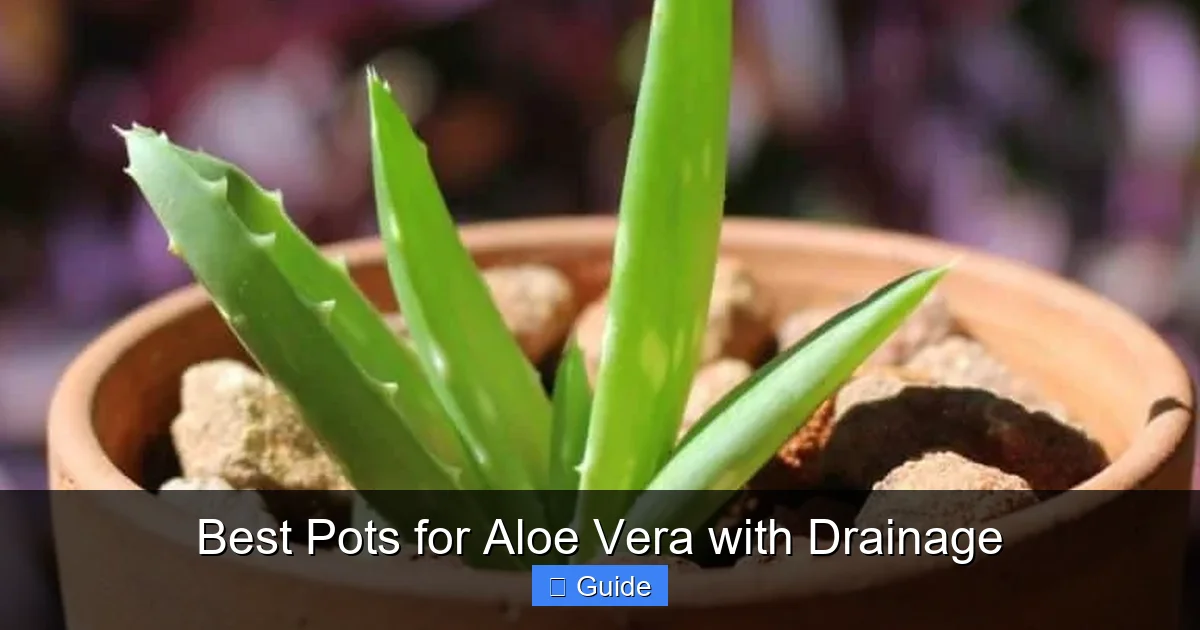
Best Pots for Aloe Vera with Drainage
Choosing the right pot with proper drainage is essential for healthy aloe vera plants. This guide covers the best materials, sizes, and specific pot recommendations to prevent root rot and promote thriving succulents.
If you have ever loved an aloe vera plant to death, you are not alone. These succulents look tough. They survive neglect. They bounce back from sunburn. But they have one true weakness: wet feet. Soggy soil kills aloe faster than anything else. The secret to a plump, gel-filled plant starts with the container it lives in. Finding the best pots for aloe vera with drainage is the single most important decision you will make for your plant.
This guide walks you through everything you need to know. We will cover materials, sizing, specific product types, and pro tips to keep your succulent thriving. Whether you are a beginner or a seasoned plant parent, the right pot makes all the difference.
Key Takeaways
- Drainage holes are non-negotiable: Aloe vera roots rot quickly in standing water, so pots must have multiple drainage holes.
- Terracotta and unglazed ceramic are top choices: These porous materials wick moisture away from roots, mimicking the plant’s natural arid environment.
- Pot size matters more than you think: Choose a pot only 1-2 inches wider than the root ball to prevent excess soil from holding too much moisture.
- Plastic pots work with modifications: Lightweight and affordable, but require extra drainage holes and careful watering habits.
- Elevate your pots for better airflow: Use pot feet or saucers with pebbles to ensure water drains completely away from the bottom.
- Repot every 2-3 years: Fresh soil and a slightly larger container refresh nutrients and give roots room to expand.
- Avoid decorative pots without drainage: Cache pots are fine as outer covers, but never plant aloe directly in a container without holes.
Quick Answers to Common Questions
What is the absolute best pot material for aloe vera?
Terracotta or unglazed ceramic is the best material because the porous walls wick moisture away from the roots and allow maximum airflow, mimicking the plant’s natural arid habitat.
How many drainage holes does an aloe vera pot need?
An aloe vera pot needs at least four to eight drainage holes; a single hole clogs easily and does not provide sufficient drainage for succulent roots.
Should I put rocks at the bottom of the pot for drainage?
No, do not put rocks at the bottom; this creates a perched water table that raises the saturation zone closer to the roots, increasing the risk of rot.
Can I plant aloe vera in a pot without drainage holes?
You should never plant aloe vera directly in a pot without drainage holes; use a cache pot system where the plant stays in a nursery pot with holes placed inside the decorative container.
How do I know when to repot my aloe vera?
Repot when roots circle the bottom densely, when pups crowd the edges, or every 2-3 years to refresh the soil, moving only 1-2 inches wider than the current root ball.
📑 Table of Contents
- Why Drainage Is Critical for Aloe Vera
- Best Pot Materials for Aloe Vera
- Choosing the Right Pot Size
- Top Features to Look For
- Specific Pot Recommendations by Category
- Potting Mix: The Partner to Your Pot
- Repotting Step by Step
- Common Mistakes to Avoid
- Caring for Aloe in Different Pot Types
- Seasonal Adjustments
- Troubleshooting Pot-Related Issues
- Creative Pot Ideas for Aloe Vera
- Conclusion
Why Drainage Is Critical for Aloe Vera
Aloe vera originates from the Arabian Peninsula. It grows in dry, rocky, well-draining soil. Rain falls infrequently. When it does, water rushes past the roots quickly. The plant stores moisture in its thick leaves. It does not need wet soil. In fact, wet soil suffocates the roots.
Root rot is the number one killer of aloe vera. It happens when water sits at the bottom of a pot. Fungi and bacteria multiply. They attack the root system. The plant cannot take up water or nutrients. Ironically, a rotting aloe looks thirsty. The leaves turn yellow, mushy, and translucent. New growers often water more, making it worse.
The Science of Wet Feet
Plant roots need oxygen. They respire just like we do. In waterlogged soil, air pockets disappear. Oxygen runs out. Root cells die. Pathogens move in. A pot with drainage holes lets gravity pull excess water out. Air replaces the water in the soil pores. The roots stay healthy. The plant thrives.
One Hole Is Not Enough
Many decorative pots come with a single tiny hole in the center. That is rarely enough for aloe. Soil particles clog a single hole easily. A piece of bark or a clump of peat blocks the exit. Water pools at the bottom. Look for pots with multiple holes. Five to eight holes spaced across the base are ideal. If you fall in love with a pot that has only one hole, drill more. A masonry bit works on ceramic. A standard drill bit works on plastic.
Best Pot Materials for Aloe Vera
Material changes how fast soil dries. It changes root temperature. It changes weight. Each material has pros and cons. Your climate and watering habits should guide your choice.
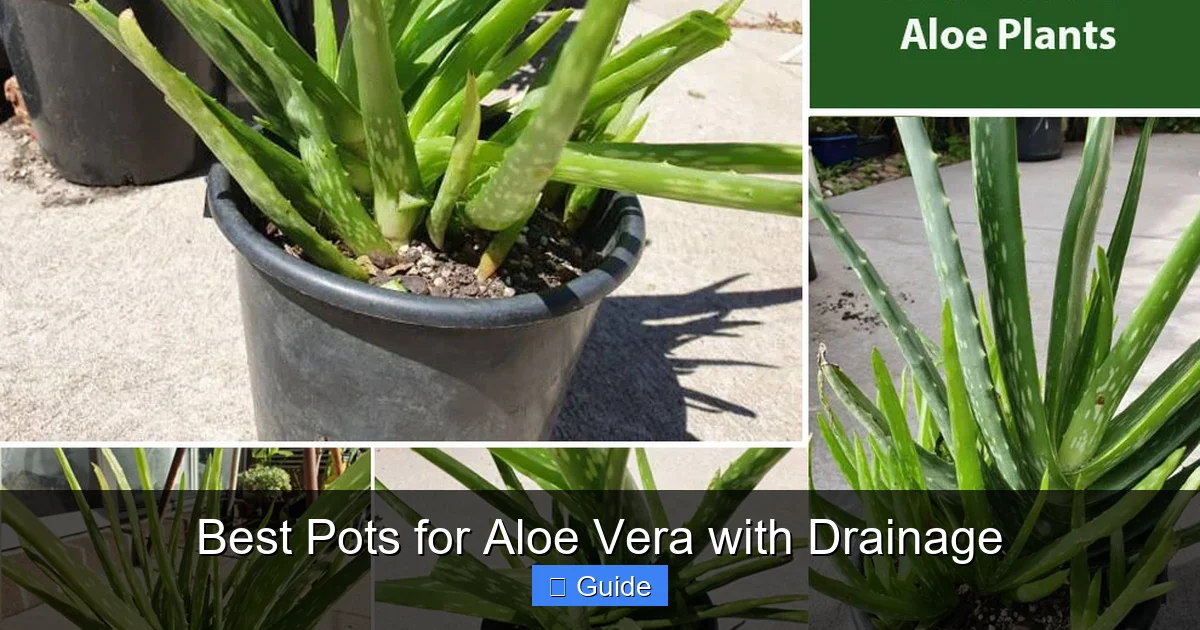
Visual guide about Best Pots for Aloe Vera with Drainage
Image source: embracegardening.com
Terracotta and Unglazed Clay: The Gold Standard
Terracotta is the classic choice for a reason. The clay is fired at low temperatures. It stays porous. Water evaporates through the walls. This pulls moisture from the soil evenly. The soil dries from the sides and the bottom. Roots get maximum airflow. Terracotta also wicks away excess salts from fertilizer.
These pots are heavy. They provide stability for top-heavy aloe. They are inexpensive. They develop a lovely patina over time. In very hot climates, they can dry soil too fast. You may need to water more often. In humid climates, they are perfect. They prevent the stagnant moisture that causes rot.
Unglazed Ceramic: Style Meets Function
Unglazed ceramic is similar to terracotta but fired higher. It is less porous but still breathes. It comes in more shapes and colors. It looks modern or rustic depending on the finish. It shares the same benefits: airflow, stability, moisture regulation. It costs more than basic terracotta. It chips less easily. It is a great middle ground.
Concrete and Stone: Heavy Duty
Concrete planters are trendy. They are extremely heavy. They will not tip over. They are porous like clay. They insulate roots from temperature swings. They are pricey. They are hard to move. If you have a large, mature aloe in a permanent spot, concrete is stunning. For a plant you rotate for sun, skip these.
Plastic: Lightweight and Affordable
Plastic pots are everywhere. They are cheap. They are light. They come in every size. They are not porous. Water only leaves through the bottom holes. Soil stays wet longer. This is risky for aloe. If you choose plastic, you must adjust. Use a grittier soil mix. Water less often. Drill extra holes in the bottom. Clear plastic lets you see root health and soil moisture. That is a hidden advantage.
Glazed Ceramic: Use With Caution
Glazed pots are beautiful. The glaze seals the clay. No moisture escapes the sides. They act like plastic. They hold water longer. They often have only one drainage hole. If you must have a glazed pot, treat it like plastic. Ensure multiple holes. Use very fast-draining soil. Check moisture deep in the pot before watering. They are best for growers who underwater rather than overwater.
Fabric Pots: The Air-Pruning Option
Fabric grow bags are gaining popularity. They are made of breathable felt or non-woven polypropylene. They offer maximum aeration. Roots hit the fabric and stop circling. They air-prune. This creates a dense, healthy root ball. They drain incredibly fast. They are light and fold flat for storage. They look utilitarian. They can dry out very fast in summer. They are excellent for propagation or rehabilitation of a struggling plant.
Choosing the Right Pot Size
Size matters more than most people realize. Aloe vera likes to be slightly root-bound. A pot that is too large holds too much soil. That soil stays wet. The small root system cannot drink it fast enough. Rot sets in. A pot that is too small dries out in hours. It stunts growth. It tips over easily.
The 1-to-2-Inch Rule
When repotting, choose a container 1 to 2 inches wider in diameter than the current root ball. Not the current pot. The root ball. Measure the width of the roots. Add two inches. That is your new pot diameter. Depth should match the root length plus an inch. Aloe roots grow shallow and wide. They do not need a deep pot. A wide, shallow bowl shape is actually better than a deep cylinder.
Pot Proportions: Wide vs. Deep
Look for “azalea pots” or “bulb pans.” These are wider than they are tall. Standard nursery pots are tall and narrow. They hold water at the bottom where aloe roots rarely reach. A wide pot spreads the soil thin. It dries faster. It matches the natural root habit. Stability improves too. A wide base resists tipping when the plant gets heavy with gel.
When to Size Up
Repot when roots circle the bottom densely. Repot when pups (offsets) crowd the edges. Repot every two to three years to refresh soil. Do not size up just because the plant looks big. If the root ball is still small, keep the same pot. Just refresh the soil. Top-dress with compost or worm castings instead.
Top Features to Look For
Beyond material and size, small details make a big difference. These features separate good pots from great ones.
Multiple Drainage Holes
We covered this, but it bears repeating. Look for at least four holes. Eight is better. Holes should be at least 1/4 inch wide. Smaller holes clog. Some pots have a raised bottom with holes around the perimeter. This creates an air gap. Water never sits against the hole. That is premium design.
Integrated Feet or Raised Bottom
Pots that sit flat on a saucer trap water. The bottom hole presses against the saucer. Capillary action pulls water back up. Good pots have molded feet. Or a recessed base. The drainage holes sit in open air. Water drips free. Air circulates under the pot. If your pot lacks feet, buy pot feet separately. Or place three wine corks under the rim. Simple fix.
Removable Saucer or Matching Tray
Indoor plants need saucers. Water ruins furniture. A matching saucer looks clean. A removable one lets you carry the plant to the sink. Water thoroughly. Let it drain fully. Put it back. Some pots have attached saucers. Avoid these. You cannot remove the water. The pot sits in its own runoff. That defeats drainage.
Durability and UV Resistance
Outdoor pots face sun, freeze, and impact. Cheap plastic becomes brittle in one season. Thin terracotta cracks in frost. Look for “frost-proof” ratings on clay. Look for “UV-stabilized” on plastic. High-fired ceramic handles weather best. Fabric pots degrade in constant sun. Replace them annually if outdoors.
Aesthetic Versatility
You will live with this pot. Choose a color and shape you love. Neutral tones (terracotta, gray, white, black) fit any decor. They let the plant be the star. Bold colors work if you curate a collection. Texture matters. Smooth glazed looks modern. Rough clay looks organic. Match the pot to your home style.
Specific Pot Recommendations by Category
Here are concrete examples of excellent pots for aloe vera. Prices and availability change, but these styles are reliable.
Best Overall: Classic Terracotta Azalea Pot
You cannot go wrong with a standard terracotta azalea pot from a local nursery. Brands like Deroma or Italian Terra Cotta are widely available. Look for the low, wide shape. Ensure multiple holes. Cost is low ($5-$15). They last years. They breathe perfectly. They look timeless. Buy a matching saucer separately.
Best Modern Design: Unglazed Cylinder with Feet
Brands like Bloem, Elho, or Lechuza make sleek unglazed cylinders. They have integrated feet. They have multiple drainage holes. They come in muted earth tones. They cost more ($20-$50). They look great in modern interiors. The feet ensure perfect drainage. The thick walls insulate roots.
Best Budget: Plastic Nursery Pot Inside a Cache Pot
Keep the plant in a black plastic nursery pot. Drill extra holes if needed. Slip it into a decorative cache pot (no holes). The cache pot catches water. It adds style. You lift the inner pot to water. You check the weight. You see the roots through the nursery pot holes. Total cost under $10. Maximum function.
Best for Large Specimens: Lightweight Fiberstone or Resin
Large aloe gets heavy. Moving a 24-inch terracotta pot requires two people. Fiberstone (fiberglass + stone powder) or high-quality resin mimics stone or concrete. It weighs a fraction. It has pre-drilled holes. It often has feet. Brands like Crescent Garden or Veradek lead here. Price is high ($80-$200). Worth it for big plants.
Best for Propagation: Fabric Grow Bags
Root pouches or generic fabric pots (1-gallon or 2-gallon) are superb for pups. They air-prune roots. They prevent circling. They drain instantly. They cost pennies each. They fold flat. Use a gritty mix. Water often. Transplant to a rigid pot once established.
Best Self-Watering (With Caveats): Lechuza or Similar
Self-watering pots have a reservoir. A wick pulls water up. For aloe, this is risky. Only use if you let the reservoir run dry completely between refills. Treat it as a bottom-watering system. Fill reservoir. Wait until empty. Wait a few days. Refill. The Lechuza Pon substrate (included) is mineral-based. It drains fast. It works if you are disciplined. Not for beginners.
Potting Mix: The Partner to Your Pot
The best pot fails with the wrong soil. Standard potting soil holds too much water. It contains peat moss. Peat stays wet. It compacts. Aloe needs a mix that drains in seconds. You can buy “cactus and succulent mix.” Or make your own. It is cheaper and better.
The Ideal DIY Mix
Combine three parts inorganic grit to one part organic matter. Inorganic options: coarse sand (not play sand), perlite, pumice, chicken grit, turface, or crushed lava rock. Organic options: coconut coir, composted pine bark, or a small amount of peat-based potting soil. Mix thoroughly. Wet it. Squeeze a handful. It should crumble instantly. No clumping.
Why Grit Matters
Grit creates macro pores. Water flows through. Air flows in. Roots grow along the rough surfaces. Mineral grit does not break down. The mix structure lasts years. Organic matter breaks down. It turns to mud. Keep organic content low. 25% max. Some growers use 100% mineral (pumice or leca). That works but requires fertilizing every watering.
Top Dressing
Add a half-inch layer of pea gravel, chicken grit, or decorative stone on top. It keeps the crown dry. It prevents perlite from floating. It looks finished. It deters fungus gnats. It reflects light up into the lower leaves. Do not use sand as top dressing. It crusts over and repels water.
Repotting Step by Step
Repotting is simple. Do it in spring or early summer. The plant is actively growing. It recovers fast.
Prepare the New Pot
Cover holes with a square of mesh screen, a coffee filter, or a piece of landscape fabric. This keeps soil in. It lets water out. Do not use gravel or gravel at the bottom. That creates a perched water table. It raises the wet zone closer to roots. Science says skip the gravel.
Remove the Plant
Water the aloe two days before. Moist soil holds the root ball. Dry soil crumbles. Wet soil makes a mess. Tip the pot. Tap the sides. Slide the plant out. If stuck, run a knife around the edge. For plastic pots, squeeze the sides. For terracotta, tap the rim on a hard surface.
Inspect and Tease Roots
Brush away loose soil. Look for rot. Healthy roots are firm, white or light tan. Rotten roots are brown, black, mushy, smelly. Cut rot away with clean scissors. Dust cuts with cinnamon or sulfur powder. If roots circle tightly, tease them apart gently. Make a few vertical slices in the root ball if very bound. This encourages new outward growth.
Position and Fill
Put a mound of mix in the new pot. Set the plant on top. The crown (where leaves meet roots) should sit just above the rim. Fill around the sides. Tap the pot to settle soil. Do not pack it down. Leave a half-inch lip for watering. Top dress with grit.
Wait to Water
This is crucial. Do not water immediately. Damaged roots need to callous. Wet soil on fresh cuts invites rot. Wait 5 to 7 days. Keep the plant in bright indirect light. No direct sun. Then water deeply. Let it drain. Return to its spot.
Common Mistakes to Avoid
Even with the perfect pot, habits kill aloe. Watch for these errors.
Using a Saucer as a Reservoir
Water runs out. It sits in the saucer. The pot wicks it back up. The bottom soil stays saturated. Always empty the saucer 30 minutes after watering. Or water in the sink. Let it drain completely. Then place it back.
Watering on a Schedule
“Water every Friday” kills plants. Water when the soil is dry. Check with a finger, a chopstick, or a moisture meter. Check the bottom half of the pot. The top dries first. The bottom stays wet. Only water when dry all the way down.
Misting the Leaves
Aloe does not need humidity. Water sitting in the crown causes rot. Misting encourages fungal spots. Water the soil only. Keep leaves dry.
Ignoring Pups
Offsets crowd the pot. They compete for resources. They create a dense mat that holds moisture. Separate pups when they have their own roots. Pot them individually. Share them. Sell them. Compost them. Do not let them choke the mother.
Fertilizing Into Dry Soil
Fertilizer salts burn dry roots. Water first with plain water. Then apply diluted fertilizer. Or use slow-release granules at repotting. Aloe needs little food. Once or twice a year is plenty.
Caring for Aloe in Different Pot Types
Your watering routine must match your pot.
Terracotta and Unglazed Clay
Check every 3-5 days in summer. Every 10-14 days in winter. The pot tells you. The clay darkens when wet. It lightens when dry. You can feel the temperature. A cool pot is damp. A warm pot is dry. Lift it. Weight tells all.
Plastic and Glazed Ceramic
Check every 7-10 days in summer. Every 3-4 weeks in winter. These hold water longer. Trust the chopstick test. Insert a wooden chopstick to the bottom. Leave 1 minute. Pull out. If it comes out clean and dry, water. If soil clings, wait.
Fabric Pots
Check daily in heat. They dry fast. They are hard to overwater. But they can underwater. Watch for leaf thinning. That signals thirst. Water until it runs out the sides and bottom.
Concrete and Stone
Similar to terracotta but slower to dry. Thick walls buffer temperature. Check weekly. They are heavy. Do not move them to water. Use a watering can with a long spout. Empty the saucer with a turkey baster if you cannot lift it.
Seasonal Adjustments
Aloe grows in spring and fall. It rests in summer heat and winter cold. Your pot care shifts with seasons.
Spring: Growth Mode
Repot now if needed. Increase watering frequency. Begin fertilizing (dilute cactus fertilizer). Move to brighter light gradually. Watch for pups.
Summer: Heat Management
Terracotta may dry daily in 90°F+ heat. Move pots to afternoon shade. Mulch top dressing helps. Plastic pots may cook roots in direct sun. The plastic gets hot. Shade the pot, not the plant. Or double-pot: put plastic inside a larger empty pot for insulation.
Fall: Prep for Rest
Reduce watering. Stop fertilizing. Bring outdoor pots in before frost. Clean leaves. Check for pests. Ensure indoor light is bright.
Winter: Dormancy
Water minimally. Once a month or less. Cool temperatures (50-60°F) are ideal. Bright light prevents etiolation (stretching). Do not repot. Do not fertilize. Let the plant rest.
Troubleshooting Pot-Related Issues
Sometimes the pot creates problems. Here is how to fix them.
Soil Washing Out of Holes
Use mesh screen. Or a coffee filter. Or a piece of shade cloth. Do not use rocks. The screen stops soil. Water passes freely.
Pot Dries Too Fast
Terracotta in hot wind dries in hours. Solutions: group pots together. Creates humidity. Mulch heavily with grit. Double-pot: place terracotta inside a slightly larger glazed pot with moss in the gap. Or switch to glazed ceramic for that spot.
Pot Stays Too Wet
Drill more holes. Elevate on feet. Switch to grittier mix. Move to brighter light. Increase airflow with a fan. Water less. If the pot has no holes and you cannot drill (glass, metal), use it as a cache pot only.
Mineral Crust on Terracotta
White crust is salt buildup. It is harmless but ugly. Scrub with vinegar and a brush. Soak in vinegar water overnight. Rinse well. It comes off. Prevent by using rainwater or distilled water. Flush soil monthly.
Algae or Mold on Pot Exterior
Green slime on clay means constant moisture. It is cosmetic. Scrub it off. Improve airflow. Space pots apart. Reduce watering. It will not hurt the plant.
Creative Pot Ideas for Aloe Vera
Function first. But beauty matters. Here are fun ways to display aloe.
Terracotta Trio
Three matching azalea pots in graduated sizes. One large mother. Two smaller pups. Grouped on a tray. Unified look. Easy care.
Hypertufa Trough
Make your own stone-like trough. Mix peat, perlite, and Portland cement. Mold in a box. Cure for weeks. Drill holes. It looks ancient. It drains perfectly. It is a weekend project.
Repurposed Containers
Old colanders. Wooden crates lined with landscape fabric. Metal buckets with holes drilled. Concrete blocks. Vintage enamelware (drill carefully). Anything with drainage works. Just match the soil volume to the root ball.
Wall-Mounted Planters
Vertical gardens save space. Use fabric pockets or ceramic wall cones. Ensure they drain forward, not onto the wall. Water carefully. Aloe stays compact in shallow vertical pockets.
Conclusion
The best pots for aloe vera with drainage share three traits. They have multiple holes. They are made of breathable material or modified for drainage. They are sized to the root ball, not the leaves. Terracotta wins for most growers. It is forgiving. It is cheap. It looks right. But unglazed ceramic, fabric, and even modified plastic all work if you respect the plant’s needs.
Remember: the pot is a tool. Your habits matter more. Check moisture before watering. Empty saucers. Use gritty soil. Repot when needed. Give bright light. Do these things, and your aloe will reward you with thick, gel-filled leaves for years. It will pup freely. It will survive vacations. It will become the plant you give to friends. Start with the right pot. The rest follows naturally.
Your aloe deserves a good home. Choose a pot that breathes. Choose a pot that drains. Choose a pot you love. Then step back and watch it grow.
Frequently Asked Questions
Can I use a glass jar or terrarium for aloe vera?
Glass jars and terrariums lack drainage and trap humidity, which causes rapid root rot in aloe vera. If you love the look, keep the plant in a plastic nursery pot with holes and place it inside the glass container, removing it to water and drain fully.
What size pot should I buy for a small aloe pup?
Choose a 3-4 inch wide pot for a single pup with a small root system; a pot that is too large holds excess moisture that the tiny roots cannot absorb, leading to rot.
Do self-watering pots work for aloe vera?
Self-watering pots are risky for aloe vera because they keep the soil consistently moist; if you use one, allow the reservoir to empty completely and the soil to dry for several days before refilling.
Why is my terracotta pot turning white?
The white crust is mineral salt buildup from fertilizer and tap water; it is harmless but can be scrubbed off with a vinegar solution, and using rainwater or distilled water prevents recurrence.
Can I paint my terracotta pot?
Painting the outside of a terracotta pot is fine, but do not paint the inside or the bottom drainage area, as sealants block the porosity that makes terracotta beneficial for succulents.
How do I drill drainage holes in a ceramic pot?
Use a diamond-tipped masonry drill bit, keep the area wet with water to cool the bit, drill slowly at a 45-degree angle to start then straighten up, and place tape over the spot to prevent the bit from slipping.