Best Grow Tent Shelving
Choosing the right grow tent shelving transforms your indoor garden from cluttered to efficient. This guide covers top shelf types, weight capacity considerations, material durability, and layout strategies to help you pick the perfect system for your tent size and plant count.
Setting up a grow tent feels exciting until you realize your plants are crowded on the floor, light barely reaches lower leaves, and watering creates a swampy mess. I’ve been there. My first tent was a jungle of pots on the ground, and I lost count of how many times I knocked over a seedling while trying to reach the back row. That’s when I discovered grow tent shelving, and honestly, it changed everything.
Good shelving does more than hold pots. It creates layers of canopy space, improves air circulation around every plant, makes watering and pruning comfortable, and keeps your tent organized enough that you actually enjoy spending time in there. But not all shelves work well in the humid, weight-heavy environment of a grow tent. Some rust within months. Others bow under the weight of wet fabric pots. And many simply don’t fit the unique dimensions of popular tent brands.
I’ve tested dozens of shelving systems across 2×2, 3×3, 4×4, and 5×5 tents over the past five years. I’ve watched cheap shelves fail, mid-range options perform surprisingly well, and premium systems justify their price tags. This guide shares everything I’ve learned so you can skip the trial and error and get straight to a setup that works.
Key Takeaways
- Wire shelving dominates the market: Chrome or epoxy-coated wire shelves offer superior airflow, drainage, and visibility for healthy plant growth.
- Weight capacity matters most: Always match shelf ratings to your heaviest pots plus wet soil weight to prevent dangerous collapses.
- Adjustable height is essential: Look for shelves with 1-inch increment adjustments to accommodate plants through every growth stage.
- Rust resistance saves money long-term: Epoxy-coated or stainless steel shelves withstand high humidity better than bare chrome.
- Modular systems scale with you: Interlocking units let you expand vertically or horizontally as your garden grows.
- Tent dimensions dictate shelf footprint: Measure interior floor space and pole locations before buying to ensure a proper fit.
- DIY options exist for tight budgets: Heavy-duty plastic storage shelves or custom wood builds can work with proper reinforcement.
Quick Answers to Common Questions
What is the best material for grow tent shelving?
Epoxy-coated wire shelving offers the best balance of rust resistance, airflow, light penetration, and weight capacity for humid grow tent environments.
How much weight can grow tent shelves hold?
Quality shelves hold 500 to 800 pounds per shelf, but always apply a 2x safety factor. Calculate your heaviest wet pot weight times pot count per shelf, then double it for your minimum rating.
Do I need to anchor grow tent shelves?
Yes. Anchor the top posts to your tent frame with heavy-duty zip ties or straps. This prevents tipping when you bump shelves while working in tight spaces.
Can I use regular garage shelving in a grow tent?
Not recommended. Garage shelving lacks the corrosion-resistant coatings needed for 50 to 70 percent humidity. It will rust within months. Choose NSF-certified or epoxy-coated units rated for wet environments.
What shelf depth works best for a 4×4 grow tent?
18 to 24 inches deep. 18-inch shelves leave more aisle space and better light penetration to back rows. 24-inch shelves hold more pots but require wider lights or supplemental under-shelf lighting.
📑 Table of Contents
Understanding Your Grow Tent Shelving Needs
Assess Your Tent Dimensions First
Before browsing a single shelf, grab a tape measure. Grow tents have interior dimensions that differ from their labeled size. A 4×4 tent might only offer 46 inches of usable width once you account for pole thickness and wall fabric. Height matters too. Most tents range from 6 to 7 feet tall, but your light hangs from the top frame, eating up 12 to 18 inches. That leaves roughly 5 to 5.5 feet of vertical growing space.
Map your tent interior on paper. Mark pole locations. Note where your intake and exhaust ports sit. Sketch your light footprint. This simple drawing prevents the frustration of buying shelves that block ducting ports or leave awkward gaps against walls. I keep a notebook with tent sketches for every size I run. It saves me from ordering the wrong thing more often than I’d like to admit.
Calculate Your Plant Count and Pot Sizes
Shelving needs scale directly with your grow style. A sea of green (SOG) setup with 16 one-gallon pots in a 3×3 tent needs very different shelves than a screen of green (SCROG) with four 10-gallon fabric pots. Count your pots. Weigh a filled pot with wet soil. A 5-gallon fabric pot with saturated soil can hit 40 to 50 pounds. Multiply that by pots per shelf. That number is your minimum weight capacity per shelf.
Don’t forget vertical spacing. Seedlings need 12 to 18 inches of headroom. Vegetative plants want 24 to 36 inches. Flowering plants can stretch 36 to 48 inches or more. If you run perpetual harvests with plants at different stages, you need adjustable shelves that can handle mixed heights simultaneously. I run a perpetual system in my 4×4, and adjustable shelves are the only reason it works.
Consider Your Environment
Grow tents sit at 50 to 70 percent humidity during veg and 40 to 50 percent in flower. Temperatures range from 70 to 85 degrees Fahrenheit. That’s a corrosion accelerator for metal. Bare chrome shelves look shiny in the box but develop surface rust within months in a humid tent. Powder-coated shelves chip when you slide heavy pots across them, exposing raw steel to moisture.
Airflow is the other environmental factor. Solid shelves block air movement to lower plants, creating humid pockets where mold thrives. Wire shelves let air circulate freely. If you run CO2 supplementation, you need maximum airflow through the canopy. Solid shelves work against you there. I learned this the hard way when powdery mildew took hold on lower branches under a solid shelf.
Types of Grow Tent Shelving Systems
Wire Shelving Units
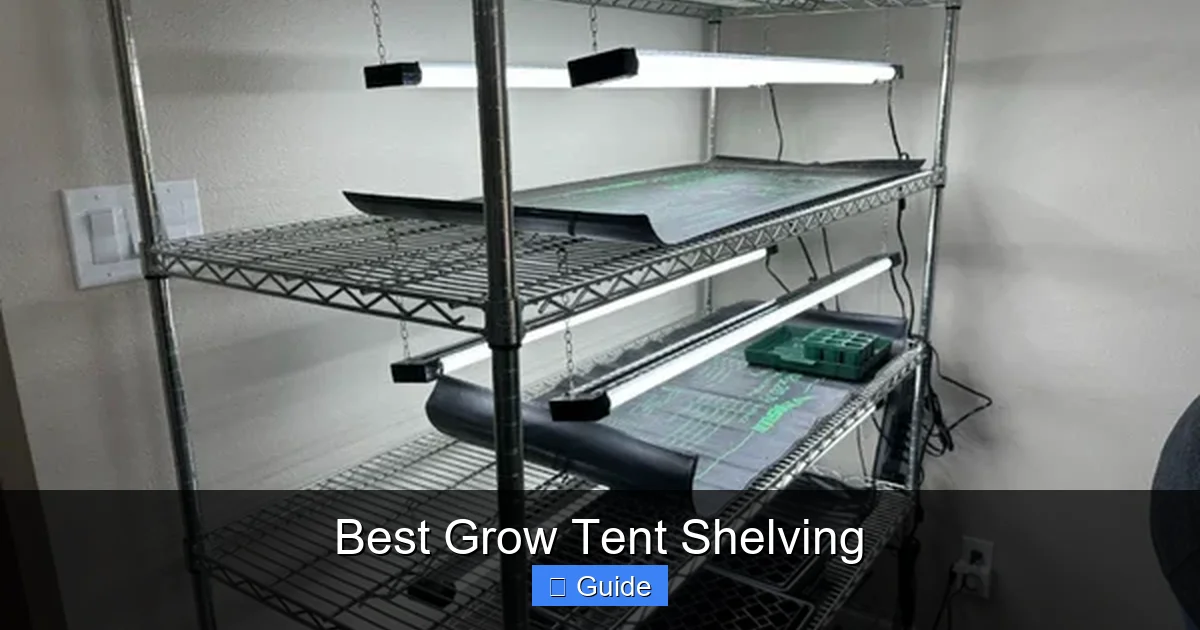
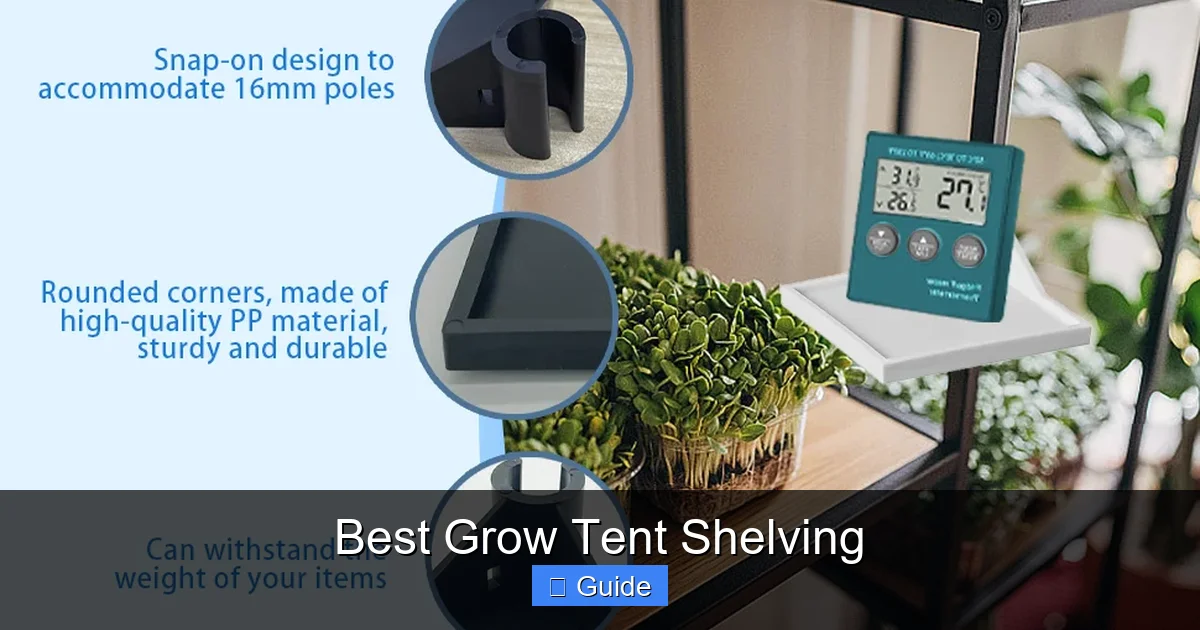
Wire shelving is the gold standard for grow tents, and for good reason. The open grid design lets light penetrate to lower levels, allows unrestricted airflow, and drains water instantly. Most units use 1-inch diameter steel posts with plastic or metal sleeves that lock shelves at 1-inch intervals. This adjustability is crucial for accommodating plant stretch.
Visual guide about Best Grow Tent Shelving
Image source: m.media-amazon.com
Chrome wire shelves dominate the budget end. They’re affordable, widely available, and strong enough for light to medium loads. But chrome plating wears thin at contact points where pots slide, and humidity attacks those exposed spots. I’ve seen chrome shelves last two years in a dry climate but fail in six months in a humid basement tent.
Epoxy-coated wire shelves cost 20 to 30 percent more but resist rust dramatically better. The thick polymer coating seals the steel completely. Look for NSF certification, which means the coating passes food-service sanitation standards. These shelves handle the constant dampness of a grow tent without flaking. My oldest epoxy set is entering year four with zero rust.
Stainless steel wire shelves sit at the premium tier. They’re essentially rust-proof, incredibly strong, and easy to sanitize between grows. The downside is cost. A 48-inch stainless shelf can cost three times what epoxy runs. For most home growers, epoxy hits the sweet spot. Commercial operations often justify stainless for its lifespan and cleanability.
Heavy-Duty Plastic Shelving
Plastic shelving units made from polypropylene or reinforced resin offer a corrosion-proof alternative. They’re lightweight, easy to clean, and completely immune to humidity. The best models feature vented or grid-style shelves for airflow. Weight capacities have improved significantly. Top-tier plastic shelves now hold 600 to 800 pounds per shelf, rivaling metal.
The main drawback is rigidity. Long plastic shelves can sag over time under constant heavy loads, especially in warm tent temperatures. Reinforced models with steel internal frames solve this but cost more. Plastic also becomes brittle in very cold environments, though that’s rarely an issue inside a heated tent.
I keep a plastic shelving unit in my propagation tent. It’s perfect for seedling trays and clone domes where weights are light and humidity sits near 80 percent. The shelves wipe down instantly between runs, and I never worry about rust contaminating young plants.
Modular Grid Systems
Modular grid systems like those from Gorilla Grow Tent, Secret Jardin, or custom-built wire grid panels offer maximum flexibility. These systems use vertical posts with horizontal crossbars that accept shelf brackets at any height. You can configure shelves in L-shapes, U-shapes, or straight runs. Some let you hang shelves from the tent frame itself, saving floor space.
The advantage is customization. You can build a shelf layout that perfectly matches your tent’s pole positions and ducting ports. You can add or remove shelves mid-grow as plants change size. The downside is complexity. These systems take longer to assemble, cost more per square foot of shelf space, and may require tools. They also create more shadow lines from the additional framework.
If you run multiple tents or frequently change layouts, modular systems pay for themselves in adaptability. For a single permanent tent, a standard wire unit is simpler and cheaper.
DIY and Budget Options
Not everyone wants to spend $200 on shelving. Heavy-duty plastic storage shelves from home improvement stores (think Husky, Gladiator, or commercial restaurant supply) often work well. Look for units rated 500+ pounds per shelf with vented deck designs. Avoid solid plastic shelves. They trap heat and moisture.
Wood builds are possible but require careful material selection. Pressure-treated lumber resists rot but off-gasses chemicals you don’t want near consumable plants. Cedar and redwood are naturally rot-resistant but expensive. If you go wood, seal every surface with food-safe polyurethane, use stainless hardware, and design for maximum airflow gaps between boards.
I built a cedar shelf system for a 5×5 tent years ago. It looked beautiful and held weight effortlessly. But cleaning between grows was a nightmare, and after three years, the constant humidity started checking the wood at screw joints. I replaced it with epoxy wire and haven’t looked back.
Critical Features to Evaluate
Weight Capacity Ratings
Every shelf lists a weight capacity. Read the fine print. Many ratings assume evenly distributed static loads. A 50-pound pot concentrated on one corner of a 24×48 shelf creates far more stress than 50 pounds spread across the whole surface. Dynamic loads matter too. When you water, you add weight suddenly. When you bump a shelf moving pots, you create shock loads.
Apply a safety factor. If your heaviest loaded shelf will hold 200 pounds of pots and soil, buy shelves rated for at least 400 pounds. Better yet, 600. The price difference between 400 and 600-pound shelves is usually minimal, but the peace of mind is massive. I’ve seen 400-pound shelves bow permanently under 300 pounds of wet fabric pots over a summer grow.
Check post capacity too. Four 600-pound shelves on four posts means each post carries 600 pounds. Most 1-inch steel posts handle 2,000+ pounds, but cheaper units use thinner steel. Verify the total unit capacity, not just per shelf.
Shelf Adjustability and Spacing
One-inch adjustment increments are the industry standard. Some budget units only adjust every 2 or 3 inches. That sounds minor until you’re trying to fit a 28-inch tall plant under a 30-inch shelf with a light hanging 6 inches above it. Those 2 inches determine whether you top the plant or burn the tips.
Look for shelves that lock securely. Plastic sleeves can crack over time. Metal compression clips last longer but can be harder to adjust. Some premium units use a double-locking mechanism that prevents shelves from dislodging if you accidentally lift one while moving a heavy pot. That feature has saved me from catastrophic spills twice.
Consider the lowest shelf height. You want it high enough for a reservoir or runoff tray underneath, but low enough to maximize vertical space. Most units let you set the bottom shelf 4 to 6 inches off the floor. That’s perfect for a shallow runoff tray or small reservoir.
Corrosion Resistance
This is where shelves live or die in grow tents. The combination of high humidity, nutrient solutions, and organic acids from soil creates a uniquely corrosive environment. Salt buildup from fertilizers accelerates metal degradation.
Epoxy coating is your best balance of cost and protection. Look for shelves where the coating covers welds and wire intersections completely. Cheap units only coat the visible wires, leaving weld points bare. Those bare spots rust first and spread.
Stainless steel (304 grade minimum) eliminates rust concerns entirely. It’s worth the premium if you run year-round in a humid climate or use aggressive nutrient regimens. For seasonal growers in dry climates, chrome may suffice for 2 to 3 years.
Plastic shelves don’t rust but can degrade from UV exposure if your tent light leaks onto them. Most tent interiors don’t get direct UV, but reflected light off Mylar walls can yellow and brittle cheap plastics over years. High-density polypropylene resists this well.
Airflow and Light Penetration
Wire shelf grid size affects both airflow and light penetration. Standard 1-inch by 2-inch grids work well. Tighter grids (1-inch square) restrict airflow slightly but support smaller pots better without tipping. Wider grids (2-inch square) maximize airflow but can let small pots tip through.
Shelf depth matters for light penetration. A 24-inch deep shelf under a 4-foot wide light leaves the back 12 inches in shadow. In a 4×4 tent with a centered light, 18-inch deep shelves often work better. They let light reach the back row while still holding plenty of pots. I use 18-inch shelves in my 4×4 and 24-inch in my 5×5 where I run larger lights.
Consider shelf color. Chrome reflects light down to lower levels. Black epoxy absorbs light but reduces algae growth on the shelf surface. White epoxy reflects well and stays cleaner looking. I prefer white epoxy for the light reflection benefit.
Ease of Cleaning and Maintenance
Between grows, you’ll need to sanitize everything. Wire shelves with removable shelves make this easy. Take them outside, hose them down, spray with diluted bleach or hydrogen peroxide, rinse, dry, reinstall. Units with fixed shelves or complex frames turn cleaning into a multi-hour project.
Look for smooth coatings without deep textures where pathogens hide. Rounded wire edges clean easier than sharp corners. Removable shelf liners (sold separately for many units) catch soil and root debris, making cleanup as simple as shaking out the liner.
I run shelf liners on every shelf. They cost $10 to $15 each and save hours of scrubbing. At harvest, I pull the liners, dump the debris, spray them down, and the shelves are 90 percent clean instantly.
Top Grow Tent Shelving Recommendations by Tent Size
Best for 2×2 and 2×3 Tents
Small tents need compact, lightweight shelving that doesn’t consume precious floor space. The Metro Max 4 18×36 Epoxy Shelving Unit is my top pick. At 18 inches deep, it fits perfectly against the back wall of a 2×2, leaving the front open for access. Four shelves give you three growing levels plus a bottom reservoir level. The 500-pound per shelf capacity handles anything you’d put in a small tent.
For ultra-tight budgets, the Amazon Basics 3-Tier Wire Shelving in 18×30 works surprisingly well. It’s chrome, so expect 1 to 2 years in humid conditions, but at under $60, it’s disposable. The 250-pound capacity suits seedling trays and 1 to 3-gallon pots.
If you want modular flexibility, Gorilla Grow Tent’s Shelf Kit for 2×2/2×3 tents integrates with their frame poles. It’s pricey but installs in minutes without tools and adjusts infinitely. Worth it if you already own a Gorilla tent.
Best for 3×3 Tents
The 3×3 is the most popular home grow size, and shelving options abound. The Seville Classics UltraHD 4-Tier 24×36 Epoxy Shelving hits the sweet spot. At 24 inches deep, it holds two rows of 3-gallon pots or one row of 5-gallons with room to work. The 600-pound capacity per shelf is overkill for most 3×3 setups, meaning zero sag ever. The commercial-grade epoxy has a 15-year warranty.
For a lighter option, Edsal 4-Tier 24×36 Steel Wire Shelving in epoxy finish costs about 30 percent less and still carries 500 pounds per shelf. The posts are slightly thinner steel, but for typical 3×3 loads (12 to 16 three-gallon pots), it’s plenty strong. I’ve run Edsal units in client tents for years with zero issues.
If you run SCROG with large fabric pots, consider the Heavy Duty 24×48 Epoxy Shelving turned sideways. The 48-inch width spans the tent, and you can run two shelves at different heights for a staggered canopy. Just verify your tent interior width accommodates 48 inches (many 3×3 tents are only 46 inches inside).
Best for 4×4 Tents
Four-by-four tents offer the most shelving flexibility. You can run a single large unit, two smaller units side by side, or an L-shaped configuration. The Metro Max Q 24×48 5-Tier Epoxy Unit is my personal choice. Five shelves give you four growing levels. The 800-pound capacity means you can load every shelf with 7-gallon pots without a worry. The polymer shelves are lighter than wire, easier to clean, and completely rust-proof.
For a wire option, InterMetro 24×48 4-Tier Epoxy Wire Shelving delivers restaurant-grade quality. These are the shelves you see in commercial kitchens. They’re built to survive daily steam cleaning, so a grow tent is easy mode. The double-locking shelf clips are the best in the business.
Budget pick: Whitmor 4-Tier 24×48 Chrome Shelving. It’s chrome, so plan on replacing in 2 to 3 years. But at under $100, you can buy three sets for the price of one Metro unit. The 350-pound capacity handles 5-gallon pots fine. Just don’t overload the top shelf.
Best for 5×5 and Larger Tents
Large tents need serious shelving. The Gorilla Grow Tent 5×5 Shelving System is purpose-built. It uses the tent’s frame poles as vertical supports, eliminating four posts and saving floor space. The shelves are heavy-duty epoxy wire, adjustable in 1-inch increments, and rated for 100 pounds per square foot. It’s expensive but integrates perfectly.
For a standalone option, Two Metro Max Q 24×48 Units Side by Side creates a 48×48 shelf footprint with a center aisle. This is my preferred commercial-style layout. You get ten total shelves (five per unit), massive capacity, and the ability to remove one unit if you need open floor space for a large mother plant or equipment.
Custom modular grid systems shine in 5×5 and larger. Secret Jardin’s WebIT System or Custom Wire Grid Panels let you build multi-level canopies with walkways, integrated trellis, and dedicated veg/flower zones. These systems cost $500 to $1,500 but transform a large tent into a professional facility.
Best for Propagation and Seedling Tents
Propagation tents (typically 2×4 or 3×3, 4 to 5 feet tall) need many shallow shelves for trays. The Bootstrap Farmer 4-Tier 18×48 Propagation Rack is designed exactly for this. It holds standard 1020 trays perfectly, has 12-inch shelf spacing for humidity domes, and uses food-grade powder coating. The casters let you roll it out for cleaning.
For DIY propagation, Metro Max 4 18×48 5-Tier with 10-inch spacing works beautifully. You fit five levels of trays in a 5-foot tent. Add heat mats on each shelf, and you have a high-density propagation machine. I run this setup and produce 500+ clones per cycle in a 2×4 tent.
Installation and Setup Strategies
Leveling on Uneven Floors
Most grow tent floors aren’t perfectly level. Concrete slopes for drainage. Basement floors dip. Carpet compresses unevenly. Shelving units come with leveling feet, but they’re often short and flimsy. Upgrade to heavy-duty threaded levelers with 2-inch diameter bases. They distribute weight better and adjust through a wider range.
Use a torpedo level on each shelf after assembly. Adjust feet until every shelf reads level front-to-back and side-to-side. An unlevel shelf makes pots lean, creates uneven watering, and stresses welds. Spend 10 minutes leveling properly. It prevents months of annoyance.
If your tent sits on thick carpet, place 12×12 inch plywood squares under each leveler foot. This prevents the feet from sinking into carpet over time, which throws off your level. I learned this after my first tent’s shelves gradually tilted over a 3-month grow.
Anchoring for Stability
Tall, loaded shelving units can tip if bumped hard. In a tent, you’re constantly moving around, pulling hoses, adjusting lights. Anchor the top of the unit to the tent frame. Most tents have horizontal crossbars at the top. Use heavy-duty zip ties or Velcro straps to secure the top shelf posts to the frame. This prevents any wobble or tip risk.
For freestanding units not against a wall, add diagonal cross-bracing. Many shelving systems sell bracing kits. If yours doesn’t, use aircraft cable and turnbuckles between opposite corners. This eliminates side-to-side sway completely. It’s cheap insurance against a catastrophic tip-over.
I anchor every unit, even in small tents. The peace of mind is worth the 5 minutes of setup time. I’ve seen unanchored units tip when a grower tripped on a power cord. The damage to plants and equipment far exceeds the cost of zip ties.
Creating Functional Zones
Plan your shelf layout around workflow. Keep the most-accessed plants (daily watering, pruning) at waist height. Put seedlings and clones at eye level for easy monitoring. Reserve the bottom shelf for reservoirs, runoff collection, or rarely accessed mother plants. Top shelf works for drying racks or light-loving supplemental plants.
Leave at least 18 inches of clear floor space in front of shelves for working room. In a 4×4 with 24-inch deep shelves, that leaves 24 inches of aisle. Tight but workable. In a 3×3, 18-inch deep shelves leave 27 inches of aisle. Much more comfortable.
Consider a rolling shelf unit for one side if space allows. You can roll it out for full access to the back row, then roll it back. Locking casters are essential. This trick turns a cramped 3×3 into a surprisingly comfortable workspace.
Integrating Lighting and Ventilation
Shelves create shade. Plan your light layout to minimize this. In multi-shelf setups, use supplemental LED bars under each shelf for lower levels. These 20 to 40-watt bars provide enough light for lower canopy growth without the heat of adding more main lights.
Run oscillating fans at shelf level, not just canopy level. Clip-on fans that attach to shelf posts work perfectly. Aim one fan per shelf level, oscillating across the canopy. This prevents the stagnant air pockets that cause powdery mildew and weak stems.
Route ducting and cables along shelf posts, not across shelves. Use Velcro cable ties every 12 inches. This keeps the growing surface clear and prevents accidental snags. I run a vertical cable raceway up one corner post for all power cords, and a separate one for data cables (sensors, controllers). Clean and safe.
Maintenance and Longevity Tips
Cleaning Between Grows
Develop a consistent cleaning protocol. After harvest, remove all shelves. Take them outside or to a utility sink. Rinse loose debris. Spray with a 10 percent bleach solution or 3 percent hydrogen peroxide. Let sit 10 minutes. Rinse thoroughly. Dry completely before reassembly. This kills pathogens, algae, and salt buildup.
Clean the posts too. Wipe them down with the same solution. Check leveling feet for corrosion. Inspect shelf clips for cracks. Replace any damaged parts immediately. A $2 clip replacement prevents a $200 shelf collapse.
I keep a dedicated “tent cleaning kit” with spray bottles, brushes, gloves, and replacement clips. It turns a 2-hour chore into a 45-minute routine. Consistency prevents the buildup that makes cleaning miserable.
Preventing Rust and Corrosion
Even epoxy shelves need care. Never use abrasive scrubbers. They micro-scratch the coating, creating entry points for moisture. Use soft brushes or cloths only. If you see a chip in the coating, touch it up immediately with epoxy appliance paint (available at hardware stores). Small touch-ups prevent big rust spots.
Wipe up nutrient spills immediately. Salt solutions are corrosive even to epoxy over time. A weekly wipe-down of shelves during the grow prevents buildup. I keep a spray bottle of plain water and a microfiber cloth in the tent for quick cleanups.
Consider a dehumidifier in the room outside the tent. Lower ambient humidity reduces condensation inside the tent, extending shelf life. This matters most in basement and garage setups where ambient humidity runs high.
Inspecting for Wear and Damage
Monthly during grows, inspect every shelf. Look for bowing (sag in the center), coating damage, loose clips, post corrosion at floor level, and leveler foot stability. Push down firmly on each shelf corner. It should feel solid with zero movement.
Check the bottom shelf posts where they meet the floor. This is the highest corrosion risk zone. Moisture wicks up the post from the floor. If you see surface rust, sand it lightly, apply rust converter, then touch up with epoxy paint. Caught early, it’s a 5-minute fix. Ignored, it compromises the post.
Keep a log. Note installation date, cleaning dates, any repairs. This helps you predict replacement timing. Quality epoxy shelves last 5 to 10 years. Chrome lasts 2 to 3. Plastic lasts 5+ but watch for sagging. Plan replacements before failure.
Upgrading and Expanding
As your skills grow, your shelving needs change. Modular systems make upgrades easy. Add a shelf level. Extend a row. Reconfigure for a new technique. Standard units are harder to modify but you can often add extension kits from the same manufacturer.
Don’t mix brands. Shelf dimensions, post diameters, and clip designs rarely match across brands. Stick with one system for seamless expansion. If you outgrow your current system, sell it used (growers always need shelves) and buy a larger matching set.
I’ve upgraded three times in six years. Each time, I sold the old system for 60 to 70 percent of purchase price. Quality shelving holds value well in the grow community. Factor this into your budget. The true cost of a $300 system that lasts 8 years and resells for $200 is only $12.50 per year.
Common Mistakes to Avoid
Underestimating Weight
The number one mistake is buying shelves rated too low. Growers calculate dry pot weight, not wet soil weight. They forget that watering adds 20 to 30 percent weight instantly. They don’t account for the weight of trellis netting, heavy fruit, or the force of bumping a shelf. Always overrate by 2x minimum.
I’ve seen 300-pound shelves hold 250 pounds for weeks, then collapse when the grower leaned on the edge to reach a back plant. Dynamic loads are real. Build in a massive safety margin.
Ignoring Humidity Ratings
Buying “garage shelving” for a grow tent is a recipe for rust. Garage shelves are rated for dry environments. Their coatings are thinner. Their welds aren’t sealed. They look identical in photos but fail fast in 60 percent humidity. Always verify the manufacturer rates the product for humid or wash-down environments. NSF certification is the gold standard indicator.
Blocking Airflow and Light
Solid shelves, shelves pressed against tent walls, shelves stacked too tightly. All these create dead zones. Plants in dead zones stretch, weaken, and invite pests. Leave 2 to 3 inches between shelf backs and tent walls. Use wire shelves, not solid. Space shelves for your tallest plant plus light clearance plus 6 inches.
Skipping Leveling and Anchoring
“It looks level” isn’t level. Use a level. “It feels stable” isn’t anchored. Anchor it. The time you save skipping these steps costs hours later fixing leaning plants, uneven watering, or cleaning up a tipped shelf disaster. Do it right once.
Buying Without Measuring
Tent sizes are nominal. A 4×4 tent is not 48×48 inches inside. Measure. Account for poles. Account for light hangers. Account for ducting ports. Draw it out. Order shelves that fit your actual measurements, not the tent’s marketing name.
Conclusion
Grow tent shelving isn’t glamorous. It doesn’t have the appeal of a new LED or the excitement of exotic genetics. But it’s the backbone of an efficient, enjoyable, high-yielding indoor garden. The right shelves turn a cramped, chaotic tent into an organized, accessible, productive space. They protect your plants, your back, and your sanity.
Invest in quality epoxy-coated wire shelving rated well above your actual needs. Measure your tent precisely. Plan your layout for workflow. Anchor everything. Clean religiously. Inspect regularly. These habits, more than any specific brand, determine whether your shelving serves you for years or fails in months.
My current 4×4 runs a Metro Max Q 5-tier system. It’s been through eight harvests, holds 24 seven-gallon pots at peak, and looks nearly new. The $350 investment works out to $44 per harvest so far. That’s cheaper than a single bag of premium nutrients. Good shelving pays for itself in saved time, prevented losses, and increased yields.
Start with the best you can afford. Expand thoughtfully. Treat your shelves like the critical infrastructure they are. Your plants will thank you with vigorous growth, and you’ll thank yourself every time you walk into a tent that’s a joy to work in instead of a cluttered obstacle course.
Happy growing. May your shelves stay level, your coatings stay intact, and your canopies stay even.
Frequently Asked Questions
How do I prevent rust on my grow tent shelves?
Choose epoxy-coated or stainless steel shelves rated for humid environments. Wipe up nutrient spills immediately, clean with non-abrasive tools, touch up coating chips promptly, and run a dehumidifier in the room outside your tent to reduce ambient moisture.
Can I put shelves directly on the tent floor?
Use the included leveling feet, not direct floor contact. On carpet, place plywood squares under feet to prevent sinking. Level each shelf with a torpedo level after assembly to ensure even water distribution and structural stability.
How many shelf levels should I run in a 4×4 tent?
Four to five growing levels plus a bottom reservoir level works well in standard 6 to 7-foot tents. This provides 12 to 18 inches per level for veg, or 18 to 24 inches for flower with proper light spacing. Adjust based on your plant training style.
Are plastic shelves good for grow tents?
Heavy-duty vented plastic shelves (600+ lb capacity) work well and are completely rust-proof. They’re ideal for propagation tents. Watch for sagging on wide spans over time, especially in warm tent temperatures. Reinforced models with steel cores prevent this.
Should I use solid or wire shelves in a grow tent?
Wire shelves are strongly preferred. They allow airflow through the canopy, let light reach lower levels, drain water instantly, and prevent humid pockets that cause mold. Solid shelves block air and light, creating problem zones.
How do I clean grow tent shelves between harvests?
Remove shelves, rinse debris, spray with 10% bleach or 3% hydrogen peroxide, wait 10 minutes, rinse thoroughly, dry completely. Clean posts and clips too. Use shelf liners during grows to catch debris and make cleaning 90% faster.