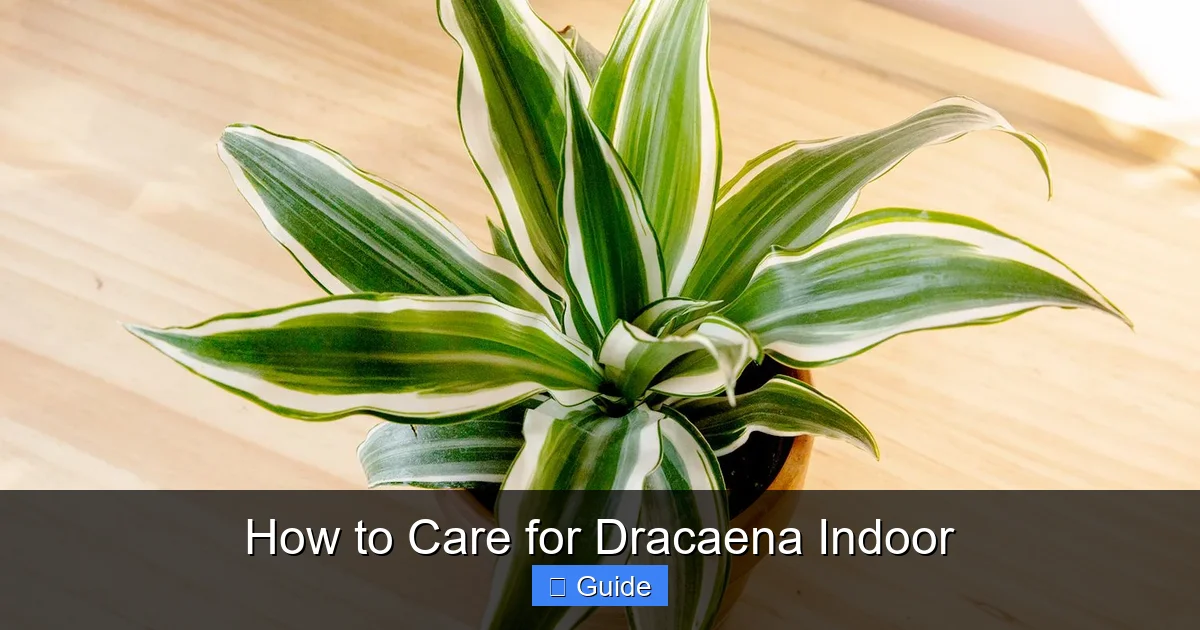
How to Care for Dracaena Indoor
Dracaena plants are perfect low-maintenance houseplants that thrive with minimal care. This guide covers everything you need to know about how to care for dracaena indoor, from proper watering and lighting to soil requirements and common problem-solving. Follow these simple steps and your dracaena will reward you with years of beautiful, architectural foliage.
Key Takeaways
- Light Requirements: Dracaena prefers bright, indirect light but tolerates low light conditions well.
- Watering Schedule: Allow the top inch of soil to dry between waterings; overwatering is the most common killer.
- Soil Mix: Use well-draining potting soil with perlite or sand added for better aeration.
- Temperature Range: Keep between 65-80°F (18-27°C); avoid cold drafts and sudden temperature changes.
- Humidity Needs: Average household humidity works fine, but occasional misting helps prevent brown tips.
- Fertilizing: Feed monthly during growing season with balanced liquid fertilizer at half strength.
- Common Issues: Brown tips usually mean fluoride sensitivity or low humidity; yellow leaves indicate overwatering.
Quick Answers to Common Questions
How often should I water my dracaena?
Water when the top inch of soil feels dry. This typically means every 7-10 days in summer and every 3-4 weeks in winter, but always check the soil first rather than following a strict schedule.
Why are the tips of my dracaena leaves turning brown?
Brown tips usually indicate low humidity, fluoride in tap water, fertilizer salt buildup, or underwatering. Trim the brown tips at an angle and address the underlying cause for healthy new growth.
Can dracaena grow in low light?
Yes, dracaenas tolerate low light better than most houseplants, especially Dracaena marginata and Dracaena fragrans. Growth will be slower and variegation may fade, but the plant will survive.
When should I repot my dracaena?
Repot every 2-3 years in spring when you see roots circling the pot bottom, water runs through without absorbing, or growth slows despite good care. Choose a pot only 1-2 inches larger.
Is dracaena toxic to pets?
Yes, dracaena contains saponins that are toxic to cats and dogs if ingested. Symptoms include vomiting, drooling, and loss of appetite. Keep plants out of reach of curious pets.
📑 Table of Contents
- Welcome to Your Dracaena Care Journey
- Understanding Your Dracaena
- Light Requirements for Thriving Dracaena
- Mastering the Watering Balance
- Soil and Potting Essentials
- Temperature and Humidity Considerations
- Fertilizing for Healthy Growth
- Pruning and Shaping Your Dracaena
- Propagation: Growing More Dracaenas
- Troubleshooting Common Problems
- Seasonal Care Calendar
- Designing with Dracaena
- Advanced Tips for Dracaena Enthusiasts
- Conclusion: Your Dracaena Journey Starts Now
Welcome to Your Dracaena Care Journey
So you brought home a dracaena. Maybe it was that striking Dracaena marginata with its spiky red-edged leaves, or perhaps a Dracaena fragrans ‘Massangeana’ with its bold yellow stripes. Whatever variety caught your eye, you made a fantastic choice. These plants are some of the most forgiving houseplants you can grow.
I remember my first dracaena. It sat in a dark corner of my apartment for months, survived my erratic watering schedule, and still looked gorgeous. That’s the magic of this genus. Native to Africa, Madagascar, and other tropical regions, dracaenas have adapted to thrive in the filtered light of forest understories. That adaptation makes them perfect for our homes.
In this comprehensive guide, I’ll walk you through everything about how to care for dracaena indoor plants. We’ll cover light, water, soil, humidity, fertilizing, pruning, propagation, and troubleshooting. By the end, you’ll feel confident keeping your dracaena healthy and beautiful for years to come.
Understanding Your Dracaena
Popular Dracaena Varieties
Before diving into care specifics, it helps to know which dracaena you have. While care requirements are similar across the genus, some varieties have slight preferences.

Visual guide about How to Care for Dracaena Indoor
Image source: thespruce.com
Dracaena marginata (Dragon Tree) features thin, arching leaves with distinctive red or purple edges. It grows tall and tree-like with bare stems topped by tufts of foliage. This variety handles lower light better than most.
Dracaena fragrans (Corn Plant) has broader leaves, often with a central yellow or cream stripe. The ‘Massangeana’ cultivar is the classic corn plant you see in offices everywhere. It grows slower but gets quite large over time.
Dracaena reflexa (Song of India) offers variegated leaves with creamy yellow margins. Its growth habit is bushier, making it great for tabletops and shelves.
Dracaena compacta stays small and dense, perfect for tight spaces. Dracaena sanderiana (Lucky Bamboo) isn’t bamboo at all but grows beautifully in water or soil.
Growth Habits and Expectations
Dracaenas are slow to moderate growers. In ideal conditions, they might add 6-12 inches of height per year. Don’t worry if yours seems static. They’re building strong root systems first.
Most varieties naturally shed lower leaves as they grow taller. This creates that attractive tree-like form with bare canes and leafy crowns. It’s not a problem. It’s just how they grow.
Indoor dracaenas rarely flower. When they do, the blooms are fragrant but unremarkable. The real show is the foliage. Focus your care on keeping those leaves vibrant and healthy.
Light Requirements for Thriving Dracaena
Finding the Sweet Spot
Light is the foundation of how to care for dracaena indoor successfully. These plants evolved in dappled forest light. Direct sun scorches their leaves. Deep shade makes them leggy and pale.
Bright, indirect light is ideal. Think near an east-facing window where morning sun is gentle, or a few feet back from a south or west window. North windows work too, though growth will be slower.
I keep my Dracaena marginata about four feet from a large south window. It gets bright light all day but no direct rays. The red leaf margins stay vivid, and growth is steady.
Signs of Light Problems
Too much light shows up as bleached, scorched patches on leaves. The edges turn brown and crispy. Move the plant back immediately.
Too little light causes leggy growth with long gaps between leaves. New leaves emerge smaller and paler. Variegated varieties lose their patterns, reverting to solid green. Rotate your plant weekly for even growth.
If you only have low light, don’t despair. Dracaena marginata and Dracaena fragrans tolerate it remarkably well. They won’t grow fast, but they’ll survive. Consider a grow light if you want better growth in dark spaces.
Seasonal Light Adjustments
Light intensity changes with seasons. In winter, you might need to move plants closer to windows. In summer, pull them back from intense afternoon sun. Watch your plant. It will tell you what it needs.
Mastering the Watering Balance
The Golden Rule: Dry Before Wet
If you remember one thing about how to care for dracaena indoor, make it this: let the top inch of soil dry out before watering again. Overwatering kills more dracaenas than anything else.
Stick your finger into the soil. If it feels dry at your first knuckle, water thoroughly. If it’s still moist, wait a few days and check again. Simple.
When you water, water deeply. Run water through until it drains from the bottom holes. This flushes accumulated salts and ensures the entire root ball gets moisture. Empty the saucer afterward. Never let your dracaena sit in standing water.
Water Quality Matters
Dracaenas are sensitive to fluoride and chlorine in tap water. These chemicals cause brown leaf tips and edges. If your tap water is heavily treated, consider alternatives.
Rainwater is ideal. Distilled or filtered water works too. If you must use tap water, let it sit overnight in an open container. This allows chlorine to dissipate. Fluoride doesn’t evaporate, though, so filtered is better for long-term health.
I use a simple countertop filter for all my houseplants. The difference in leaf tip health is noticeable.
Seasonal Watering Changes
Water more frequently during active growth (spring through early fall). In winter, growth slows and water needs drop dramatically. I water my dracaenas every 7-10 days in summer but every 3-4 weeks in winter.
Always check the soil rather than following a rigid schedule. Your home’s humidity, temperature, and light all affect how quickly soil dries.
Signs of Watering Issues
Overwatering: Yellowing lower leaves, mushy stems, foul soil smell, fungus gnats. The soil stays wet for weeks. Root rot follows quickly.
Underwatering: Leaves curl inward, brown crispy tips, drooping that perks up after watering, soil pulling away from pot edges.
Both problems are fixable if caught early. Adjust your routine and the plant usually recovers.
Soil and Potting Essentials
The Perfect Dracaena Soil Mix
Drainage is everything. Standard potting soil alone holds too much water. Create a mix that drains freely but retains some moisture.
My go-to recipe: 2 parts quality potting soil, 1 part perlite or pumice, 1 part orchid bark or coarse sand. This mimics the loose, aerated soil of their native habitat.
If mixing isn’t your thing, look for a “cactus and succulent” mix and add extra potting soil. Or buy a quality indoor potting mix and amend with 30% perlite.
Choosing the Right Pot
Drainage holes are non-negotiable. No exceptions. Decorative pots without holes? Use them as cachepots. Keep your dracaena in a plastic nursery pot with holes, then slip that into the pretty pot.
Terracotta pots are excellent for dracaenas. The porous clay wicks moisture away from roots, reducing rot risk. Plastic works fine too if you’re careful with watering.
Size matters. Dracaenas prefer being slightly root-bound. Choose a pot only 1-2 inches larger than the current root ball. Too much soil stays wet too long.
When and How to Repot
Repot every 2-3 years in spring. Signs it’s time: roots circling the bottom, water running straight through without absorbing, slowed growth despite good care.
Process: Water the plant a day before. Gently remove from pot. Loosen circling roots. Trim any mushy or dead roots. Place in new pot with fresh mix at the same depth. Water lightly. Skip fertilizer for a month.
Large floor specimens can be top-dressed instead. Remove the top 2 inches of soil and replace with fresh mix. Less stressful for big plants.
Temperature and Humidity Considerations
Ideal Temperature Range
Dracaenas thrive in normal household temperatures: 65-80°F (18-27°C). They hate cold. Below 55°F (13°C) causes damage. Below 50°F (10°C) can kill them.
Keep them away from cold drafts near doors, leaky windows, and air conditioning vents. Also avoid heating vents and radiators. Hot, dry air causes brown tips.
If you summer your plants outdoors, bring them in before night temperatures drop below 60°F (15°C). Acclimate gradually over a week.
Humidity: Good Enough vs. Optimal
Average home humidity (30-50%) is fine for dracaenas. They don’t demand tropical levels. But higher humidity (50-60%) prevents brown tips and keeps leaves lush.
Simple humidity boosters: Group plants together. Use a pebble tray with water (pot sits on pebbles, not in water). Run a humidifier nearby. Misting helps briefly but doesn’t raise ambient humidity much.
I run a humidifier in my plant room during winter when indoor air gets desert-dry. My dracaenas thank me with clean leaf tips.
Dealing with Brown Tips
Brown tips are the number one cosmetic complaint. Causes include: low humidity, fluoride in water, fertilizer salt buildup, underwatering, cold damage.
You can trim brown tips with clean scissors. Cut at an angle following the leaf’s natural shape. Don’t cut into green tissue. The trimmed edge will seal itself.
Address the underlying cause, and new growth will emerge clean.
Fertilizing for Healthy Growth
Less Is More
Dracaenas are light feeders. Too much fertilizer burns roots and causes brown leaf tips from salt buildup. When in doubt, under-fertilize.
Use a balanced liquid fertilizer (10-10-10 or 20-20-20) diluted to half the label strength. Apply once monthly during active growth (April through September). Stop completely in winter.
Alternatively, use slow-release granules in spring. One application lasts 3-4 months. Much harder to overdo.
Signs of Nutrient Issues
Under-fertilized: Pale new growth, small leaves, very slow growth during season. Older leaves yellow prematurely.
Over-fertilized: Brown leaf tips and edges, white crust on soil surface, stunted growth, root damage.
If you suspect salt buildup, flush the soil. Run water through the pot for several minutes. Let drain completely. Repeat monthly during growing season as prevention.
Special Note on Fluoride Sensitivity
Dracaenas are unusually sensitive to fluoride. Many fertilizers contain fluoride compounds. Choose a fluoride-free formula if possible, or use organic options like fish emulsion or seaweed extract.
This sensitivity is another reason to go easy on fertilizer. The less you apply, the less fluoride accumulates.
Pruning and Shaping Your Dracaena
Why Prune?
Pruning controls height, encourages bushiness, removes damaged foliage, and rejuvenates old plants. It’s not required but keeps your plant looking its best.
Dracaenas respond well to pruning. Cut a cane, and it usually sprouts 2-3 new growth points below the cut. This creates a fuller plant.
How to Prune
Use clean, sharp pruners. Cut canes at a 45-degree angle just above a leaf node (the ring around the stem where leaves emerge). New growth emerges from nodes.
You can prune anytime, but spring is ideal. The plant has maximum energy for recovery.
Don’t remove more than one-third of the foliage at once. Stagger major cuts over a few weeks if needed.
Managing Height
If your dracaena hits the ceiling, you have options. Cut the main cane back to your desired height. It will branch below the cut.
Or try air layering. Make a small upward cut on a tall cane, wrap with damp sphagnum moss and plastic. Roots form in the moss. Then cut below the roots and pot the top section. You get a new plant and a shorter original.
Removing Damaged Leaves
Yellow or brown leaves won’t recover. Snip them off at the base where they meet the cane. This improves appearance and prevents fungal issues.
If a whole cane dies (shriveled, hollow, no leaves), cut it off at soil level.
Propagation: Growing More Dracaenas
Stem Cuttings in Water
The easiest propagation method. Take a 4-6 inch stem cutting with at least 2-3 nodes. Remove lower leaves. Place in a glass of water. Change water weekly.
Roots appear in 2-8 weeks. Once roots are 2-3 inches long, pot in soil. Keep extra humid for the first few weeks.
I’ve propagated dozens of dracaenas this way. Success rate is near 100% with healthy cuttings.
Stem Cuttings in Soil
Same cutting preparation. Dip the cut end in rooting hormone (optional but helpful). Plant in moist perlite or your regular mix. Cover with a clear plastic bag for humidity. Place in bright indirect light.
Roots form in 4-6 weeks. Tug gently to check resistance.
Cane Cuttings
For older, bare canes, cut into 3-inch sections, each with at least one node. Lay horizontally on moist soil, half-buried. Or stand vertically. New shoots emerge from nodes.
This works great for rejuvenating leggy plants. You get multiple new plants from one cane.
Air Layering
Best for large plants you don’t want to chop up. Choose a healthy section of cane. Make a 1-inch upward cut halfway through. Insert a toothpick to keep it open. Wrap with damp sphagnum moss, then plastic wrap. Secure with ties.
In 6-12 weeks, roots fill the moss. Cut below the roots and pot up.
Troubleshooting Common Problems
Pest Issues
Dracaenas are relatively pest-resistant but not immune. Common invaders:
Spider mites: Tiny, create fine webbing, cause stippled yellow leaves. Thrive in dry air. Treatment: Increase humidity, spray with insecticidal soap or neem oil weekly for 3 weeks.
Mealybugs: White cottony masses in leaf axils and undersides. Treatment: Dab with alcohol on cotton swab. Spray with neem oil. Check weekly.
Scale: Small brown bumps on stems and leaves. Hard to spot. Treatment: Scrape off gently. Spray with horticultural oil.
Fungus gnats: Tiny black flies around soil. Larvae eat roots. Caused by overwatering. Treatment: Let soil dry more. Yellow sticky traps. Mosquito bits in water.
Inspect plants weekly. Early detection makes treatment easy.
Disease Problems
Root rot: The big one. Caused by overwatering and poor drainage. Symptoms: wilting despite wet soil, yellow leaves, mushy stems, foul smell. Treatment: Unpot. Trim all mushy roots. Repot in fresh, dry mix. Water sparingly.
Leaf spot: Brown or black spots with yellow halos. Fungal or bacterial. Treatment: Remove affected leaves. Improve air circulation. Avoid overhead watering. Copper fungicide if severe.
Fluoride toxicity: Brown tips and margins, especially on older leaves. Not a disease but looks like one. Treatment: Switch to filtered water. Flush soil. Stop fertilizing temporarily.
Environmental Stress
Cold damage: Blackened, mushy leaves after cold exposure. Trim damaged parts. Move to warm spot. Recovery depends on severity.
Sunburn: Large bleached patches on leaves facing the window. Move immediately. Damaged leaves won’t recover but new growth will be fine.
Transplant shock: Drooping, yellowing after repotting. Normal for 2-3 weeks. Keep conditions stable. Don’t fertilize. Water carefully.
Seasonal Care Calendar
Spring (March-May)
Active growth begins. Increase watering frequency. Start monthly fertilizing. Repot if needed. Prune for shape. Check for pests. Move closer to windows if light was low all winter.
Summer (June-August)
Peak growth. Water most frequently. Continue fertilizing. Monitor for spider mites in hot, dry weather. Can summer outdoors in shade if acclimated slowly. Watch for sunburn.
Fall (September-November)
Growth slows. Reduce watering. Stop fertilizing by late September. Bring outdoor plants in before cold nights. Check thoroughly for hitchhiking pests.
Winter (December-February)
Dormancy or slow growth. Water minimally (every 3-4 weeks). No fertilizer. Maximize light. Increase humidity if air is dry. Keep away from cold drafts and heat vents. Don’t panic over slow growth.
Designing with Dracaena
Styling Tips
Dracaenas are architectural stars. Their vertical form adds height and structure to plant groupings. Pair with trailing plants (pothos, philodendron) and mounding plants (peace lily, fern) for a layered look.
Tall varieties anchor corners beautifully. Shorter ones work on plant stands or grouped on shelves. The striped varieties add color without flowers.
Consider the pot as part of the design. Simple modern pots highlight the plant’s form. Terracotta adds warmth. Baskets soften the look.
Office and Low-Light Spaces
Dracaenas are office legends for a reason. They tolerate fluorescent light, irregular watering, and dry air. Dracaena fragrans ‘Massangeana’ and Dracaena marginata are the toughest for tough spots.
If your office has zero natural light, add a small LED grow light. Even 8-10 hours daily makes a huge difference.
Advanced Tips for Dracaena Enthusiasts
Creating Multi-Cane Specimens
Nursery dracaenas often have 3-5 canes of different heights in one pot. You can recreate this. Plant 3-5 rooted cuttings of varying heights together. As they grow, you’ll get that classic layered look.
Or buy a single tall plant and air layer the top. Once rooted, cut and replant the top in the same pot. Repeat over years for a multi-generational clump.
Training and Shaping
Young, flexible canes can be gently bent and staked for interesting forms. Spiral, zigzag, or horizontal growth creates living sculpture. Use soft ties. Adjust monthly as the cane thickens.
This works best with Dracaena marginata and Dracaena reflexa. Thicker canes of Dracaena fragrans resist bending.
Hydroponic and Semi-Hydroponic Growing
Dracaenas adapt well to LECA (clay pebbles) or pon (mineral substrate). Benefits: no soil pests, precise water control, easy to monitor roots. Transition gradually. Expect an adjustment period.
I grow several dracaenas in semi-hydroponics. They thrive with consistent moisture and zero fungus gnats.
Conclusion: Your Dracaena Journey Starts Now
You now have everything you need to know about how to care for dracaena indoor plants. From light and water to propagation and troubleshooting, these guidelines will keep your plant thriving.
Remember the core principles: bright indirect light, let soil dry between waterings, well-draining mix, average home temperatures, light fertilizing, and patience. Dracaenas reward consistency, not perfection.
Every plant parent kills a few plants along the way. It’s how we learn. If your dracaena struggles, diagnose the issue, adjust, and watch it bounce back. These plants are survivors.
Start with one variety. Master its care. Then expand your collection. Before you know it, you’ll be the friend giving away propagated cuttings and sharing care tips.
Your dracaena journey starts today. Happy growing!
Frequently Asked Questions
What is the best soil mix for dracaena?
A well-draining mix of 2 parts potting soil, 1 part perlite or pumice, and 1 part orchid bark or coarse sand works perfectly. This provides aeration while retaining enough moisture for healthy roots.
How do I propagate dracaena from cuttings?
Take 4-6 inch stem cuttings with at least 2-3 nodes, remove lower leaves, and place in water or moist soil. Roots develop in 2-8 weeks. Once roots reach 2-3 inches, pot in regular soil mix.
Why are my dracaena leaves turning yellow?
Yellow leaves usually indicate overwatering. Check soil moisture and drainage. If soil stays soggy, repot in fresh mix. Natural aging also causes lower leaves to yellow and drop as the plant grows taller.
Can I put my dracaena outside in summer?
Yes, dracaenas enjoy summer outdoors in bright shade. Acclimate gradually over 7-10 days. Bring inside before temperatures drop below 60°F. Check thoroughly for pests before returning indoors.
How tall do indoor dracaenas grow?
Indoors, most varieties reach 4-6 feet over many years. Dracaena fragrans can reach 6-10 feet in ideal conditions. Growth is slow, typically 6-12 inches per year. Pruning controls height easily.
What fertilizer should I use for dracaena?
Use a balanced liquid fertilizer (10-10-10) at half strength monthly during spring and summer. Alternatively, apply slow-release granules in spring. Avoid fluoride-containing formulas as dracaenas are sensitive to fluoride.