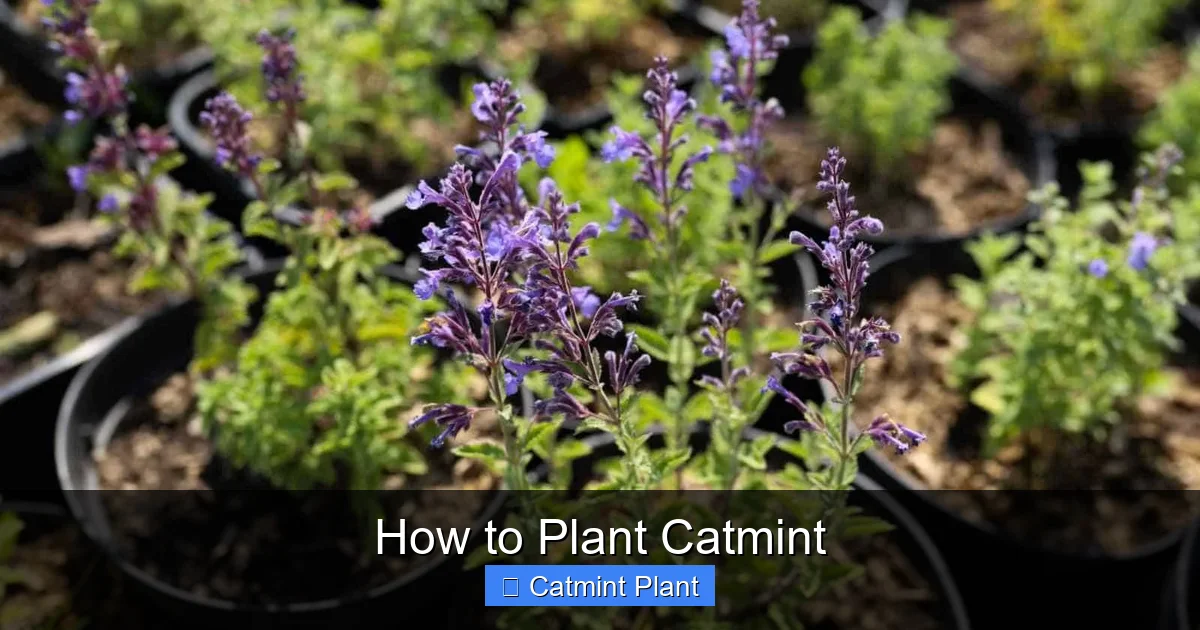
How to Plant Catmint
Catmint is a hardy perennial that thrives in full sun and well‑drained soil. Plant it in early spring or fall, space plants 18‑24 inches apart, and water regularly until established. With minimal care, you’ll enjoy fragrant blooms that attract bees and butterflies all season.
Catmint is a favorite among gardeners who want color, fragrance, and pollinator appeal without a lot of fuss. This perennial herb returns year after year and asks for very little in return. In the next sections you will learn everything you need to know about how to plant catmint and keep it thriving.
Whether you have a sunny border, a rock garden, or a container on a patio, catmint fits right in. Its soft gray‑green foliage and spikes of lavender‑blue flowers add texture and movement to any planting scheme. Follow the steps below and you’ll have a healthy, blooming catmint patch in no time.
Key Takeaways
- Choose a sunny spot: Catmint needs at least six hours of direct light each day.
- Use well‑drained soil: Heavy clay can cause root rot; amend with compost or sand.
- Plant at the right time: Early spring or early fall gives roots time to settle before extreme heat or cold.
- Space plants 18‑24 inches apart: Good airflow reduces disease and encourages bushy growth.
- Water deeply but infrequently: Once established, catmint tolerates drought and prefers dry conditions.
- Prune after the first flush: Cutting back encourages a second bloom and keeps the plant tidy.
Quick Answers to Common Questions
When is the best time to plant catmint?
Early spring after the last frost or early fall at least six weeks before the first hard freeze.
How much sun does catmint need?
At least six hours of direct sunlight each day for optimal flowering.
What type of soil is best for catmint?
Lean, well‑drained soil with a pH between 6.0 and 7.5.
How often should I water established catmint?
Water deeply every 7‑10 days during dry periods; otherwise, rainfall is usually sufficient.
Can catmint grow in containers?
Yes, choose a dwarf variety, use a pot with drainage holes, and a light potting mix.
📑 Table of Contents
Why Grow Catmint
Catmint offers several benefits that make it a smart choice for both new and experienced gardeners. The plant is drought tolerant once established, so you spend less time watering. Its aromatic leaves deter many common garden pests, reducing the need for chemical sprays. Bees, butterflies, and hummingbirds love the nectar‑rich flowers, turning your garden into a lively habitat. Catmint also works well as a ground cover, suppressing weeds while looking attractive.
Drought tolerance
Catmint survives dry spells once established. It needs little supplemental water. Deep roots store moisture for weeks. This trait makes catmint ideal for xeriscape gardens.
Pollinator magnet
Bees love catmint flowers. Butterflies visit catmint daily. Hummingbirds sip nectar from catmint blooms. A single catmint clump can support dozens of pollinator visits each day.
Pest resistance
Catmint repels deer and rabbits. Its scent deters many insects. Gardeners report fewer aphid outbreaks near catmint. This natural defense reduces pesticide use.
Ground cover value
Catmint spreads slowly to fill gaps. It suppresses weeds naturally. The dense foliage shades soil, keeping it cool. This ground cover effect saves labor.
Seasonal interest
Catmint blooms from late spring to fall. Foliage stays attractive after bloom. The silver‑green leaves add winter texture. Year‑round appeal makes catmint a garden staple.
Advanced tips
Advanced gardeners often pair catmint with tomatoes and peppers to deter aphids and whiteflies. The strong menthol scent confuses many insect pests. Plant a border of catmint around the vegetable bed for a natural barrier. This companion planting reduces the need for chemical sprays and supports a healthier ecosystem. The flowers also attract beneficial insects like ladybugs and lacewings. These predators keep pest populations low throughout the season. A mixed planting of catmint and herbs creates a resilient garden community.
Catmint works well in a cottage garden mixed with roses, lavender, and salvia. The silver foliage contrasts beautifully with deep green leaves and bright blooms. This combination extends the flowering period from early summer into fall. Pollinators move freely between the different nectar sources, increasing overall garden biodiversity. The varied heights create layers that add depth to the border. Garden visitors enjoy the changing colors throughout the season. Maintenance stays low because each plant shares similar water and light needs.
For a low‑maintenance meadow, sow catmint seeds directly in autumn. The cold period stratifies the seeds, improving germination rates in spring. Thin the seedlings to the recommended spacing once they develop true leaves. This method creates a naturalized drift of catmint that returns each year with minimal effort. The resulting meadow supports a wide range of pollinators and beneficial insects. It also suppresses weeds by forming a dense mat of foliage. Over time the clumps can be divided to expand the planting area.
Choosing the Right Variety
There are several catmint cultivars, each with slightly different habits and flower colors. Selecting the best variety for your climate and design goals ensures the best performance.
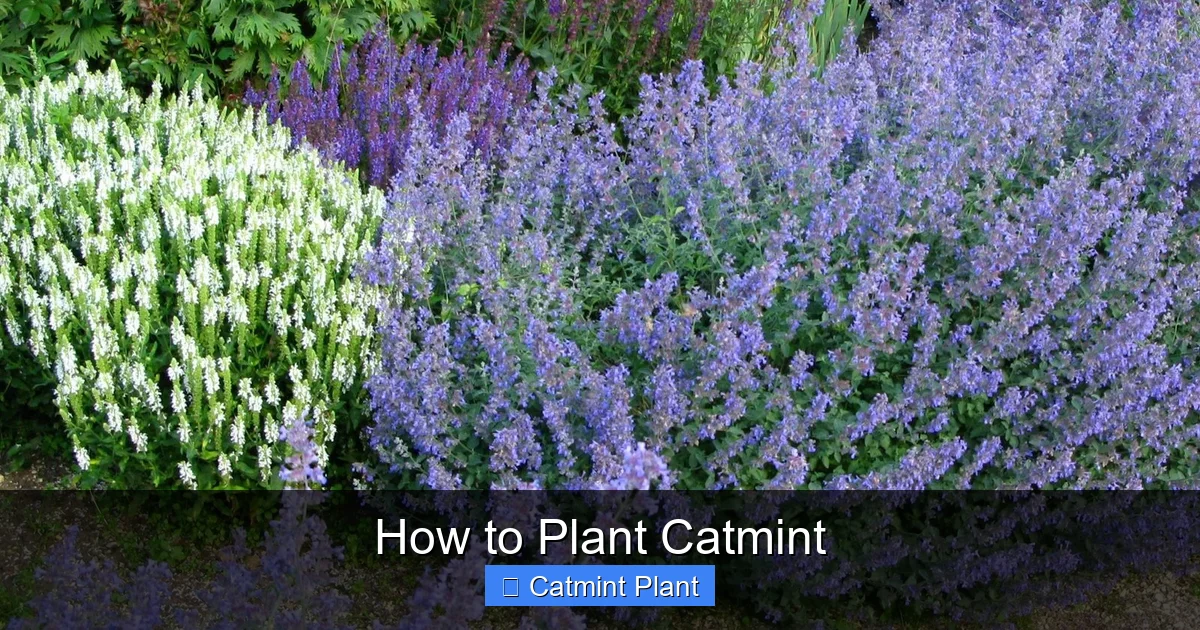
Visual guide about How to Plant Catmint
Image source: cdn.mos.cms.futurecdn.net
Common catmint types
Nepeta faassenii ‘Walker’s Low’ is a compact, mound‑forming variety that reaches about 18 inches tall. Nepeta racemosa ‘Blue Wonder’ grows a bit taller, up to 24 inches, with deeper blue flowers. Nepeta × faassenii ‘Six Hills Giant’ can reach 30 inches and works well as a backdrop plant. All of these are hardy in USDA zones 3‑8.
Matching variety to climate
In cooler northern zones, choose a variety with proven cold hardiness such as ‘Walker’s Low’. In hot southern zones, look for heat‑tolerant selections like ‘Blue Wonder’ that keep blooming through summer. Container growers can pick dwarf forms that stay under 12 inches, making them perfect for pots.
Flower color options
Catmint flowers range from pale lavender to deep violet. Some cultivars produce white blooms for a softer look. Choose a color that complements your existing palette. Mixed plantings create a dynamic display.
Growth habit considerations
Compact varieties suit edging and containers. Tall varieties work well as background plants. Spreading types fill large beds quickly. Match the habit to your space for best results.
Advanced tips
When selecting a catmint cultivar, consider the mature height and spread for your design. Tall varieties like ‘Six Hills Giant’ serve as a backdrop, while dwarf types fit containers and edging. Matching the plant size to the space prevents overcrowding and reduces future pruning work. A compact cultivar also works well in rock gardens where soil depth is limited. The limited root zone encourages a tighter habit and more intense fragrance. Choose a variety that matches both aesthetic and practical goals.
Flower color can influence the mood of a garden bed. Lavender‑blue catmint adds a cool tone that pairs nicely with yellow coreopsis or orange marigolds. White‑flowered selections brighten shady corners and reflect light. Mixing colors creates a dynamic tapestry that changes through the season. The varied hues also attract different pollinator species, boosting overall biodiversity. A palette of catmint shades can be coordinated with existing perennials for a cohesive look. Plan the color scheme before planting to avoid clashes.
Growth habit influences maintenance frequency. Clumping catmint stays tidy and requires division only every few years. Spreading types fill gaps quickly but may need occasional thinning. Selecting the habit that matches your time commitment keeps the garden enjoyable rather than burdensome. A clumping variety also works well in formal borders where neat lines are desired. Spreading forms excel in naturalized areas where a loose look is preferred. Understanding the habit helps you plan long‑term garden structure.
Preparing the Planting Site
Good site preparation sets the stage for a vigorous catmint plant. The steps are simple but important.
Soil requirements
Catmint prefers lean, well‑drained soil with a pH between 6.0 and 7.5. Heavy clay holds too much moisture and can cause root rot. Amend clay with coarse sand, perlite, or compost to improve drainage. A soil test can confirm pH and nutrient levels before you plant.
Sunlight needs
Full sun is ideal for catmint. At least six hours of direct light produces the strongest stems and the most flowers. In very hot climates, a little afternoon shade can prevent leaf scorch, but too much shade reduces bloom count.
Drainage tips
If your garden bed stays soggy after rain, raise the planting area with a berm or build a raised bed. Adding a layer of gravel at the bottom of the planting hole also helps water move away from the roots. Good drainage is the single most important factor for long‑term catmint health.
Soil amendment guide
Mix one part compost with two parts native soil for a balanced blend. Add a handful of coarse sand per planting hole for extra drainage. Avoid heavy manure, which can cause excessive leaf growth. A light feeding at planting time is sufficient.
Site orientation
Orient the bed so catmint receives morning sun and afternoon shade in hot regions. This orientation reduces heat stress. In cooler areas, full south exposure maximizes bloom. Proper orientation improves plant vigor.
Advanced tips
Before planting catmint, test the soil pH with a simple kit. Aim for a slightly acidic to neutral range between 6.0 and 7.0. If the soil is too alkaline, add elemental sulfur to lower the pH gradually. Proper pH ensures nutrient availability and strong root development. A balanced pH also reduces the risk of fungal diseases that thrive in extreme conditions. Regular testing each season keeps the bed in optimal condition. Amendments should be worked into the top six inches for best results.
Good drainage is critical for catmint because wet roots lead to rot. Create a raised mound or incorporate coarse sand and perlite into the planting hole. A layer of gravel at the base of the hole further improves water movement. These steps keep the root zone aerated and healthy. If the site is naturally low‑lying, install a French drain to redirect excess water. Mulching with pine bark also helps maintain consistent moisture without waterlogging. Monitoring drainage after heavy rain confirms the effectiveness of your preparations.
Sun exposure should be mapped before planting catmint. Observe the site throughout the day to confirm at least six hours of direct light. In hot climates, a brief afternoon shade can protect foliage from scorching. Proper light ensures abundant blooms and strong essential oil production. If the chosen spot receives less light, consider a more shade‑tolerant companion like hosta. Rotating the planting area each year can also balance light distribution. Consistent sun exposure leads to a more uniform plant shape.
Step‑by‑Step Planting Guide
Follow these steps to get your catmint off to a strong start.
Timing the planting
Plant catmint in early spring after the last frost, or in early fall at least six weeks before the first hard freeze. Cool temperatures allow roots to establish without the stress of summer heat.
Spacing the plants
Space each catmint plant 18 to 24 inches apart. This distance gives each clump room to expand and promotes air circulation, which helps prevent fungal diseases.
Planting depth and technique
Dig a hole twice as wide as the root ball and just as deep. Place the catmint in the hole so the crown sits level with the surrounding soil. Backfill with the amended soil, firm gently, and water thoroughly to settle the soil around the roots.
Watering after planting
Water the newly planted catmint deeply right after planting. Keep the soil evenly moist for the first two weeks, then gradually reduce frequency. Once the plant shows new growth, switch to a deep‑watering schedule every 7‑10 days during dry spells.
Mulching for moisture retention
Apply a thin layer of shredded bark or straw around the base. Mulch conserves moisture and suppresses weeds. Keep mulch a few inches away from the crown to prevent rot. Replenish mulch annually.
Labeling and record keeping
Write the variety name and planting date on a garden marker. This helps track performance over years. Good records make future division easier. Simple notes save time later.
Advanced tips
Timing the planting of catmint can be fine‑tuned to your local climate. In regions with mild winters, a late‑fall planting gives roots a head start before spring growth. In colder zones, wait until the soil can be worked and the danger of hard frost has passed. This flexibility reduces transplant shock and improves survival. A soil thermometer can confirm that temperatures are consistently above 50°F for optimal root activity. Planting on a cloudy day reduces water loss from the foliage. Water thoroughly after planting to settle the soil around the roots.
Spacing catmint correctly prevents future crowding and disease. Use a measuring tape to mark 18‑inch intervals for dwarf types and 24‑inch intervals for larger cultivars. Proper spacing allows air to circulate, which keeps foliage dry and discourages powdery mildew. It also makes later division easier. If you plant in rows, stagger the plants in a zigzag pattern for a fuller look. This arrangement maximizes ground coverage while maintaining the recommended distance. A well‑spaced bed looks tidy and performs better over time.
After planting, apply a thin mulch layer to conserve moisture and suppress weeds. Keep mulch a few inches away from the crown to prevent rot. Water deeply once a week for the first month, then transition to a deep‑soak every ten days. Consistent moisture during establishment sets the stage for drought tolerance later. A rain gauge helps you track natural precipitation and adjust watering accordingly. Avoid overhead irrigation to keep leaves dry and reduce disease pressure. A well‑established catmint will reward you with years of low‑maintenance beauty.
Ongoing Care for Healthy Catmint
Established catmint is low maintenance, but a few routine tasks keep it looking its best.
Watering schedule
During the first growing season, water catmint once a week if rainfall is less than an inch. After the first year, the plant tolerates drought and only needs supplemental water during prolonged dry periods. Always water at the base to keep foliage dry.
Fertilizing basics
Catmint does not require heavy feeding. A top‑dressing of compost in early spring supplies enough nutrients for the season. Avoid high‑nitrogen fertilizers, which encourage leafy growth at the expense of flowers.
Pruning and deadheading
After the first flush of blooms fades, shear the plant back by about one‑third. This encourages a second bloom in late summer and maintains a compact shape. Remove any dead or diseased stems throughout the season.
Pest and disease watch
Catmint is generally pest‑free. Occasionally aphids or spider mites may appear on new growth. A strong spray of water or an insecticidal soap treatment controls them quickly. Good airflow and proper spacing prevent powdery mildew.
Dividing mature clumps
Divide catmint every three to four years in early spring. Lift the clump, separate healthy sections, and replant at the same depth. Division rejuvenates vigor and provides new plants for sharing.
Winter protection
In zones 3‑4, apply a light mulch of straw after the ground freezes. This insulates roots from extreme cold. Remove mulch in early spring to avoid crown rot. Most catmint survives winter without extra care.
Advanced tips
Establish a simple watering schedule based on rainfall and soil type. In sandy soils, catmint may need water every five days during hot spells. In clay soils, extend the interval to ten days to avoid waterlogging. Checking the top inch of soil with your finger is an easy moisture test. A drip irrigation system delivers water directly to the root zone, reducing waste. Mulch helps retain moisture and keeps the soil temperature stable. Consistent watering during the first two years builds a deep root system that tolerates drought.
Fertilize catmint sparingly to avoid excessive leaf growth. A single application of balanced compost in early spring supplies enough nutrients for the season. Avoid high‑nitrogen products that promote soft stems and reduce flower production. A light feeding after the first bloom can encourage a second flush. Organic options like fish emulsion provide a gentle nutrient boost without burning roots. Apply fertilizer in the morning when the soil is moist for best uptake. Over‑fertilizing leads to leggy plants that flop under the weight of flowers.
Prune catmint after the first bloom to maintain shape and encourage reblooming. Cut back about one‑third of the stem height using clean shears. Remove any dead or diseased wood at the same time. Regular deadheading prevents the plant from putting energy into seed production. A mid‑summer trim also improves air flow, reducing the chance of powdery mildew. In late fall, cut the plant back to a few inches above ground to prepare for winter. This practice keeps the clump compact and vigorous year after year.
Harvesting and Using Catmint
Catmint leaves and flowers are edible and have a mild minty flavor with a hint of citrus. Harvesting at the right time preserves aroma and potency.
When to cut stems
Cut stems in the morning after the dew has dried but before the heat of the day. Choose stems that are just beginning to open for the strongest essential oil content. Use clean scissors and leave at least one‑third of the plant intact.
Drying and storing
Bundle small bunches and hang them upside down in a dark, well‑ventilated area. Once the leaves crumble easily, strip them from the stems and store in an airtight jar away from light. Properly dried catmint retains flavor for up to a year.
Culinary and herbal ideas
Add fresh catmint leaves to salads, fruit dishes, or iced tea for a refreshing twist. Dried catmint makes a soothing herbal tea that can aid digestion and promote relaxation. The flowers also make a pretty garnish for desserts and cocktails.
Medicinal uses
Traditional herbalists use catmint tea to calm nerves and ease mild headaches. A poultice of crushed leaves can soothe insect bites. Always consult a healthcare professional before using herbs medicinally.
Craft and decorative uses
Dried catmint stems add fragrance to potpourri and sachets. The silvery foliage works well in dried flower arrangements. Children enjoy making catmint crowns for garden play. Creative uses extend the plant’s value beyond the garden.
Advanced tips
Harvest catmint in the morning when essential oils are most concentrated. Snip stems just above a leaf node to promote new growth. Use the fresh leaves immediately in teas, salads, or as a garnish for cocktails. The bright flavor adds a refreshing twist to summer dishes. For a stronger infusion, steep a handful of leaves in hot water for ten minutes. The resulting tea can soothe an upset stomach and calm nerves. Fresh catmint also pairs well with lemon and honey for a simple herbal drink.
Dry catmint by hanging small bundles upside down in a dark, ventilated space. Once the leaves crumble easily, strip them from the stems and store in airtight jars. Properly dried catmint retains its aroma for up to a year. Label jars with the harvest date for easy rotation. Avoid drying in direct sunlight, which can degrade the volatile oils. A low‑temperature dehydrator set at 95°F works well for larger batches. Store the dried herb away from heat sources to preserve potency.
Catmint can be used beyond the kitchen for natural remedies and crafts. A poultice of crushed leaves relieves insect bites and minor skin irritations. Dried stems add fragrance to homemade sachets and potpourri. Children enjoy weaving catmint crowns for garden play, turning harvest time into a family activity. The essential oil extracted from catmint can be diluted for a calming massage blend. Always perform a patch test before applying any herbal preparation to the skin. Sharing catmint products with friends spreads the joy of this versatile herb.
With the right site, a little preparation, and simple ongoing care, catmint will reward you with months of color, fragrance, and pollinator activity. Plant a few clumps this season and enjoy the easy beauty they bring to any garden.
Frequently Asked Questions
Does catmint attract cats?
Catmint contains nepetalactone, which many cats find irresistible. However, the plant is primarily grown for its ornamental and pollinator value.
Is catmint invasive?
Most cultivated catmint varieties are clump‑forming and do not spread aggressively. They may self‑seed lightly, but they are not considered invasive in most regions.
Can I divide catmint plants?
Yes, divide mature clumps every 3‑4 years in early spring or fall to rejuvenate growth and create new plants.
What pests commonly affect catmint?
Aphids and spider mites are the most common pests. They are easily managed with water sprays or insecticidal soap.
How do I prevent powdery mildew on catmint?
Provide good air circulation by spacing plants properly, water at the base, and avoid overhead watering.
Can catmint be used in cooking?
Both leaves and flowers are edible. They add a mild minty flavor to teas, salads, and desserts.