How Far Apart to Plant Coral Bells
Plant coral bells 12 to 18 inches apart for most varieties, measured from center to center. Dwarf types need only 8 to 10 inches, while large cultivars require up to 24 inches. Proper spacing ensures good air circulation, prevents disease, and allows each plant to reach its full mature width without crowding neighbors.
Key Takeaways
- Standard spacing is 12 to 18 inches: Most coral bells varieties thrive when planted 12 to 18 inches apart from center to center, giving them room to reach mature size.
- Dwarf varieties need less space: Compact cultivars like ‘Petite Pearl Fairy’ or ‘Little Cutie’ series only require 8 to 10 inches between plants.
- Large varieties need more room: Big cultivars such as ‘Big Top’ or ‘Mega Caramel’ can spread 24 inches wide and need 20 to 24 inch spacing.
- Purpose changes spacing: Ground cover plantings use tighter 10 to 12 inch spacing, while specimen plants need 18 to 24 inches for full display.
- Air circulation prevents disease: Proper spacing reduces humidity around crowns, preventing crown rot, powdery mildew, and fungal issues common in crowded plantings.
- Measure from center to center: Always measure spacing from the center of one plant’s crown to the center of the next, not edge to edge.
- Container planting differs: In pots, space 6 to 8 inches apart for full look, but plan to divide or repot annually as they fill in quickly.
Quick Answers to Common Questions
What is the standard spacing for most coral bells varieties?
Most standard coral bells varieties should be planted 12 to 18 inches apart, measured from center of crown to center of crown.
How close can I plant dwarf coral bells varieties?
Dwarf and miniature coral bells like the ‘Little Cutie’ series can be planted 8 to 10 inches apart center to center.
Does spacing change if I am planting coral bells as ground cover?
Yes, for ground cover plantings use tighter spacing of 10 to 12 inches for standard varieties and 6 to 8 inches for dwarf types to create a dense carpet quickly.
Should I measure spacing from leaf tip to leaf tip or crown to crown?
Always measure from center of crown to center of crown, not leaf tip to leaf tip. Measuring edge to edge results in plants that are too close together.
How far apart should coral bells be planted in containers?
In containers, space coral bells 6 to 8 inches apart for an immediate full look, but plan to divide or repot annually. For longer-term container plantings, use 10 to 12 inch spacing.
📑 Table of Contents
- Getting Started with Coral Bells Spacing
- Why Proper Spacing Matters for Coral Bells
- General Spacing Guidelines by Variety Size
- Spacing Based on Planting Purpose
- Step-by-Step Planting Process with Spacing
- Climate and Regional Considerations
- Companion Planting and Spacing Interactions
- Common Spacing Mistakes and How to Fix Them
- Maintenance Practices That Affect Spacing
- Design Ideas Using Strategic Spacing
- Troubleshooting Spacing Issues
- Seasonal Spacing Considerations
- Advanced Spacing Techniques for Enthusiasts
- Conclusion
Getting Started with Coral Bells Spacing
If you have ever wandered through a garden center in spring, you have probably seen coral bells. Their ruffled leaves come in shades of purple, caramel, lime green, silver, and near-black. The botanical name is Heuchera, but most gardeners call them coral bells or alumroot. These perennials are beloved for their foliage more than their flowers, though the delicate bell-shaped blooms on wiry stems are charming in late spring and early summer.
One question comes up again and again: how far apart to plant coral bells? The answer depends on several factors. The variety you choose matters. The purpose of your planting matters. Your climate and soil conditions matter too. Getting spacing right from the start saves you from transplanting later. It also prevents disease problems that thrive in crowded, humid conditions. This guide covers everything you need to know to space your coral bells perfectly.
Why Proper Spacing Matters for Coral Bells
Air Circulation and Disease Prevention
Coral bells are prone to a few specific problems when planted too close together. Crown rot is the biggest killer. It happens when the crown stays wet for too long. Good air movement helps the crown dry out between rains and watering. Powdery mildew is another issue. It appears as a white dusty coating on leaves. It thrives in humid, still air. Proper spacing lets breezes move through the foliage. This keeps leaves dry and fungal spores from settling.
Visual guide about How Far Apart to Plant Coral Bells
Image source: i.ytimg.com
Root Competition and Nutrient Access
Each coral bells plant develops a fibrous root system that spreads outward from the crown. When plants are too close, roots compete for water and nutrients. The result is smaller leaves, fewer flowers, and weaker plants overall. In extreme cases, the weaker plants simply die out. Giving each plant its own soil volume ensures vigorous growth. This is especially important in the first two years as plants establish.
Aesthetic Impact and Design Intent
Spacing changes the entire look of your planting. Tight spacing creates a solid carpet of color. This works well for ground cover or edging. Wider spacing shows off each plant’s individual form. You see the mounded habit, the leaf texture, and the color variations. For specimen plantings or focal points, wider spacing is essential. Think about your design goal before you dig.
General Spacing Guidelines by Variety Size
Dwarf and Miniature Varieties (8 to 10 Inches)
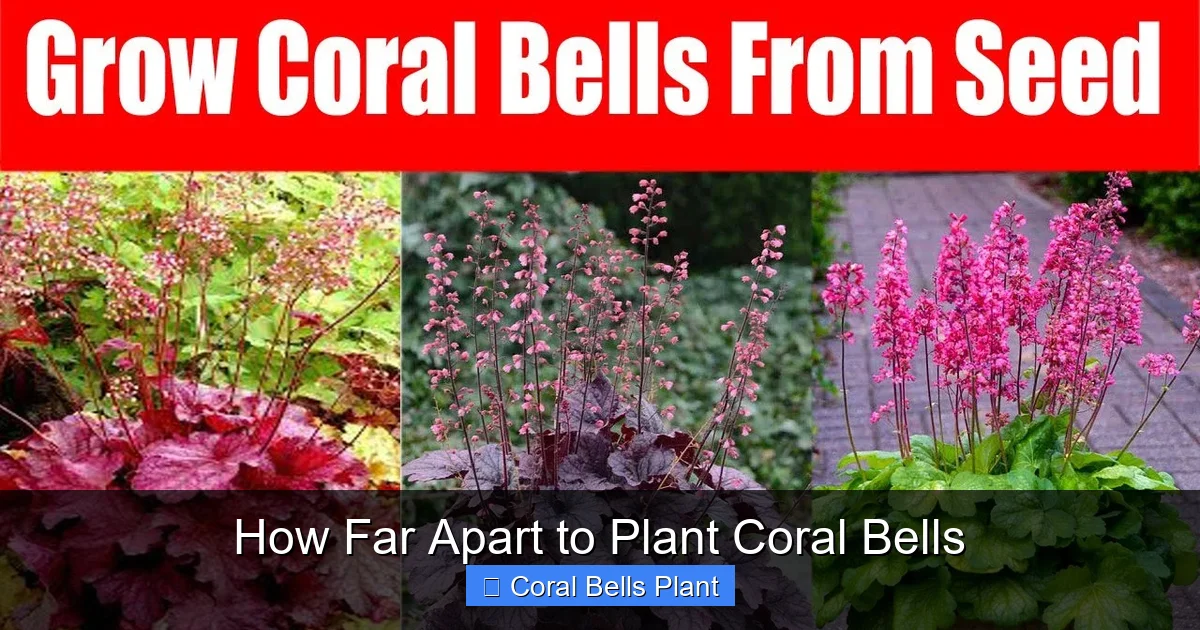
Breeders have developed many compact coral bells in recent years. The ‘Little Cutie’ series includes ‘Blondie’, ‘Frost’, ‘Ginger Snap’, and ‘Sugar Plum’. These reach only 6 to 8 inches tall and 8 to 10 inches wide. The ‘Petite’ series and ‘Fairy’ series are similar. Plant these 8 to 10 inches apart center to center. They fill in quickly to form a dense low mat. These are perfect for fairy gardens, trough planters, and the front of borders.
Standard Varieties (12 to 18 Inches)
This group includes most popular cultivars you find at nurseries. ‘Palace Purple’ is the classic deep purple variety. ‘Caramel’ offers warm amber foliage. ‘Lime Rickey’ brings chartreuse brightness. ‘Obsidian’ is nearly black. ‘Berry Smoothie’ has rose-pink leaves. These typically reach 12 to 16 inches wide at maturity. Space them 12 to 18 inches apart. The tighter 12 inch spacing creates a continuous row. The wider 18 inch spacing shows individual mounds.
Large and Vigorous Varieties (20 to 24 Inches)
Some coral bells are simply bigger. ‘Big Top’ series cultivars can spread 24 inches or more. ‘Mega Caramel’ lives up to its name. ‘Southern Comfort’ grows large in warm climates. ‘Brownies’ forms substantial clumps. Give these 20 to 24 inches of space. They need room to show their full grandeur. Crowding them hides their best features and invites disease in the dense center.
Species Types and Native Varieties
Straight species like Heuchera americana, Heuchera villosa, and Heuchera sanguinea vary in size. H. villosa cultivars like ‘Autumn Bride’ are large and vigorous. Space them 18 to 24 inches. H. sanguinea types are often smaller at 10 to 12 inches wide. Research the specific species or cultivar before planting. When in doubt, give a little extra space. You can always fill gaps with annuals later.
Spacing Based on Planting Purpose
Ground Cover and Mass Plantings
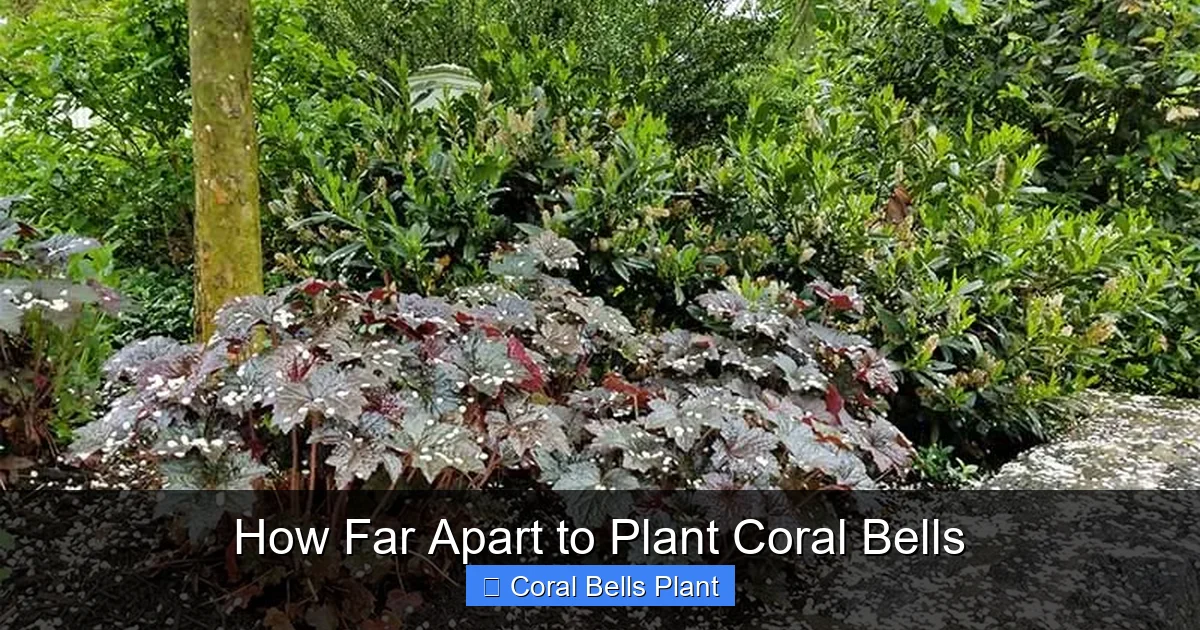
When you want a solid carpet of foliage, plant closer together. Use 10 to 12 inch spacing for standard varieties. Use 6 to 8 inch spacing for dwarf types. The plants will knit together within one growing season. This suppresses weeds effectively. It creates a uniform color block that makes a strong visual statement. Mass plantings work well under trees, along woodland paths, and on shady slopes. Just remember that denser plantings need more vigilant disease monitoring.
Border Edging and Pathway Lines
For a defined edge along a path or border, consistency is key. Space plants 12 inches apart for a tight line. Space 15 to 18 inches for a more relaxed look. Measure from the path edge to the center of the first plant. Keep that distance consistent. A measuring stick or marked trowel helps. Stagger the second row slightly behind the first for a fuller appearance. This creates depth without looking rigid.
Specimen and Focal Point Plantings
When a single coral bells is the star, give it breathing room. Space 24 to 30 inches from neighboring plants. This lets the plant achieve its natural mounded form. You can see the full silhouette. The leaf color shows best without competition. This approach works for container specimens too. One large coral bells in a decorative pot makes a stunning patio feature. Surround it with lower trailing plants if desired.
Mixed Perennial Borders
In a mixed border, coral bells play a supporting role. Space them 15 to 18 inches from other perennials. Consider the mature size of neighbors. Hostas need more space. Ferns need similar space. Low ground covers like ajuga or lamium can creep closer. Plan for the mature width of every plant. Draw a quick sketch on graph paper. One square equals six inches. Place circles for each plant at mature width. Adjust until nothing overlaps.
Container and Planter Spacing
Containers follow different rules. For a full, lush pot right away, space 6 to 8 inches apart. The plants will fill the container in weeks. Plan to divide or repot in 12 to 18 months. For longer-term container plantings, use 10 to 12 inch spacing. Use a pot at least 18 inches wide for three standard plants. Ensure excellent drainage. Container plants need more frequent water and fertilizer than in-ground plants.
Step-by-Step Planting Process with Spacing
Prepare the Planting Area
Start by clearing the area of weeds, grass, and debris. Loosen the soil to a depth of 12 inches. Coral bells have shallow roots but appreciate loose soil. Amend heavy clay with compost and coarse sand. Amend sandy soil with compost and peat moss. Aim for rich, well-draining soil with a slightly acidic to neutral pH (6.0 to 7.0). Rake the surface smooth.
Layout and Measure
Before digging any holes, place your plants in their pots on the prepared bed. Step back and look at the arrangement. Adjust until you like the look. Use a tape measure to check spacing. Measure from center of pot to center of pot. For rows, use a string line. For mass plantings, use a grid pattern. Mark each spot with a trowel, stick, or pinch of flour. This prevents mistakes once you start digging.
Dig Proper Holes
Dig each hole twice as wide as the root ball. Depth should equal the pot depth. The crown must sit at or slightly above soil level. Planting too deep causes crown rot. Planting too high exposes roots. Make a small mound of soil in the bottom of each hole. This supports the crown and encourages roots to grow downward.
Plant and Backfill
Gently remove each plant from its pot. Loosen circling roots with your fingers. Place the plant on the soil mound. Spread roots outward. Backfill with amended soil. Firm gently with your hands. Do not tamp with your foot. Water each plant immediately after planting. This settles soil around roots and eliminates air pockets.
Mulch and Monitor
Apply 1 to 2 inches of shredded bark, leaf mold, or pine straw. Keep mulch away from the crown. A mulch volcano around the stem invites rot. Water deeply twice a week for the first month. Then reduce to once a week unless rain provides an inch. Watch for wilting in afternoon sun. New plantings may need temporary shade cloth in hot climates.
Climate and Regional Considerations
Hot Southern Climates (Zones 8 to 9)
In the South, coral bells appreciate more shade and more space. Heat and humidity increase disease pressure. Space at the wider end of recommendations. 18 to 24 inches for standard varieties. Choose heat-tolerant cultivars like ‘Southern Comfort’, ‘Georgia Peach’, or the ‘Villosa’ hybrids. Provide afternoon shade. Mulch heavily to keep roots cool. Water at soil level, not overhead.
Cool Northern Climates (Zones 3 to 5)
In the North, coral bells can handle more sun. They also grow a bit smaller due to shorter seasons. You can space slightly closer. 10 to 14 inches for standard varieties. Winter hardiness is the main concern. Plant early enough for roots to establish before freeze. Mulch heavily after ground freezes. Snow cover is the best insulation. Avoid low spots where ice accumulates.
Coastal and Maritime Climates
Coastal gardens have moderate temperatures but high humidity. Salt spray can damage foliage. Space widely for maximum air flow. 18 to 24 inches. Rinse foliage occasionally if salt builds up. Choose cultivars with thicker leaves like ‘Obsidian’ or ‘Midnight Rose’. They resist salt and wind better than thin-leaved types.
Arid and High Elevation Climates
Dry climates reduce disease risk but increase water needs. Space normally or slightly closer since humidity is low. 12 to 16 inches works well. The challenge is winter desiccation. Plant in protected spots. Mulch heavily. Water monthly during dry winters if ground isn’t frozen. Choose xeric-tolerant species like Heuchera parvifolia.
Companion Planting and Spacing Interactions
Companion Plants That Need Similar Space
Good companions share cultural needs and complement coral bells visually. Hostas are classic partners. Space hostas 24 to 36 inches apart. Place coral bells 18 inches from hosta crowns. Ferns like Japanese painted fern or autumn fern need 18 to 24 inches. Place coral bells 15 inches from fern crowns. Astilbe needs 18 inches. Heucherella (foamy bells) needs 12 to 15 inches. Tiarella (foamflower) needs 12 inches.
Ground Covers Around Coral Bells
Low creepers can fill gaps between coral bells. Ajuga (bugleweed) spreads rapidly. Plant it 12 inches from coral bells crowns. It will fill in but not smother. Lamium (dead nettle) is slower. Plant 10 inches away. Sweet woodruff (Galium) is gentle. Plant 8 inches away. Avoid aggressive spreaders like vinca, ivy, or bishop’s weed. They will choke coral bells.
Spring Bulbs Between Coral Bells
Coral bells emerge early but stay low until late spring. This creates an opportunity. Plant daffodils, species tulips, or crocus between coral bells in fall. Space bulbs 4 to 6 inches from coral bells crowns. The bulb foliage ripens as coral bells expand. By June, coral bells hide the yellowing bulb leaves. This doubles your seasonal interest in the same space.
Annuals for Temporary Fill
While coral bells fill in, gaps may look bare. Plant shade-tolerant annuals as temporary fillers. Impatiens, begonias, coleus, and torenia work well. Space annuals 8 to 10 inches from coral bells. Remove annuals at season end or let frost kill them. Do not let annuals overwhelm the perennial crowns. This trick works especially well in new mass plantings.
Common Spacing Mistakes and How to Fix Them
Planting Too Close for Instant Effect
It is tempting to pack plants tightly for an immediate full look. This backfires within a year. Plants compete. Disease spreads. You end up digging and dividing sooner than planned. Resist the urge. Use annuals or mulch to fill visual gaps. Patience pays off with healthier, longer-lived plants.
Ignoring Mature Width on Labels
Plant tags list mature width. Believe them. A 4-inch pot becomes a 16-inch plant. Measure your spacing based on that mature width, not the current pot size. If the tag says 14 inches wide, space 14 to 18 inches apart. If no tag, research the cultivar online. When truly unknown, default to 18 inches for safety.
Measuring Edge to Edge Instead of Center to Center
This is the most common measurement error. Spacing is always center of crown to center of crown. If you measure leaf tip to leaf tip, you underestimate by half the plant width. Use a tape measure from the center of one planting hole to the center of the next. Mark centers with flags or stakes before digging.
Not Accounting for Growth Rate Differences
Some varieties grow fast. ‘Caramel’ and ‘Lime Rickey’ are vigorous. Others grow slowly. ‘Obsidian’ and ‘Midnight Rose’ are slower. If mixing fast and slow growers, give the slow ones a head start. Plant slow growers a year earlier. Or space fast growers wider. Or accept that fast growers will need division sooner.
Forgetting Container Growth Constraints
In pots, roots hit walls. This restricts top growth somewhat. But coral bells in containers still expand crowns. A 12-inch pot fits one standard plant comfortably. An 18-inch pot fits three if you accept annual repotting. Do not cram five plants in a 14-inch pot. They will decline by midsummer. Fewer plants, larger pot, better results.
Maintenance Practices That Affect Spacing
Division and Spacing Reset
Coral bells benefit from division every 3 to 4 years. The center of the clump becomes woody and dies out. Division rejuvenates the plant. It also lets you reset spacing. Dig the whole clump in early spring or fall. Pull or cut into sections with roots and crown. Replant divisions at proper spacing. Discard woody centers. Share extras with friends.
Deadheading and Foliage Cleanup
Remove spent flower stems at the base. This directs energy to foliage. In late winter, remove any tattered or dead leaves. This improves air circulation at the crown. It also reveals the true plant width. You may realize plants have grown closer than you thought. Plan division accordingly.
Mulch Management
Refresh mulch annually but do not let it build up against crowns. Thick mulch over the crown causes rot. Rake mulch away from centers each spring. Keep a 2-inch clear zone around each crown. This simple habit prevents many spacing-related disease issues.
Fertilizer and Growth Rate
Heavy fertilizing pushes rapid growth. Plants fill their allotted space faster. They may crowd neighbors sooner. Use slow-release organic fertilizer once in spring. Avoid high-nitrogen lawn fertilizers near coral bells. Moderate growth is stronger growth. It also means less frequent division.
Design Ideas Using Strategic Spacing
Color Gradient Drifts
Plant a drift of coral bells transitioning from dark to light. Start with ‘Obsidian’ (black), then ‘Plum Pudding’ (purple), ‘Berry Smoothie’ (rose), ‘Caramel’ (amber), ‘Lime Rickey’ (chartreuse). Space each 15 inches apart in a curved line. The color flow draws the eye through the shade garden. This works along a woodland path or border curve.
Contrasting Texture Blocks
Alternate blocks of coral bells with blocks of fine-textured plants. Plant a 3-foot square of ‘Caramel’ coral bells at 12-inch spacing. Next to it, plant a 3-foot square of Japanese forest grass (Hakonechloa) at 18-inch spacing. Repeat. The bold ruffled leaves contrast with the fine cascading grass. Spacing keeps each block distinct.
Container Groupings
Group three pots of different sizes. Large pot: one ‘Big Top’ coral bells. Medium pot: three ‘Little Cutie’ coral bells at 6-inch spacing. Small pot: one ‘Obsidian’ with trailing lysimachia. The varying densities create visual rhythm. All share the same care routine. Move pots to follow seasonal shade patterns.
Understory Tapestry
Under a high-limbed tree, create a tapestry. Space coral bells 18 inches apart in a loose grid. Intersperse with tiarella at 12 inches, heucherella at 15 inches, and epimedium at 18 inches. Add spring bulbs throughout. The different leaf shapes and colors knit together. Wide spacing lets each genus shine. The tree canopy provides perfect dappled light.
Troubleshooting Spacing Issues
Plants Are Touching and Merging
If mature plants are touching, air flow is reduced. Option one: dig and divide the largest plants. Replant divisions elsewhere. Option two: selectively remove every other plant if in a row. Option three: accept the dense look but increase monitoring for crown rot. Water at soil level only. Apply preventive copper fungicide in spring if powdery mildew is a history.
Gaps That Never Fill In
If gaps persist after two years, something is wrong. Check soil drainage. Check for root competition from nearby trees. Check for vole or root weevil damage. Check pH. Coral bells hate wet feet and alkaline soil. Fix the underlying issue. Then plant new divisions in the gaps. Use the same cultivar for uniformity.
Center Die-Out in Clumps
This is natural aging, not a spacing error. The woody center stops producing leaves. Division fixes it. Dig the clump in early spring. Cut away the woody center. Replant the vigorous outer sections at proper spacing. Water well. The plant will reset and fill in beautifully.
Flopping Open Centers
Sometimes outer leaves flop outward, leaving a bare center. This happens in too much shade or too rich soil. The plant stretches for light. Or it grows too fast and weak. Solution: move to brighter light. Or reduce fertilizer. Or stake the outer leaves temporarily. Division and replanting deeper (crown slightly below soil) can help reset the habit.
Seasonal Spacing Considerations
Spring Planting Advantages
Spring planting gives a full growing season to establish. Roots develop before summer heat. Space normally. Water consistently. Mulch well. Fall planting works too in zones 6 and warmer. Plant 6 weeks before ground freeze. Space normally. Mulch heavily after freeze. Winter heaving can push spring-planted crowns up. Check and firm in early spring.
Summer Planting Precautions
Summer planting is stressful. If you must plant in summer, space slightly wider. Extra space reduces root competition for limited water. Provide temporary shade cloth for two weeks. Water daily for first week, then every other day. Mulch 3 inches deep. Avoid fertilizing until fall. Fall planting is strongly preferred over summer.
Fall Planting for Root Establishment
Fall is ideal in many regions. Soil is warm. Air is cool. Rain is reliable. Roots grow until ground freezes. Space normally. Plant 6 to 8 weeks before hard freeze. Mulch after freeze. Do not fertilize. The plant focuses on roots, not top growth. Spring emergence is strong and early.
Winter Spacing Assessment
Winter reveals the true structure. With foliage gone or dormant, you see crown positions clearly. Take photos. Measure actual spacing. Plan spring divisions. Mark crowded areas with flags. Note gaps for new plants. Winter is the best time to evaluate your spacing decisions objectively.
Advanced Spacing Techniques for Enthusiasts
Staggered Grid vs. Straight Rows
Straight rows look formal. Staggered grids look natural. For mass plantings, use a triangular grid. Each plant is equidistant from six neighbors. This maximizes space efficiency. It creates a seamless carpet faster. Layout: place first row at 15-inch centers. Second row offset 7.5 inches, also at 15-inch centers. Rows spaced 13 inches apart (15 x 0.866). This geometry covers ground most efficiently.
Matrix Planting with Multiple Species
Matrix planting mixes species in a designed pattern. Choose 3 to 5 shade perennials with different seasons of interest. Assign each a spacing module. Example: coral bells at 18 inches, tiarella at 12 inches, epimedium at 18 inches, carex at 12 inches. Plant in a repeating pattern. The matrix suppresses weeds. It provides year-round interest. It mimics natural plant communities.
Living Mulch Approach
Use coral bells as living mulch under shrubs. Space 18 inches apart under the drip line. They suppress weeds. They keep soil cool and moist. They add color where little else grows. Choose tough cultivars like ‘Autumn Bride’ or ‘Palace Purple’. Avoid delicate ruffled types. The shrub roots dominate. Coral bells adapt. It’s a functional and beautiful solution.
Propagation Spacing for Nursery Beds
If you divide and grow on for sharing or sales, use nursery spacing. Rows 18 inches apart. Plants 6 inches apart in row. This high density is temporary. Grow for one season. Then pot up or plant out at final spacing. Nursery beds need rich soil, consistent water, and weed control. Label every cultivar carefully. Mix-ups are easy at this density.
Conclusion
Knowing how far apart to plant coral bells transforms your garden from hopeful to successful. The general rule of 12 to 18 inches serves most situations well. But the details matter. Dwarf varieties need less. Giants need more. Ground covers need tight spacing. Specimens need wide spacing. Your climate, soil, and design goals all shift the numbers slightly.
Remember the core principles. Measure center to center. Respect mature width. Prioritize air circulation. Plan for the long term. Use annuals or mulch for temporary fill. Divide every few years to reset spacing. Observe your plants through the seasons. They will tell you if they are happy.
Coral bells are one of the most rewarding shade perennials. Their foliage colors paint the garden from April to November. Their flowers feed hummingbirds in June. Their evergreen leaves provide winter structure. With proper spacing, they thrive for years with minimal care. Get the spacing right at planting, and the rest follows naturally. Your coral bells will thank you with vigorous growth, brilliant color, and enduring beauty.
Now grab your tape measure, your trowel, and your plants. Lay them out. Step back. Adjust. Plant with confidence. The perfect coral bells display is just a well-spaced planting away.
Frequently Asked Questions
Can I plant coral bells closer together for instant impact?
Planting closer than recommended creates immediate fullness but leads to crowding within one season. This reduces air circulation, increases disease risk, and forces early division. Use annuals or mulch to fill visual gaps instead.
What happens if I plant coral bells too far apart?
Excessive spacing leaves bare soil that invites weeds and erosion. It also looks sparse for years. You can always add more plants later, but starting with proper spacing creates the best balance of plant health and appearance.
Do different colored coral bells need different spacing?
Color does not determine spacing. Mature width determines spacing. A purple ‘Palace Purple’ and a chartreuse ‘Lime Rickey’ have similar mature widths and need the same 12 to 18 inch spacing.
How do I space coral bells when planting around tree roots?
Space normally at 12 to 18 inches but dig holes carefully between large roots. Use smaller divisions or quart-sized plants that fit between roots. Water more frequently since tree roots compete aggressively for moisture.
Can I plant coral bells right next to each other if they are different varieties?
Different varieties still need proper spacing based on their mature widths. Two different 16-inch wide varieties planted 8 inches apart will merge into one indistinguishable mass. Respect each plant’s mature size regardless of variety.
When is the best time to adjust spacing of established coral bells?
Early spring before new growth emerges or early fall are the best times to dig and reposition coral bells. The plant recovers quickly in cool, moist conditions. Avoid moving them during summer heat or winter freeze.